

Nothing disrupts the aesthetic appeal and functionality of a home quite like a wooden door that refuses to close properly. Wood naturally responds to changes in humidity and temperature, which often causes the material to bend, bow, or twist out of its original shape over time. When a door bows out of its frame, it allows drafts into your rooms, compromises your privacy, and creates incredibly frustrating friction against the doorjamb. Learning how to straighten a warped door empowers you to save money and restore your home seamlessly without requiring a costly replacement.
Tackling this project might seem incredibly intimidating for a beginner, but it relies entirely on basic science and simple patience. By using moisture, pressure, and time, you can coax the wood fibers back into their proper alignment. This guide breaks down the restoration process into highly manageable phases that any homeowner can successfully follow. You do not need an advanced woodworking shop or expensive specialized tools to accomplish this satisfying repair task.
Why Fixing A Warped Door Matters
Ignoring a bowing door often leads to cascading issues throughout your home environment. A misaligned barrier forces you to yank or shove the handle forcefully, which eventually damages the locking mechanism and tears the hinges directly out of the frame. This constant aggressive friction scrapes the protective paint away from your jamb, leaving the raw wood completely exposed to further environmental damage.
Furthermore, interior climate control becomes incredibly difficult when your barriers fail to sit flush against their weatherstripping. Air conditioning escapes through the large gaps during the summer, while freezing drafts enter your living space throughout the winter months.
Step-By-Step Guide To How To Straighten A Warped Door
Step 1: Removing The Door From Its Hinges
Before attempting any structural correction, you must completely remove the slab from its vertical frame. Attempting to bend the wood while it remains attached to the wall will inevitably destroy your delicate hinges and crack the surrounding casing. Grab a standard flathead screwdriver and a small hammer to gently tap the hinge pins upward until they pop completely out of their metallic barrels.

Have a strong partner hold the heavy wooden slab steady while you extract the final pin to prevent an unexpected fall. Once detached, carry the heavy piece horizontally into a spacious, climate-controlled room like a garage or basement. Laying it completely flat allows gravity to assist you effectively during the upcoming restoration phases.
Step 2: Preparing Your Workspace
A successful repair operation requires a perfectly flat and highly stable foundational surface. You must find an area of your concrete floor or a heavy-duty workbench that exhibits absolutely no dips or structural unevenness. Place two sturdy wooden sawhorses securely on the flat ground, ensuring their top beams are perfectly level with one another.
Understanding how to straighten a warped door relies entirely on having a reliable reference point for the wood to flatten against. Laying a large, thick piece of perfectly flat plywood across your sawhorses provides an excellent sturdy tabletop for the heavy slab. Clear the immediate surrounding area of any tools or debris so you have plenty of room to maneuver the heavy materials safely.
Step 3: Removing Hardware And Accessories
You cannot apply even pressure across the wooden surface if metal handles or locking mechanisms stand in the way. Use a standard screwdriver to carefully extract the doorknobs, the central deadbolt, and all the metallic hinge plates attached to the wooden edge. Place all these small metal components and their corresponding screws inside a secure plastic container so nothing gets permanently lost.
Removing the hardware also protects your expensive decorative finishes from accidental water damage during the upcoming moisture application phase. It gives you a completely unobstructed wooden canvas to analyze, ensuring you can identify the exact apex of the problematic curvature. Leave the hollowed mortises completely empty, as you will clean and inspect them later before rehanging the finished piece.
Step 4: Analyzing And Positioning The Bow
You must carefully inspect the edge of the wood to determine exactly which way the fibers have bent over time. Lay the slab flat on your prepared table so that the highest point of the curved arch points directly up toward the ceiling. The concave side should face downward, resting securely against the flat plywood surface you set up earlier.
Correctly orienting the wood is arguably the most critical technical aspect of the entire straightening process. If you face the arch down, applying pressure will only crack the fibers rather than flatten them. Take your time to run a long metal straightedge across the surface to precisely mark the highest elevated section with a light pencil line.
Step 5: Applying Moisture To The Bowed Wood
Wood warps primarily because one side dries out faster than the opposing side, causing uneven shrinking and pulling. To reverse this frustrating tension, you must reintroduce gentle moisture to the concave side of the slab. Soak several large, heavy cotton towels in warm water and wring them out until they remain damp but not actively dripping.
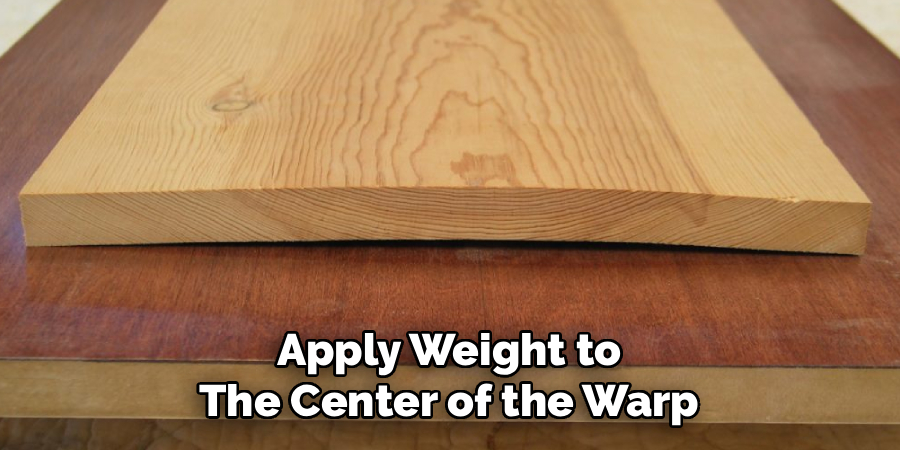
Lay these warm, damp towels directly over the concave, hollowed area of the wood to soften the tight, pulling fibers. The warmth and moisture penetrate the protective finish slightly, giving the rigid internal structure the flexibility it needs to move. Leave the wet towels resting on the surface for several hours, checking occasionally to ensure they have not dried out completely.
Step 6: Setting Up Heavy Weights
With the fibers softened by the moisture, you must now apply strategic physical pressure to push the arch downward. Place a clean, dry piece of protective scrap wood directly over the highest point of the elevated curve to distribute the weight evenly. This scrap barrier prevents your heavy weights from denting or scratching the delicate decorative surface of your home fixture.
The secret to How To Straighten A Warped Door involves stacking fifty to one hundred pounds of weight directly onto this central protective board. You can use heavy cinder blocks, thick exercise weight plates, or several large buckets filled completely with sand. Ensure the heavy objects are balanced perfectly so they push the arched curve straight down toward your flat plywood table.
Step 7: Allowing Time For The Wood To Dry
Patience becomes your absolute best tool during the critical drying and pressing phase of this woodworking project. The heavy weights must remain completely undisturbed on the slab until the internal moisture evaporates entirely from the softened fibers. Removing the pressure too early guarantees that the wood will immediately spring right back into its problematic curved shape.
Leave the entire heavy setup alone in your dry, well-ventilated garage for at least three to four full days. You can set up a small oscillating fan nearby to gently circulate the surrounding air and encourage faster, more even evaporation. Resist the incredible urge to peek under the heavy weights, as consistent, uninterrupted pressure dictates your overall success.
Frequently Asked Questions
Can Any Type Of Wood Be Unwarped?
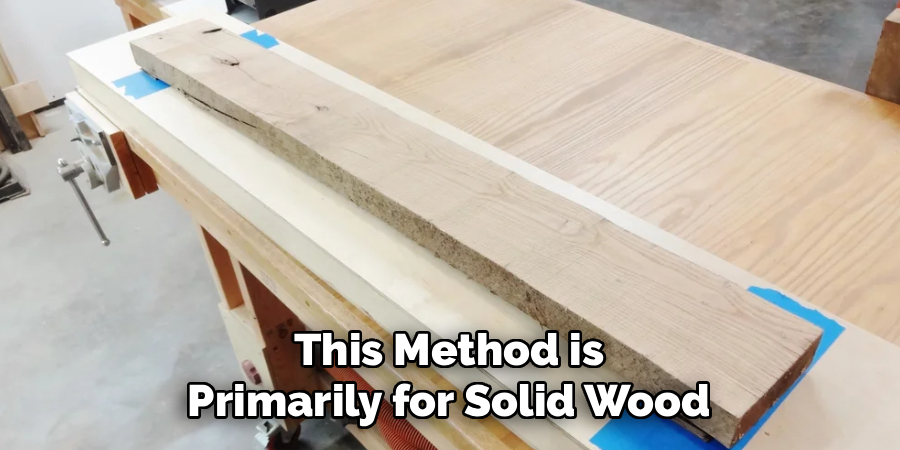
Solid hardwoods and traditional softwoods generally respond very well to moisture and pressure treatments. Oak, pine, and mahogany feature natural grain structures that flex and reset when treated with appropriate dampness and heavy weights. However, completely hollow core doors or composite manufactured materials do not respond to this method properly. Pressing a warped hollow composite usually causes the thin outer veneer to permanently crack or delaminate rather than bend back into place.
How Long Does The Drying Process Take?
The required drying time varies wildly depending on your local climate, the thickness of the material, and the severity of the original bow. A thin interior closet fixture might flatten out perfectly in just forty-eight hours under heavy weights. A thick, solid oak exterior entryway might demand a full week of continuous pressing in a dry environment. Always err on the side of caution and leave the heavy weights on for an extra day to ensure maximum stability.
Will Heat Speed Up The Process?
You should absolutely avoid using intense artificial heat sources like commercial heat guns or powerful blow dryers to accelerate the drying timeline. Extreme, concentrated heat forces the moisture out of the fibers much too aggressively, leading to severe structural cracking and splintering. Gentle, ambient room temperature and natural air circulation provide the safest environment for the wood to reset its shape. Patience produces a significantly better structural result than rushed, artificial heating techniques.
Do I Always Need To Remove The Hinges?
You must always remove the hinges because fixing the structural integrity requires a perfectly flat, horizontal working surface. Attempting to bend the piece while it remains vertically attached to your wall distributes the heavy pressure incredibly unevenly. Furthermore, the immense physical force required to push the arch flat would simply tear the metal screws directly out of your drywall. Taking the piece down remains the only safe and effective way to complete this structural repair.
What Happens If The Bow Returns?
If the curvature returns after a few weeks, the wood likely absorbed new moisture from a humid home environment. This usually happens when the top and bottom horizontal edges remain unpainted, allowing invisible water vapor to seep deep into the porous end-grain. You must repeat the entire dampening and pressing process from the very beginning to fix it again. Once flattened the second time, ensure you apply three thick coats of waterproof sealant to every single exposed edge.
Conclusion
Restoring a stubborn wooden fixture requires little more than basic household items, strategic pressure, and dedicated patience. You have learned that understanding how to straighten a warped door allows you to rescue beautiful structural pieces from the expensive landfill. By correctly identifying the arch, applying gentle moisture, and utilizing heavy weights, you can force unpredictable wood fibers back into a perfectly flush state. Remember to thoroughly seal all edges after your successful repair to lock out the environmental humidity forever. Grab your screwdriver, clear off a flat space in your garage, and take the first confident step toward fixing your home today.

About
Mike May is a distinguished figure in the world of woodworking and timber design, with a decade of expertise creating innovative and sustainable indoor solutions. His professional focus lies in merging traditional craftsmanship with modern manufacturing techniques, fostering designs that are both practical and environmentally conscious. As the author of Woodimber, Mike delves into the art and science of timber-craft, inspiring artisans and industry professionals alike.
Education
RMIT University (Melbourne, Australia)
-
Associate Degree in Design (Timber): Focus on sustainable design, industry-driven projects, and practical craftsmanship.
-
Gained hands-on experience with traditional and digital manufacturing tools, such as CAD and CNC software.
Nottingham Trent University (United Kingdom)
-
Bachelor’s in Woodworking and Product Design (Honors): Specialized in product design with a focus on blending creativity with production techniques.
-
Participated in industry projects, working with companies like John Lewis and Vitsoe to gain real-world insights.
Publications and Impact
In Woodimber, May shares his insights on timber design processes, materials, and strategies for efficient production. His writing bridges the gap between artisan knowledge and modern industry needs, making it a must-read for both budding designers and seasoned professionals.