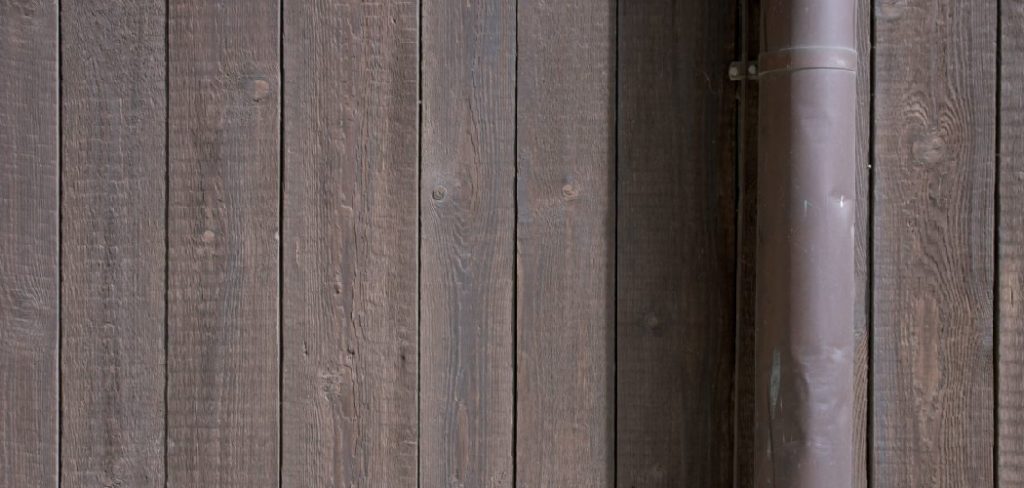
 (1)")

The industrial design trend, with its cool tones and sleek surfaces, has made metallic finishes a popular choice in home decor. But solid metal can be heavy, expensive, and difficult to work with. What if you could achieve that same look using a much more forgiving and affordable material? With a few simple painting techniques, you can transform ordinary wood into a convincing replica of aged iron, brushed steel, or weathered copper.
This artistic illusion, known as a faux finish, is a game-changer for DIY enthusiasts. Learning how to make wood look like metal is a surprisingly simple project that allows you to create stunning custom pieces, from picture frames to furniture, without needing a welder or a forge. This guide will walk you through the entire process, empowering you to add a touch of industrial chic to your home with just a paintbrush and a little creativity.
Why Create a Faux Metal Effect?
The appeal of a faux metal finish lies in its incredible versatility and cost-effectiveness. It allows you to upcycle old wooden furniture, giving a dated dresser or a simple pine shelf the high-end appearance of cast iron or brushed nickel. Wood is lightweight, easy to cut, and widely available, making it the perfect canvas for your creative projects. By mastering a few painting techniques, you can craft decor that perfectly matches your vision, whether you want the rustic charm of rusted steel or the modern elegance of galvanized metal. This method saves you a significant amount of money compared to buying solid metal pieces and gives you the satisfaction of creating something truly unique with your own hands. It’s a project that combines artistry with practicality, yielding impressive results.
Step-by-Step Guide on How to Make Wood Look Like Metal
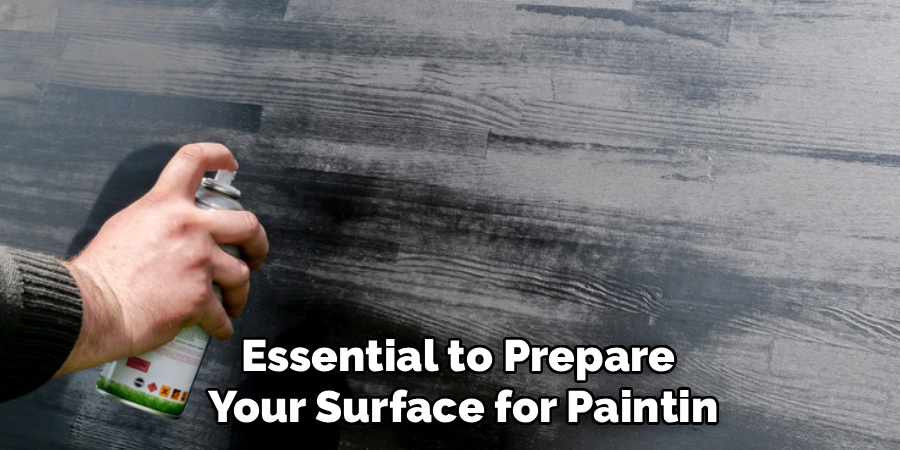
Step 1: Prepare the Wood and Your Workspace
Before you start the transformation, it is essential to prepare your surface for painting. Any imperfections in the wood, like deep grain or knots, can ruin the metallic illusion. Begin by filling any holes or dents with wood filler and let it dry completely. Then, sand the entire piece with medium-grit sandpaper (around 120-grit) followed by a fine-grit sandpaper (220-grit) until it is perfectly smooth to the touch. The goal is to eliminate all traces of wood grain texture. Once sanded, wipe the surface with a tack cloth to remove every speck of dust. Set up your workspace in a well-ventilated area and lay down drop cloths to protect your floors from paint splatters.
Step 2: Apply a Smooth Base Coat of Primer
Primer is the crucial foundation that ensures your metallic paint adheres properly and has a uniform appearance. Since you want to create the illusion of a non-porous metal surface, a high-quality, sandable filler primer is your best choice. This type of primer is thicker than standard primer and is designed to fill in any remaining wood grain or tiny imperfections, creating a glass-smooth base. Apply a thin, even coat of primer with a foam roller or a paint sprayer for the most uniform coverage. Once the primer is dry, sand it lightly with fine-grit sandpaper (220-grit or higher) to smooth out any bumps, and wipe it clean with a tack cloth.
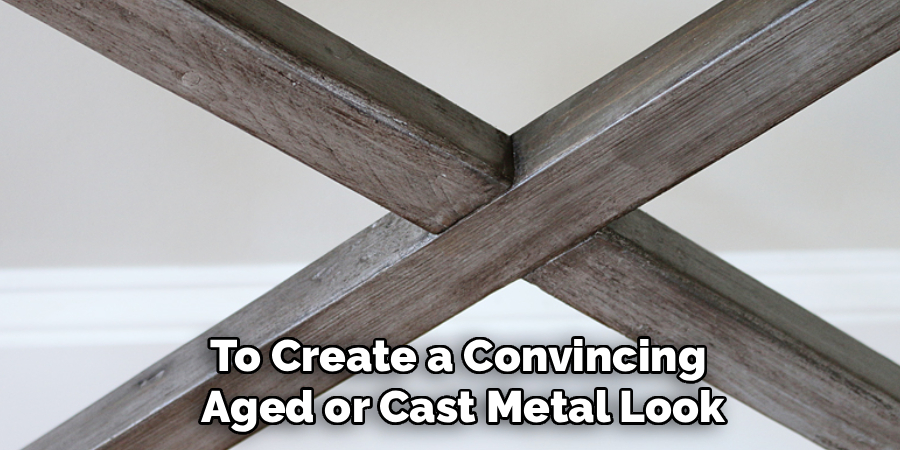
Step 3: Add Texture with Metallic Paint and Filler
To create a convincing aged or cast metal look, you need to add a bit of texture. A simple way to do this is by mixing a small amount of fine sand or a specialized texture additive into your base metallic paint. Alternatively, you can use a joint compound. Apply a thin layer of the compound over the primed surface with a putty knife, creating subtle, random textures. For a hammered metal effect, you can gently dab the surface with a crumpled-up plastic bag while the compound is still wet. Let the texture dry completely before moving on. This step gives the surface a tangible quality that mimics the imperfections of real, weathered metal.
Step 4: Apply the Metallic Base Color
Now it is time to lay down your primary metallic color. Whether you are aiming for silver, iron, or bronze, choose a high-quality metallic spray paint or liquid paint. Spray paint often provides the most even and convincing sheen. Apply the paint in several light, thin coats rather than one heavy coat to avoid drips and ensure a smooth finish. Hold the can about 10-12 inches from the surface and use sweeping, overlapping motions. Let each coat dry completely before applying the next. This base color will be the dominant hue of your final piece, so take your time to build up an opaque, consistent metallic layer.
Step 5: Metal with Aging Effects
The secret to a realistic finish lies in creating layers of age and wear. This is done by applying a “wash,” which is a very thin, watery layer of paint. To create a rust effect, mix a small amount of burnt sienna or dark orange craft paint with water. For a general aged look, use black or dark brown paint. Brush this wash over the metallic base coat, making sure to get it into all the crevices and textured areas you created earlier. Before the wash dries, use a clean, damp rag to wipe it off the high points, leaving the dark color settled in the recesses. This technique creates instant depth and shadow, mimicking years of natural aging.
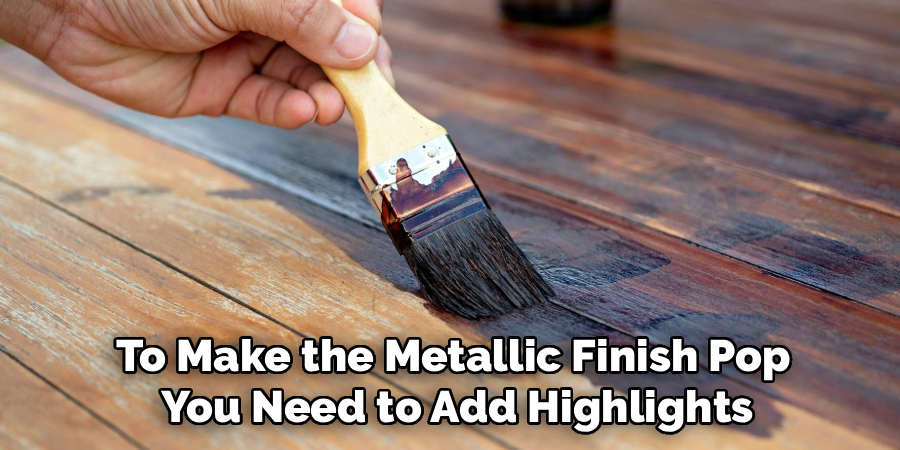
Step 6: Create Highlights with a Lighter Metallic Color
To make the metallic finish pop, you need to add highlights. This technique is called dry-brushing. Pour a small amount of a lighter metallic paint (like a bright silver or light gold) onto a paper plate. Dip the very tips of a dry paintbrush into the paint, then wipe almost all of it off on a clean paper towel. The brush should look almost clean. Lightly drag the brush over the high points and edges of your piece. This will deposit a small amount of the lighter paint, catching the light and simulating the way real metal wears and shines on its most prominent edges. This subtle detail adds a significant amount of realism to the overall effect.
Step 7: Add a Faux Rust Finish for Extra Character
If you want to create the look of weathered, rusted iron, you can easily add convincing rust patches. Dab small, irregular spots of dark brown paint onto the surface where rust would naturally form, such as in corners or around edges. While the brown paint is still wet, dab a bit of bright orange paint into the center of the brown spots. Use a dry brush to gently blend the edges of the orange and brown together, creating a natural-looking transition. For an even more realistic texture, you can sprinkle a tiny amount of cinnamon or fine sand into the wet paint to mimic the gritty feel of real rust. This is a key technique for anyone learning how to make wood look like metal.
Step 8: Seal Your Work with a Protective Topcoat
Once you are satisfied with your faux metal finish and it has completely dried, you must protect your hard work with a clear topcoat. The sheen you choose will have a big impact on the final look. A matte or satin finish topcoat is usually the best choice, as most aged metals are not highly glossy. A glossy finish can look artificial and ruin the illusion. Apply two to three thin, even coats of a water-based polycrylic or polyurethane spray. This will protect the paint from scratches and scuffs and make the piece more durable, ensuring your metallic masterpiece lasts for years to come.
Frequently Asked Questions
What Is the Best Paint for a Faux Metal Finish?
Modern Masters and Rust-Oleum are two brands that make excellent metallic paints.
- Spray Paint: Metallic spray paints often provide the smoothest, most convincing sheen and are easy to use.
- Liquid Paint: There are also liquid acrylic paints with real metal particles that can be brushed on. These are great for adding texture.
- Base Color: Always start with a dark base, like black or dark gray, before applying your metallic color for the most depth.
Can I Make Wood Look Like Galvanized Metal?
Yes, this is a popular and achievable look.

- Technique: After priming, spray the piece with a bright silver metallic paint.
- The Effect: While the paint is still slightly tacky, lightly mist the surface with a spray bottle of water. Then, use a dry brush to gently dab and mottle the surface. This creates the blotchy, weathered pattern characteristic of galvanized steel.
- Finishing: Use a dark wash to add some age to the crevices.
How Do I Create a Faux Verdigris or Copper Patina?
A verdigris patina is the greenish-blue coating that forms on aged copper or bronze.
- Base: Start with a rich copper or bronze metallic base coat.
- The Wash: Create a thin wash using turquoise or aqua-colored craft paint mixed with water.
- Application: Brush this wash over the copper base, letting it pool in the crevices. Use a damp rag to wipe it off the high points, leaving the green patina in the recesses.
Does This Technique Work on MDF?
Yes, this technique works exceptionally well on MDF (Medium-Density Fiberboard).
- Why it Works: MDF is a fantastic choice because it has no wood grain and is already very smooth, which saves you a lot of time on initial sanding and preparation.
- Preparation: You still need to prime MDF, especially on the cut edges which are very porous, to ensure an even paint finish.
How Do I Simulate Rivets or Weld Marks?
Adding these details greatly enhances the industrial illusion.
- Rivets: Use upholstery tacks or split peas glued onto the surface before priming. Once painted over, they will look like metal rivets.
- Weld Marks: After priming, run a bead of hot glue or wood glue along the “seams” of your piece. Once this bead is dry, you can paint over it. The raised, slightly irregular line will look just like a weld seam.
Conclusion
Creating a faux metal finish is an incredibly rewarding DIY skill that blends art with craft. It proves that with the right techniques, humble materials like wood and paint can be elevated into something spectacular. The key to success lies in building up layers: a smooth base, a metallic color, textured washes, and subtle highlights. By focusing on preparation and having the patience to let each layer do its work, you can create a convincing illusion that will have people touching your piece to believe it is not real metal.
This project is a testament to the power of creative painting to completely transform an object. Now that you have the knowledge of how to make wood look like metal, you are ready to upcycle that old furniture, build that industrial-style shelf, and add a touch of metallic magic to your home decor.
About
Mike May is a distinguished figure in the world of woodworking and timber design, with a decade of expertise creating innovative and sustainable indoor solutions. His professional focus lies in merging traditional craftsmanship with modern manufacturing techniques, fostering designs that are both practical and environmentally conscious. As the author of Woodimber, Mike delves into the art and science of timber-craft, inspiring artisans and industry professionals alike.
Education
RMIT University (Melbourne, Australia)
-
Associate Degree in Design (Timber): Focus on sustainable design, industry-driven projects, and practical craftsmanship.
-
Gained hands-on experience with traditional and digital manufacturing tools, such as CAD and CNC software.
Nottingham Trent University (United Kingdom)
-
Bachelor’s in Woodworking and Product Design (Honors): Specialized in product design with a focus on blending creativity with production techniques.
-
Participated in industry projects, working with companies like John Lewis and Vitsoe to gain real-world insights.
Publications and Impact
In Woodimber, May shares his insights on timber design processes, materials, and strategies for efficient production. His writing bridges the gap between artisan knowledge and modern industry needs, making it a must-read for both budding designers and seasoned professionals.