 (1)")

A hardwood table often serves as the heart of a home—a place for family meals, late-night conversations, and holiday celebrations. Over time, daily life can leave its mark in the form of scratches, water rings, and a dull finish. Instead of replacing this cherished piece of furniture, you can restore its original beauty and character. Refinishing a hardwood table is a rewarding project that breathes new life into your furniture, allowing it to shine for many more years.
This guide on how to refinish hardwood table will walk you through the entire process, from gathering your supplies to applying the final protective coat.
We will cover the benefits of taking on this project, provide a detailed step-by-step tutorial, and highlight common pitfalls to avoid.
What Will You Need?
Before you begin, gathering all the necessary tools and materials will ensure a smooth and efficient process. Having everything ready and within reach will help you avoid interruptions and focus on the task at hand.
Safety Gear:
- Safety glasses or goggles
- Dust mask or respirator
- Chemical-resistant gloves (for stripping)
- Work gloves
Stripping and Cleaning:
- Chemical paint and varnish stripper (citrus-based options are less harsh)
- Paintbrush (for applying stripper)
- Plastic or metal scraper
- Mineral spirits or denatured alcohol
- Clean rags or tack cloths
Sanding:
- Random orbital sander (highly recommended for efficiency)
- Sandpaper discs in various grits (80, 120, 150, and 220)
- Sanding block or sponge for edges and detailed areas
Staining and Finishing:
- Pre-stain wood conditioner
- Oil-based or water-based wood stain
- Foam brushes or high-quality natural bristle brushes
- Clean, lint-free cloths (for applying and wiping the stain)
- Topcoat finish (polyurethane, lacquer, or tung oil)
Miscellaneous:
- Drop cloths or plastic sheeting to protect your workspace
- Painter’s tape
- Empty metal can for used rags (important for safety)
10 Easy Steps on How to Refinish Hardwood Table
Follow these detailed steps to achieve a professional-looking finish on your hardwood table. This process requires patience, so take your time with each stage to ensure the best possible outcome.
Step 1: Prepare Your Workspace
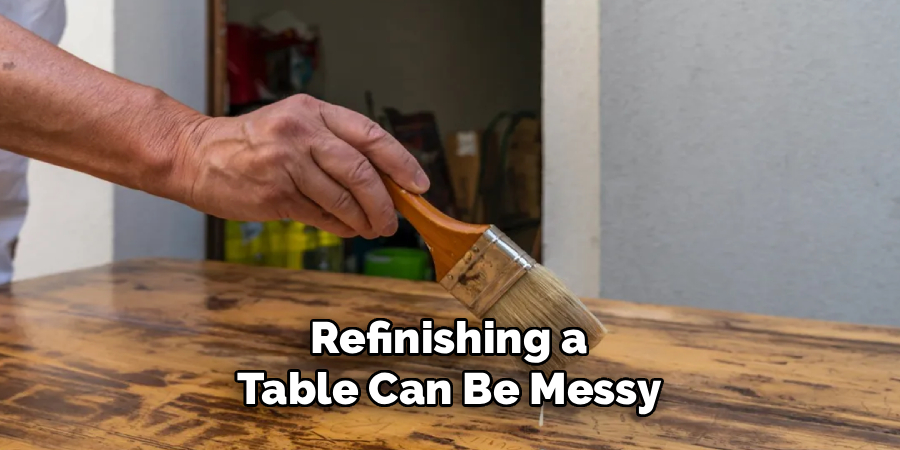
The first and most crucial step is to set up a proper workspace. Refinishing a table can be messy, and the chemicals involved require good ventilation. Choose a location like a garage, workshop, or a well-ventilated outdoor area protected from direct sunlight and wind. Lay down drop cloths or plastic sheeting to cover the floor and any nearby objects.
If you’re working indoors, open windows and use fans to create cross-ventilation. This not only protects your surroundings from dust and spills but also ensures your safety from fumes. Disassemble the table if possible by removing the legs. This makes it much easier to work on each component separately and ensures you can reach every surface evenly.
Step 2: Strip the Old Finish
With your workspace prepared and safety gear on, it’s time to remove the old finish. Apply a thick, even layer of chemical stripper to the tabletop and other surfaces using a paintbrush. Work in smaller, manageable sections. Let the stripper sit for the time recommended by the manufacturer, typically 15 to 30 minutes. You will see the old finish bubble and lift from the wood. Once ready, use a plastic scraper to gently push the softened finish off the surface, moving with the grain of the wood.
A metal scraper can be used carefully on flat surfaces but can easily gouge the wood. For curved or detailed areas, use steel wool or a stripping pad. Collect the stripped gunk in a disposable container. You may need to apply a second coat of stripper for stubborn areas or multiple layers of old finish.
Step 3: Clean the Surface Thoroughly
After stripping, a sticky residue will remain on the wood. It is essential to neutralize the stripper and clean the surface completely before sanding. Use a rag dampened with mineral spirits or denatured alcohol to wipe down the entire table. This will remove any remaining stripper and dissolve any leftover wax or contaminants.
Be sure to wipe down all surfaces, including edges and legs. This cleaning step prevents the old finish from gumming up your sandpaper and ensures the new stain and topcoat will adhere properly. Allow the wood to dry completely before moving on to the next step. Proper drying can take a few hours, so be patient.
Step 4: Initial Sanding for a Smooth Start
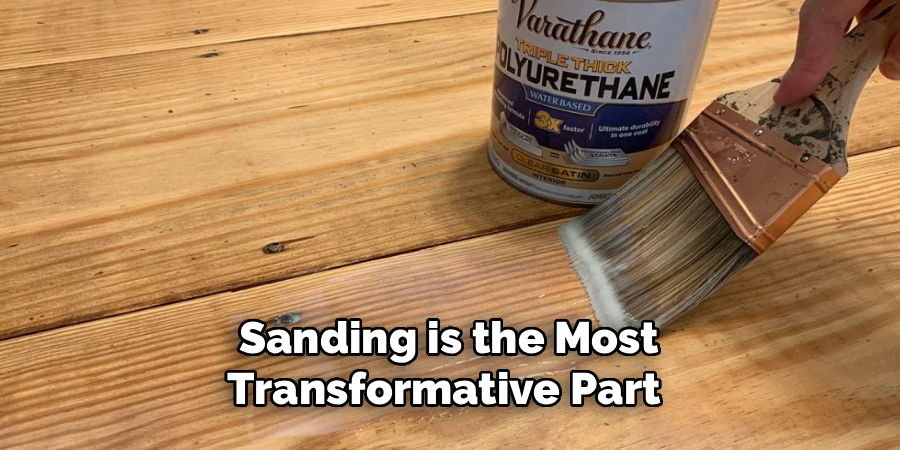
Sanding is the most transformative part of the process, as it removes any lingering finish and smoothes out imperfections. Start with a coarse-grit sandpaper, like 80-grit, on your random orbital sander. This initial pass is designed to remove any remaining traces of the old finish and level out minor scratches or dings.
Move the sander slowly and consistently across the surface, always following the direction of the wood grain. Applying even pressure is key; letting the sander do the work will prevent uneven spots. For table edges, corners, and legs, a sanding block or hand sanding is more effective and provides better control. The goal of this first sanding stage is to create a uniform, raw wood surface.
Step 5: Progress to Finer Grits
Once you have completed the initial sanding, it’s time to refine the surface. Switch to a medium-grit sandpaper, such as 120-grit, and sand the entire table again. This step will remove the scratches left by the 80-grit paper and begin to smooth the wood. After the 120-grit pass, move up to a 150-grit sandpaper. Continue sanding with the grain, ensuring you cover every inch of the surface.
Each progressive grit refines the wood further, creating an increasingly smooth texture. Take your time during these stages, as a well-sanded surface is the foundation of a beautiful finish. Between each grit, wipe away the dust with a tack cloth or a rag slightly dampened with mineral spirits to inspect your progress.
Step 6: Final Sanding and Preparation
The final sanding step is what creates a silky-smooth surface ready for staining. Use a fine 220-grit sandpaper for this last pass. This polishes the wood and ensures there are no visible scratches. After this final sanding, a thorough cleaning is critical. Use a vacuum with a brush attachment to remove the bulk of the fine dust.
Then, wipe the entire piece down meticulously with a tack cloth. A tack cloth is specially designed to pick up even the smallest dust particles that a regular cloth might miss. Any dust left behind can get trapped in the stain or topcoat, creating a rough, gritty finish. Your tabletop should feel perfectly smooth to the touch.
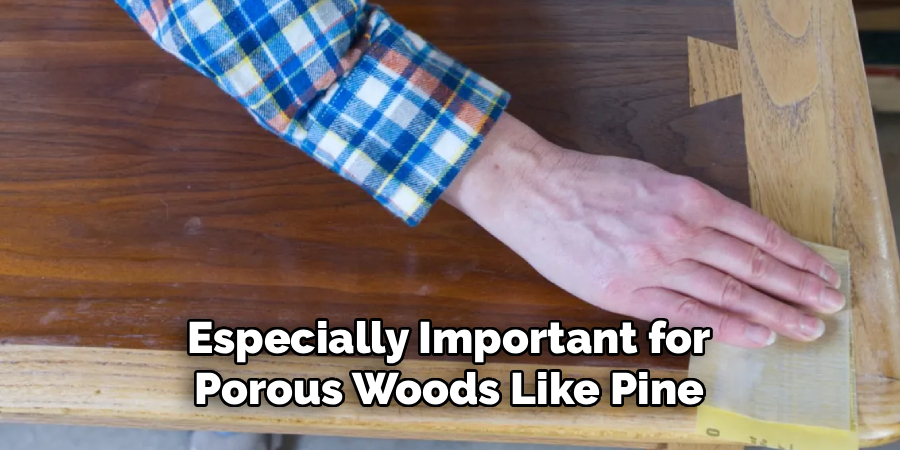
Step 7: Apply a Wood Conditioner
Before applying stain, it is highly recommended to use a pre-stain wood conditioner. This is especially important for porous woods like pine, maple, or birch, but it benefits all hardwoods by ensuring even stain absorption. Apply the conditioner with a clean cloth or foam brush, working in the direction of the grain.
A pre-stain conditioner works by partially sealing the wood pores, which prevents the stain from looking blotchy or uneven. Let the conditioner penetrate for the time specified on the product’s label, usually around 15 minutes. Wipe off any excess with a clean, dry cloth before it dries completely. This simple step makes a significant difference in achieving a professional, uniform color.
Step 8: Stain the Wood
Now for the exciting part: adding color. Before applying stain to the table, always test it on a hidden spot, like the underside of the tabletop, to ensure you are happy with the color. Once you are ready, apply the stain liberally with a foam brush or a clean, lint-free cloth. Work in manageable sections, following the grain of the wood. Allow the stain to penetrate for a few minutes—the longer it sits, the darker the color will be.
Use a separate clean cloth to wipe away the excess stain, again moving with the grain. Overlapping your strokes slightly between sections will help you avoid lap marks. Let the stain dry completely according to the manufacturer’s instructions, which could be anywhere from 4 to 24 hours.
Step 9: Apply the First Coat of Topcoat
The topcoat is the protective layer that will shield your table from daily wear and tear. Polyurethane is a popular choice due to its durability. Stir the can of finish gently but thoroughly—never shake it, as this creates bubbles that will mar your finish. Using a high-quality natural bristle brush (for oil-based) or a synthetic brush (for water-based), apply a thin, even coat of the finish.
Use long, smooth strokes that follow the wood grain. Avoid over-brushing, as this can create imperfections. Let this first coat dry completely in a dust-free environment. Drying times can vary significantly based on the product, temperature, and humidity, so follow the directions on the can.
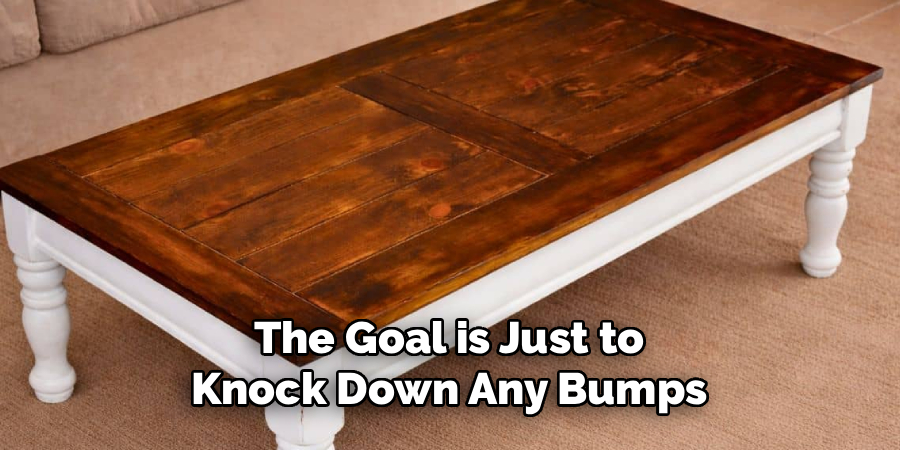
Step 10: Sand Lightly and Apply Final Coats
Once the first coat of finish is completely dry, it may feel slightly rough. This is due to raised wood grain. Lightly sand the entire surface with very fine-grit sandpaper (220-grit or higher) or a fine-finishing sanding sponge. The goal is just to knock down any bumps and create a smooth surface for the next coat—do not sand through the finish. After sanding, wipe away all dust with a tack cloth.
Apply your second coat of finish just as you did the first. For maximum durability, especially on a high-use surface like a dining table, three coats are recommended. Repeat the process of light sanding and cleaning between each coat. After applying the final coat, allow the table to cure fully for several days before putting it back into regular use.
5 Things You Should Avoid
Avoiding common mistakes is just as important as following the steps correctly. Keep these points in mind to prevent setbacks.
- Skipping Safety Precautions: Chemical strippers and finishing products release strong fumes. Always work in a well-ventilated area and wear a respirator, safety glasses, and chemical-resistant gloves to protect yourself.
- Sanding Against the Grain: Sanding against the wood grain creates cross-grain scratches that are difficult to remove and will be highly visible once you apply stain. Always move your sander in the same direction as the grain.
- Not Cleaning Thoroughly: Any dust, debris, or chemical residue left on the surface will interfere with the adhesion of your stain and topcoat, resulting in a gritty, uneven, or peeling finish. Take extra time to clean between steps.
- Shaking the Polyurethane Can: Shaking a can of polyurethane or varnish introduces air bubbles into the finish. These bubbles will transfer to your tabletop and dry into unsightly bumps. Always stir the can gently and thoroughly.
- Rushing the Drying and Curing Times: Each product has specific drying times that must be respected. Applying a new coat before the previous one is dry can lead to a sticky mess. Additionally, allow the final coat to cure fully for several days for maximum hardness and durability.
Conclusion
How to refinish hardwood table is a project that blends craftsmanship with personal expression.
y carefully following these steps, you can erase years of wear and tear and restore the natural elegance of the wood. The process requires patience and attention to detail, but the reward is a beautiful, durable piece of furniture that you customized yourself.
Your newly refinished table will not only look stunning but will also carry the story of your effort and care, ready to host new memories for years to come.
About
Mike May is a distinguished figure in the world of woodworking and timber design, with a decade of expertise creating innovative and sustainable indoor solutions. His professional focus lies in merging traditional craftsmanship with modern manufacturing techniques, fostering designs that are both practical and environmentally conscious. As the author of Woodimber, Mike delves into the art and science of timber-craft, inspiring artisans and industry professionals alike.
Education
RMIT University (Melbourne, Australia)
-
Associate Degree in Design (Timber): Focus on sustainable design, industry-driven projects, and practical craftsmanship.
-
Gained hands-on experience with traditional and digital manufacturing tools, such as CAD and CNC software.
Nottingham Trent University (United Kingdom)
-
Bachelor’s in Woodworking and Product Design (Honors): Specialized in product design with a focus on blending creativity with production techniques.
-
Participated in industry projects, working with companies like John Lewis and Vitsoe to gain real-world insights.
Publications and Impact
In Woodimber, May shares his insights on timber design processes, materials, and strategies for efficient production. His writing bridges the gap between artisan knowledge and modern industry needs, making it a must-read for both budding designers and seasoned professionals.