

No one, I suspect, ever dreamed of splitting firewood for hours as a leisure pursuit. The work, as any old-timer will confirm, is punishing on the body—especially as the nights get colder, the pile gets higher, and the rhythm of the axe grows wearisome. So, you start thinking: Is there an easier way?
A home-built hydraulic wood splitter makes for a fascinating diversion from relentless chopping, especially if you’re keen to save some cash and shape a tool to fit your own peculiar demands. Now, there’s a catch: This isn’t a project for those without a bit of welding experience or the willingness to get greasy. With a respectable grasp of your tools, though, you can turn a cramped garage into a shop and craft a machine that shoulders the bulk of the labor.
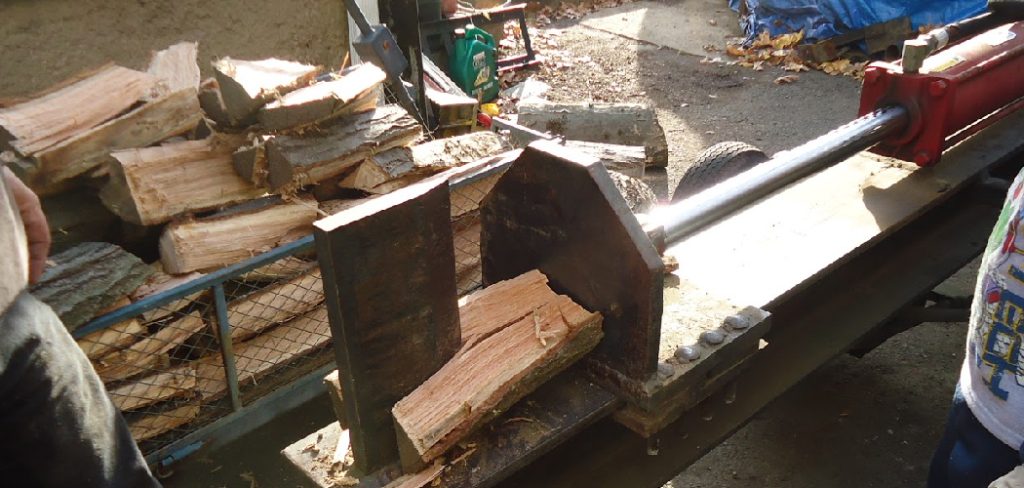
You might be surprised at how many of the parts—hydraulic bits, lengths of steel—can be tracked down if you’re sharp-eyed and a little persistent. Still, a word of caution: assembling a functioning, safe log splitter is as much about anticipating trouble as anything else.
In this guide, I’ll walk you through the must-have materials, walk the winding path of assembly (with the missteps I’ve seen all too often flagged for good measure), and lay out some ballpark costs. If all goes well, you’ll swap blisters for a hum of machinery the next time the woodpile grows. In this guide on how to make a wood splitter, we will also discuss the different types of wood splitters and their uses.
Tools and Materials You’ll Need
Scrounging for supplies or stocking up in advance, your life will be easier if you gather every tool and part before cutting steel. There’s little worse than losing a Saturday because the right coupling is buried somewhere at the bottom of a box, or you discover your welding wire ran out in the middle of a bead.
- Steel I-beam, heavy gauge—at least 6″ wide and six feet long, if not a little more.
- A hydraulic cylinder, 4″ or 5″ bore; 24″ stroke is typical for general firewood.
- Gas engine; somewhere in the 5 to 8 HP range is usually just right.
- Two-stage hydraulic pump, plus a coupling that actually fits your engine’s shaft.
- Hydraulic control valve, with an auto-return detent (anything less, and you’ll curse it quickly).
- Reservoir for hydraulic fluid—at absolute minimum, a 5-gallon tank.
- High-pressure hoses, with fittings rated for serious PSI.
- Cutting wedge—buy a hardened one or, if you’re confident, carve it yourself out of plate steel.
- Steel tubing—enough for the axle and to firm up the frame.
- A pair of wheels and sturdy hubs, unless you fancy lifting it everywhere.
- MIG or stick welder, with a healthy pile of rods or wire, and a full safety kit.
- Angle grinder (and plenty of discs—cutting, not just grinding).
- Drill press, or at least a hefty hand drill.
- Tape measure, builder’s square, and whatever clamps you trust not to slip.
7 Steps on How to Make a Wood Splitter
Step 1: Main Frame and Axle – Get It Square or Regret It
Every log splitter lives or dies by the straightness and strength of its frame. Lay your I-beam flat—sawhorses and a level floor help keep things manageable. Now, the axle: slice tubing to your chosen width (err on the side of stability if you plan to drag it out into rough field edges), and weld it square across the underside, about a third from the back.
This offset keeps most of the weight centered over the wheels once the engine and pump find their place. Fish out your wheel hubs, slide them onto the axle ends, and lock them down. Don’t rush the welds here; they’re carrying every pound of metal and wood that comes after.

Step 2: Hydraulic Reservoir – Don’t Skimp or Spill
The hydraulic reservoir does two simple things: keeps the fluid clean and keeps the pump from starving. If you have the patience and tools, fabricating your own tank from plate steel is ideal. Or, a repurposed tank (think old air compressor or machinery) may do, so long as it’s free of rust and holds a proper volume.
Weld every seam like you’re expecting a critic—any leak under pressure becomes a slippery, wasted mess. Position the tank close to the axle, with just enough offset toward the tongue to balance the final machine. Install a breather cap up top, and drill a feed hole low so the supply line stays reliably flooded.
Step 3: Engine and Hydraulic Pump – The Business End
Now, the driving force: A gas engine handles the heavy lifting here, but only if it’s locked down and married to the hydraulic pump with absolute alignment.
Weld a thick plate to the beam, double-check its level, and use vibration-resistant hardware to secure the engine. As for the pump, a flexible jaw coupling is worth every penny; even a tiny misalignment can chew up bearings in a season. The suction hose needs to run, unimpeded, from the reservoir’s base to the pump’s mouth. Go over every clamp twice—any air leak here, and you’ll lose power in baffling, hard-to-diagnose ways.
Step 4: Hydraulic Cylinder – Muscle in Steel
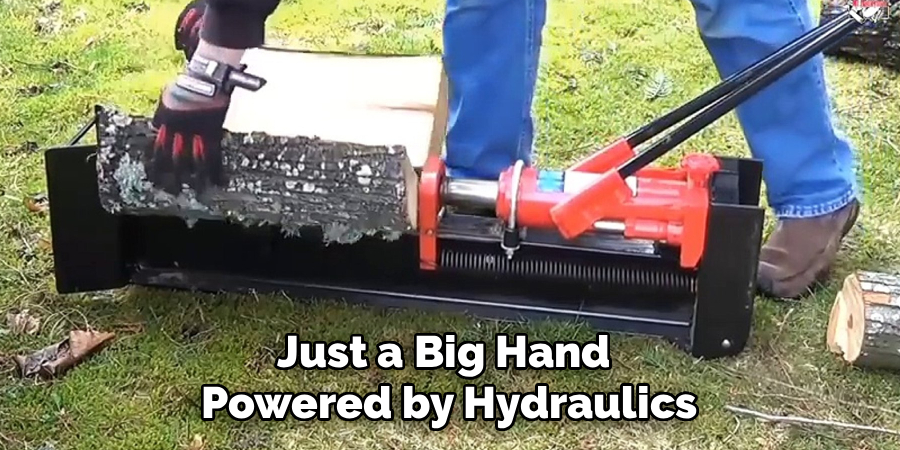
A wood splitter is, at its heart, just a big hand powered by hydraulics, and the cylinder is the muscle. Place the cylinder against the rear of your I-beam, lining the base up with the beam’s center so the push block travels true. Spend the extra time on mounting brackets—make them from thick steel, weld them with deliberate, overlapping passes, and dare to overbuild. The rod end should hang free for now; only fix it in place after the push block’s ready. Absolutely ensure the cylinder runs parallel to the beam, or you’ll be fighting a binding block forever.
Step 5: Push Block – Keep It Sliding
This is the moving wall that drives a log through the wedge. Start with plate steel the width of your beam, then weld heavy tabs on the back to connect to the cylinder rod. Opt for a steel pin here that won’t flex under stress. To keep everything moving straight, weld up guide plates or even form a wrap-around retainer so the block stays hugged to the beam as it moves. Generous grease helps, but if you see scoring or tight spots, don’t ignore them—adjust before the first test run.
Step 6: The Wedge – Never Trust a Dull Edge
Many folks start with a store-bought wedge, but making your own from a one-inch plate and grinding it to 30 degrees can be oddly satisfying. Weld the wedge directly to the I-beam’s nose, reinforcing behind it with gussets. Once again, don’t skimp on the welds—nothing moves faster or with more risk than a wedge that decides to break loose. Check and double-check that it stands dead vertical and lines up with the push block’s path. A crooked setup is not just an inconvenience; it’s a shortcut to dangerous misfires.
Step 7: Plumb, Test, and Keep Your Head on a Swivel
Final steps bring in all the ugly, fiddly business of hoses and valves. The valve should mount somewhere you aren’t reaching past the moving parts to operate it. Feed the pump output to the valve, then split from there to both sides of the cylinder. Include a return line with a dedicated oil filter—fragments or fines in the hydraulic oil can gouge a pump in no time.
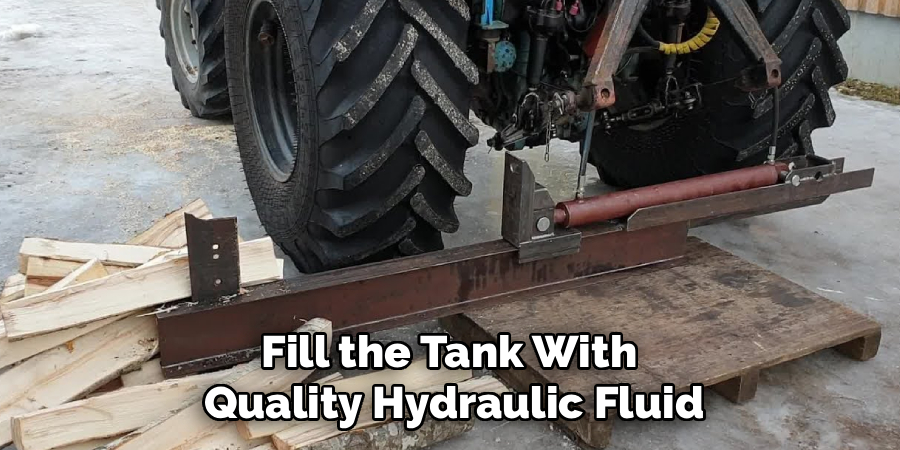
Before firing up, check the engine’s oil, top up the fuel, and fill the tank with quality hydraulic fluid. Cycle the valve slowly back and forth to bleed air—odd noises or jerky movement are warning signs not to ignore. Only once you’re absolutely sure every fitting holds pressure and every path is clear should you try splitting a sacrificial piece of wood.
Following these steps on how to make a wood splitter will help ensure that your machine functions properly and safely. However, it is important to note that regular maintenance and upkeep are also crucial in prolonging the lifespan of your wood splitter.
Likely Missteps and How to Sidestep Them
It may tempt you to rush, but misaligning the cylinder is a guaranteed route to frustration. The push block starts binding, seals wear out, and all that force goes somewhere unintended. Using a one-stage pump seems reasonable—until you watch the wedge crawl through a log at a snail’s pace or worse, the engine strains and stalls out.
Maybe most importantly, don’t trust a ‘good enough’ weld when it comes to the wedge or the cylinder mounts. Under hydraulic stress, a failed weld can launch steel with more force than you’d ever expect. Forgetting reservoir capacity? The fluid overheats, breaks down, and your pump takes the brunt.
Should You DIY, or Hire an Expert?
I won’t sugarcoat it: piecing together a hydraulic splitter isn’t for absolute beginners. You need to be comfortable with deep-penetration welds on thick steel, confident in your understanding of pressure, flow, and basic safety. If you don’t have a sturdy 220-volt welder or you’re second-guessing your skills, pay a qualified welder for the structural work.

High-pressure hydraulics, especially, are not a forgiving teacher—a burst hose or cracked fitting can inject fluid right through your skin, which is far more serious than most people realize. If these warnings give you pause, consider buying a commercial unit. In some cases, that truly is the wiser route.
What’s It Going to Cost?
The range is broad—much depends on how cleverly you can source salvaged parts. For those buying everything new (steel, hydraulic hardware, engine), expect the bill to add up: $1,200 to $1,800 is plausible. If you have access to second-hand farm gear, or an old engine waiting for a second life, you may shave the cost to well below $600.
Don’t budget too thinly; high-pressure hoses and fittings alone routinely break $200. Factor in everything before you start cutting.
Frequently Asked Questions
Q1: What Size Engine Makes Sense for a Wooden Splitter?
If you’re building a standard mid-size splitter (22 to 28 tons of force), a 5-8 horsepower gas engine serves well, turning over a two-stage pump without drama. Press it harder, and you risk stalling; oversize it, and you’ll burn fuel without splitting more wood.
Q2: Is a Two-Stage Hydraulic Pump Necessary?
Strictly speaking, you can make do without—but you’ll regret it. A two-stage pump moves the cylinder quickly when there’s no resistance, then cleverly shifts gears to provide extra force when the wood gets tough. Saves both time and frustration.
Q3: What About the Beam—How Thick Is Enough?
There’s no trick here. A thick central beam is vital; anything less can result in permanent warpage. An 8-inch width with web and flange thickness in the 3/8″ to 1/2″ range is about the minimum you should accept. Thin beams bend in ways you can’t fix.
Conclusion
If you’ve made it this far, you’re probably itching to fire up your creation. There’s a quiet satisfaction in seeing heavy logs fall apart with one decisive push—knowing full well all the labor and thought you invested sits at the heart of it.
Pay attention to safety at every turn, both as you build and each time you roll it out for another pile of logs. A winter’s supply of firewood is less daunting when your splitter waits in the shed, ready to do its job. Thanks for reading this guide on how to make a wood splitter.

About
Mike May is a distinguished figure in the world of woodworking and timber design, with a decade of expertise creating innovative and sustainable indoor solutions. His professional focus lies in merging traditional craftsmanship with modern manufacturing techniques, fostering designs that are both practical and environmentally conscious. As the author of Woodimber, Mike delves into the art and science of timber-craft, inspiring artisans and industry professionals alike.
Education
RMIT University (Melbourne, Australia)
-
Associate Degree in Design (Timber): Focus on sustainable design, industry-driven projects, and practical craftsmanship.
-
Gained hands-on experience with traditional and digital manufacturing tools, such as CAD and CNC software.
Nottingham Trent University (United Kingdom)
-
Bachelor’s in Woodworking and Product Design (Honors): Specialized in product design with a focus on blending creativity with production techniques.
-
Participated in industry projects, working with companies like John Lewis and Vitsoe to gain real-world insights.
Publications and Impact
In Woodimber, May shares his insights on timber design processes, materials, and strategies for efficient production. His writing bridges the gap between artisan knowledge and modern industry needs, making it a must-read for both budding designers and seasoned professionals.