 (1)")

Gray-washed wood is a fantastic way to give furniture or flooring a fresh, modern, and rustic look.
This technique mutes the natural wood tones, allowing the grain to show through while adding a soft, weathered gray hue. It’s a popular choice for achieving styles from coastal to farmhouse chic. Unlike a solid coat of paint, a gray wash enhances the wood’s natural beauty, creating a finish with depth and character.
This guide on how to gray wash wood will walk you through everything you need to know to master this simple yet transformative DIY project.
What Will You Need?
Before you begin, gather all your materials to ensure the process goes smoothly.
- Gray latex or water-based paint
- Water
- Mixing container
- Stir stick
- Sandpaper (medium-grit, e.g., 120-150, and fine-grit, e.g., 220)
- Sanding block or electric sander
- Tack cloths or clean, lint-free rags
- Paintbrushes
- Clean rags for applying and wiping the wash
- Drop cloths or plastic sheeting
- Protective gloves
- Safety glasses
- Clear topcoat (polyurethane, polycrylic, or finishing wax)
10 Easy Steps on How to Gray Wash Wood
Follow these detailed steps to achieve a beautiful, professional-looking gray wash finish on your wood project.
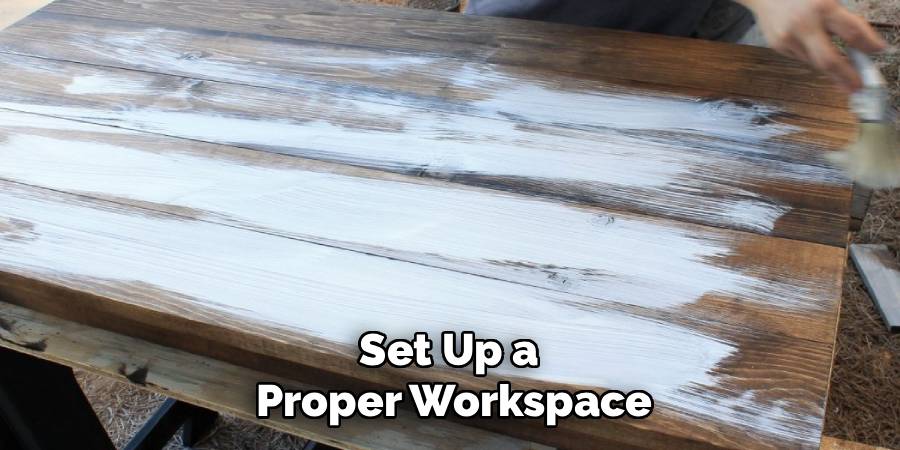
Step 1: Prepare Your Workspace
Before you even touch your wood piece, it is crucial to set up a proper workspace. This first step prevents messes and ensures you can work efficiently and safely. Lay down drop cloths or plastic sheeting to protect your floors and any nearby furniture from paint splatters and dust. Proper ventilation is key, especially when sanding and applying finishes. If possible, work in a well-ventilated garage, a workshop, or outdoors on a calm, clear day. If you must work inside, open windows and use fans to create airflow. This not only helps with fumes but also speeds up drying times between coats. Finally, arrange all your tools and materials so they are within easy reach. Having your sandpaper, paints, brushes, and rags organized will make the entire process flow much more smoothly, preventing you from scrambling to find an item mid-application.
Step 2: Prepare the Wood Surface
The quality of your final result is heavily dependent on how well you prepare the wood surface. Start by thoroughly cleaning the piece to remove any dirt, grime, or oils. A simple solution of mild soap and water applied with a clean rag usually does the trick. Be sure to rinse it well with a damp cloth and let it dry completely. If the wood has an existing finish, like paint, varnish, or lacquer, you will need to remove it. Use a paint stripper according to the manufacturer’s directions or, for a more manual approach, begin sanding. The goal is to get down to the bare wood so the wash can penetrate the grain properly. Neglecting this step will result in a blotchy, uneven finish, as the wash will not adhere to sealed surfaces.
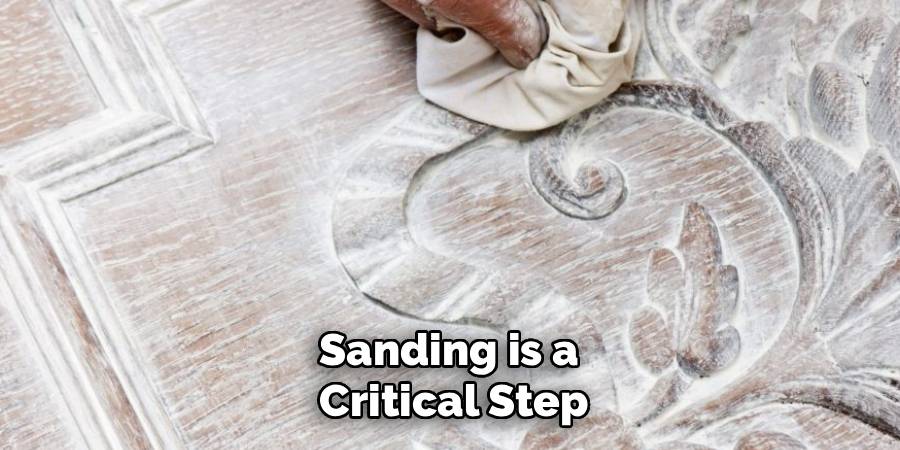
Step 3: Sand the Wood
Sanding is a critical step that opens up the wood’s pores, allowing the gray wash to soak in evenly. Start with a medium-grit sandpaper, around 120 to 150-grit. If you are working on a large, flat surface like a tabletop, an electric orbital sander will save you significant time and effort. For smaller or more intricate areas, a sanding block or simply wrapping the sandpaper around your hand will work fine. Move the sander in the direction of the wood grain, applying even pressure. This initial sanding will remove any remaining old finish and smooth out minor imperfections. After you have sanded the entire piece with the medium-grit paper, you can move on to a finer grit, like 220, for an extra-smooth surface, though this is optional for a more rustic look.
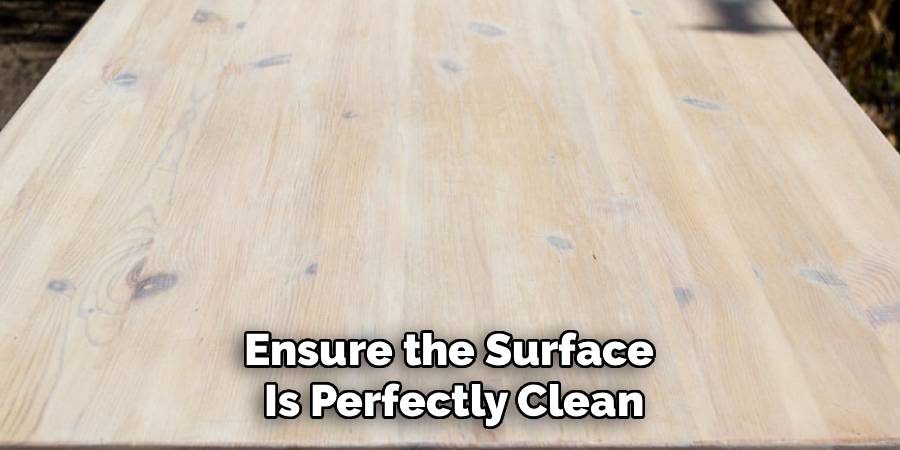
Step 4: Clean Up the Sanding Dust
After sanding, your wood piece and workspace will be covered in a fine layer of dust. It is essential to remove all of it before applying the wash. Any dust left behind will mix with your gray wash, creating a gritty, uneven texture and a muddy appearance. The most effective way to remove this dust is with a tack cloth. These sticky cloths are specifically designed to pick up fine particles without leaving any residue. Gently wipe down every surface of your project. If you don’t have a tack cloth, a slightly damp, lint-free rag, or a microfiber cloth can work as an alternative. You can also use the brush attachment on a shop vacuum for the initial removal, followed by a final wipe-down with a cloth to ensure the surface is perfectly clean and ready for the next step.
Step 5: Mix Your Gray Wash
Creating the gray wash is where you get to control the final look of your project. The ratio of paint to water determines the opacity of the finish. A common starting point is a 1:1 ratio, meaning one part gray paint to one part water. Pour your desired amount of paint into a mixing container, then add an equal amount of water. Use a stir stick to mix them together thoroughly until you have a consistent, thin liquid. For a more transparent, subtle effect that shows more of the wood grain, you can increase the water, trying a 1:2 ratio of paint to water. For a more opaque, paint-like finish, a 2:1 ratio of paint to water would be better. It’s always a good idea to test your mixture on a scrap piece of the same wood or on an inconspicuous area of your project, like the underside of a table, to see if you like the color and transparency before committing to the entire piece.
Step 6: Apply the First Coat of Wash
Now it’s time to apply the wash. Using a clean paintbrush, apply a thin, even layer of your gray wash mixture to the wood. Work in manageable sections, especially on larger pieces, to prevent the wash from drying too quickly. Follow the direction of the wood grain with your brush strokes for a natural look. The goal is to get a consistent layer of the mixture over the entire surface of the section you are working on. Don’t worry about making it look perfect at this stage; the next step is where the magic happens. The key is to work methodically and ensure you don’t miss any spots. Keep your brush loaded but not dripping to avoid creating pools of wash on the surface.
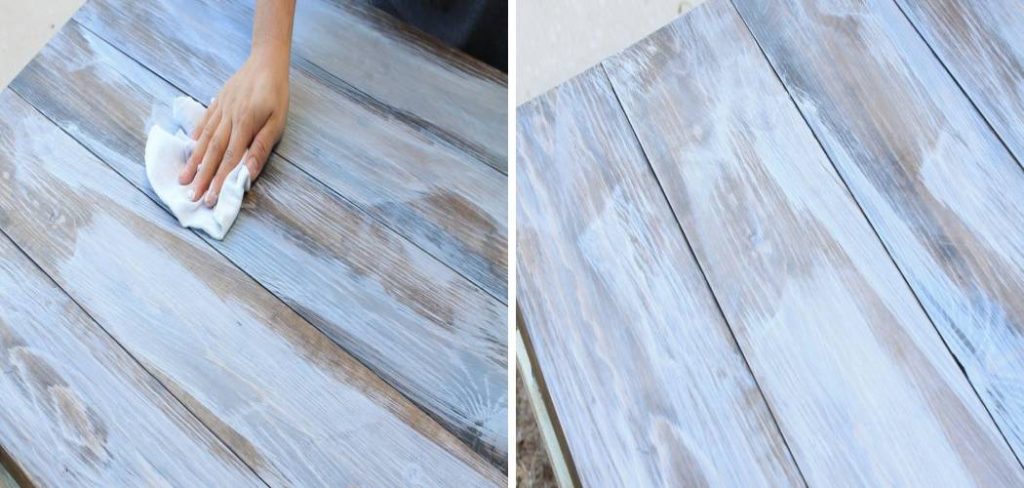
Step 7: Wipe Back the Excess Wash
This step is what distinguishes a “wash” from a simple coat of thinned paint. Immediately after applying the wash to a section, take a clean, lint-free rag and gently wipe it back. Again, always wipe in the direction of the wood grain. Wiping removes the excess surface liquid while leaving the pigment settled into the wood’s grain and texture. The amount of pressure you apply during this wipe-back will affect the outcome. A light wipe will leave more color for a more opaque look, while a firmer wipe will remove more of the wash, resulting in a subtler finish that highlights the grain more prominently. Experiment to find the look you prefer. Have a pile of clean rags ready, as they will become saturated with the wash mixture quickly.
Step 8: Let It Dry and Assess
Once you have applied and wiped back the wash on the entire piece, you need to let it dry completely. Drying time will vary based on the humidity and temperature of your workspace, but allow at least 2-4 hours. As the wash dries, the color may lighten slightly. Once it is fully dry, take a step back and assess the color and coverage. Is it the shade of gray you were hoping for? Is the coverage even? This is your opportunity to decide if you are happy with the result or if you want to deepen the color. One of the great things about a wash is its buildable nature.
Step 9: Apply Additional Coats (Optional)
If the first coat is too light or you want a more saturated gray color, you can apply a second coat. The process is the same as the first: apply the wash with a brush, work in sections, and immediately wipe it back with a clean rag. Applying multiple thin coats gives you much more control over the final color than trying to apply one thick, heavy coat. Each layer will deepen the hue and can help even out any inconsistencies from the first application. Make sure to let each coat dry completely before deciding to add another. For most projects, one or two coats are sufficient to achieve the desired effect.
Step 10: Seal the Wood
After you have achieved your desired gray wash look and the piece is completely dry (it’s best to wait 24 hours), the final step is to protect your work. Applying a clear topcoat is essential for durability, especially for high-use items like tables, chairs, or cabinets. A clear sealant will protect the wood from moisture, scratches, and everyday wear and tear. Popular choices include water-based polycrylic, which won’t yellow over time, or a traditional polyurethane. You can also use a finishing wax for a softer, more matte finish on decorative pieces. Apply the topcoat according to the manufacturer’s instructions, typically with a clean brush in thin, even coats. Most sealants require 2-3 coats for maximum protection, with light sanding using fine-grit sandpaper (220-grit or higher) between coats for an ultra-smooth finish.
Conclusion
Gray washing is a simple, affordable, and highly effective technique for modernizing wooden furniture and decor.
By preparing your surface properly, mixing the right consistency of wash, and applying it methodically, you can create a beautiful, professional-grade finish. This project allows for immense creativity, giving you the power to transform any wooden item into a piece with rustic charm and character.
Hopefully, this guide on how to gray wash wood has given you all the information and inspiration you need to take on your next gray washing project. Happy painting!