

Building your own sports equipment brings incredible satisfaction and a touch of rustic charm to your driveway. Instead of buying a flimsy plastic backboard that rattles with every shot, creating a solid lumber fixture provides unmatched durability. This fun weekend project requires only basic woodworking tools and materials found at any local hardware store. Plus, you get complete control over the design, size, and paint job.
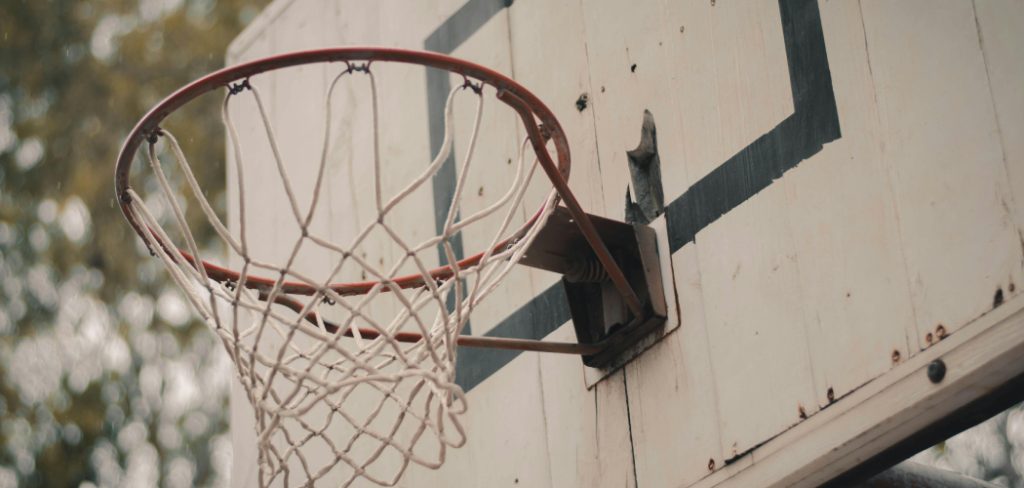
If you are wondering exactly how to make a basketball hoop out of wood, you are in the perfect spot. We will walk you through every phase of the build, from selecting the right weather-resistant lumber to mounting the final metal rim. You will learn the best techniques for cutting the backboard, securing the mounting brackets, and painting the classic square target. Gather your supplies, clear your workbench, and let us start crafting a custom court feature your whole family will love.
9 Step-By-Step Guide: How to Make a Basketball Hoop Out of Wood
Step 1: Choose the Right Exterior Lumber
Picking the correct materials determines how long your backboard will survive outdoor weather conditions. You want a heavy, durable sheet of exterior-grade plywood measuring at least three-quarters of an inch thick. Thinner wood will warp quickly and vibrate loudly whenever the ball strikes the surface. Marine plywood or pressure-treated pine offers excellent resistance to rain and humidity. Avoid standard interior MDF boards because they will swell and disintegrate after the first major rainstorm. Lay your chosen plywood completely flat on your work table and inspect both sides for deep gouges. Selecting a smooth, sturdy foundation guarantees a professional-looking finished product.
Step 2: Measure and Cut the Backboard Shape
Standard backboards feature a rectangular shape, but you can customize the dimensions to fit your specific playing space. For a traditional look, measure a rectangle that is fifty-four inches wide and thirty-six inches tall. Use a long straight edge and a dark pencil to clearly mark your cutting lines across the raw lumber. Secure the plywood to your workbench using heavy-duty clamps before picking up your circular saw. Put on your safety glasses and guide the blade slowly along the drawn lines. Pushing the saw too fast causes the wood veneer to splinter, so take your time and maintain a steady pace.
Step 3: Sand the Wooden Edges Smooth
After cutting the primary rectangle, the perimeter edges will feel incredibly rough and dangerous to handle. Grab an orbital power sander equipped with medium-grit sandpaper and carefully round over the sharp corners. Smoothing the edges prevents painful splinters and helps the final coats of paint adhere much better to the raw wood. Once the edges feel safe, switch to a fine-grit sandpaper and lightly buff the broad front face of the board. This step removes stray pencil marks and prepares the surface for finishing. Wipe the entire piece down meticulously with a tack cloth to remove all lingering sawdust particles.
Step 4: Apply Weather-Resistant Primer and Paint
Sealing the lumber properly protects your backboard from rotting and gives it that classic gymnasium appearance. Start by brushing on a thick layer of high-quality exterior wood primer to block moisture from penetrating the grain. Allow the primer to dry completely before applying two coats of brilliant white exterior acrylic paint. Use a foam roller rather than a standard brush to achieve a perfectly smooth, texture-free surface. Let the paint cure overnight in a dry, well-ventilated garage or workshop. Skipping this crucial drying time will result in a sticky surface that traps dirt and ruins the clean aesthetic you desire.
Step 5: Mask and Paint the Target Square
Every proper backboard needs a high-contrast target box sitting right above the metal rim to help players aim their bank shots. Measure precisely to find the lower center of your painted white board. Use blue painter’s tape to outline a rectangle measuring twenty-four inches wide and eighteen inches tall. Press the tape down firmly along the inner edges to prevent any wet paint from bleeding underneath. Brush a bold red or black exterior paint inside the taped borders to create the striking target line. Carefully peel the tape away while the secondary paint remains slightly wet to reveal crisp, professional edges.
Step 6: Drill Holes for the Metal Rim
Attaching the breakaway rim requires precise drilling to ensure the hoop sits perfectly level during intense gameplay. Purchase a standard steel rim kit from a local sporting goods store, which usually includes the necessary mounting bolts. Hold the metal bracket against the backboard directly below your painted target square. Mark the four mounting hole locations with a pencil while checking the alignment with a small bubble level. Use a power drill with a wood bit to bore straight through the thick plywood at your designated marks. Keep the drill perfectly perpendicular to prevent the heavy bolts from entering at crooked angles.
Step 7: Mastering Hoop Out of Wood Mounts
Creating a secure mounting system keeps the entire structure safely attached to your garage or dedicated outdoor post. You must bolt two thick, pressure-treated wooden braces horizontally across the back of the plywood board. These sturdy braces prevent the large flat panel from bowing backward under the heavy weight of the steel rim. Drive long galvanized deck screws through the front of the backboard directly into these rear support beams. Countersink the screw heads slightly below the front surface and fill the tiny holes with exterior wood putty. This ensures the ball never hits an exposed metal screw during practice.
Step 8: Attach the Rim and Net Assembly
With the backboard fully painted and braced, you can finally bolt the heavy steel rim onto the front face. Push the thick carriage bolts through the metal rim bracket and into your pre-drilled wooden holes. Slide heavy metal washers onto the bolts protruding out the back of the board, followed by locking nuts. Tighten the nuts down firmly using a socket wrench, but avoid cracking the painted wood by overtightening them. Once the steel rim feels completely rigid and immobile, loop the nylon net securely through the welded metal hooks. Your custom backboard assembly now looks ready for serious driveway action.
Step 9: Mount the Completed Hoop Structure
The final phase involves lifting and securing your heavy wooden creation to its permanent outdoor home. Because the thick plywood and steel rim weigh a significant amount, you absolutely need a helper to lift the assembly safely. Position tall ladders securely on flat ground and lift the backboard into place against your garage wall or wooden mounting post. Drive massive galvanized lag screws through your rear wooden braces directly into the wall studs or support pole. Verify the rim sits exactly ten feet off the driveway surface using a tape measure. Give the structure a firm shake to ensure total stability.
Frequently Asked Questions
What Is The Best Wood For A Backboard?
Exterior-grade plywood remains the absolute best choice for outdoor sports fixtures and driveway backboards.
- Marine plywood strongly resists moisture and prevents long-term warping.
- Pressure-treated pine offers incredible durability against harsh weather elements.
- Always select a thickness of at least three-quarters of an inch to prevent annoying vibrations.
You must avoid MDF or particleboard entirely. Those cheaper interior materials quickly absorb rain, swell up, and ultimately crumble after just one damp season.
Can I Build The Metal Rim Myself?
While you can craft the wooden backboard from scratch, we highly recommend purchasing a pre-made steel rim. Bending solid steel tubing into a perfect eighteen-inch circle requires specialized welding equipment and metalworking skills.
- Store-bought rims include proper spring-loaded breakaway mechanisms.
- Commercial rims feature safe, welded hooks for attaching the nylon net.
- They come with appropriately sized mounting hardware.
Buying a proper rim ensures a safe target that will not bend permanently during play.
How Do I Protect The Paint From Peeling?
Protecting your customized paint job requires proper surface preparation and sealing techniques before you ever hang the board outside.
- Always sand the raw wood completely smooth before applying any liquids.
- Use a high-quality, stain-blocking exterior primer as your foundational base coat.
- Choose premium exterior acrylic paint designed for outdoor furniture.
Finally, apply two clear coats of exterior polyurethane over the finished design. This clear protective layer seals out moisture and prevents sun fading.
How High Should I Mount The Hoop?
Setting the correct height depends entirely on who will be playing on your newly constructed driveway court.
- Regulation height for adults and older teenagers is exactly ten feet from the ground to the top of the metal rim.
- For middle school children, a nine-foot height provides a better shooting experience.
- For younger elementary kids, lowering the rim to eight feet helps them develop proper shooting mechanics.
Measure carefully from the driveway asphalt up to the top lip of the steel hoop.
Does The Wood Make The Ball Bounce Differently?
Yes, a wooden backboard offers a slightly different rebounding experience compared to tempered glass or thick acrylic boards found in professional arenas.
- Thick plywood provides a notoriously dead bounce, meaning the ball drops straight down.
- This softer rebound actually helps players sink close-range bank shots much easier.
- Secure the rear braces tightly to prevent unwanted energy absorption.
To ensure the best possible bounce, make sure you use thick lumber. A flimsy board will ruin the game.
Conclusion
Building your own sports equipment provides a tremendously rewarding experience that the whole family can enjoy together. From carefully cutting the thick plywood base to painting the classic high-contrast target square, this weekend project tests your basic woodworking skills in the best way possible. By utilizing durable exterior lumber and heavy-duty mounting brackets, you ensure your new driveway fixture will withstand countless intense games and harsh seasonal weather.
Now that you understand exactly how to make a basketball hoop out of wood, it is time to grab your tape measure and start building. Do not settle for a noisy, vibrating plastic backboard when you can craft a solid, custom-painted masterpiece. Gather your primer, pick up a fresh steel rim, and enjoy the immensely satisfying process of upgrading your home court. Step outside, follow the instructions carefully, and get ready to shoot some incredible hoops.

About
Mike May is a distinguished figure in the world of woodworking and timber design, with a decade of expertise creating innovative and sustainable indoor solutions. His professional focus lies in merging traditional craftsmanship with modern manufacturing techniques, fostering designs that are both practical and environmentally conscious. As the author of Woodimber, Mike delves into the art and science of timber-craft, inspiring artisans and industry professionals alike.
Education
RMIT University (Melbourne, Australia)
-
Associate Degree in Design (Timber): Focus on sustainable design, industry-driven projects, and practical craftsmanship.
-
Gained hands-on experience with traditional and digital manufacturing tools, such as CAD and CNC software.
Nottingham Trent University (United Kingdom)
-
Bachelor’s in Woodworking and Product Design (Honors): Specialized in product design with a focus on blending creativity with production techniques.
-
Participated in industry projects, working with companies like John Lewis and Vitsoe to gain real-world insights.
Publications and Impact
In Woodimber, May shares his insights on timber design processes, materials, and strategies for efficient production. His writing bridges the gap between artisan knowledge and modern industry needs, making it a must-read for both budding designers and seasoned professionals.