

A wooden toilet seat can bring a touch of natural warmth and rustic charm to any bathroom, a perfect complement to a home gardener’s aesthetic. However, unlike standard plastic seats, wood requires a specific cleaning approach to maintain its beauty and hygiene without damaging the finish. Harsh chemical cleaners can strip the protective varnish, leading to discoloration, cracking, and a breakdown of the material. Learning the proper technique ensures your fixture remains sanitary and attractive for years. This guide will provide simple, effective instructions on how to clean wooden toilet seat, using gentle methods that protect the material while ensuring a thoroughly clean surface.
Wooden toilet seats add a touch of warmth and elegance to any bathroom, but they require special care to preserve their natural beauty. Unlike plastic or ceramic alternatives, wood is more susceptible to damage from improper cleaning techniques or harsh chemicals. To keep it in pristine condition, it’s important to follow a cleaning routine tailored to the material while prioritizing hygiene and durability.
Why Careful Cleaning Matters for Natural Wood
As a gardener, you understand the importance of proper care for living materials. Wood, even when finished and sealed, is a natural product that responds to its environment. It can absorb moisture, scratch easily, and react poorly to abrasive chemicals. Using harsh, bleach-based sprays or scouring pads on a wooden toilet seat can permanently damage its protective lacquer. This not only ruins the aesthetic but also creates microscopic cracks where bacteria can hide, making the seat less hygienic over time. A gentle, mindful cleaning routine is about more than just appearances; it is about preserving the integrity of the material and ensuring a long-lasting, sanitary fixture in your home.
8 Step-by-Step Guide on How to Clean Wooden Toilet Seat
Step 1: Gather Your Gentle Cleaning Supplies
Before you begin, gather the correct tools for the job. You will not need any harsh chemicals. Instead, find two soft, clean microfiber cloths, a small bowl of warm water, and a mild dish soap. Microfiber is ideal because it is non-abrasive and highly effective at trapping dust and grime without scratching the wood’s delicate varnish. Mild dish soap acts as a gentle yet effective degreaser and disinfectant, capable of breaking down oils and killing germs without stripping the protective finish. Having all your supplies ready on the counter makes the entire process quick and efficient.
Step 2: Perform a Thorough Dry Dusting First
The first active step is to remove all loose dust, hair, and debris from the seat, lid, and hinges. Use one of your dry microfiber cloths to wipe down every surface thoroughly. Pay close attention to the area around the hinge attachments, as this is where dust tends to accumulate. This dry-dusting step is more important than it seems; it prevents you from turning dry debris into a muddy mixture when you introduce water. It ensures that your wet cleaning phase is focused solely on sanitizing the surface rather than just pushing around loose particles, leading to a much more effective clean.
Step 3: Prepare Your Mild Soapy Solution
Now, create your gentle cleaning agent. Fill your small bowl with warm water and add just a few drops of mild dish soap. You do not need a lot of soap; too many suds will leave behind a sticky residue that is difficult to rinse and can dull the wood’s natural sheen. Swirl the water with your hand to create a light, soapy solution. This simple mixture is powerful enough to disinfect and clean the surface effectively without resorting to harsh chemicals like bleach or ammonia, which can cause the wood to dry out, crack, or become discolored over time.
Step 4: Wipe Down the Seat with the Damp Cloth
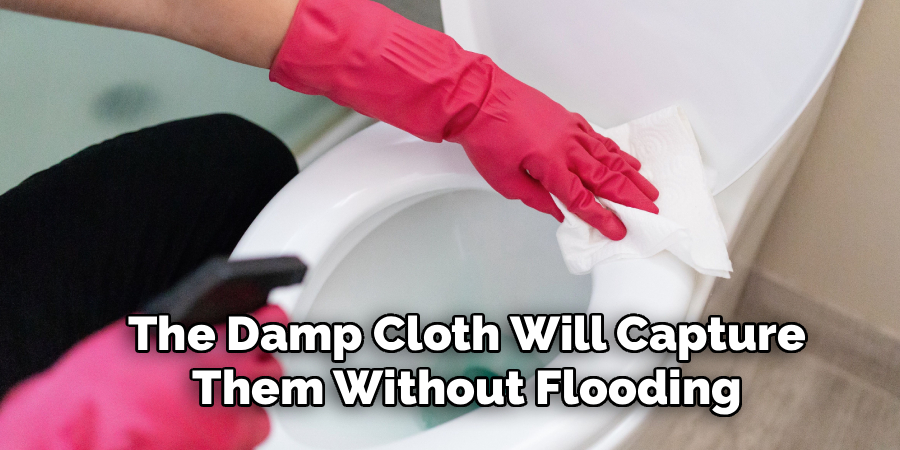
Dip your second microfiber cloth into the warm, soapy water and wring it out thoroughly. The cloth should be damp, not dripping wet. Excess water is the enemy of wood, as it can seep into seams or scratches and cause the material to swell or warp. Begin wiping down all surfaces of the toilet seat and lid. Work methodically from the top of the lid down to the underside of the seat. The gentle soap will lift away grime and germs, while the damp cloth will capture them without flooding the surface with moisture.
Step 5: Clean Around the Hinges and Attachments
The hinges are often the most neglected part of the toilet seat, yet they harbor the most buildup. Use your damp cloth to carefully clean around and under the hinge hardware. If there is stubborn grime packed into the crevices, you can use an old, soft-bristled toothbrush dipped in your soapy solution to gently scrub the area. Be careful not to press too hard, as you do not want to scratch the metal or the surrounding wood. A thorough cleaning of the hinges is a key part of learning how to clean wooden toilet seat correctly for a truly hygienic result.
Step 6: Rinse the Surface with a Clean, Damp Cloth
After you have finished cleaning with the soapy solution, you need to “rinse” the surface to remove any soap residue. Empty your bowl, rinse it out, and refill it with clean, plain warm water. Take a fresh, clean microfiber cloth (or thoroughly rinse out your cleaning cloth) and get it damp with the plain water. Go over all the surfaces of the seat and lid one more time. This step removes any lingering soap film, which could otherwise attract dust and leave the wood looking dull and feeling sticky to the touch.
Step 7: Dry the Wooden Seat Completely
This is arguably the most critical step in the entire process. Use a final, completely dry and clean microfiber cloth to thoroughly dry every inch of the wooden seat, lid, and hinges. Do not let the seat air dry. Any moisture left sitting on the surface can slowly penetrate the finish, leading to long-term damage like water spots, swelling, or even mold growth. A completely dry surface ensures the protective varnish remains intact and the wood underneath stays safe and sound, preserving the beauty and integrity of your fixture.
Step 8: Polish the Wood for Extra Protection
For an optional final touch that adds protection and shine, you can polish the wood. Apply a small amount of a wax-based furniture polish or a natural beeswax conditioner to a clean, soft cloth. Gently rub the polish onto the seat and lid, moving in the direction of the wood grain. This not only restores a beautiful luster but also adds an extra layer of protection against moisture. This polishing step, performed every few months, is an advanced technique for those who truly want to master how to clean wooden toilet seat and keep it looking new.

Frequently Asked Questions
Can I Use Disinfecting Wipes on a Wooden Toilet Seat?
It is best to avoid commercial disinfecting wipes. Most of these wipes contain alcohol or other harsh chemicals that are designed for non-porous surfaces like plastic or ceramic. On a wooden seat, these chemicals can break down the protective lacquer over time, leading to a dull, sticky, or damaged finish. A simple solution of mild dish soap and water is just as effective for sanitizing without causing harm.
How Often Should I Clean My Wooden Toilet Seat?
For general hygiene, you should wipe down your wooden toilet seat with a damp, soapy cloth at least once a week as part of your regular bathroom cleaning routine. A more thorough cleaning, including the hinges and a full dry-down, should be done every two to four weeks. This regular maintenance prevents grime from building up and keeps the seat sanitary and looking its best.
What Do I Do if My Wooden Seat Is Stained?
For minor stains, you can try using a paste made of baking soda and a few drops of water. Gently rub the paste onto the stain with a soft cloth. However, if a stain has penetrated the varnish, it may be difficult to remove without refinishing. Harsh scrubbing will only damage the surrounding finish, so it is important to proceed with caution and test any method on a small, inconspicuous area first.
How Can I Fix Scratches on the Wood?
For very light surface scratches in the varnish, rubbing the area with a high-quality furniture wax or a specialized wood polish can sometimes fill them in and make them less visible. For deeper scratches that have gone through the finish and into the wood itself, you may need to use a wood-filler pen that matches the color of your seat before lightly sanding and resealing the spot.
Is It Safe to Use Vinegar to Clean a Wooden Seat?
While vinegar is a popular natural cleaner, it should be used with extreme caution on wood. Vinegar is an acid, and even when diluted, it can slowly eat away at certain types of lacquer and varnish finishes over time, leaving the surface looking dull. A pH-neutral cleaner like mild dish soap is a much safer choice for the regular cleaning of finished wood.
Conclusion
Caring for a wooden toilet seat is a simple task that requires a gentle touch rather than aggressive chemicals. By using a mild soap solution, soft microfiber cloths, and ensuring the surface is dried completely, you protect the wood’s finish while maintaining a perfectly hygienic environment. The key is to avoid harsh, abrasive cleaners and excess moisture, which are the primary enemies of any finished wood product. Now that you have a clear understanding of how to clean wooden toilet seat, you can confidently maintain the natural beauty and warmth of your bathroom fixture for many years to come.

About
Mike May is a distinguished figure in the world of woodworking and timber design, with a decade of expertise creating innovative and sustainable indoor solutions. His professional focus lies in merging traditional craftsmanship with modern manufacturing techniques, fostering designs that are both practical and environmentally conscious. As the author of Woodimber, Mike delves into the art and science of timber-craft, inspiring artisans and industry professionals alike.
Education
RMIT University (Melbourne, Australia)
-
Associate Degree in Design (Timber): Focus on sustainable design, industry-driven projects, and practical craftsmanship.
-
Gained hands-on experience with traditional and digital manufacturing tools, such as CAD and CNC software.
Nottingham Trent University (United Kingdom)
-
Bachelor’s in Woodworking and Product Design (Honors): Specialized in product design with a focus on blending creativity with production techniques.
-
Participated in industry projects, working with companies like John Lewis and Vitsoe to gain real-world insights.
Publications and Impact
In Woodimber, May shares his insights on timber design processes, materials, and strategies for efficient production. His writing bridges the gap between artisan knowledge and modern industry needs, making it a must-read for both budding designers and seasoned professionals.