 (1)")

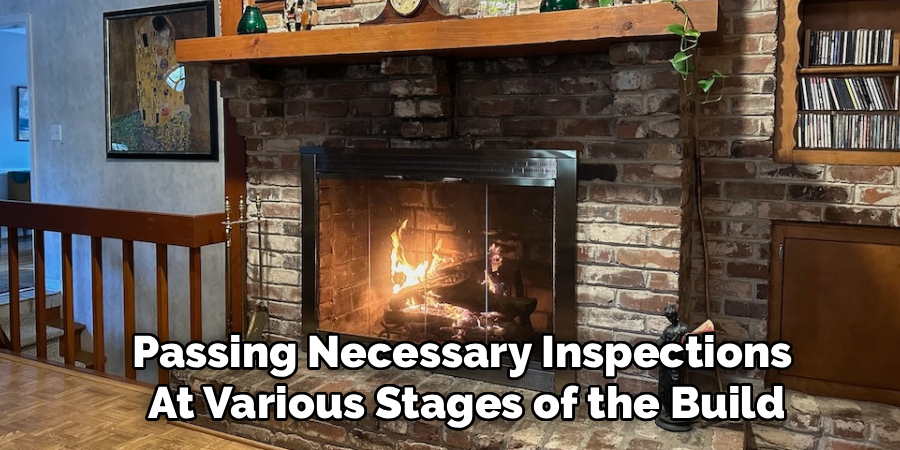
There is nothing quite like the crackle and warmth of a real wood fire. A traditional masonry fireplace serves as a stunning focal point in any home, creating an inviting atmosphere for family gatherings and quiet evenings. While building one is a significant undertaking that combines artistry with engineering, the thought of creating such a lasting feature is deeply appealing.
Many homeowners assume this project is exclusively for professional masons, but with careful planning, a respect for safety codes, and a methodical approach, the process can be understood by an ambitious DIYer. This guide is designed to provide a foundational overview of how to build a wood burning fireplace, breaking down the complex process into understandable stages. It will cover the critical components, from the foundation to the chimney, offering insight into what this monumental project entails.
Why Build a Masonry Fireplace?
A traditional masonry fireplace is more than just a place to burn wood; it is a permanent architectural feature that adds significant value and character to a home. Unlike prefabricated metal inserts, a masonry fireplace is built to last for generations, constructed from durable materials like brick, stone, and mortar. The thermal mass of the structure absorbs heat from the fire and radiates it slowly back into the room, providing a comfortable, gentle warmth long after the flames have died down. Building your own also offers complete design freedom. You can customize the size, shape, and materials of the hearth, surround, and mantel to perfectly match your home’s style, creating a one-of-a-kind centerpiece.
Step-by-Step Guide on How to Build a Wood Burning Fireplace
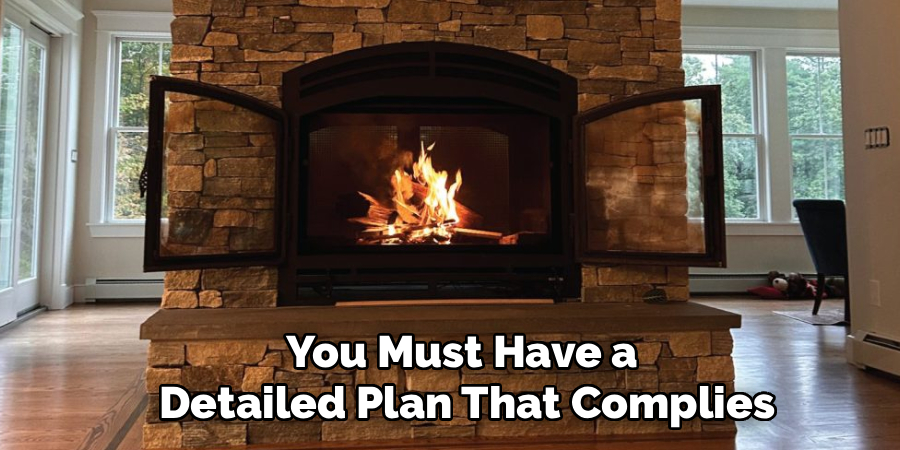
Step 1: Design, Planning, and Code Compliance
Before a single brick is laid, you must have a detailed plan that complies with all local building codes and safety standards. This is the most critical phase. Your design will need to specify the exact dimensions of the firebox, the throat, the smoke shelf, the flue, and the chimney. Consult with your local building department to obtain the necessary permits and understand the specific requirements for clearances from combustible materials, foundation depth, and chimney height. A mistake in the design, particularly in the ratio of the firebox opening to the flue size, can result in a smoky, inefficient fireplace.
Step 2: Construct a Solid Foundation
A masonry fireplace is incredibly heavy and requires its own dedicated foundation to support the immense weight. This is not something that can be built on a standard floor. You must pour a reinforced concrete footing that extends below the frost line to prevent shifting and cracking. This usually involves excavating a section of your home’s foundation and crawlspace or basement floor. The footing must be perfectly level and allowed to cure completely before you can begin laying any bricks. This solid base is non-negotiable and ensures the structural integrity of the entire fireplace and chimney system for its lifetime.
Step 3: Build the Hearth and Firebox Walls
With the foundation ready, you can begin constructing the base of the fireplace. The first layers form the hearth, which is the floor of the fireplace and the protective area in front of it. The inner hearth, where the fire will burn, must be made of firebrick—a dense ceramic brick capable of withstanding extreme temperatures. The surrounding outer hearth can be made of brick, stone, or tile. As you build up from the hearth, you will construct the walls of the firebox, also using firebrick mortared with high-temperature refractory cement. The side walls should be angled inward to help reflect heat out into the room.
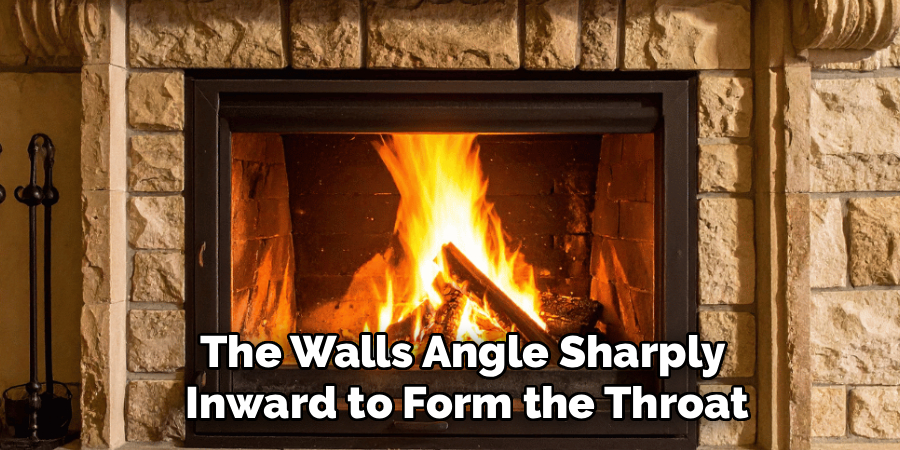
Step 4: Construct the Throat
This is a technically challenging but crucial part of the guide on how to build wood burning fireplace. Above the firebox opening, the walls angle sharply inward to form the throat. A cast-iron damper is installed within the throat to allow you to close off the flue when the fireplace is not in use, preventing heat loss. Directly behind the throat, you will build the smoke shelf. This horizontal shelf is designed to catch any downdrafts from the chimney and prevent them from blowing smoke back into the room, directing the cool air back up the flue.
Step 5: Form the Smoke Chamber
The smoke chamber is the funnel-shaped area that sits directly on top of the throat and smoke shelf. Its job is to smoothly transition the smoke from the wide opening of the firebox into the narrow channel of the flue. The walls of the smoke chamber are corbeled, meaning each course of bricks slightly overlaps the one below it, gradually creating the inverted funnel shape. The interior surface of the smoke chamber should be parged smooth with refractory mortar to ensure an unrestricted path for the smoke to travel, which is essential for proper draft.
Step 6: Install the Flue Liner and Build the Chimney Stack
Now you can begin constructing the main chimney stack. As you build the outer chimney walls with standard brick or stone, you will install clay flue liners inside. These square or round terracotta liners protect the masonry from the corrosive byproducts of combustion and create a smooth channel for smoke to exit. Each section of the flue liner is mortared in place, and there should be an air gap between the liner and the chimney masonry. The chimney must extend at least three feet above the point where it exits the roof and two feet higher than any part of the roof within ten feet.
Step 7: Through the Roof
Breaching the roof is a critical step that requires careful attention to waterproofing. As you build the chimney through the roof deck, you must install flashing to create a watertight seal. This involves layering metal step flashing with the roofing shingles and installing a cricket (a small peaked structure) on the high side of the chimney to divert water. Counterflashing is then mortared into the chimney and folded down over the step flashing to complete the seal. A professionally executed flashing job is the only way to prevent leaks that could cause serious water damage to your home.
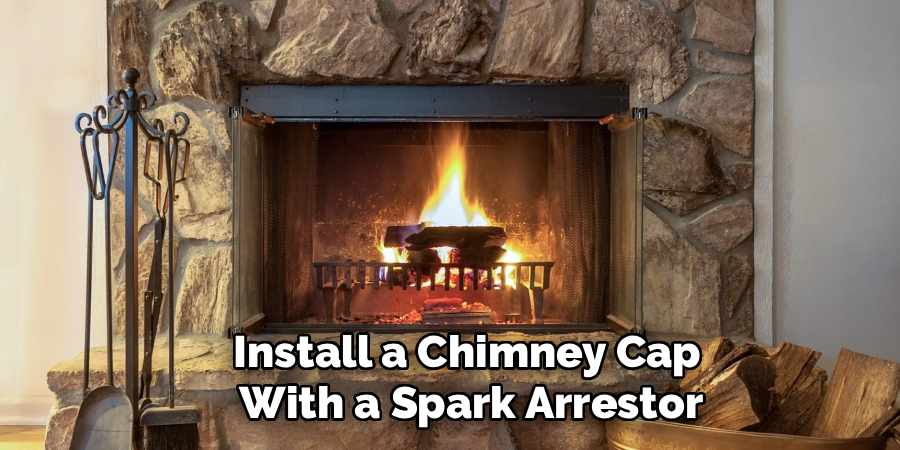
Step 8: Construct the Chimney Crown and Cap
The final step in the construction is to finish the very top of the chimney. You will pour a concrete chimney crown on top of the masonry stack. The crown should be sloped away from the flue liner to shed water and should extend over the edges of the chimney to create a drip edge. This prevents water from running down the face of the brickwork. Finally, install a chimney cap with a spark arrestor. The cap prevents rain, animals, and debris from entering the flue while the spark arrestor stops embers from landing on your roof.
Frequently Asked Questions
Can a Beginner Really Build a Masonry Fireplace?
While this guide provides an overview, building a masonry fireplace is an advanced project.
- Complexity: It requires a deep understanding of masonry techniques, structural loads, and strict fire safety codes.
- Recommendation: For a true beginner, it is highly recommended to hire a professional mason. An improperly built fireplace is a significant fire and health hazard. This guide is best used for understanding the process or for those with significant construction experience.
What Is the Most Important Part of Building a Fireplace?
The most critical aspect is the design and adherence to code. The relationship between the firebox opening, flue size, and chimney height determines whether the fireplace will draw smoke properly. Proper clearances from combustible materials are also non-negotiable for fire safety. A flawed design will result in a fireplace that is inefficient, smoky, and dangerous.
How Much Does It Cost to Build a Masonry Fireplace?
The cost can vary dramatically, ranging from $10,000 to $30,000 or more.
- Factors: Costs depend on the size of the fireplace, the materials used (brick vs. stone), the height of the chimney, and local labor rates.
- DIY vs. Pro: While a DIY build saves on labor, the cost of materials, equipment rental, and potential mistakes can still be substantial. Professional installation ensures it is done correctly and safely.
What Is the Difference Between a Fireplace and a Wood Stove Insert?
A traditional masonry fireplace is built into the structure of the home, while an insert is a self-contained unit.
- Fireplace: An open-hearth fireplace is beautiful but generally inefficient for heating.
- Wood Stove Insert: This is a manufactured metal firebox designed to be installed inside an existing masonry fireplace. It is highly efficient, burns wood more completely, and generates significantly more heat, but lacks the open-flame aesthetic.
How Long Does It Take to Build a Fireplace?
For a professional mason, a typical interior fireplace and chimney can take 1 to 3 weeks to complete, depending on the complexity. For a DIYer working part-time, the project could easily take several months. This timeline includes time for foundation curing, mortar setting, and passing necessary inspections at various stages of the build.
Conclusion
A wood burning fireplace is a timeless feature that brings unparalleled warmth and ambiance to a home. While the construction process is complex and demanding, it is rooted in logical principles of structure, heat management, and airflow. From the solid foundation to the carefully crafted smoke chamber and the watertight chimney, each component plays a vital role in creating a safe and functional hearth. The project requires immense planning, precision, and a deep respect for safety codes.
For those with the skill and ambition, understanding how to build wood burning fireplace is the first step toward creating a lasting legacy of craftsmanship in your home. For most, this guide serves to illuminate the incredible work involved, fostering a deep appreciation for the art and science behind this classic architectural element.
About
Mike May is a distinguished figure in the world of woodworking and timber design, with a decade of expertise creating innovative and sustainable indoor solutions. His professional focus lies in merging traditional craftsmanship with modern manufacturing techniques, fostering designs that are both practical and environmentally conscious. As the author of Woodimber, Mike delves into the art and science of timber-craft, inspiring artisans and industry professionals alike.
Education
RMIT University (Melbourne, Australia)
-
Associate Degree in Design (Timber): Focus on sustainable design, industry-driven projects, and practical craftsmanship.
-
Gained hands-on experience with traditional and digital manufacturing tools, such as CAD and CNC software.
Nottingham Trent University (United Kingdom)
-
Bachelor’s in Woodworking and Product Design (Honors): Specialized in product design with a focus on blending creativity with production techniques.
-
Participated in industry projects, working with companies like John Lewis and Vitsoe to gain real-world insights.
Publications and Impact
In Woodimber, May shares his insights on timber design processes, materials, and strategies for efficient production. His writing bridges the gap between artisan knowledge and modern industry needs, making it a must-read for both budding designers and seasoned professionals.