 (1)")

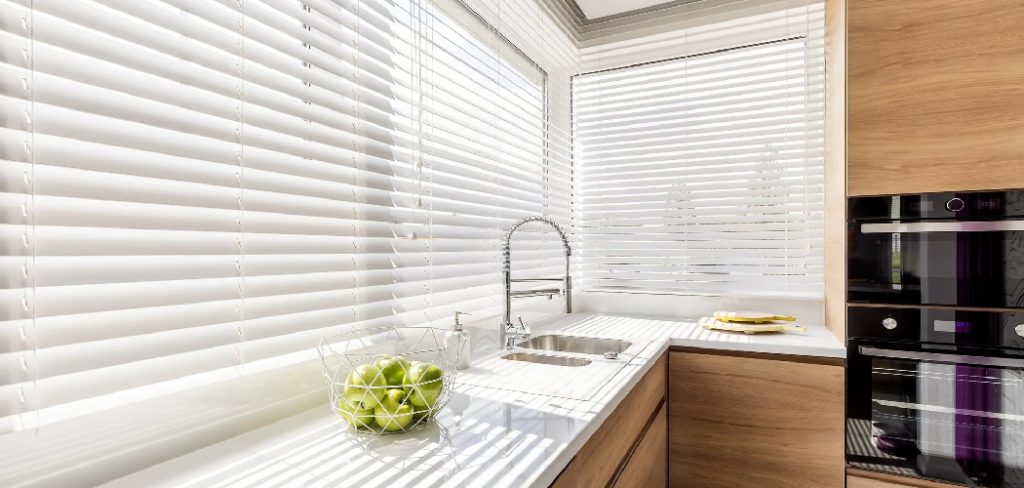
Keeping your home looking pristine often comes down to the smallest details. Beautiful window treatments add warmth and elegance to any room, but they also act as massive dust magnets. When you neglect them, that charming wooden finish becomes dull and coated in grime. Figuring out the best approach can feel intimidating because real wood requires gentle care. Learning how to clean wood venetian blinds properly ensures you protect your investment while keeping your indoor air fresh.
Dusting and wiping down your slats might seem like a simple chore, but using the wrong techniques or harsh chemicals can permanently damage the delicate surface. Moisture is the biggest enemy of natural timber, so you must approach this task with strategy and care. We have created a comprehensive method to help you tackle this household task with confidence. You will discover the exact tools you need and the precise techniques required to restore that original luster. Protect your fixtures and elevate your living space by mastering this essential maintenance routine today.
Why Proper Maintenance For Wooden Window Treatments Matters
Regular maintenance goes far beyond basic aesthetics. Dust accumulation heavily impacts your daily life and the overall health of your household environment. Airborne particles settle on flat surfaces continuously. When you leave those particles sitting on your window fixtures, they multiply and circulate throughout the room every time a breeze flows through. This constant circulation triggers allergies and causes respiratory discomfort for your family members. Taking the time to care for these surfaces creates a healthier space for everyone who enters your home.
Beyond health benefits, routine care significantly extends the lifespan of your fixtures. Real timber is an organic material that reacts to its environment. When thick layers of dirt sit on the surface, they draw moisture from the air. This trapped moisture slowly degrades the protective finish and eventually warps the slats themselves. Replacing high-quality window treatments requires a massive financial investment. Spending a few extra minutes on upkeep saves you from premature replacements and costly repairs down the line.
Step-By-Step Guide To How to Clean Wood Venetian Blinds
Step 1: Gather Your Supplies

Preparation serves as the foundation for any successful home maintenance project. When mastering how to clean wood venetian blinds safely. You need to collect all your materials before you begin so you do not have to interrupt your workflow. Grab a high-quality microfiber cloth because it traps dust particles instead of simply pushing them around the surface. You will also need a vacuum cleaner with a soft brush attachment, a small bowl of warm water, and a mild wood soap. Having everything within reach allows you to move systematically from one window to the next without frustration.
Step 2: Position The Slats Correctly
Starting your project requires the right positioning to access every surface area effectively. Lower the fixtures completely so they cover the entire window pane from top to bottom. Next, tilt the slats all the way down until they sit completely flat against one another. This closed position creates a solid, uniform surface that makes the initial dusting phase much faster and incredibly efficient. Securing them in this downward position prevents them from swinging wildly while you apply pressure during the process.
Step 3: Remove Loose Surface Dust

Always remove dry particles before you introduce any form of moisture to the situation. Take your vacuum cleaner and securely attach the soft brush tool to the hose. Turn the suction down to a low setting to avoid scratching the delicate finish. Gently run the brush horizontally across each individual slat, starting from the top of the fixture and working your way down to the bottom. Working from top to bottom ensures that any displaced dust falls onto uncleaned areas rather than settling on sections you have already finished.
Step 4: Reverse And Repeat The Process
Once you finish the front side, you must address the reverse side with equal attention. Rotate the tilt wand so the slats flip in the completely opposite direction, facing upward. You will likely notice a significant amount of hidden dust trapped near the string ladders and overlapping edges. Use your vacuum brush attachment again, following the exact same top-to-bottom horizontal motion you used previously. Taking the time to address the back side guarantees a truly thorough result and prevents hidden dirt from blowing around your room.
Step 5: Master Venetian Blinds Deeply

Sometimes dry methods simply cannot cut through greasy buildup or stubborn fingerprints. Lightly dampen your microfiber cloth with plain warm water, ensuring you wring it out completely so it remains only slightly moist. Never use soaking wet materials on natural timber. Gently wipe down any sticky spots or visibly soiled sections with smooth, horizontal strokes. If plain water fails to remove the grime, add a tiny drop of mild wood soap to the cloth and gently buff the affected area until the dirt lifts away entirely.
Step 6: Address The Strings And Cords
People often overlook the fabric cords and string ladders that hold everything together. These materials absorb oils from your hands and collect severe amounts of dust over time. Take a dry microfiber cloth and pinch it tightly around the lift cords and use natural oil or wood polish. Pull the cloth downward along the length of the string to gently pull off loose dirt. If the strings look heavily soiled, you can apply a tiny amount of foaming upholstery cleaner to a cloth and dab the fabric gently, being incredibly careful not to let any moisture drip onto the adjacent timber.
Step 7: Dry Every Surface Completely
Moisture serves as the primary cause of warping and cracking in natural timber products. Even though you only used a slightly damp cloth, you must guarantee zero moisture remains on the surface. Take a completely fresh, dry microfiber towel and wipe over every single slat you previously treated. Pay special attention to the edges and the areas surrounding the routing holes where water tends to hide. Leave the window open slightly to allow fresh air circulation to evaporate any microscopic moisture left behind.
Step 8: Apply A Protective Conditioner

Adding a protective layer helps repel future dust and keeps the timber looking rich and vibrant. Choose a high-quality commercial furniture polish or natural lemon oil designed specifically for treated timber. Apply a small amount of the product to a clean cloth rather than spraying it directly onto the fixture. Gently buff the polish into the surface using long, even strokes across each slat. This final conditioning step restores the natural shine and creates an anti-static barrier that dramatically reduces how often you need to perform this chore.
Frequently Asked Questions
Can I Use Water To Wash The Slats?
Using excessive water causes severe damage to natural timber products. Wood acts like a sponge and will rapidly absorb standing liquid, which leads to permanent warping, bubbling paint, or rotting. You should primarily rely on dry dusting methods for routine maintenance. If you encounter sticky residue that requires moisture, you may use a cloth that is barely damp to the touch. You must always follow up immediately with a completely dry towel to remove any lingering moisture from the surface.
What Is The Best Tool For Removing Dust?
Microfiber cloths and specialized fluffy dusters stand out as the absolute best tools for this task. The microscopic fibers in these materials create a static charge that physically grabs and holds onto tiny particles rather than just sweeping them into the air. Feather dusters generally push dirt around and aggravate allergies. Vacuum cleaners equipped with soft brush attachments also work wonderfully for removing heavy layers of debris quickly, provided you use a gentle suction setting to prevent scratching the finish.
Should I Take The Fixtures Down To Wash Them?
You should never remove natural timber fixtures from their brackets for standard maintenance. Taking them down requires significant effort and increases the risk of dropping or breaking the internal mechanisms. Furthermore, you can never submerge them in a bathtub or hose them down outside like you might with cheap plastic alternatives. Leaving them securely mounted in the window frame provides the tension and stability you need to wipe them down safely and efficiently right where they hang.
How Often Do These Fixtures Need Attention?
Establishing a consistent schedule prevents severe grime accumulation and makes the chore much easier. You should perform a light, dry dusting with a microfiber cloth or vacuum every single week as part of your normal room cleaning routine. A more thorough session that involves spot-treating sticky spots and wiping everything down should happen roughly once every three months. Homes with pets, heavy cooking grease, or open windows may require this deeper attention more frequently to maintain a pristine appearance.
Will White Vinegar Damage The Finish?
White vinegar possesses strong acidic properties that can easily ruin delicate stains and protective sealants. While many people champion vinegar as a natural household miracle, it eats away at the clear coat applied to timber products over time. Stripping this protective layer leaves the raw material vulnerable to moisture damage and fading from sunlight. You should stick to products specifically formulated for timber surfaces, or simply rely on minimal amounts of mild dish soap and water for tackling stubborn grime safely.
Conclusion
Taking excellent care of your window treatments ensures they remain a beautiful focal point in your home for years to come. By dedicating just a few minutes each week to simple dusting, you prevent thick grime from setting in and ruining the protective finish. Remember that moisture is your biggest concern, so always prioritize dry techniques and gentle tools.
Knowing how to clean wood venetian blinds gives you the power to protect your investment and maintain a hygienic living environment. Grab your microfiber cloth today, turn on your favorite playlist, and start transforming your dusty window fixtures back into the stunning architectural features they were meant to be.
As an avid home gardener, you appreciate the beauty of natural elements, carefully nurturing plants outdoors and bringing that earthy warmth inside your home. Natural wood window treatments beautifully complement indoor houseplants and rustic potting rooms, filtering sunlight perfectly for your delicate seedlings. However, just like garden leaves gather dust, these wooden slats attract airborne dirt, pollen, and everyday household grime. When left unattended, that buildup can dull their beautiful organic finish and even harbor allergens that affect your indoor air quality.
If you are wondering how to clean wood venetian blinds without damaging the delicate grain, you are in the right place. This beginner-friendly guide will show you the exact methods to restore their natural luster. With a few simple, non-toxic household supplies, you can protect your wooden fixtures and keep your home feeling as fresh and vibrant as your favorite outdoor garden beds.
Why Keeping Your Indoor Wood Pristine Matters
When you dedicate your time to growing organic vegetables and fostering a healthy backyard ecosystem, maintaining a clean, chemical-free home environment naturally follows. Wooden window treatments act as a massive filter for your home, catching dust, pet dander, and microscopic pollen particles that drift in from the garden. If you neglect these fixtures, the accumulated grime can slowly degrade the natural wood finish, causing it to warp, crack, or discolor over time.
Furthermore, heavy dust buildup significantly reduces the amount of natural sunlight filtering into your home, which can negatively impact the indoor houseplants and tender seedlings you nurture on your windowsills. By keeping these fixtures pristine, you prolong their lifespan, improve your indoor air quality, and ensure your indoor garden receives the optimal light it deserves. Relying on gentle, natural cleaning methods protects the wood’s structural integrity while aligning perfectly with your eco-friendly, green-thumb lifestyle.
8 Step-by-Step Guide on How to Clean Wood Venetian Blinds
Step 1: Close the Slats Completely
Before you begin any actual dusting or wiping, you must properly position your window treatments to access the maximum surface area. Locate the tilt wand or pull cords attached to the side of your fixture and rotate them until the wooden slats are completely closed, facing flat downward against the window glass. This closed position creates a solid, unified wooden wall that makes the initial dusting phase incredibly efficient.
Trying to clean each individual slat while they are open and hanging horizontally is a frustrating, time-consuming process that often leads to tangled cords and uneven results. Securing them in this flat, closed position provides a sturdy canvas, allowing you to easily glide your cleaning tools across the surface without the wood shifting or bending under your hands.
Step 2: Remove Surface Dust Gently
With the slats secured in the closed position, your next objective is removing the loose, superficial layer of dust, pollen, and pet hair. Take a high-quality microfiber cloth or a soft, natural feather duster and start at the very top left corner of the fixture. Wipe straight across the top slat in a single, smooth horizontal motion, moving from left to right.
Slowly work your way down the fixture, addressing one wooden slat at a time until you reach the bottom sill. Microfiber cloths are exceptional for this task because their tiny synthetic fibers act like a magnet, capturing and holding onto dry dust particles rather than simply pushing them around into the surrounding indoor air.
Step 3: Reverse the Slats and Repeat
Once you have successfully dusted the front-facing side of the wooden fixture, you must address the opposite side to ensure a comprehensive clean. Grasp the tilt wand again and rotate the mechanism in the opposite direction until the slats flip over completely, exposing their convex backsides to your room. You will likely notice that this side carries just as much dust, especially if your windows remain open during the breezy spring gardening season.
Take your microfiber cloth and repeat the exact same horizontal wiping motion, starting from the uppermost slat and methodically working your way down to the bottom ledge. This thorough dry-dusting technique prevents loose dirt from turning into stubborn mud when you introduce moisture later.
Step 4: Prepare a Natural Cleaning Solution
After eliminating the loose dry debris, you must prepare a gentle, garden-safe liquid mixture to tackle any sticky residue or hardened sap. Wood is highly porous and sensitive to harsh chemical cleaners, so natural ingredients are always your safest bet. Grab a small bucket and mix one cup of warm water with just a single drop of mild, plant-based dish soap.
Alternatively, a splash of white vinegar heavily diluted in water works beautifully to cut through household grease. , avoiding oversaturation is the most critical rule to remember. You never want to soak the delicate material, as excess water causes severe warping, swelling, and permanent structural damage.
Step 5: Lightly Dampen Your Wiping Cloth
The application of your natural liquid mixture requires an incredibly light touch to preserve the organic integrity of the wood grain. Take a fresh, entirely clean microfiber cloth and dip just one small corner of it into your prepared soap or vinegar solution. Pull the cloth out of the bucket and wring it out forcefully with both hands until it feels barely damp to the touch. You should absolutely not see any water dripping from the fabric whatsoever. If the cloth feels overly wet, wring it out again or press it firmly against a dry towel to absorb the excess liquid. Applying a soaking wet rag directly to your wooden fixtures will quickly lead to water stains and ruined finishes.
Step 6: Wipe Away Stubborn Grime Carefully
With your barely damp cloth prepared, you can now safely address the sticky spots or hardened grime that the dry duster left behind. Open the wooden slats slightly so you can comfortably pinch each individual piece between your thumb and index finger. Gently glide your damp cloth along the length of the wood, applying only mild pressure to lift away the stubborn soil.
If you encounter a particularly sticky patch of grease or organic sap, rub the specific area lightly in a small, circular motion until the residue lifts completely. Avoid scrubbing aggressively or using rough abrasive sponges, as these harsh actions will inevitably strip away the protective varnish and deeply scratch the gorgeous natural lumber.
Step 7: Dry the Wood Immediately
Because natural timber is highly susceptible to moisture damage, you cannot allow any residual dampness to sit on the surface and air dry. The moment you finish wiping away the grime with your damp cloth, you must follow up immediately with a completely dry, highly absorbent microfiber towel. Run this dry towel over every single slat you just cleaned, absorbing any lingering microscopic water droplets left behind by the cleaning solution. This crucial immediate drying step prevents the liquid from seeping into the delicate porous grain, effectively halting any potential swelling, cracking, or unsightly water ring formations. Taking this extra precaution guarantees your window fixtures will maintain their smooth, factory-fresh appearance for many gardening seasons to come.
Step 8: Condition with a Natural Polish
To truly elevate your maintenance routine and restore the rich, earthy luster of the natural timber, consider applying a gentle conditioning treatment. Just as you enrich your garden soil with organic compost, you can nourish dried-out window fixtures with a specialized . Place a dime-sized drop of pure lemon oil or a high-quality beeswax polish onto a soft cotton rag. Gently buff the oil into the wooden slats using broad, sweeping strokes following the natural direction of the grain. This conditioning process hydrates the lumber, brings out the vibrant organic color variations, and creates a protective barrier that actively repels future dust accumulation, making your next cleaning session significantly faster and much easier.
Frequently Asked Question
Can I Use Olive Oil To Polish My Window Fixtures?
While olive oil is a fantastic, natural staple in your kitchen, it is not recommended for polishing wooden window fixtures.
- Food-grade oils like olive or canola oil can eventually go rancid when exposed to sunlight and warm indoor temperatures.
- Rancid oils produce a foul odor and create a sticky, gummy residue that attracts even more dirt and pet hair.
- Instead, stick to products specifically designed for timber, such as pure lemon oil, boiled linseed oil, or natural beeswax blends, which safely condition the grain without spoiling over time.
How Often Should I Dust My Window Fixtures?
To maintain a healthy indoor environment and keep your fixtures looking beautiful, a light dry-dusting should become a regular part of your weekly chore routine.
- Wipe down the wooden slats with a dry microfiber cloth at least once every seven days.
- If you leave your windows open frequently during the spring gardening season, you may need to dust twice a week.
- Consistent dry maintenance prevents dirt from hardening, completely eliminating the need for tedious, time-consuming wet washing sessions down the road.
Is It Safe To Vacuum The Wooden Slats?
Yes, using a household vacuum cleaner is a highly effective way to remove loose debris, provided you use the correct attachment and technique.
- Always use the soft brush upholstery attachment to prevent the hard plastic vacuum nozzle from scratching the delicate varnish.
- Keep the suction setting on the lowest possible level to avoid pulling or damaging the internal support cords.
- Gently sweep the brush attachment horizontally across the closed slats, letting the machine effortlessly pull the pollen and soil out of the intricate crevices.
Will Water Permanently Ruin My Natural Timber?
Excess moisture is the biggest enemy of indoor wooden furnishings, and prolonged water exposure will absolutely cause permanent, irreversible damage.
- When raw timber absorbs liquid, it swells, warps out of shape, and eventually cracks as it dries.
- Heavy moisture can also dissolve the protective clear coat and cause the underlying stain to peel or bubble.
- This is why you must strictly use a barely damp cloth for cleaning and instantly follow up with a dry towel to absorb any lingering droplets before they penetrate the grain.
How Do I Clean The Pull Cords And Strings?
The fabric pull cords and ladder strings holding your fixtures together gather dirt and oils from your hands over time, requiring their own specific cleaning approach.
- Do not use harsh bleach, as it weakens the fabric fibers and causes the strings to snap.
- Instead, dab a tiny amount of shaving cream or mild laundry detergent onto a clean rag.
- Gently rub the damp rag up and down the soiled cords, being careful not to pull too hard on the fragile internal pulley mechanism.
Conclusion
Maintaining a clean, natural home perfectly complements your passion for gardening and outdoor living. Taking care of your indoor wooden fixtures ensures your living spaces remain free of allergens while allowing brilliant, unfiltered sunlight to reach your indoor plants and seedlings. By relying on simple dry-dusting techniques, creating gentle, plant-based washing solutions, and diligently avoiding excess moisture, you protect the beautiful organic materials that bring warmth to your rooms.
The process requires patience and a gentle touch, but the gleaming, refreshed results are always well worth the effort. Now that you understand exactly how to clean wood venetian blinds, you can confidently tackle this weekend chore without fear of damaging the delicate timber grain. Grab your favorite microfiber cloths, mix up a gentle soapy solution, and restore the bright, earthy beauty to your favorite sunny windows.
About
Mike May is a distinguished figure in the world of woodworking and timber design, with a decade of expertise creating innovative and sustainable indoor solutions. His professional focus lies in merging traditional craftsmanship with modern manufacturing techniques, fostering designs that are both practical and environmentally conscious. As the author of Woodimber, Mike delves into the art and science of timber-craft, inspiring artisans and industry professionals alike.
Education
RMIT University (Melbourne, Australia)
-
Associate Degree in Design (Timber): Focus on sustainable design, industry-driven projects, and practical craftsmanship.
-
Gained hands-on experience with traditional and digital manufacturing tools, such as CAD and CNC software.
Nottingham Trent University (United Kingdom)
-
Bachelor’s in Woodworking and Product Design (Honors): Specialized in product design with a focus on blending creativity with production techniques.
-
Participated in industry projects, working with companies like John Lewis and Vitsoe to gain real-world insights.
Publications and Impact
In Woodimber, May shares his insights on timber design processes, materials, and strategies for efficient production. His writing bridges the gap between artisan knowledge and modern industry needs, making it a must-read for both budding designers and seasoned professionals.