 (1)")

Wood furniture brings warmth and character to any home, but over time, dust, grime, and everyday use can leave it looking dull and neglected. Whether you’ve inherited a vintage dresser or your dining table has seen better days, knowing how to properly clean wood furniture is essential to preserving its beauty and longevity. Many people unknowingly damage their wooden pieces by using harsh chemicals or abrasive materials that strip away the finish or cause discoloration.
The good news? Cleaning dirty wood furniture doesn’t require expensive products or professional help. With the right approach and a bit of elbow grease, you can restore your furniture’s natural luster and protect it for years to come. This guide on how to clean dirty wood furniture will walk you through everything you need to know—from gathering the right materials to avoiding common pitfalls that could harm your cherished pieces.
Materials You’ll Need
Before you begin cleaning your wood furniture, it’s important to gather all the necessary materials. Here are some items that will come in handy:
- Soft, lint-free cloths or microfiber cloths
- Mild dish soap or specialized wood cleaner
- Water
- White vinegar (optional)
- Olive oil or beeswax polish (optional)
7 Simple Step-By-Step Guidelines on How to Clean Dirty Wood Furniture
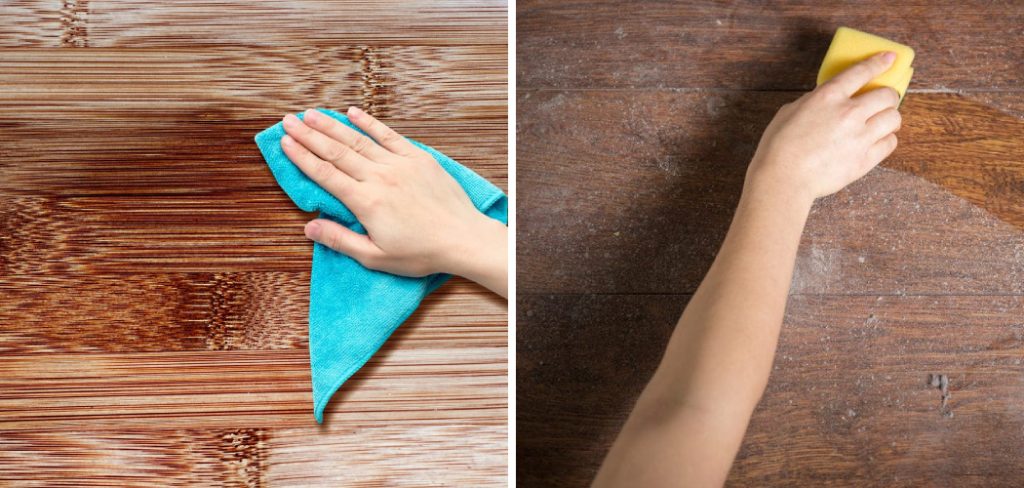
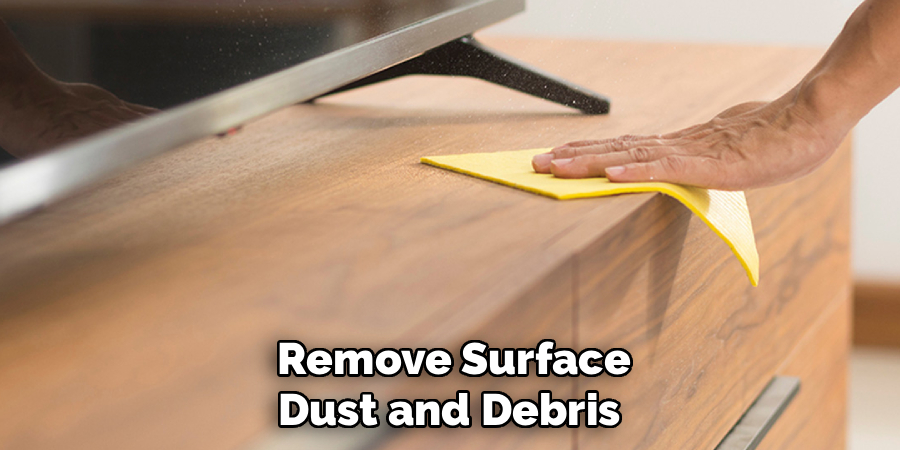
Step 1: Remove Surface Dust and Debris
Start by removing loose dust, dirt, and debris from your wood furniture. Use a soft microfiber cloth to gently wipe down all surfaces, paying special attention to corners, crevices, and decorative details where dust tends to accumulate. For intricate carvings or hard-to-reach areas, use a soft-bristled brush or vacuum with a brush attachment to dislodge trapped particles.
This initial step is crucial because cleaning off dust and grit can scratch the wood’s surface. Take your time to ensure all loose debris is removed before moving on to wet cleaning. If your furniture has removable cushions or hardware, set them aside to clean separately.
Step 2: Prepare Your Cleaning Solution
Create a gentle cleaning solution by mixing a few drops of mild dish soap with warm water in a bowl. The mixture should be sudsy but not overly soapy—too much soap can leave a residue on the wood. Alternatively, you can use a solution of equal parts white vinegar and water for a natural cleaning option that effectively cuts through grease and grime.
Avoid using harsh chemicals, ammonia-based cleaners, or abrasive products, as these can strip the finish from your wood furniture or cause permanent damage. The goal is to clean the surface without compromising the protective coating that keeps your furniture looking beautiful.
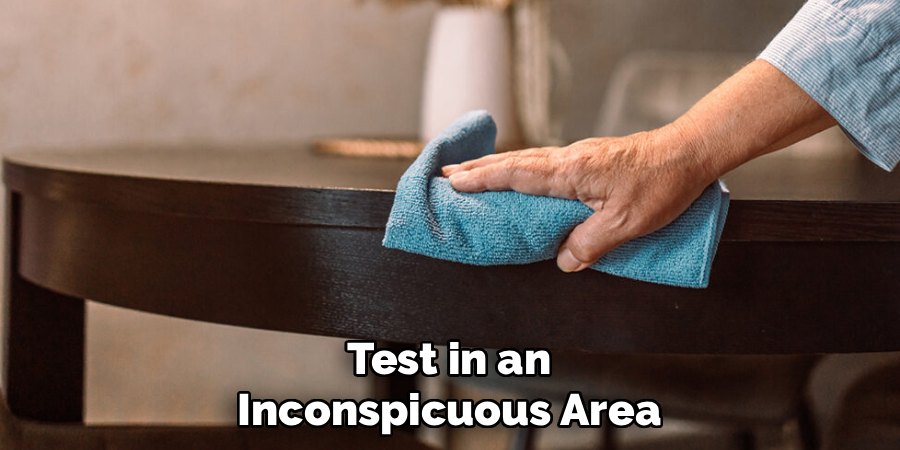
Step 3: Test in an Inconspicuous Area
Before applying your cleaning solution to the entire piece, test it on a small, hidden area such as the underside of a table or the back of a chair leg. Dampen a cloth with your solution and gently rub the test spot, then wait a few minutes to see if there’s any adverse reaction like discoloration, cloudiness, or damage to the finish.
This precautionary step can save you from accidentally ruining a visible portion of your furniture. Different wood finishes react differently to cleaning solutions, so what works for one piece may not be suitable for another. If you notice any negative effects, dilute your solution further or switch to plain water.
Step 4: Clean the Wood Surface
Once you’ve confirmed your cleaning solution is safe, dip a soft cloth into the mixture and wring it out thoroughly—the cloth should be damp, not dripping wet. Excess water can seep into the wood grain, causing warping, swelling, or water stains. Gently wipe the furniture in the direction of the wood grain, using circular motions for stubborn spots.
Work in small sections, frequently rinsing and wringing out your cloth to avoid spreading dirt around. For particularly grimy areas, you may need to make several passes, but always use a light touch to prevent scratching. If you encounter sticky residue or built-up grime, let the damp cloth sit on the spot for a minute to loosen it before wiping again.
Step 5: Rinse and Dry Thoroughly
After cleaning, it’s important to remove any soap or cleaning solution residue from the wood surface. Dampen a clean cloth with plain water, wring it out well, and wipe down the furniture to rinse away any remaining cleaner. This step prevents buildup that can attract more dust or leave a dull film on your furniture.
Immediately follow with a dry microfiber cloth to thoroughly dry all surfaces. Never let water sit on wood furniture, as moisture is one of the biggest enemies of wooden pieces. Pay extra attention to joints, corners, and any areas where water might pool. Proper drying prevents water damage and keeps your furniture looking its best.
Step 6: Address Stubborn Stains
For stains that didn’t come out during regular cleaning, you may need to take additional measures. Water rings can often be removed by gently rubbing them with a paste made from equal parts baking soda and non-gel toothpaste, then wiping clean with a damp cloth. For grease stains, a small amount of mineral spirits on a cloth can be effective, but always test first and use sparingly.
Scratches and scuff marks may benefit from a furniture touch-up marker that matches your wood’s color, available at most hardware stores. For more serious damage or persistent stains, consider consulting a professional furniture restorer rather than risking further harm with aggressive cleaning methods.
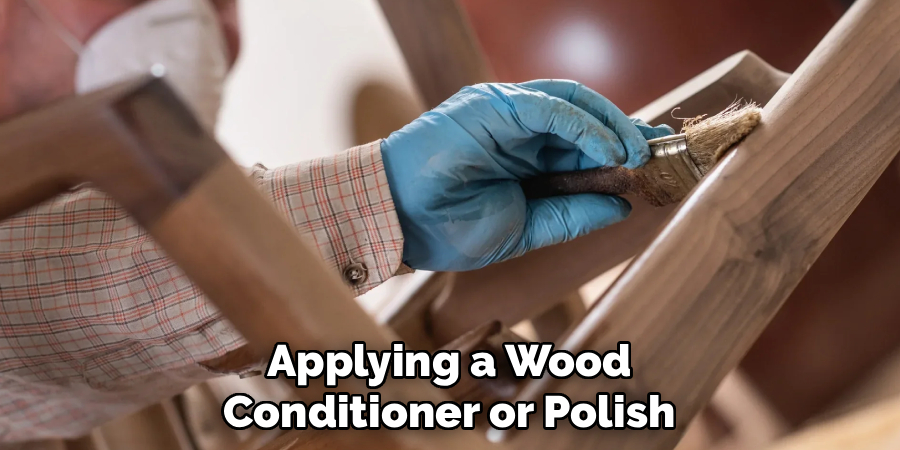
Step 7: Condition and Polish
Once your furniture is clean and completely dry, restore its luster by applying a wood conditioner or polish. You can use a commercial wood polish following the manufacturer’s instructions, or make your own by mixing one part white vinegar with three parts olive oil. Apply a small amount to a clean cloth and rub it into the wood in the direction of the grain.
Let the polish sit for a few minutes to penetrate the wood, then buff with a clean, dry cloth until you achieve the desired shine. This conditioning step not only enhances the wood’s appearance but also provides a protective layer that helps repel dust and moisture. Avoid over-polishing, as too much product can create a sticky buildup—a little goes a long way.
Following these steps on how to clean dirty wood furniture will help restore its beauty and extend its lifespan. But beyond these basic maintenance steps, there are other ways to protect and care for your wood furniture.

Common Mistakes to Avoid
When cleaning wood furniture, steer clear of these common errors that can cause damage. Never use excessive water or let moisture sit on the surface, as this can lead to warping and discoloration. Avoid all-purpose cleaners, bleach, or products containing silicone, which can harm wood finishes.
Don’t scrub against the grain or use abrasive materials like steel wool or rough sponges. Skip furniture polish that contains wax if you plan to refinish the piece later, as wax can interfere with staining. Finally, never place your furniture in direct sunlight immediately after cleaning, as this can cause the finish to become uneven or fade.
How Much Will It Cost?
The cost of cleaning dirty wood furniture is surprisingly affordable, especially when compared to professional cleaning services or furniture replacement. If you already have basic household items like dish soap and vinegar, your out-of-pocket expenses could be nearly zero. A set of quality microfiber cloths typically costs between $8 and $15, while a bottle of wood polish ranges from $5 to $20, depending on the brand and size. Commercial wood cleaners fall in a similar price range of $7 to $25.
For those who prefer natural solutions, olive oil and vinegar are pantry staples that cost just a few dollars. Overall, you can expect to spend anywhere from $0 to $50 to properly clean your wood furniture, with most people spending around $20 to $30 for supplies that will last through multiple cleaning sessions. This modest investment protects furniture that may be worth hundreds or thousands of dollars.
Frequently Asked Questions
Q1: How Often Should I Clean My Wood Furniture?
A1: The frequency of cleaning depends on how much use your furniture gets and the environment it’s in. As a general rule, dust your wood furniture weekly with a dry microfiber cloth to prevent buildup. Perform a deeper cleaning with a damp cloth and mild cleaner every one to three months, or whenever you notice visible dirt or grime. High-traffic pieces like dining tables may need more frequent attention, while display cabinets or decorative items can go longer between cleanings. Regular maintenance prevents dirt from becoming embedded in the finish and keeps your furniture looking beautiful with minimal effort.
Q2: Can I Use Vinegar on All Types of Wood Furniture?
A2: While vinegar is an excellent natural cleaner for many wood surfaces, it’s not suitable for all finishes. Vinegar’s acidity can damage certain finishes, particularly shellac and some older varnishes, causing cloudiness or dullness. It works well on most modern polyurethane and lacquer finishes when properly diluted (equal parts vinegar and water).
Always test vinegar solutions in an inconspicuous area first and never use undiluted vinegar on wood. If you’re unsure about your furniture’s finish, stick with a mild soap and water solution, which is gentler and safer for virtually all wood types. When in doubt, consult the manufacturer’s care instructions or a furniture professional.
Conclusion
Cleaning dirty wood furniture doesn’t have to be intimidating or time-consuming. By following these straightforward steps and using gentle, appropriate cleaning methods, you can restore your furniture’s natural beauty while protecting it from damage. Remember that consistency is key—regular dusting and occasional deep cleaning will keep your wooden pieces looking stunning for generations.
Your wood furniture is an investment worth protecting. Set aside time this weekend to give your pieces the care they deserve, and you’ll be rewarded with furniture that continues to enhance your home’s aesthetic for years to come. Start with one piece today and experience the satisfaction of seeing your efforts transform dull, dirty wood into a gleaming focal point of your space. Thanks for reading this guide on how to clean dirty wood furniture.
About
Mike May is a distinguished figure in the world of woodworking and timber design, with a decade of expertise creating innovative and sustainable indoor solutions. His professional focus lies in merging traditional craftsmanship with modern manufacturing techniques, fostering designs that are both practical and environmentally conscious. As the author of Woodimber, Mike delves into the art and science of timber-craft, inspiring artisans and industry professionals alike.
Education
RMIT University (Melbourne, Australia)
-
Associate Degree in Design (Timber): Focus on sustainable design, industry-driven projects, and practical craftsmanship.
-
Gained hands-on experience with traditional and digital manufacturing tools, such as CAD and CNC software.
Nottingham Trent University (United Kingdom)
-
Bachelor’s in Woodworking and Product Design (Honors): Specialized in product design with a focus on blending creativity with production techniques.
-
Participated in industry projects, working with companies like John Lewis and Vitsoe to gain real-world insights.
Publications and Impact
In Woodimber, May shares his insights on timber design processes, materials, and strategies for efficient production. His writing bridges the gap between artisan knowledge and modern industry needs, making it a must-read for both budding designers and seasoned professionals.