


Creating beautiful, personalized signs adds a charming and rustic touch to any living space or special event. Many crafters admire the gorgeous wooden plaques found in boutique decor shops, assuming these items require advanced hand-lettering skills or expensive printing machinery to produce. Fortunately, achieving professional results is entirely possible for anyone willing to learn the basics of crafting. When you discover how to use letter stencils on wood, you immediately unlock endless creative possibilities for customizing your home interior.
Understanding this simple technique allows you to transform raw timber into stunning artwork, personalized gifts, and eye-catching event signage. Whether you want to create a welcoming porch sign, a customized nursery nameplate, or a romantic wedding display, mastering this craft guarantees crisp, clear lettering every single time. We will walk you through the entire process, covering the essential tools, proper preparation methods, and expert painting techniques necessary for success. With a bit of patience and the right approach, your next weekend crafting session will yield a spectacular, boutique-quality wooden masterpiece.
Why Crafting With Stencils Elevates Your Projects
Taking the time to master this lettering technique provides incredible benefits for both novice crafters and experienced artists alike. Hand-lettering requires years of dedicated practice, steady hands, and specialized tools to achieve consistent, professional-looking typography. Templates eliminate this steep learning curve entirely, allowing complete beginners to produce flawless text alignment and perfect proportions on their very first attempt. You bypass the frustration of crooked lines and uneven spacing, ensuring your creative vision translates perfectly onto your chosen canvas.
Beyond the immediate aesthetic advantages, utilizing templates represents a highly cost-effective approach to decorating your home or organizing a special event. Purchasing custom-made wooden signage from boutique retailers often comes with a premium price tag, especially for large statement pieces. Creating these items yourself significantly reduces your decorating budget while allowing total control over the exact colors, wording, and wood finishes utilized in the project.
Step-By-Step Guide To How To Use Letter Stencils On Wood
Step 1: Choose Your Materials
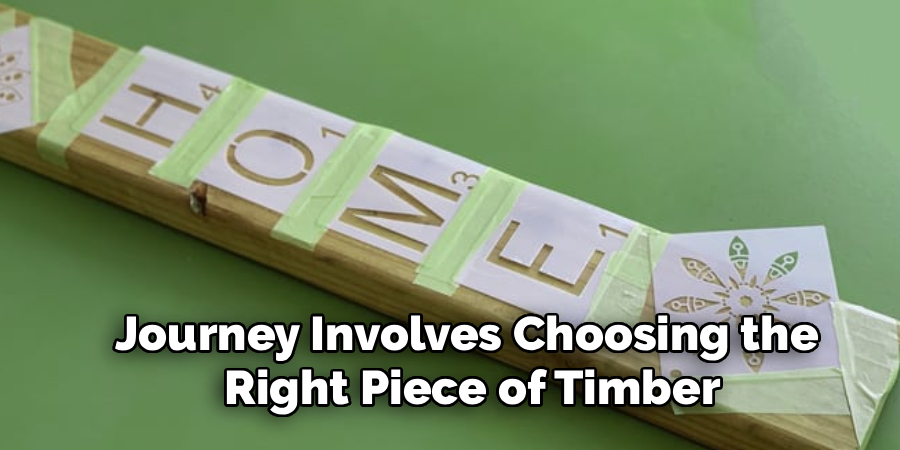
Using letter stencils on wood can be an enjoyable and rewarding project, allowing you to personalize and customize various wooden surfaces with ease. Whether you’re creating decorative signs, labeling items, or designing unique gifts, this technique provides an accessible way to achieve professional-looking results. With just a few simple materials and a bit of patience, you can turn plain wood into a beautifully styled masterpiece.
Step 2: Prepare the Wood Surface
Before diving into the stenciling process, it’s essential to properly prepare your wood surface. This will ensure that the paint adheres smoothly and that your stencil lines come out clean and crisp.
Start by sanding the wood surface to create a smooth, even base. Use fine-grit sandpaper to remove any rough patches, splinters, or imperfections. Applying a high-quality outdoor stain or a solid acrylic base coat protects the material from moisture and gives your lettering a beautiful contrasting background. After sanding, wipe the surface clean with a damp cloth to remove dust and debris, allowing it to dry completely. If the wood has been previously painted or stained, you may need to strip or prime the surface to ensure the new design adheres properly. Taking the time to prepare the wood thoroughly will set the stage for a polished and professional-looking final product.
Step 3: Measuring And Planning Your Layout

Diving straight into painting ensure your wooden surface is sanded completely smooth to eliminate gaps. You need to use a measuring tape to find the exact center of your wooden canvas, marking it lightly with a pencil. Plan your entire word or phrase by laying the plastic templates out dry, ensuring you leave equal margins on the left and right sides. Drawing a faint, level pencil line serves as a reliable guide to keep your text perfectly straight. This preliminary planning guarantees a balanced, visually pleasing final composition.
Step 4: Securing The Template Firmly In Place
Even the slightest movement during the painting process will ruin the crisp edges of your typography. Once your layout is finalized, you must secure the plastic template firmly against the board using low-tack painter’s tape. Press the tape down firmly along all four edges of the plastic, double-checking that the material sits completely flat against the timber. Learning how to use letter stencils on wood requires absolute stability, as any gaps between the plastic and the board allow wet paint to seep outward. Take your time taping to ensure a tight, secure seal.
Step 5: Loading The Brush With Minimal Paint
The most common mistake beginners make is applying entirely too much paint to their brush or foam dauber. Dip only the very tips of your brush bristles into the acrylic paint, avoiding soaking the entire head. Next, offload the excess paint by vigorously swirling the brush onto a folded paper towel until the bristles feel almost completely dry to the touch. This “dry brush” technique is the absolute secret to achieving flawless, sharp edges. Having too little paint is always better than having too much, as excess liquid instantly bleeds under the plastic barriers.
Step 6: Applying Paint With The Dabbing Technique

Proper application requires a specific motion to keep the liquid exactly where you want it. Instead of dragging the brush back and forth in sweeping strokes, hold the brush perfectly vertical and use a rapid up-and-down dabbing motion. Tap the bristles gently over the cut-out areas, slowly building up the color opacity through thin, controlled layers. A vital element of how to use letter stencils on wood effectively is relying on this vertical tapping motion, which prevents the bristles from pushing wet paint underneath the plastic edges. Build the coverage slowly for the best results.
Step 7: Peeling The Template Away While Wet

Many crafters mistakenly believe they should wait for the project to dry entirely before removing the plastic templates. You should actually lift the template away while the acrylic is still slightly damp to prevent peeling or cracking the newly formed text. Grab one corner of the taped plastic and slowly pull it upward in a smooth, continuous motion, being careful not to drag it across the fresh lettering. Removing the barrier while the paint is fresh leaves a sharp, defined edge and allows the piece to dry naturally without lifting any colored flakes.
Frequently Asked Questions
What Kind Of Paint Is Best For Wood Stenciling?
Thick, high-quality craft acrylic paint is the absolute best choice for stenciling projects on raw or painted timber surfaces. Acrylics offer a dense pigment concentration and a thicker consistency that naturally resists seeping under the plastic edges of your template. Chalk paint also serves as an excellent alternative, providing an ultra-matte finish and a very thick texture that stays exactly where you apply it. You should actively avoid thin, watery latex paints, as their runny consistency makes achieving sharp, crisp lines incredibly difficult.
How Do I Prevent Paint From Bleeding Under The Stencil?
Preventing paint bleed requires a combination of proper surface preparation and employing the dry brush technique. Always ensure your timber canvas is sanded incredibly smooth so the plastic template can lay completely flat without any tiny gaps. You must offload nearly all the wet paint onto a paper towel before your brush ever touches the project surface. Applying multiple, extremely thin, nearly dry layers of color through a vertical dabbing motion completely eliminates the risk of liquid seeping under the protective plastic barriers.
Can I Reuse My Stencils After Painting?
High-quality mylar or plastic templates are entirely reusable if you take the time to clean them properly after each crafting session. Once you finish your project, immediately soak the plastic sheets in warm water mixed with a few drops of mild dish soap. Gently massage the wet paint off the plastic using your fingertips or a very soft sponge, being extremely careful not to bend or tear the delicate inner bridges of the letters. Lay them flat on a clean towel to air dry before storing them away safely.
Do I Need To Sand The Wood Before Starting?
Sanding your timber base is an absolutely mandatory step if you want to achieve professional, clean typography. Raw lumber features tiny ridges, splinters, and natural grain variations that prevent your plastic template from forming a tight seal against the surface. Running medium and fine-grit sandpaper over the board flattens these imperfections, creating a perfectly smooth, level canvas for your artwork. Skipping the sanding process almost always results in heavy paint bleeding, fuzzy letter edges, and a sloppy, amateur-looking final product.
How Long Should The Paint Dry Before Removing The Stencil?
You should actually remove the plastic template while the acrylic layer is still slightly wet rather than waiting for it to dry completely. Leaving the template in place until the paint hardens creates a solid bond between the plastic edge and the timber surface. When you eventually pull the template away, it often rips chunks of dried paint off the lettering, ruining your crisp, perfect edges. Peeling the plastic off gently just minutes after you finish dabbing ensures the borders remain sharp and completely intact.
Conclusion
Creating custom, hand-painted wooden signage is an incredibly rewarding craft that instantly adds personalized charm to your home decor. By properly preparing your surface, utilizing the correct dry-brush techniques, and carefully mapping out your layout, you can easily achieve professional, boutique-quality results. Knowing how to use letter stencils on wood empowers you to bypass the frustration of difficult hand-lettering and jump straight into producing beautiful, flawless typography. Gather your wooden canvas, select your favorite acrylic colors, and start bringing your creative vision to life today.

About
Mike May is a distinguished figure in the world of woodworking and timber design, with a decade of expertise creating innovative and sustainable indoor solutions. His professional focus lies in merging traditional craftsmanship with modern manufacturing techniques, fostering designs that are both practical and environmentally conscious. As the author of Woodimber, Mike delves into the art and science of timber-craft, inspiring artisans and industry professionals alike.
Education
RMIT University (Melbourne, Australia)
-
Associate Degree in Design (Timber): Focus on sustainable design, industry-driven projects, and practical craftsmanship.
-
Gained hands-on experience with traditional and digital manufacturing tools, such as CAD and CNC software.
Nottingham Trent University (United Kingdom)
-
Bachelor’s in Woodworking and Product Design (Honors): Specialized in product design with a focus on blending creativity with production techniques.
-
Participated in industry projects, working with companies like John Lewis and Vitsoe to gain real-world insights.
Publications and Impact
In Woodimber, May shares his insights on timber design processes, materials, and strategies for efficient production. His writing bridges the gap between artisan knowledge and modern industry needs, making it a must-read for both budding designers and seasoned professionals.