

Got an old, tired-looking piece of furniture that needs a fresh lease on life? Updating your home decor doesn’t have to mean buying brand-new items. Sometimes, a simple splash of color is all it takes to completely transform a room. If you are wondering how to paint a wooden stool, you have landed in the perfect place.
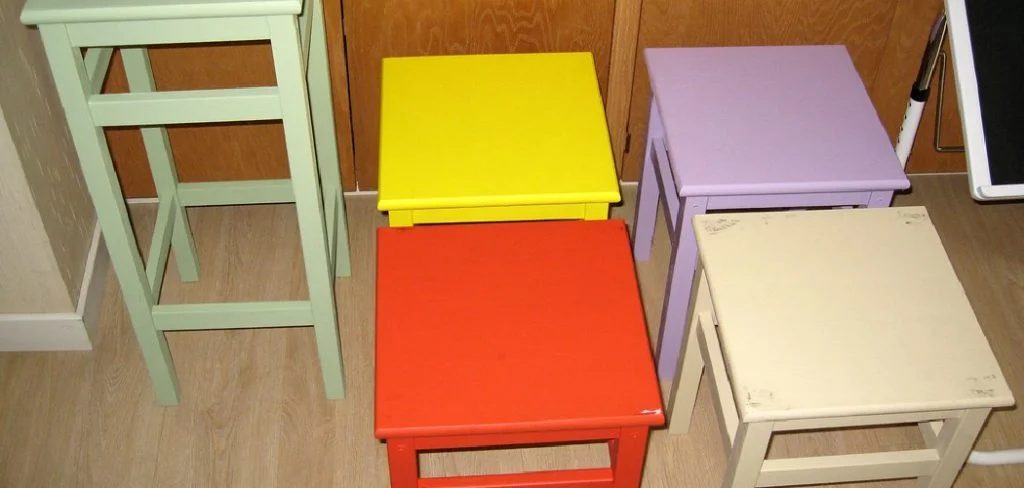
This fun, beginner-friendly project is a fantastic way to dip your toes into DIY furniture flipping. Whether you want a bright accent piece for your kitchen island or a subdued, classic look for your living room, updating your seating is highly rewarding. We will walk you through everything from the initial prep work to the final protective coat.
By following these straightforward techniques, you will achieve a smooth, professional-grade finish that lasts for years. Grab your brushes, put on your painting clothes, and let us dive into the wonderful world of furniture restoration. You will be amazed at what a little creativity and elbow grease can accomplish!
Step-by-Step Guide on How to Paint a Wooden Stool
Step 1: Gather Your Supplies and Prepare the Workspace
Before you begin applying any color, you must set up your workstation properly. Find a well-ventilated area like a garage or a shaded backyard spot. Lay down a large drop cloth to protect your floors from accidental spills.
Next, gather your materials so everything is within reach. You will need sandpaper, primer, your chosen paint, a synthetic brush, and a clear protective topcoat. Having supplies organized ensures a smooth workflow. This preparation phase is often overlooked by beginners, but creating a dedicated environment is crucial for achieving professional results without making a frustrating mess of your home.
Step 2: Clean the Surface Thoroughly
Once your workspace is ready, turn your attention to the furniture itself. Years of use leave behind a stubborn layer of dirt and grease. If you skip this cleaning phase, your new finish will struggle to adhere, leading to peeling later.
Mix warm water and gentle grease-cutting dish soap. Use a soft sponge to wipe down every surface, paying special attention to the legs and rungs. After washing, rinse the entire piece with clean water and dry it completely with a lint-free towel. Wait until the wood is entirely dry before proceeding to the next stage.

Step 3: Sand Away the Old Finish
Now comes the most critical part of understanding how to paint a wooden stool successfully. You must scuff the surface to give your new primer something to grip. Grab a medium-grit sandpaper, ideally around 120-grit, and gently rub down the entire piece. You do not need to strip the wood to its bare state unless the current finish is actively peeling. Your goal is simply to remove the glossy sheen and create a slightly rough texture. Always move your sandpaper in the direction of the wood grain to prevent deep scratches, ensuring no glossy spots remain.
Step 4: Remove All Lingering Dust
Creating that rough texture inevitably generates fine dust that settles into every crevice. Painting over this dust results in a gritty texture rather than the flawless finish you desire. Start by using a vacuum with a brush attachment to remove the bulk of the debris. Next, take a slightly damp lint-free cloth or a tack cloth and wipe down every surface. A tack cloth is incredibly effective at picking up microscopic particles. Run your bare hand over the dried surface; it should feel completely smooth and free of any gritty residue before opening your primer.
Step 5: Apply a High-Quality Primer
Applying primer acts as an essential bridge between your scuffed wood and the final color. It blocks stubborn stains, prevents tannins from bleeding through, and provides an ideal surface for your topcoat. Stir your primer thoroughly, then use a synthetic brush to apply an even layer across the entire piece. Start by tackling the underside and rungs before moving to the top seat. Do not panic if the primer looks slightly streaky; its primary job is adhesion. Allow this layer to dry completely according to the manufacturer’s specific instructions before proceeding.

Step 6: Lightly Sand the Primer
This specific step is a closely guarded secret among professional furniture flippers. Once your primer is completely dry, you will want to smooth it out before applying color. Grab a fine-grit sandpaper, around 220-grit, and very gently rub the primed surfaces. This light scuffing knocks down raised wood grains or minor brush marks. Use an extremely light touch, as you do not want to sand through the primer back to raw wood. After finishing this delicate smoothing process, grab a clean tack cloth and meticulously wipe away the newly created dust.
Step 7: Paint the First Coat of Color
You are finally ready to add vibrant personality to your project. When people ask about how to paint a wooden stool, they usually envision this exciting step. Thoroughly stir your chosen paint. Dip your brush just halfway into the tin to avoid messy drips. Apply the color in long, smooth strokes following the natural wood grain. Keep your layers incredibly thin. Thick layers take forever to cure and are prone to unsightly drips. The first coat will likely look patchy and slightly transparent, but resist the urge to glob on more product. Let it dry completely.
Step 8: Apply the Second Coat and Touch-Ups
After the first coat feels dry and no longer tacky, it is time to apply the second layer. This is where your chosen hue truly comes alive and provides beautiful coverage. Using the exact same technique, apply another thin, even coat across the entire surface. Pay close attention to the intricate details, the bottom edges of the seat, and the inner facing sides of the legs where shadows hide missed spots. If you notice drips forming, gently smooth them out. Two coats are generally sufficient for most colors to reach full opacity.

Step 9: Seal with a Protective Topcoat
Seating endures a massive amount of daily wear, making a protective finish absolutely mandatory. Once your final layer of color has dried for at least twenty-four hours, apply a clear water-based polyurethane sealer. Using a clean brush, apply a very thin layer of the topcoat, working systematically so you do not miss any sections. Water-based polyurethanes dry crystal clear, meaning they will not yellow over time. Allow the first coat to dry, lightly scuff it with a 320-grit sponge, wipe away the dust, and apply one final protective layer to shield your hard work.
Step 10: Let It Cure Before Use
The physical painting process is finished, but your patience is required for one last crucial phase. While the surface might feel dry within hours, the chemical curing process takes significantly longer. Curing is when the finish hardens completely, reaching its maximum durability. Depending on the brand and your home’s humidity, this can take a few days to a few weeks. Keep the piece in a well-ventilated room during this time. You can move it into its final location, but avoid sitting on it or placing heavy objects on the seat until fully cured.

Frequently Asked Questions
Do I Always Need to Use a Primer?
Yes, using a primer is highly recommended for almost every furniture transformation project. Primer serves several critical functions that ensure your final product looks professional and lasts a long time:
- It blocks old stains and wood tannins from bleeding through.
- It provides a slightly textured surface for your topcoat to grip.
- It significantly reduces peeling and chipping.
Unless you are using an all-in-one product specifically formulated with built-in bonding agents, never skip this foundational step.
What Kind of Paint Is Best for Furniture?
Choosing the right product ensures a durable and beautiful finish. For high-traffic items, you have several excellent options:
- Acrylic Enamel: Offers a tough, hard-wearing finish that resists scuffs.
- Chalk Finish: Perfect for achieving a matte, vintage look, though it requires a heavy-duty wax or sealer.
- Mineral Paint: Provides excellent adhesion and a smooth, durable surface.
Avoid standard flat wall paints, as they simply cannot withstand the daily friction and wear that seating experiences.
Can I Paint Over Varnished Wood?
You can absolutely transform varnished pieces, provided you take the proper preparatory steps. You do not need to strip the varnish completely off, but you must aggressively scuff the glossy surface. Use a medium-grit sandpaper to break the shiny seal, creating a dull, scratched texture. Follow this by cleaning the dust thoroughly and applying a high-adhesion bonding primer. This process guarantees your new color will stick perfectly to the previously glossy, varnished exterior.
How Can I Avoid Brush Marks?
Achieving a smooth, factory-like finish without visible brush strokes requires good technique and the right tools. Keep these tips in mind:
- Invest in a high-quality, synthetic bristle brush.
- Apply very thin layers rather than thick, heavy coats.
- Add a liquid paint conditioner to extend the drying time.
- Always brush in the same direction as the natural wood grain.
- Sand very lightly between dried layers with a fine-grit sponge.
How Long Will the Finish Last?
The longevity of your newly finished piece depends entirely on your preparation and the quality of your topcoat. If you clean, scuff, prime, and apply two layers of a durable water-based polyurethane sealer, the finish can easily last for a decade or more. Taking care to avoid harsh chemical cleaners and allowing the piece to fully cure before heavy use will dramatically extend its lifespan. Proper maintenance keeps it looking fresh and vibrant.
Conclusion
Reviving old furniture is an incredibly satisfying project that saves money and adds unique character to your living space. We have covered everything you need to know, from the crucial preparation and sanding phases to applying the final protective polyurethane shield. Remember that patience is your greatest ally; taking the time to apply thin coats and allowing proper drying times will make all the difference in your final results.
Now that you know exactly how to paint a wooden stool, it is time to roll up your sleeves and start your own DIY transformation. Do not be afraid to experiment with bold hues or classic neutrals that match your personal aesthetic. Grab your brushes, head to your local hardware store for supplies, and breathe new life into that tired old piece today!

About
Mike May is a distinguished figure in the world of woodworking and timber design, with a decade of expertise creating innovative and sustainable indoor solutions. His professional focus lies in merging traditional craftsmanship with modern manufacturing techniques, fostering designs that are both practical and environmentally conscious. As the author of Woodimber, Mike delves into the art and science of timber-craft, inspiring artisans and industry professionals alike.
Education
RMIT University (Melbourne, Australia)
-
Associate Degree in Design (Timber): Focus on sustainable design, industry-driven projects, and practical craftsmanship.
-
Gained hands-on experience with traditional and digital manufacturing tools, such as CAD and CNC software.
Nottingham Trent University (United Kingdom)
-
Bachelor’s in Woodworking and Product Design (Honors): Specialized in product design with a focus on blending creativity with production techniques.
-
Participated in industry projects, working with companies like John Lewis and Vitsoe to gain real-world insights.
Publications and Impact
In Woodimber, May shares his insights on timber design processes, materials, and strategies for efficient production. His writing bridges the gap between artisan knowledge and modern industry needs, making it a must-read for both budding designers and seasoned professionals.