

Let’s be honest: no one ever glances at a wooden hinge and thinks, “What an engineering triumph!” But if you’ve ever opened a handcrafted keepsake box and run your thumb along a smooth, all-wood join, you might pause. There’s a quiet satisfaction there—no sudden cold metal to catch the eye or interrupt the design. Homemade wooden hinges can bring a quiet unity to a project. Metal, for all its strength and convenience, seems out of place on some pieces. If you’re chasing true craftsmanship—and, perhaps, a stubborn sense of independence—making your own wooden hinge becomes almost tempting. Strangely tempting.
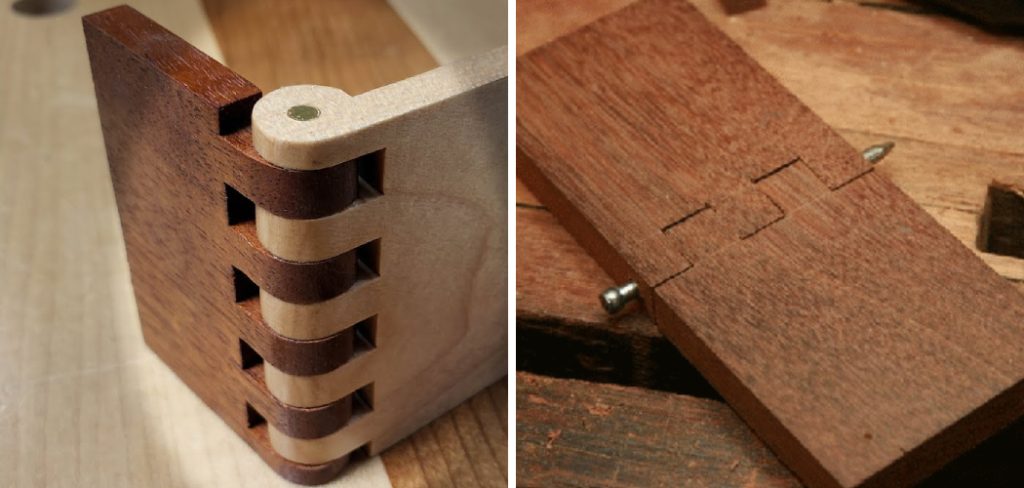
What follows is less a rigid instruction manual and more an invitation to dive in—errors, clever improvisations, minor setbacks, and all. You’ll find a way, perhaps slower than you’d hoped, but when that finished hinge swings freely for the first time, it’s oddly gratifying. In this guide on how to make a wood hinge, we’ll walk you through the steps and some tips to help you achieve that satisfaction.
Understanding Wood Hinges
If you strip away any romance, wood hinges are pretty basic. No magic—just knuckles, alternating and interlocked, centered around a pin. The mechanics line up with metal hinges: rotate, support, repeat. But with wood, everything’s exposed—your skill, your blunders, your grain choices. Do you want subtlety, letting the hinge fade away into the timber?
Or drama, using a contrasting species to shout, “Look at me!”? Worth noting: wood, unlike steel, is opinionated about its grain. Run the grain the wrong direction and a hinge’s knuckles become heartbreakingly fragile. It all comes down to how those fibers line up—grain should follow the length of each knuckle, or you’ll be making firewood, not hardware.
Tools and Materials You’ll Need
- A variety of wood species for different aesthetic effects
- Measuring tape
- Pencil and paper
- Saw (circular or jigsaw)
- Chisel
Safety Precautions
The odd thing about making hinges: the pieces get ever smaller and your fingers somehow inch closer to menacing blades. Dust flies everywhere (even if you promise yourself you’ll vacuum later). Don’t risk your eyes—cheap goggles won’t help, so invest in the good ones.
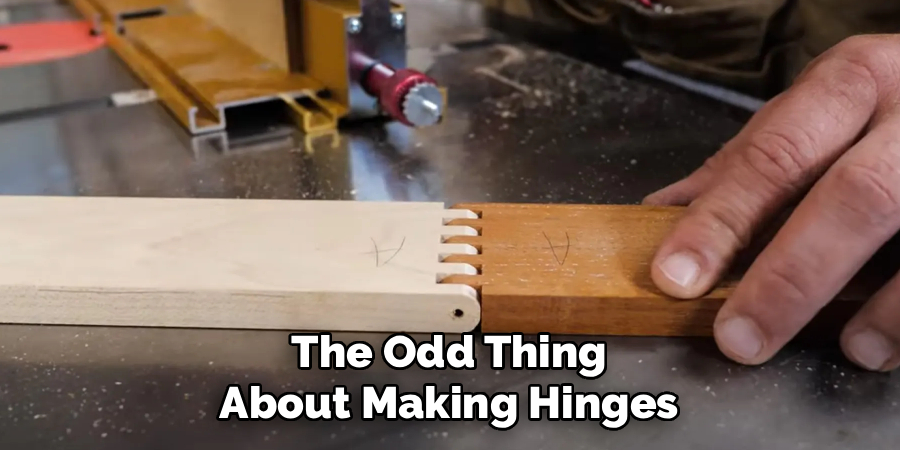
Spend an extra moment setting up push sticks or a jig; your hands’ closeness to spinning steel isn’t brave so much as foolish. Vibrating routers or shrieking saws can lull you into carelessness—be deliberate. Perhaps a bit too cautious. And, if possible, keep loud, fussy tools on when others aren’t around to jostle your arm.
7 Irregular Steps on How to Make a Wood Hinge
Step 1: Selecting and Preparing the Wood Blank
Selecting wood might sound dull, but the entire hinge depends on it. That small piece must be flawless: no knots, wandering grain, or untrustworthy cracks. If you settle (and you’ll want to), your hinge will probably betray you later. Square up the blank on a table saw; take time here, as rushed prep somehow haunts every next step. If tool marks remain, a hand plane or jointer can rescue the piece, but only patience will save you from redoing it altogether. Care now avoids mysterious binding and visible seams in the final fit.
Step 2: Drilling the Hinge Pin Hole
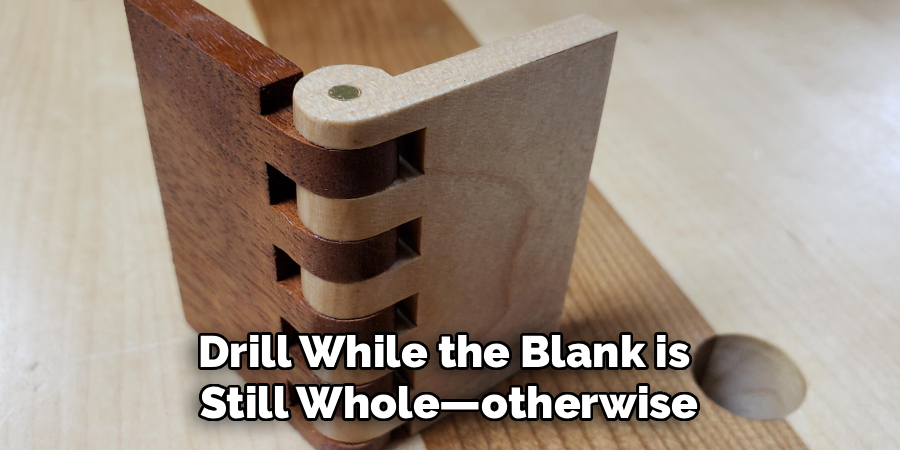
This is one task you only want to attempt once. Drill while the blank is still whole—otherwise, drill bits tend to wander, and the hinge alignment might never recover. Set up your drill press with the correct-diameter bit. Clamps and a reliable fence keep the blank vertical. Slowly, deliberately, drill straight through, pulling out frequently to clear chips and keep the bit cool. If you’re planning a longer hinge, consider drilling from both ends, hoping the holes meet cleanly in the middle (they sometimes don’t). A perfectly straight hole now—nothing wobbly or off-center—will make later steps possible. Anything less, and you’re courting disaster.
Step 3: Shaping the Hinge Barrel
With your blank drilled and dimensioned, now you get to shape the outer curve—the “barrel.” A router table with a bullnose bit makes this almost easy, as long as you keep the passes shallow and controlled. Those without a router can reach for a block plane or a piece of sandpaper wrapped around a dowel, but it takes patience. The aim? A curve that follows the pin hole precisely, no flat spots, no hidden bumps. If the hinge twists or binds at assembly, suspect the surface here.
Step 4: Marking the Knuckles
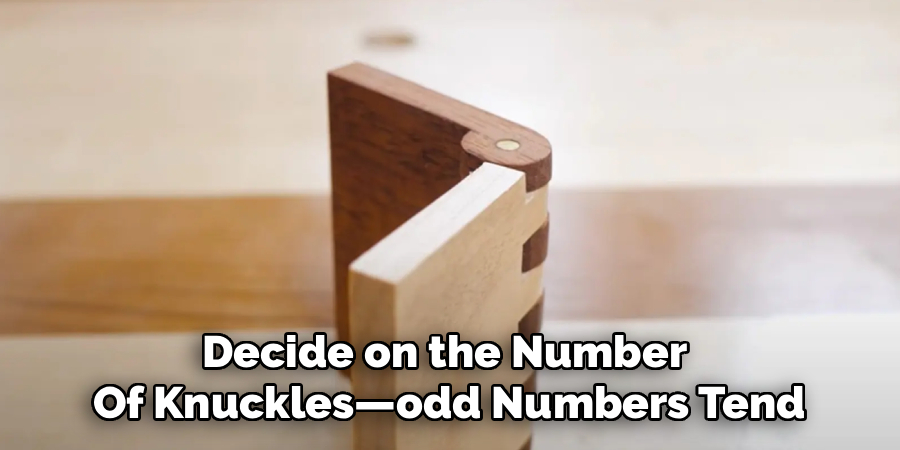
Here’s where careful layout pays dividends. A sharp marking knife, a reliable square, and a pencil: your best friends for this step. Decide on the number of knuckles—odd numbers tend to work nicely, but perfection isn’t mandatory. Double-check as you go; it’s surprisingly easy to mix up which part is waste. Shade the bits you’ll remove to avoid any heart-stopping mistakes. The measurements should be checked once, twice—then do it again. An error here can turn an hour’s work into kindling.
Step 5: Cutting the Knuckles
There’s no machine to fully automate this—bandsaw, scroll saw, or dovetail saw will get you close, but the final shaping is fussy. Stay just inside your layout lines; you’ll want room to fine-tune later. To clear out waste between knuckles, a series of relief cuts paired with a chisel does the job. Move patiently, checking the fit often. Forced fits create splits, but loose, uneven gaps feel amateurish. Oddly enough, time spent here pays off in fewer repairs (and less regret) after the first test-fit.
Step 6: Test Fitting and Refining
With the slots cut, this is the moment you see if things actually come together. Slip the pin through and try moving the hinge. It’ll feel stiff—if it’s floppy, that’s a new kind of problem. Open and close, and listen for stubbornness: any gritty catching means wood is rubbing too tightly. Remove tiny amounts of material—knuckles and mating faces demand attention. Sandpaper wrapped around a thin dowel, a sharp file, or a chisel helps with the fussy spots. Reassemble, try again—repetition here is almost comforting. You’ll know you’re close when the movement smooths out and closes cleanly. Resist the urge to rush this part.
Step 7: Final Sanding and Assembly
Once satisfied with the joint, pause to inspect it all before final assembly. Sand everything that’s visible, slowly working up through finer grits. Leave the interlocking faces alone unless things feel sticky. When attaching the two halves, use glue sparingly—only on the outer knuckles, to avoid freezing the whole mechanism solid. Metal pins can be peened lightly or capped if you want a more finished look. Once you trim excess pin flush, a wooden hinge that opens and shuts with surprising precision appears—almost as if you always knew how.
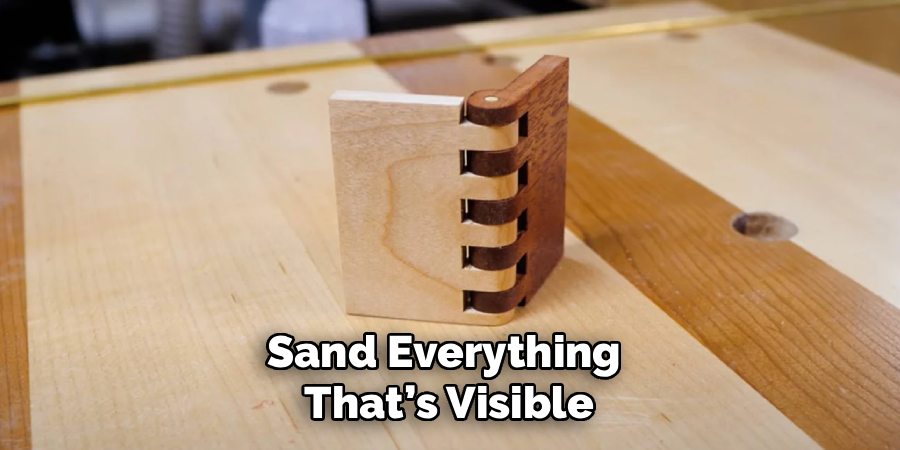
Following these steps on how to make a wood hinge can result in a unique and functional addition to your woodworking projects. It allows for a smooth and elegant movement, adding intricacy and charm to any piece.
Common Mistakes to Avoid
A few lessons seem to repeat endlessly. Ignore the grain direction, and the knuckles will split sooner rather than later. Drill the pin hole after cutting knuckles? The alignment will probably never be right.
Rushing or fudging the layout means the hinge will look and work unevenly. Too much glue in the wrong spot? Easily turns your moving joint into—well, an unmoving one. Regret follows quickly.
Tips for Better Results
Some small interventions yield major improvements. Use a drill press whenever possible, not hand drills—accuracy matters. A dab of paste wax on the hinge pin or knuckles helps movement and avoids annoying squeaks.
Still figuring things out? Practice on scrap wood before trying your main material, especially if that walnut blank costs more than you’d like to admit. Sharp chisels and tuned saws slice more cleanly, sparing you endless sanding.
Applications of Wood Hinges
Wooden hinges can appear almost anywhere woodworkers want unity—or want to avoid garish flashes of metal. They’re at home on small boxes, humidors, custom chests, sometimes even on cabinet doors if sized generously.
While not suited for every door or lid, there are times a metal hinge would feel invasive, unwelcome. There’s an appeal in making every component match, in letting the hardware recede until you notice only the form and not its mechanics.
Frequently Asked Questions
Q1: What Is The Best Wood For Making Wooden Hinges?
Let’s not get precious: hard maple, cherry, walnut, and oak are perennial favorites because they cut cleanly and last. Softer species—pine or cedar, for instance—may compress, or just snap. They can leave you redoing things, no matter how careful you are.
Q2: Can I Use A Metal Pin In A Wooden Hinge?
You certainly can. Brass or stainless pins hold up better under strain and don’t shift with humidity. Visually, a brass rod tucked inside walnut or mahogany looks quietly elegant. Some woodworkers never go back to wooden dowels once they try metal pins.
Q3: How Do I Stop My Wooden Hinge From Squeaking?
When things get noisy, friction is almost always to blame. Waxes and dry lubricants like graphite or beeswax smooth things out, without risking wood fiber swelling. Liquid oils, though, aren’t your friend—they’ll soak in and make the whole operation worse.
Conclusion
Patience is part of the deal here. Laying out parts by hand, carefully fitting and tweaking, demands focus—but that’s precisely what makes the outcome satisfying. No factory compromise, just your effort and judgment, for better or worse.
If you approach the project with attention (and a little humility), the results can surprise you. Maybe you’ll stumble, maybe you’ll start over—but that’s what makes it worth doing at all. With time, you’ll find your own rhythm, quirks, and shortcuts. And when you’re finished, hinge swings open with that quiet sense of rightness? That’s craftsmanship. Thanks for reading this guide on how to make a wood hinge.

About
Mike May is a distinguished figure in the world of woodworking and timber design, with a decade of expertise creating innovative and sustainable indoor solutions. His professional focus lies in merging traditional craftsmanship with modern manufacturing techniques, fostering designs that are both practical and environmentally conscious. As the author of Woodimber, Mike delves into the art and science of timber-craft, inspiring artisans and industry professionals alike.
Education
RMIT University (Melbourne, Australia)
-
Associate Degree in Design (Timber): Focus on sustainable design, industry-driven projects, and practical craftsmanship.
-
Gained hands-on experience with traditional and digital manufacturing tools, such as CAD and CNC software.
Nottingham Trent University (United Kingdom)
-
Bachelor’s in Woodworking and Product Design (Honors): Specialized in product design with a focus on blending creativity with production techniques.
-
Participated in industry projects, working with companies like John Lewis and Vitsoe to gain real-world insights.
Publications and Impact
In Woodimber, May shares his insights on timber design processes, materials, and strategies for efficient production. His writing bridges the gap between artisan knowledge and modern industry needs, making it a must-read for both budding designers and seasoned professionals.