 (1)")

Woodworking offers a wonderful way to express your creativity while building something highly functional for your home. Many beginners feel intimidated by loud power tools and complex fractional measurements, but starting with a manageable project builds your confidence quickly. If you have been wondering how to make a small jewelry box out of wood, you are in the right place to begin your journey.
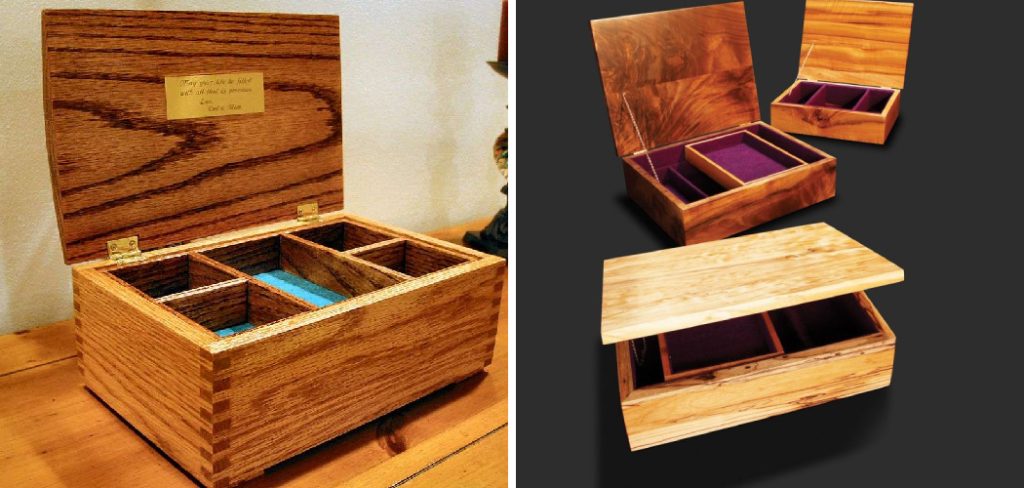
This straightforward guide walks you through the entire process, from selecting the right timber at the hardware store to applying the final shiny coat of finish. You will learn essential crafting techniques that serve as a solid foundation for future, more advanced projects. Creating a handmade storage piece not only gives you a safe place to keep your favorite rings and delicate necklaces, but it also makes a deeply personal, heartfelt gift for loved ones. Grab your safety glasses, clear off your dusty workbench, and let us dive into this deeply rewarding craft together.
Step-by-Step Guide: How to Make a Small Jewelry Box Out of Wood
Step 1: Planning How to Make a Small Jewelry Box Out of Wood
Before cutting any timber, you must establish a clear, thoughtful plan for your project. Sketch out your desired dimensions on a piece of grid paper to visualize the final shape and proportions. A standard starter size measures roughly six inches long, four inches wide, and three inches deep.

This compact size minimizes the amount of material you need to purchase while providing plenty of room for basic, straight cuts. Decide whether you want a simple lift-off lid or a fancy hinged top, as this decision dictates your specific hardware needs later on. Gathering all your precise measurements beforehand ensures you buy the correct amount of lumber and prevents frustrating mistakes during the crucial assembly phase. Taking ten minutes to draw your plans saves hours of wasted effort in the workshop.
Step 2: Selecting and Preparing Your Lumber
Choosing the right material heavily influences the final look, weight, and durability of your piece. Softwoods like white pine or poplar are incredibly forgiving for novices, making them exceptionally easy to cut and sand by hand. However, beautiful hardwoods like walnut, cherry, or maple offer a much richer appearance and resist accidental dents far better over time.
Purchase timber that comes pre-surfaced from your local hardware store to save yourself the massive hassle of milling raw, rough boards. Carefully inspect each piece for severe warping, deep cracks, or large, ugly knots that might complicate your straight cuts. Let the fresh boards acclimate to your workspace for a few days to prevent unexpected warping after you finish assembly.
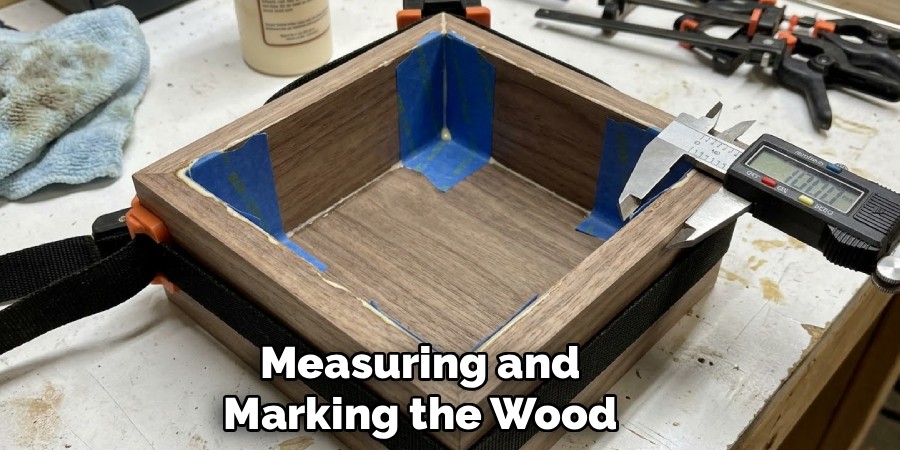
Step 3: Measuring and Marking the Wood
Precision at this stage guarantees a tight, professional-looking assembly later down the line. Use a reliable combination square and a sharply pointed pencil to mark your cut lines across the flat boards. You will need four side pieces, a solid top, and a sturdy bottom panel. Measure twice before making any permanent marks, ensuring your opposing sides perfectly match in overall length. Drawing a large “X” on the waste side of your line helps prevent cutting on the wrong side of your carefully measured mark. Take your time to align your square perfectly flat against the straight factory edge of the board. Accurate markings serve as the absolute crucial roadmap for every subsequent cut you make.
Step 4: Cutting the Pieces to Size
Now comes the exciting part of actually shaping your raw materials into usable pieces. Secure your marked board tightly to your heavy workbench using strong clamps to prevent any dangerous slipping while you work. You can use a standard hand saw for a quiet, traditional approach, or a motorized miter saw for faster, highly accurate results.
Cut carefully along the waste side of your pencil lines, letting the sharp tool do the heavy lifting rather than forcing the blade through the dense grain. Keep your cuts as straight and square as humanly possible to ensure the corners join seamlessly later. Safety remains absolutely paramount here, so always wear your protective glasses and keep your fingers well away from the moving blade.
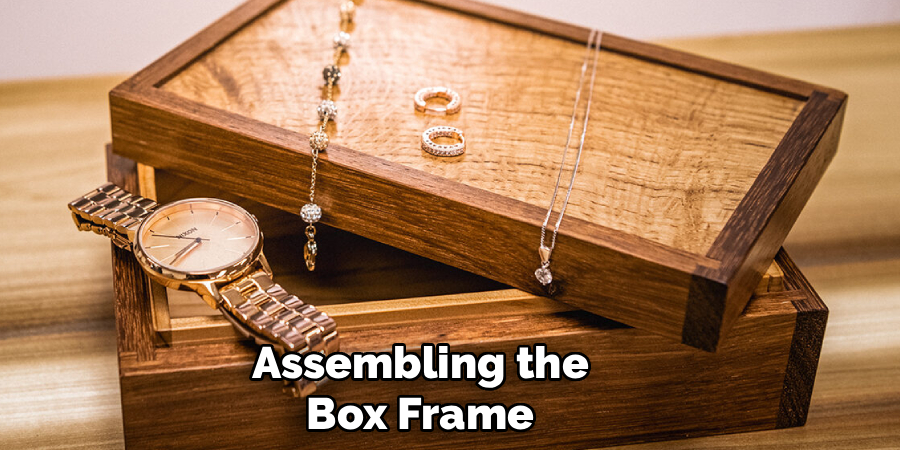
Step 5: Assembling the Box Frame
Bringing the freshly cut pieces together transforms your flat boards into a recognizable three-dimensional object. Apply a thin, even layer of quality wood glue to the joining edges of your four side panels. Press the corners together firmly to form a perfect rectangle, checking that the top and bottom edges sit perfectly flush with one another.
Secure the wooden frame tightly using specialized strap clamps or standard bar clamps, applying just enough pressure to squeeze out a tiny bead of excess liquid glue. Use a damp rag to wipe away this messy squeeze-out immediately, as dried glue absolutely ruins the final wood finish. Leave the clamped frame entirely undisturbed overnight to achieve maximum joint strength.
Step 6: Attaching the Top and Bottom Panels
Once the main rectangular frame fully cures, you can enclose the open structure by adding the top and bottom panels. Spread a consistent, thin line of glue along the top edges of your wooden frame. Carefully align your lid piece so it sits perfectly centered over the opening, then clamp it firmly into place with even pressure. Repeat this exact same process for the bottom panel, ensuring no visible gaps exist between the flat boards and the frame edges. If you plan to create a swinging hinged lid later, simply attach the bottom panel right now and set the top piece aside for separate finishing and delicate hardware installation.
Step 7: Sanding Everything Smooth
A flawless finish requires meticulous sanding to remove rough patches and minor surface imperfections. Start with a coarse eighty-grit sandpaper to level out any slightly uneven joints where the corners meet together. Wrap your paper tightly around a firm sanding block to maintain perfectly flat surfaces and crisp, sharp edges. Gradually progress to a medium one-hundred-and-twenty-grit paper to remove the deep, ugly scratches left by the previous round of sanding. Finally, switch to a fine two-hundred-and-twenty-grit paper until the entire wooden surface feels incredibly smooth to the bare touch. Always rub in the exact same direction as the natural grain to avoid leaving unsightly cross-scratches that will become highly visible later.
Step 8: Applying the Final Protective Finish
The finishing touch brings out the natural, hidden beauty of the grain and protects your hard work for generations to come. Wipe the entire surface down thoroughly with a clean, slightly damp cloth to remove all lingering sawdust particles. Brush or wipe on your chosen finish, such as Danish oil, liquid polyurethane, or simple natural beeswax, following the manufacturer instructions closely.
Oil finishes penetrate deeply to enrich the rich color, while clear polyurethane provides a tough, glossy shield against household moisture. Allow the first coat to dry completely in a dust-free environment before lightly buffing it with super fine steel wool. Apply a second generous coat to achieve a truly professional, long-lasting shiny luster.
Frequently Asked Question
What Is The Best Wood For A Beginner Project?
Pine and poplar serve as excellent starter woods because they cost very little and cut quite easily. These softwoods allow you to practice your measuring and joining techniques without ruining expensive materials.
- They accept wood glue readily for strong joints.
- You can easily sand out minor mistakes.
- They absorb paints and finishes well.
Once you feel comfortable with the basic process, you can upgrade to stunning hardwoods like cherry or walnut for a more professional aesthetic.
What Basic Tools Do I Need To Start?
You do not need a massive workshop full of expensive power machinery to build a beautiful storage container. A few reliable hand tools will perfectly handle the job for beginners.
- A sturdy hand saw or miter box for straight cuts.
- High-quality wood glue and several bar clamps.
- Sandpaper in various grits and a firm sanding block.
- A reliable combination square and a sharp pencil.
These simple items provide everything required to create tight joints and smooth finishes.
How Do I Prevent The Wood From Splitting?
Splitting often occurs when driving nails or screws too close to the edge of a thin board. For small, delicate projects, you should rely primarily on high-quality wood glue rather than metal fasteners.
- Always pre-drill holes if you must use small screws for hinges.
- Use a sharp saw blade and cut slowly to avoid tear-out.
- Keep your clamps snug but avoid overtightening them.
Modern wood glues create bonds stronger than the actual timber itself, rendering nails entirely unnecessary.
Can I Stain Softwood To Look Like Hardwood?
Yes, you can easily apply colored stains to inexpensive softwoods to mimic the rich, dark appearance of walnut or mahogany. However, softwoods like pine tend to absorb liquids unevenly, which often results in a blotchy finish.
- Apply a pre-stain wood conditioner before adding your color.
- Wipe the stain on gently with a clean rag.
- Let it sit for a few minutes before wiping off the excess.
Testing your stain on a small scrap piece first ensures you achieve the exact color you want.

How Long Does This Project Typically Take?
A novice woodworker can generally complete the physical cutting and assembly over a single weekend. The actual active labor usually requires only three to four hours from start to finish.
- Measuring and cutting takes about one hour.
- Glue requires at least twelve hours to cure properly.
- Sanding and finishing takes another hour of active work.
Patience remains vital during the drying phases, so never rush the glue or the final topcoat if you want excellent results.
Conclusion
Completing your very first woodworking project brings a massive sense of personal pride and accomplishment. You have successfully learned how to select the right materials, measure accurately, cut straight lines, and assemble a remarkably sturdy frame. These fundamental crafting skills translate directly into building larger household furniture, crafting decorative floating shelves, or designing custom picture frames. Remember that making minor mistakes represents a completely natural part of the learning process, so do not stress over a slightly uneven joint or an imperfect glossy finish.
The true charm of handmade items lies entirely in their unique character and the sheer effort you poured into them. Now that you understand exactly how to make a small jewelry box out of wood, you can confidently experiment with different timber species, complex interlocking joints, and creative lid designs. Clean up your dusty workspace, sharpen your pencils, and start sketching out your next brilliant creation today.
About
Mike May is a distinguished figure in the world of woodworking and timber design, with a decade of expertise creating innovative and sustainable indoor solutions. His professional focus lies in merging traditional craftsmanship with modern manufacturing techniques, fostering designs that are both practical and environmentally conscious. As the author of Woodimber, Mike delves into the art and science of timber-craft, inspiring artisans and industry professionals alike.
Education
RMIT University (Melbourne, Australia)
-
Associate Degree in Design (Timber): Focus on sustainable design, industry-driven projects, and practical craftsmanship.
-
Gained hands-on experience with traditional and digital manufacturing tools, such as CAD and CNC software.
Nottingham Trent University (United Kingdom)
-
Bachelor’s in Woodworking and Product Design (Honors): Specialized in product design with a focus on blending creativity with production techniques.
-
Participated in industry projects, working with companies like John Lewis and Vitsoe to gain real-world insights.
Publications and Impact
In Woodimber, May shares his insights on timber design processes, materials, and strategies for efficient production. His writing bridges the gap between artisan knowledge and modern industry needs, making it a must-read for both budding designers and seasoned professionals.