

Woodworking offers incredible opportunities to create functional, fun items from scratch. Few projects capture the imagination quite like crafting a flying toy that actually returns to your hand. This classic aerodynamic marvel has fascinated people for centuries, and building one yourself is an incredibly rewarding weekend activity. If you want to impress your friends at the local park or simply enjoy a hands-on crafting experience, you have found the right guide.
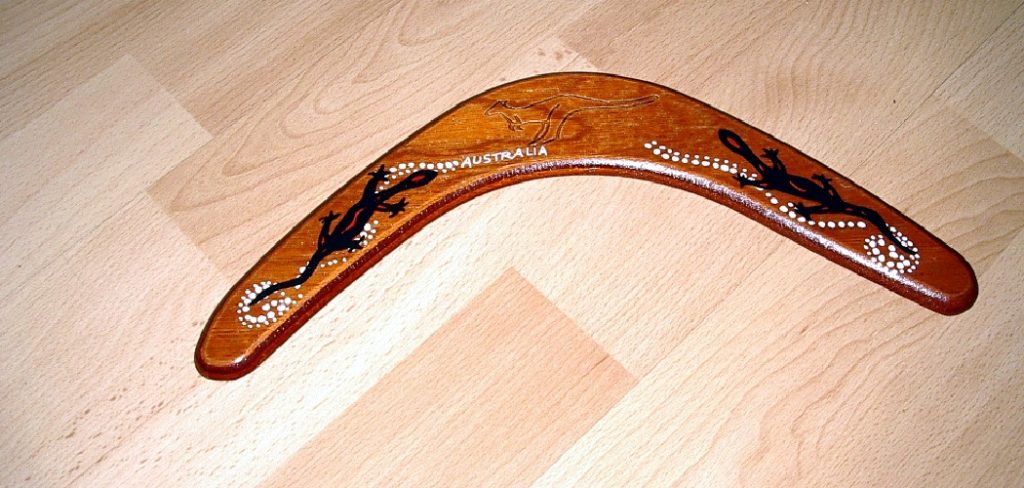
We will walk you through the entire process, demonstrating exactly how to make a boomerang out of wood using basic tools and materials. You do not need an advanced carpentry shop or decades of engineering experience to succeed here. With a little patience, some sturdy plywood, and careful sanding techniques, you can shape an impressive, fully functional flying piece. Gather your safety gear, clear off your sturdy workbench, and let us start creating your very first aerodynamic masterpiece today.
8 Step-By-Step Guide: How to Make a Boomerang Out of Wood
Step 1: The Basics of how to make a boomerang out of wood
Selecting the correct lumber determines whether your final creation flies beautifully or shatters on its first landing. You must purchase high-quality Baltic birch plywood for this specific aerodynamic project. Standard solid wood planks will easily snap along the natural grain when they inevitably strike the hard ground. Plywood contains alternating layers of thin wood glued together, providing the immense structural strength required for surviving heavy outdoor impacts. A thickness of one-quarter inch or five millimeters offers the perfect balance between manageable weight and stable flight. Carefully inspect your chosen board to ensure it remains completely flat, as warped lumber ruins the trajectory.
Step 2: Trace Your Traditional Design Pattern
Finding a proven aerodynamic shape guarantees a much higher success rate for your initial woodworking attempt. You can easily find free traditional V-shaped templates online to print at actual size. Cut out your paper template carefully with sharp scissors and lay it flat against your smooth birch board. You should position the paper so the elbow joint of the design points diagonally across the natural wood grain, maximizing the structural integrity of the arms. Use a dark, heavy pencil to trace the outer edges onto the lumber. Press firmly to ensure the outline remains highly visible over the dusty sawdust later.
Step 3: Cut the Rough Shape Safely
Once your design is clearly drawn, securing the board properly prevents dangerous slipping during the cutting phase. Clamp your Baltic birch firmly to the overhanging edge of a stable workbench. Put on your protective safety glasses and grab a coping saw or an electric jigsaw equipped with a fine-toothed blade. Slowly navigate your saw around the dark pencil outline, staying about one millimeter outside the line to leave room for final shaping. Pushing the blade too quickly causes the delicate outer layers of the plywood to splinter. Take your time navigating the tight inner curve of the central elbow.

Step 4: Master the Aerodynamic Airfoil Shaping
Shaping the wings properly transforms a flat piece of lumber into a functional flying machine. You must create an airfoil profile similar to an airplane wing on the leading and trailing edges. The leading edge requires a blunt, rounded profile to slice cleanly through the wind. The trailing edge needs a long, smooth taper that gently slopes down toward the bottom surface. Using a coarse wood rasp or a power sander, slowly remove material to form these crucial aerodynamic slopes. Maintain a consistent angle along the entire length of each arm to ensure balanced lift and stable rotation during flight.
Step 5: Smooth the Edges and Surfaces
After achieving the correct airfoil profile, removing deep tool marks significantly improves the overall aerodynamics. Grab a medium-grit sandpaper block and gently work your way around all the curved edges. Transitioning to fine-grit paper allows you to polish the broad top and bottom faces until they feel completely smooth to the touch. Any rough patches or protruding splinters will create unwanted drag, reducing the total distance your creation can travel. Take a moment to wipe the entire surface meticulously with a slightly damp cloth. This critical step removes microscopic sawdust particles that would otherwise ruin your final protective finish.
Step 6: Test the Flight Dynamics Outdoors
Before you apply any colorful paint or permanent clear coats, verifying the flight characteristics is absolutely essential. Find a massive, open grassy field completely free of tall trees, buildings, and innocent bystanders. Grip the painted end of one arm firmly, holding the device vertically rather than flat like a flying disc. Throw it straight ahead with a swift snap of your wrist to generate maximum spinning rotation. Pay close attention to how it climbs and curves through the breezy air. If it fails to return properly, you might need to head back inside for a little more corrective sanding.
Step 7: Apply Vibrant Colors and Patterns
Adding bright colors not only personalizes your project but makes it much easier to locate in tall grass. You can use high-quality acrylic paints to brush on vibrant geometric patterns, traditional dot art, or your favorite racing stripes. Apply the paint in thin, even layers to prevent heavy drips from altering the carefully crafted airfoil slopes. Let the first color dry completely before adding any secondary details or overlapping shapes. Using contrasting neon colors on the spinning tips creates a mesmerizing visual effect as the object rotates rapidly through the bright afternoon sky. Allow the paint to cure fully.

Step 8: Seal with a Protective Finish
Applying a durable clear coat protects your beautiful artwork and shields the raw lumber from damaging ground moisture. Brush on a thin layer of exterior-grade polyurethane or spray a clear acrylic sealer evenly across the entire top surface. Let the clear coat dry overnight in a well-ventilated area before flipping the piece over to seal the bottom side. A glossy finish naturally reduces air friction, slightly enhancing the overall flight performance. Regular maintenance with a damp cloth keeps the surfaces clean after muddy landings. Your beautiful aerodynamic craft is now fully complete and ready for endless outdoor entertainment.
Frequently Asked Question
What Is The Best Wood For This Project?
Baltic birch plywood remains the absolute best material for crafting returning flight toys.
- It features thin, glued layers that provide incredible strength.
- The uniform density ensures balanced weight distribution.
- It resists breaking when hitting the ground at high speeds.
Marine plywood also works well, provided it is perfectly flat and void of interior gaps.
Do Left-Handed Throwers Need A Different Design?
Yes, the aerodynamic airfoil shape must be completely reversed for a left-handed thrower.
- The leading edge must sit on the opposite side of the arm.
- The lift generation requires a counter-clockwise spin instead of clockwise.
- Throwing a right-handed model with your left hand usually results in a rapid crash.
Always mirror your paper template before tracing if you throw left-handed.
How Long Does It Take To Build?
Building your first functional piece usually takes a dedicated beginner about one weekend to complete fully.

- Cutting and shaping the raw lumber takes roughly two to three hours.
- Sanding the surfaces completely smooth requires another hour of detailed effort.
- Paint and clear protective coats require overnight drying times.
Rushing the airfoil shaping process usually ruins the aerodynamic performance entirely.
Can I Use Solid Wood Instead Of Plywood?
Using solid lumber planks is highly discouraged for beginners attempting this specific aerodynamic project.
- Solid wood has a continuous grain that acts as a natural weak point.
- High-speed impacts with the ground will instantly snap solid planks in half.
- Plywood’s cross-layered construction absorbs shock much more effectively.
If you must use solid wood, you will need advanced steam-bending techniques.
Why Is My Toy Not Returning Properly?
A failure to return usually stems from improper wing shaping or incorrect throwing techniques.
- The leading edges might not be rounded enough to slice the wind.
- The trailing edges may lack a smooth, consistent taper for proper lift.
- Throwing the object completely flat like a frisbee ruins the required trajectory.
Always throw vertically with a slight outward tilt for the best return.

Conclusion
Woodworking provides immense satisfaction, especially when your finished creation takes to the skies and flies right back to your waiting hands. By carefully selecting the right birch plywood, tracing an accurate template, and meticulously shaping the critical airfoils, you have successfully engineered a remarkable aerodynamic device. The detailed sanding and vibrant paint job not only protect your hard work but make every single throw a visually stunning experience.
Mastering the unique throwing technique will take a little practice, but watching your hand-crafted project carve a massive circle through the air makes every moment worthwhile. Now that you understand exactly how to make a boomerang out of wood, you can experiment with different traditional shapes, varying sizes, and custom flight paths. Grab your safety glasses, secure your lumber, and head out to the local park to enjoy the fantastic results of your very own craftsmanship.

About
Mike May is a distinguished figure in the world of woodworking and timber design, with a decade of expertise creating innovative and sustainable indoor solutions. His professional focus lies in merging traditional craftsmanship with modern manufacturing techniques, fostering designs that are both practical and environmentally conscious. As the author of Woodimber, Mike delves into the art and science of timber-craft, inspiring artisans and industry professionals alike.
Education
RMIT University (Melbourne, Australia)
-
Associate Degree in Design (Timber): Focus on sustainable design, industry-driven projects, and practical craftsmanship.
-
Gained hands-on experience with traditional and digital manufacturing tools, such as CAD and CNC software.
Nottingham Trent University (United Kingdom)
-
Bachelor’s in Woodworking and Product Design (Honors): Specialized in product design with a focus on blending creativity with production techniques.
-
Participated in industry projects, working with companies like John Lewis and Vitsoe to gain real-world insights.
Publications and Impact
In Woodimber, May shares his insights on timber design processes, materials, and strategies for efficient production. His writing bridges the gap between artisan knowledge and modern industry needs, making it a must-read for both budding designers and seasoned professionals.