 (1)")

Hardwood floors are a timeless feature in any home, adding warmth, character, and significant value. However, high-traffic areas inevitably suffer from wear and tear over time. You might notice dull patches near the entryway, scratches under the dining chairs, or discoloration where the sun hits the floorboards every afternoon.
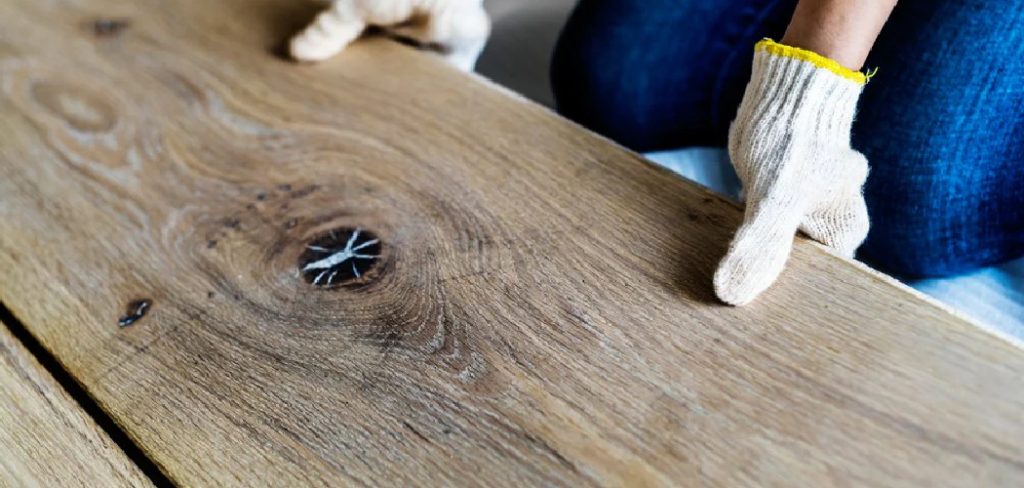
These imperfections can make an otherwise beautiful room look neglected. The good news is that you don’t always need to sand and refinish the entire room to address these localized issues. Spot repairing is a practical, cost-effective skill that every homeowner can master.
This guide on how to fix worn spots on hardwood floors will walk you through the process of restoring the luster to your worn hardwood spots, saving you money and extending the life of your flooring.
What Will You Need?
Before you begin, gather these essential tools and materials to ensure a smooth repair process.
- Cleaning Supplies: Hardwood floor cleaner, warm water, mild dish soap, and microfiber cloths.
- Abrasives: Fine-grit sandpaper (120-grit and 220-grit), sanding block, and #0000 steel wool.
- Repair Compounds: Wood putty or filler (color-matched to your floor).
- Finishing Materials: Polyurethane or varnish (matching your floor’s sheen—satin, semi-gloss, or gloss), wood stain (if color correction is needed).
- Applicators: High-quality natural bristle brush, foam brush, or lint-free rags.
- Protection: Painter’s tape, dust mask, and safety glasses.
- Cleanup: Tack cloth or a vacuum with a soft brush attachment.
10 Easy Steps on How to Fix Worn Spots on Hardwood Floors
Step 1: Assess the Damage
Before you touch a piece of sandpaper to the floor, you need to understand exactly what you are dealing with. Get down on the floor and examine the worn spot closely. Is the damage just to the surface finish, or has it penetrated down to the raw wood? If it’s just surface scratches or dullness, a light screening and recoat might be enough.
However, if the wood feels rough or looks gray, the finish has worn away completely, and you will need to sand down to bare wood. Check for any deep gouges that might require filler. Understanding the depth of the damage dictates how aggressive your sanding needs to be. Also, determine the type of finish currently on your floor—wax, oil, or polyurethane—as you must use compatible products for the repair to blend seamlessly.
Step 2: Clean the Area Thoroughly
You cannot repair a dirty floor. Dirt, grease, wax, and grime are the enemies of a good finish. If you sand over a dirty floor, you will grind that dirt into the wood grain, causing permanent discoloration. Start by vacuuming the area to remove loose dust and debris. Next, use a specialized hardwood floor cleaner or a mixture of mild soap and warm water.
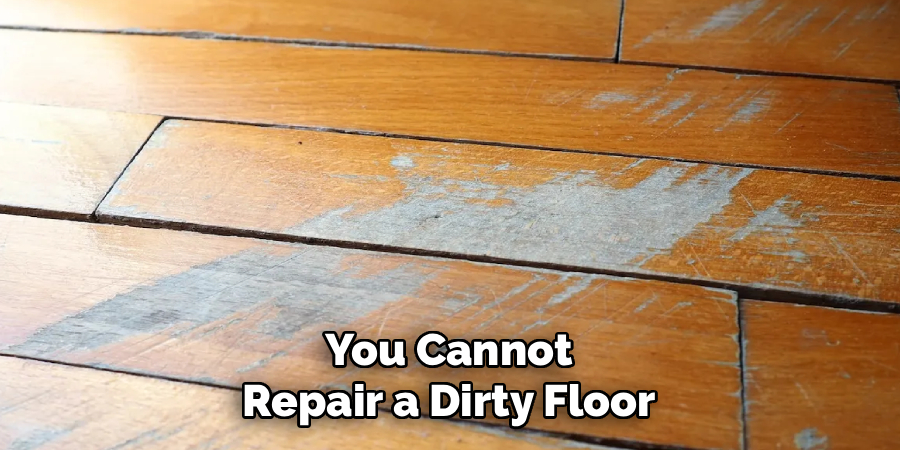
Scrub the worn spot and the surrounding area vigorously with a microfiber cloth. If your floor has ever been waxed, you must use a wax remover to strip it completely; otherwise, the new finish will not adhere. Allow the area to dry completely before moving on to the next step. Any trapped moisture can ruin your repair.
Step 3: Isolate the Work Area
It is crucial to protect the surrounding floor that doesn’t need repair. Use painter’s tape to mark off the area you will be working on. Don’t just tape a tight square around the damage; give yourself a few inches of buffer space. However, avoid creating hard, straight lines with the tape if possible, as this can create a visible “frame” effect when the new finish is applied.
Instead, you might loosely tape off the area to remind yourself where to stop, but plan to feather your sanding and finishing edges. If you are working near baseboards or furniture that cannot be moved, tape them off carefully to prevent accidental scratches or stain marks.
Step 4: Sand the Worn Spot
This is the most critical step for preparation. Start with 120-grit sandpaper wrapped around a sanding block. Sand the worn area in the direction of the wood grain—never across it, as this creates visible scratches. Your goal is to remove the old, damaged finish and smooth out any rough wood fibers. Apply even pressure and work slowly.
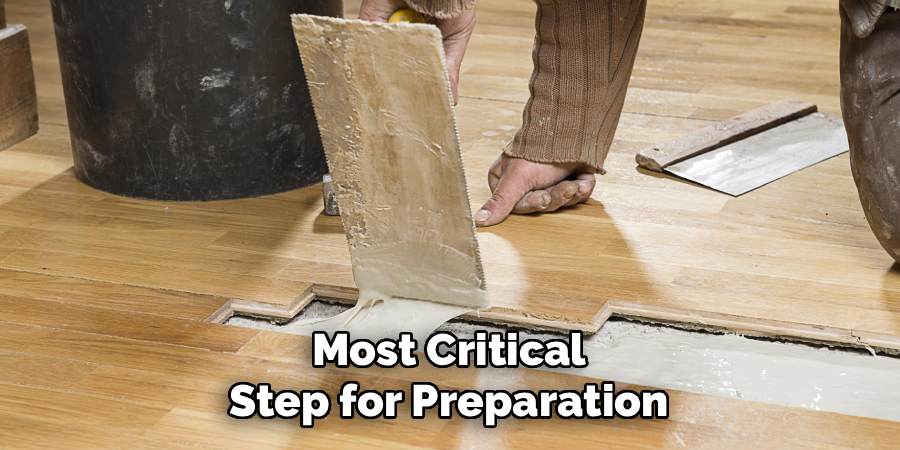
If the wood is gray from water damage or oxidation, you need to sand until you reach fresh, bright wood. Once you have removed the old finish, switch to a finer 220-grit sandpaper to smooth the surface and prepare it for staining or sealing. The wood should feel as smooth as glass to the touch.
Step 5: Clean Up the Dust
Sanding creates fine dust that can ruin your final finish if left behind. Even a small amount of dust can create a rough, bumpy texture in your polyurethane. First, vacuum the area thoroughly using a soft brush attachment to pull dust out of the grain. Then, use a tack cloth—a sticky cheesecloth designed specifically for this purpose—to wipe the area gently. Do not use a wet rag at this stage, as it will raise the grain of the wood you just smoothed out. Wipe until the cloth comes up clean. Check the area with a bright light to ensure no specks of dust remain.
Step 6: Apply Wood Filler (If Needed)
If your worn spot includes deep scratches, gouges, or gaps between boards, now is the time to fill them. Select a wood filler that matches the color of your raw wood (or your intended stain color). Press the filler firmly into the defects using a putty knife, leaving it slightly higher than the surrounding surface to account for shrinkage as it dries.
Allow the filler to dry completely according to the manufacturer’s instructions. Once dry, lightly sand the filled areas with 220-grit sandpaper until they are perfectly flush with the surrounding floor. Wipe away the dust again with your tack cloth.
Step 7: Apply Stain (Optional)
If you sanded down to bare wood and your floors are stained, you will need to replace that color. If your floors are natural with just a clear coat, skip this step. Test your stain on a small, inconspicuous area first to ensure a match. Apply the stain with a lint-free rag or brush, working with the grain.
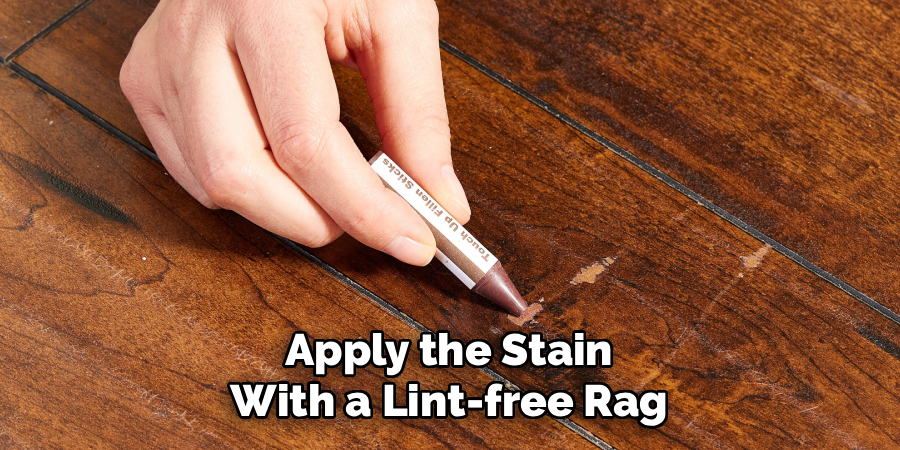
Let it penetrate the wood for a minute or two, then wipe away the excess. If the color is too light, let it dry and apply a second coat. The key is to match the surrounding floor color as closely as possible. Allow the stain to dry completely—usually overnight—before applying the protective finish.
Step 8: Apply the First Coat of Finish
Choose a finish that matches your floor’s sheen (matte, satin, semi-gloss, or gloss). Water-based polyurethane dries fast and stays clear, while oil-based adds an amber glow and is more durable. Using a high-quality brush or foam applicator, apply a thin, even layer of finish. Ideally, feather the edges of the new finish into the old finish to avoid a hard line.
To feather, lift your brush slightly as you reach the edge of the repair area, thinning out the layer. Avoid overworking the finish; brush it on and leave it alone to self-level. Bubbles can form if you brush back and forth too vigorously.
Step 9: Lightly Sand and Recoat
One coat is rarely enough for a durable repair. Once the first coat is completely dry (check the can for dry times), you need to lightly scuff it to help the next coat adhere. Use #0000 steel wool or very fine 220-grit sandpaper to gently buff the surface. You aren’t trying to remove the finish, just dull it slightly.
This creates a mechanical bond for the next layer. Wipe away the dust with a tack cloth. Apply a second coat of finish just as you did the first. For high-traffic areas, a third coat is recommended for maximum protection.
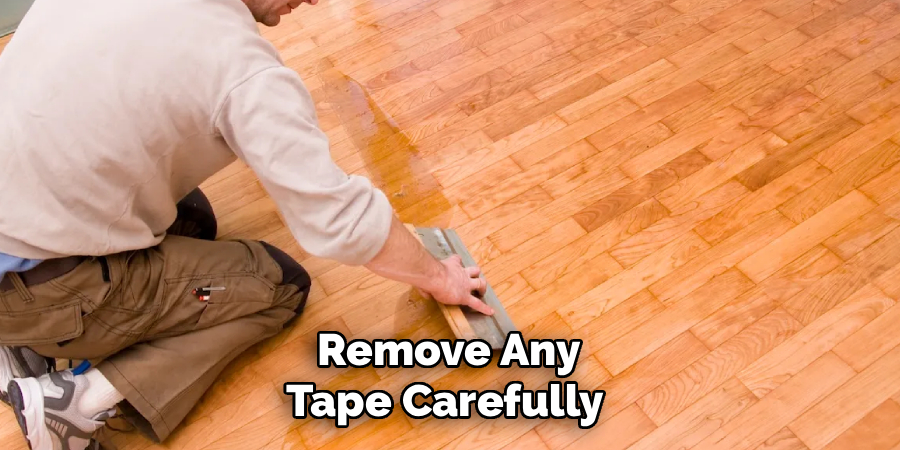
Step 10: Blend and Cure
After the final coat is applied, remove any tape carefully while the finish is still slightly tacky to prevent peeling. Let the repair cure completely before walking on it or replacing furniture. Light foot traffic might be okay after 24 hours, but full curing can take several days or even a week, depending on the product and humidity.
To help the repair blend visually, you can sometimes buff the edges with a polishing compound once fully cured to match the sheen of the surrounding floor perfectly.
5 Things You Should Avoid
- Using the Wrong Finish: Never mix oil-based and water-based products without proper curing and preparation; they will peel.
- Sanding Across the Grain: This leaves unsightly scratches that become very visible once you apply stain or finish.
- Rushing Drying Times: Applying a new coat before the previous one is dry will result in a tacky, soft finish that ruins easily.
- Skipping the Cleaning Step: Sealing over dust or hair creates permanent bumps that can only be fixed by sanding everything down again.
- Using Too Much Product: Thick layers of polyurethane take forever to dry and are prone to dripping, bubbling, and wrinkling.
Conclusion
How to fix worn spots on hardwood floors is a rewarding project that restores the beauty of your home without the heavy price tag of professional refinishing.
By carefully assessing the damage, preparing the surface correctly, and applying the finish with patience, you can achieve professional-looking results. Remember that the key to a seamless repair is blending the new with the old and allowing ample time for materials to dry.
With these steps, your floors will look revitalized and be protected for years to come.
About
Mike May is a distinguished figure in the world of woodworking and timber design, with a decade of expertise creating innovative and sustainable indoor solutions. His professional focus lies in merging traditional craftsmanship with modern manufacturing techniques, fostering designs that are both practical and environmentally conscious. As the author of Woodimber, Mike delves into the art and science of timber-craft, inspiring artisans and industry professionals alike.
Education
RMIT University (Melbourne, Australia)
-
Associate Degree in Design (Timber): Focus on sustainable design, industry-driven projects, and practical craftsmanship.
-
Gained hands-on experience with traditional and digital manufacturing tools, such as CAD and CNC software.
Nottingham Trent University (United Kingdom)
-
Bachelor’s in Woodworking and Product Design (Honors): Specialized in product design with a focus on blending creativity with production techniques.
-
Participated in industry projects, working with companies like John Lewis and Vitsoe to gain real-world insights.
Publications and Impact
In Woodimber, May shares his insights on timber design processes, materials, and strategies for efficient production. His writing bridges the gap between artisan knowledge and modern industry needs, making it a must-read for both budding designers and seasoned professionals.