 (1)")

There is something undeniably captivating about the world of miniatures. Whether you are assembling a dollhouse, building a model railroad, or creating a diorama for a tabletop game, adding color brings these tiny worlds to life. While plastic and metal figures often get the spotlight in hobby shops, wooden miniatures possess a unique charm and warmth that synthetic materials simply cannot replicate. However, the porous nature of wood presents a specific set of challenges for the aspiring artist. If you treat wood exactly like plastic, you might end up with fuzzy textures or bleeding colors.

Learning how to paint wood miniatures effectively requires a slightly different approach than painting other materials. It involves understanding grain, absorption, and the importance of surface preparation. But don’t be intimidated; with the right tools and a bit of patience, anyone can transform a plain wooden carving into a vibrant masterpiece. This guide is designed for beginners, walking you through every stage of the process—from sanding away imperfections to applying the final protective varnish. Get ready to pick up your brush and breathe life into your tiny wooden creations.
Step-by-Step Guide on How to Paint Wood Miniatures
Step 1: Clean and Inspect Your Miniature
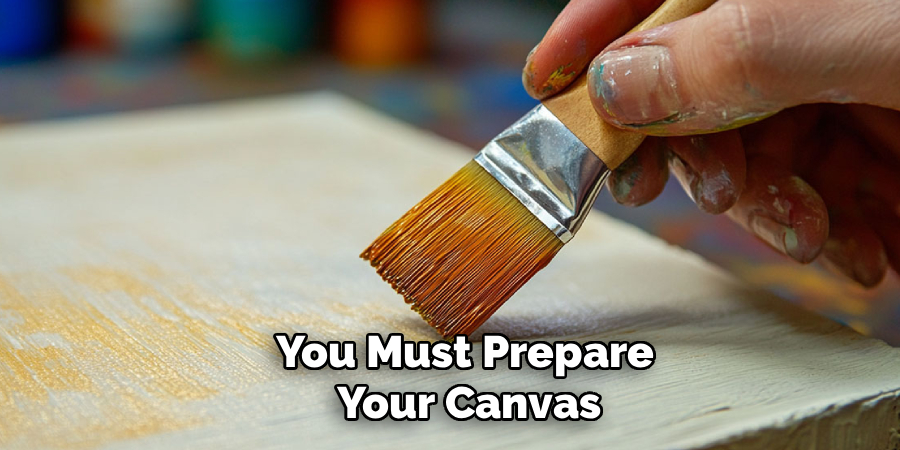
Before you even think about opening a paint bottle, you must prepare your canvas. Wooden miniatures often collect dust, oils from handling, or residue from the manufacturing process. Start by wiping the entire figure down with a slightly damp cloth or a tack cloth to remove loose particles. Inspect the wood closely for any sap or resin spots, especially if you are working with pine. These spots can bleed through paint later, so if you find any, you may need to clean them with a little mineral spirits. This initial cleaning ensures that your primer and paint will adhere properly to the surface without peeling or flaking off later.
Step 2: Sand the Surface to Perfection
Wood naturally has a grain texture that can look rough or fuzzy on a miniature scale. To achieve a professional finish, you need to smooth this out. Use fine-grit sandpaper, ideally between 220 and 400 grit, to gently sand the entire surface of the miniature. Be careful not to sand away delicate details or sharp edges. If your miniature has intricate crevices, you can fold a small piece of sandpaper or use a sanding twig to reach them. The goal is to knock down any raised grain fibers that might stick up when they get wet with paint, ensuring a silky smooth base for your colors.
Step 3: Apply a High-Quality Primer
Priming is arguably the most critical step when learning how to paint wood miniatures because wood is extremely porous. If you apply paint directly to bare wood, it will soak in unevenly, causing the colors to look dull and the wood grain to swell. Apply a thin, even coat of a high-quality primer. A spray primer works well for general coverage, but a brush-on gesso is often better for miniatures as it fills in the wood grain slightly without obscuring details. Let the primer dry completely according to the manufacturer’s instructions. A good primer seals the wood and gives your paint a solid surface to grip.
Step 4: Choose the Right Paints and Brushes
Selecting the correct tools will make your job significantly easier. For wooden miniatures, water-based acrylic paints are generally the best choice. They dry quickly, are non-toxic, and clean up easily with water. Avoid heavy oil paints unless you are very experienced, as they take a long time to dry and can be messy on small items. You will also need a set of quality brushes. Look for synthetic brushes in small sizes, such as 0, 00, and even 000 for the tiniest details. A flat brush is useful for base coats, while a pointed round brush is essential for fine lines and eyes.

Step 5: Apply Your Base Colors
Start by blocking in the main colors of your miniature. Use your larger brushes to apply the base coats to the largest areas first, such as clothing, skin, or fur. It is always better to apply two or three thin coats of paint rather than one thick, gloopy coat. Thick paint can clog up the fine details of the carving and leave unsightly brush marks. Thin your acrylic paint with a tiny drop of water or acrylic medium to improve its flow. Allow each coat to dry fully before applying the next one to prevent lifting the previous layer and creating a muddy texture.
Step 6: Add Depth with Shading and Washes
Once your base colors are solid and dry, the miniature might look a bit flat. To bring out the details and make the figure look three-dimensional, you need to add shadows. The easiest way to do this is with a wash. A wash is simply paint diluted with water until it is very runny. Apply a dark wash (like brown or black) over the textured areas of the miniature. The liquid will settle into the recesses and crevices, creating instant shadows. This technique is particularly effective for wood, as it highlights the carving work. Be careful not to let the wash pool too heavily on flat surfaces.
Step 7: A Guide on How to Paint Wood Miniatures with Highlights
After the wash has dried and created shadows, you need to bring back the light. Highlighting involves applying a lighter shade of your base color to the raised areas of the miniature that would naturally catch the light, such as the top of the head, shoulders, or nose. You can do this by mixing a little white or yellow into your base color. Use a technique called “dry brushing” for this step. Dip your brush in the lighter paint, wipe almost all of it off on a paper towel, and then lightly dust the brush over the raised details. This catches only the high points and adds incredible definition.
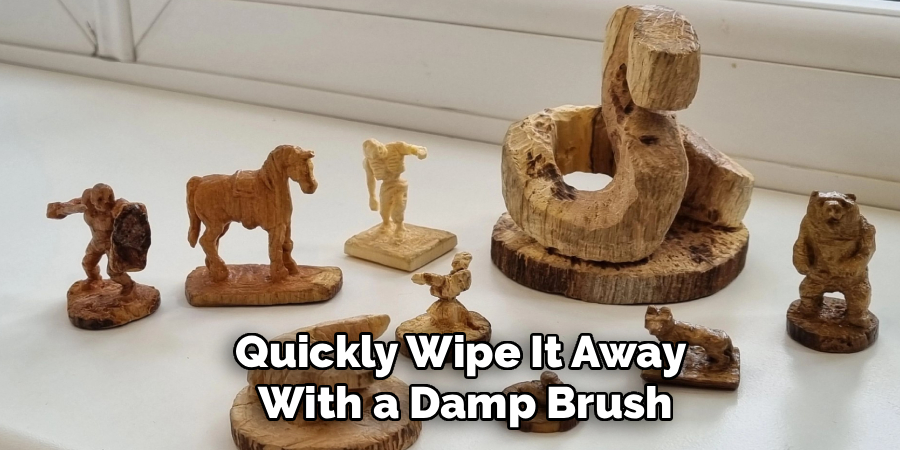
Step 8: Paint the Fine Details
Now is the time for patience and a steady hand. Switch to your smallest brush to paint the tiny details that bring the character to life, such as eyes, buttons, belt buckles, or jewelry. Brace your elbows on the table and hold the miniature securely to minimize shaking. If you are painting eyes, a simple dot of white with a smaller dot of black is usually sufficient for this scale. Do not rush this step. If you make a mistake, you can quickly wipe it away with a damp brush or wait for it to dry and paint over it with the base color.
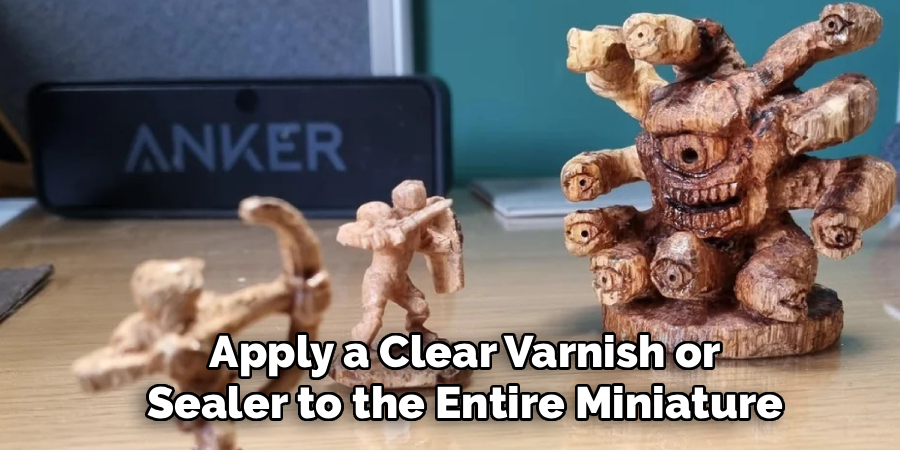
Step 9: Seal and Protect Your Work
The final step is to protect your hard work from handling, dust, and moisture. Wood can expand and contract with humidity changes, which might crack the paint over time if not sealed. Apply a clear varnish or sealer to the entire miniature. You can choose between a matte finish, which looks natural and non-reflective, a satin finish for a slight sheen, or a gloss finish for a wet or shiny look. Spray sealers are convenient for even coverage, but brush-on sealers offer more control. Let the sealer cure for at least 24 hours before handling the miniature excessively to ensure a durable, long-lasting finish.
Frequently Asked Questions
What Is the Best Type of Paint for Wood Miniatures?
The best paint for wood miniatures is generally acrylic paint.
- Fast Drying: It dries quickly, allowing you to layer colors without waiting days.
- Water Soluble: You can thin it with water and clean your brushes easily.
- Adhesion: High-quality model acrylics (like Vallejo, Citadel, or Reaper) or craft acrylics adhere very well to primed wood.
- Flexibility: Acrylics have a slight flexibility when dry, which is good for wood that might expand or contract slightly.
Do I Really Need to Use Primer on Wood?
Yes, using primer is highly recommended and almost essential for a good result.
- Absorption: Wood is like a sponge; without primer, it will suck the moisture out of your paint, making it blotchy and dull.
- Grain Filling: Primer helps fill in the microscopic texture of the wood grain, giving you a smoother surface to paint on.
- True Colors: A white or grey primer provides a neutral background so your colors appear bright and vibrant, rather than being darkened by the wood tone underneath.
How Do I Stop the Paint from Bleeding into the Wood Grain?
Paint bleeding is a common issue caused by the capillary action of the wood fibers.
- Seal the Wood: The most effective prevention is a solid coat of primer or a clear sanding sealer before you start painting.
- Thicker Paint: Avoid using overly watered-down washes directly on bare wood.
- Sanding: Proper sanding closes up some of the open pores. If bleeding persists, apply a layer of clear matte medium over the area to create a barrier before applying colored paint.
Can I Use Watercolor Paint on Wood Miniatures?
While you can use watercolors, they behave differently than acrylics.
- Staining Effect: Watercolors will act more like a stain, soaking into the wood and showing the grain through the color.
- Reactivation: Watercolors can be reactivated with water even after drying, so you must seal them perfectly with a spray varnish to prevent smudging.
- Transparency: They are transparent, so you cannot paint light colors over dark ones. They are best for a soft, washed, natural look rather than a bold, opaque finish.
How Do I Fix a Mistake on a Painted Wood Miniature?
Fixing mistakes on wood is relatively easy.
- Wet Paint: If the paint is still wet, quickly wipe it away with a damp brush or a cotton swab.
- Dry Paint: If the mistake has dried, simply paint over it. Acrylics are opaque, so you can cover a stray mark with the base color.
- Sanding: For major texture mistakes (like a glob of paint), wait for it to dry fully, gently sand it smooth with fine sandpaper, and then repaint the area.
Conclusion
Painting wood miniatures is a delightful journey that combines precision with creativity. It transforms simple organic shapes into characters and objects rich with personality. By following the steps outlined above—cleaning, sanding, priming, and layering your paints—you can overcome the challenges of the wooden medium and achieve results that look professional and polished. The key is to respect the material; wood is alive in a way that plastic is not, and preparing it properly is the secret to a great finish.
Now that you have the knowledge of how to paint wood miniatures, it is time to set up your workspace and let your imagination run wild. Whether you are painting a fleet of tiny wooden ships, a village of RPG characters, or a simple dollhouse chair, the skills you have learned here will serve you well. Remember to be patient with yourself, enjoy the process of mixing colors, and take pride in creating something beautiful with your own two hands.
About
Mike May is a distinguished figure in the world of woodworking and timber design, with a decade of expertise creating innovative and sustainable indoor solutions. His professional focus lies in merging traditional craftsmanship with modern manufacturing techniques, fostering designs that are both practical and environmentally conscious. As the author of Woodimber, Mike delves into the art and science of timber-craft, inspiring artisans and industry professionals alike.
Education
RMIT University (Melbourne, Australia)
-
Associate Degree in Design (Timber): Focus on sustainable design, industry-driven projects, and practical craftsmanship.
-
Gained hands-on experience with traditional and digital manufacturing tools, such as CAD and CNC software.
Nottingham Trent University (United Kingdom)
-
Bachelor’s in Woodworking and Product Design (Honors): Specialized in product design with a focus on blending creativity with production techniques.
-
Participated in industry projects, working with companies like John Lewis and Vitsoe to gain real-world insights.
Publications and Impact
In Woodimber, May shares his insights on timber design processes, materials, and strategies for efficient production. His writing bridges the gap between artisan knowledge and modern industry needs, making it a must-read for both budding designers and seasoned professionals.