 (1)")

Finding the perfect desk can feel like a never-ending quest. You scroll through endless furniture websites only to find that everything is either too expensive, the wrong size, or made of cheap particleboard that won’t last a year. There is a simple solution that solves all these problems at once: building it yourself.
Creating your own workspace isn’t just about saving money—though that is a massive perk. It’s about crafting a piece of furniture that fits your specific needs, your room’s dimensions, and your personal style. Whether you need a sprawling surface for multiple monitors or a compact writing nook, wood is a forgiving and versatile material that lets you take control of your environment.
This guide on how to build a desk out of wood will walk you through the entire process, turning a pile of lumber into a sturdy, beautiful desk you’ll be proud to use every day.
The Benefits of Building Your Own Desk
Why bother getting sawdust on your clothes when you could just click “buy now”? The advantages of a DIY approach go far beyond the price tag.
First, customization is key. When you build, you aren’t limited to standard manufacturing dimensions. If you have an awkward alcove that is exactly 43 inches wide, you can build a desk that fits like a glove. You choose the height, the depth, and the finish. You can add built-in cable management, secret compartments, or shelves exactly where you need them.
Second, you get superior quality at a lower price. Most affordable store-bought desks are made of MDF or hollow-core composites. By sourcing your own solid wood or high-quality plywood, you are building an heirloom-quality piece for a fraction of what a high-end furniture store would charge.
Finally, there is the sense of accomplishment. Every time you sit down to work, study, or game, you’ll have the satisfaction of knowing you built the foundation of your productivity with your own hands.
What Will You Need?
Before you head to the hardware store, you need a plan. This list assumes a simple, sturdy table-style desk design, but you can adjust the quantities to fit your specific dimensions.
Materials
- Desktop: Solid wood planks (like 2x6s or 2x8s joined together) or a thick sheet of birch plywood.
- Legs/Frame: 4×4 posts for legs and 2x4s for the apron (the frame under the top that connects the legs).
- Joinery: 2.5-inch pocket hole screws and 2-inch wood screws.
- Glue: High-quality wood glue.
- Finish: Sandpaper (80, 120, and 220 grit), wood stain, and polyurethane or Danish oil.
Tools
- Saws: Miter saw (for crosscuts) and a circular saw or table saw (for ripping boards).
- Drill: Cordless drill with driver bits and drill bits.
- Pocket Hole Jig: Extremely helpful for hiding screws and creating strong joints.
- Sanders: Orbital sander helps speed up the smoothing process.
- Clamps: You can never have too many; you’ll need long bar clamps for the tabletop.
- Safety Gear: Safety glasses, ear protection, and a dust mask.
- Measuring: Tape measure, speed square, and a level.
10 Easy Steps on How to Build a Desk Out of Wood
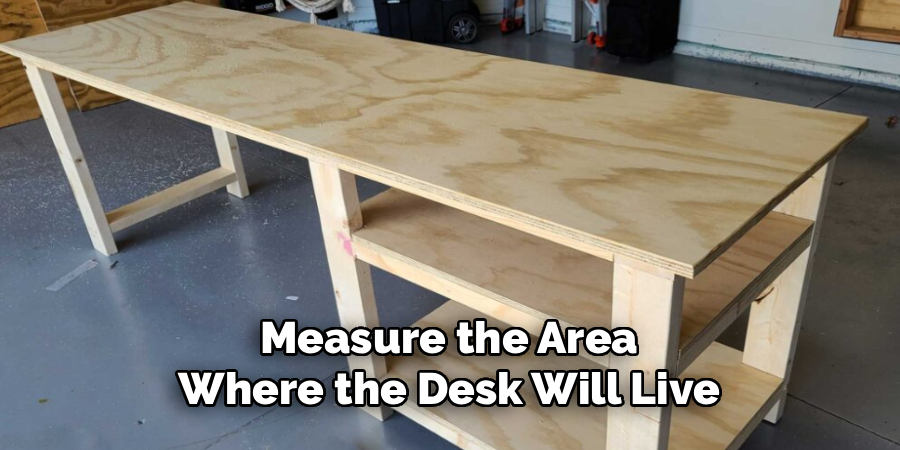
Step 1: Design and Measure Your Space
The most critical work happens before you cut a single piece of wood. Measure the area where the desk will live. Standard desk height is usually between 28 and 30 inches. A comfortable depth is often 24 to 30 inches. Sketch your design on paper. Decide if you want a simple four-leg table or if you want storage cabinets as the base. Creating a cut list based on your sketch will save you from buying too much wood or, worse, running out halfway through.
Step 2: Cut Your Lumber to Size
Once you have your lumber, it’s time to process it according to your cut list. Start by cutting your tabletop planks to length. If you are using 2x6s, you might need four or five boards to achieve your desired depth. Next, cut your 4×4 posts for the legs. Remember to account for the thickness of the tabletop when cutting leg height. Finally, cut the 2x4s that will serve as the apron connecting the legs. Always measure twice and cut once to ensure your frame is square.
Step 3: Prepare the Tabletop Boards
If you are building a tabletop from individual boards, you need them to sit flush against each other. Factory edges on construction lumber are slightly rounded. For a seamless look, you may want to rip roughly ¼ inch off the edges of your 2x6s using a table saw to create a crisp, square edge. If you don’t have a table saw, you can leave the rounded edges, which creates a rustic “planked” look with small grooves between boards. Lay them out on the floor to arrange the grain patterns in the most visually appealing way.
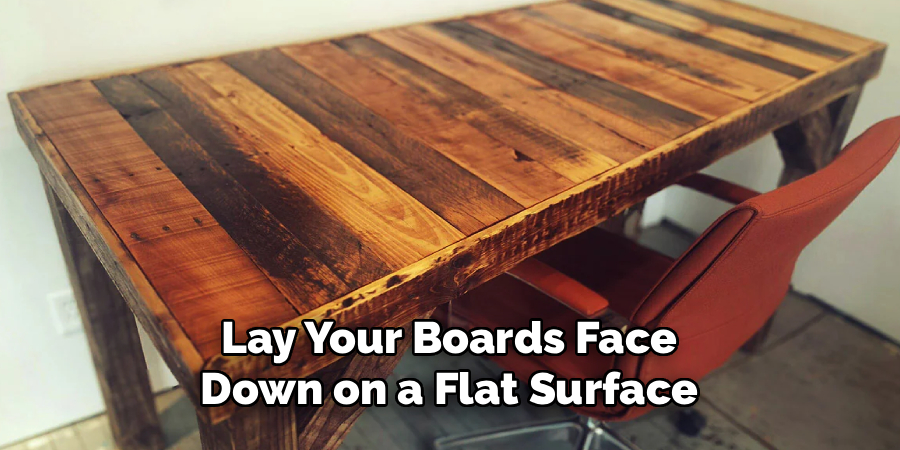
Step 4: Assemble the Tabletop
This is often the most intimidating part, but it is straightforward with the right setup. Lay your boards face down on a flat surface. Apply a bead of wood glue along the edges where the boards meet. Use bar clamps to squeeze the boards together tightly. If you have a pocket hole jig, drill holes along the edges of the underside boards and drive screws to pull them tight. If you don’t have a jig, you can use mending plates or simply rely on the glue and clamps, provided you let it cure for at least 24 hours.
Step 5: Sand the Tabletop Smooth
Once the glue is dry, you will likely have some unevenness where the boards meet. Start with 80-grit sandpaper on your orbital sander to level out the joints and remove any dried glue squeeze-out. This takes patience. Move the sander slowly and evenly across the grain. Once the surface is flat, switch to 120-grit to remove the scratches from the coarse paper. Finish with 220-grit for a surface that feels smooth to the touch. Don’t forget to sand the edges and corners to remove any sharpness.
Step 6: Construct the Leg Frames
While the tabletop is curing or after sanding, build your base. You need to create two side structures first. Attach a short apron piece (the side support) between two legs. If using pocket holes, drill them into the apron piece and screw into the legs from the inside so the screws are hidden. Alternatively, you can use long wood screws driven from the outside of the leg into the apron, creating a more industrial look, especially if you countersink the heads. Ensure the legs are perfectly parallel.
Step 7: Assemble the Full Base Frame
Now connect your two side leg structures with the long apron pieces that run the length of the desk. This completes the skeleton of your desk. Again, use wood glue at every joint for added strength. Use a square tool to ensure every corner is a perfect 90 degrees. If the frame is twisted, your desk will wobble. You can add a support beam across the bottom or middle of the back legs if you want extra stability, though a standard apron is usually sufficient for a writing desk.

Step 8: Attach the Tabletop to the Base
Place your tabletop face down on a soft surface (like a blanket) to protect it. Flip your completed base frame upside down and center it on the underside of the tabletop. Measure the overhang on all sides to ensure it is centered. To attach the top, you have two options. You can use “figure-8” fasteners or Z-clips, which allow the wood to expand and contract with humidity changes. Or, for a simpler approach, drill pocket holes in the apron pointing upward and screw directly into the tabletop. Be careful that your screws aren’t too long, or they will poke through the top surface!
Step 9: Apply Your Finish
Now that the desk is built, it needs protection. If you want to change the color, apply a wood stain using a rag or brush. Wipe off excess stain after a few minutes to ensure an even coat. Let the stain dry completely according to the can’s instructions. Once dry, apply a protective clear coat like polyurethane. Apply a thin coat, let it dry, lightly sand with high-grit sandpaper (300+), and apply a second or third coat. This creates a durable surface that can handle coffee spills and mouse movements.
Step 10: Final Assembly and Setup
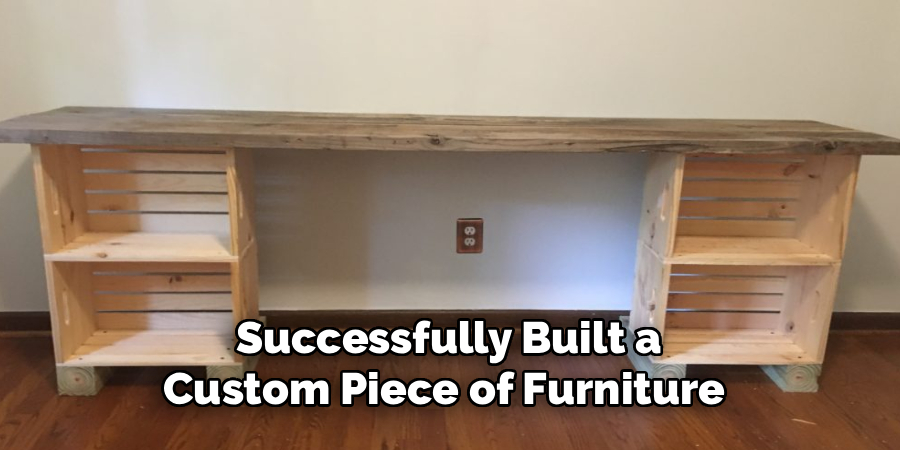
Once the finish has cured—give it a few days to harden fully so you don’t dent it—move the desk into its new home. If you have hard floors, stick felt pads to the bottom of the legs to prevent scratching. Check for wobbles; if the floor is uneven, you may need to shim one leg or use adjustable leveling feet. Set up your computer, add a lamp, and take a moment to admire your work. You have successfully built a custom piece of furniture from scratch.
5 Things You Should Avoid
Building a desk is rewarding, but there are common pitfalls that can ruin your hard work.
- Ignoring Wood Movement: Wood expands and contracts with humidity. If you screw a breadboard end (a board running perpendicular to the main planks) tight without allowing for movement, your table will crack.
- Skipping the Glue: Screws hold wood together, but glue creates the bond. Skipping glue results in a squeaky, wobbly desk over time. Always use wood glue on your joints.
- Rushing the Sanding: It is tempting to jump straight to staining, but poor sanding shows immediately. Stain highlights scratches rather than hiding them. Spend extra time on the prep work.
- Buying Warped Lumber: When shopping, look down the length of every board like a telescope. If it twists, bows, or cups, put it back. You cannot force a twisted board straight easily.
- Forgetting to Pre-drill: Driving a screw near the end of a board without a pilot hole will almost certainly split the wood. Always pre-drill your holes to keep the lumber intact.
Conclusion
Building your own desk is a gateway project into the world of woodworking. It teaches you the fundamentals of structure, joinery, and finishing, all while resulting in a highly functional object.
Hopefully, this guide on how to build a desk out of wood has provided you with the essential tips and tricks for creating a sturdy and attractive desk that will serve you well for years to come.
Don’t be afraid to make errors along the way; they are just part of the character of your piece. Now, grab your tape measure and get started on building the best desk you’ve ever owned.
About
Mike May is a distinguished figure in the world of woodworking and timber design, with a decade of expertise creating innovative and sustainable indoor solutions. His professional focus lies in merging traditional craftsmanship with modern manufacturing techniques, fostering designs that are both practical and environmentally conscious. As the author of Woodimber, Mike delves into the art and science of timber-craft, inspiring artisans and industry professionals alike.
Education
RMIT University (Melbourne, Australia)
-
Associate Degree in Design (Timber): Focus on sustainable design, industry-driven projects, and practical craftsmanship.
-
Gained hands-on experience with traditional and digital manufacturing tools, such as CAD and CNC software.
Nottingham Trent University (United Kingdom)
-
Bachelor’s in Woodworking and Product Design (Honors): Specialized in product design with a focus on blending creativity with production techniques.
-
Participated in industry projects, working with companies like John Lewis and Vitsoe to gain real-world insights.
Publications and Impact
In Woodimber, May shares his insights on timber design processes, materials, and strategies for efficient production. His writing bridges the gap between artisan knowledge and modern industry needs, making it a must-read for both budding designers and seasoned professionals.