 (1)")

There is something undeniably satisfying about running your hand along the smooth grain of a piece of furniture you built yourself. Walking into a furniture store often leads to sticker shock or disappointment in the quality of materials used in mass-produced items. Building your own bookshelf isn’t just about storage; it is about reclaiming the quality and pride that comes with craftsmanship.
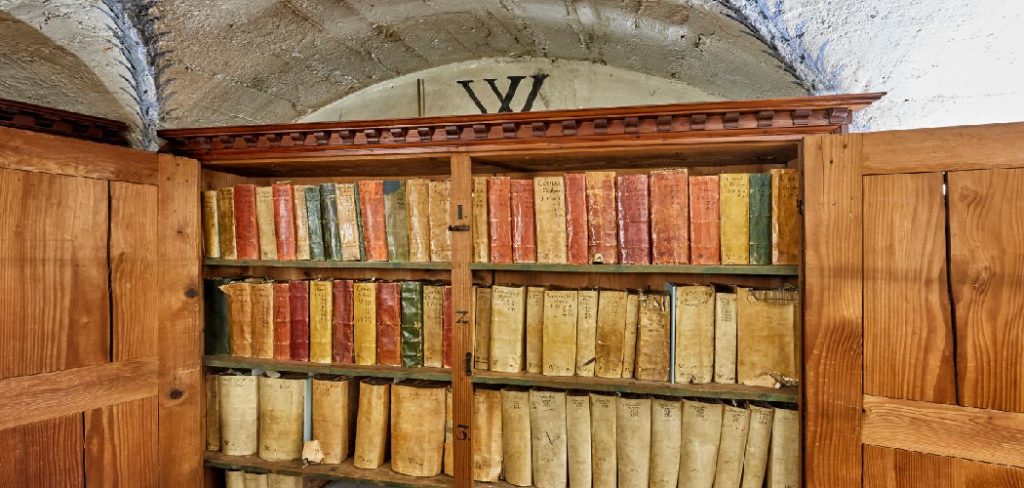
Whether you have a growing library that needs a home or you simply want to display your favorite decor, a custom wooden bookshelf is the perfect weekend project. You don’t need a professional workshop to get started.
This guide on how to make a wooden bookshelf will walk you through the process, turning a pile of lumber into a functional work of art.
What are the Benefits?
Taking the DIY route offers advantages that buying pre-made furniture simply cannot match.
- Customization: You control the dimensions. If you have a weirdly shaped alcove or need specific shelf heights for oversized art books, you can design it to fit exactly.
- Cost Savings: High-quality wooden furniture is expensive. By purchasing the raw materials and putting in the labor yourself, you often spend a fraction of the cost of a comparable retail item.
- Quality Control: You choose the wood. Instead of particleboard that bows under weight, you can select solid pine, oak, or high-grade plywood that will stand the test of time.
- Skill Development: This project is a gateway. The joinery, measuring, and finishing skills you learn here apply to almost any future woodworking project, from tables to cabinets.
What Will You Need?
Before you head to the lumber yard, gather your supplies. This list assumes a standard 4-foot by 6-foot bookshelf, but you can adjust quantities based on your design.
Materials:
- Lumber: 1×10 or 1×12 boards for the frame and shelves (Pine is affordable and easy to work with).
- Backing Material: ¼ inch plywood sheet.
- Wood Glue: Essential for strong joints.
- Screws: 1 ¼ inch and 2-inch wood screws (or pocket hole screws if using a jig).
- Sandpaper: Assorted grits (80, 120, and 220).
- Finish: Wood stain, polyurethane, or paint.
Tools:
- Circular Saw or Miter Saw: For cutting boards to length.
- Power Drill: For driving screws and drilling pilot holes.
- Measuring Tape: Accuracy is key.
- Speed Square: To ensure your cuts and joints are 90 degrees.
- Clamps: To hold pieces in place while you work.
- Safety Gear: Safety glasses and ear protection are mandatory.
10 Easy Steps on How to Make a Wooden Bookshelf
Step 1: Plan Your Dimensions and Design
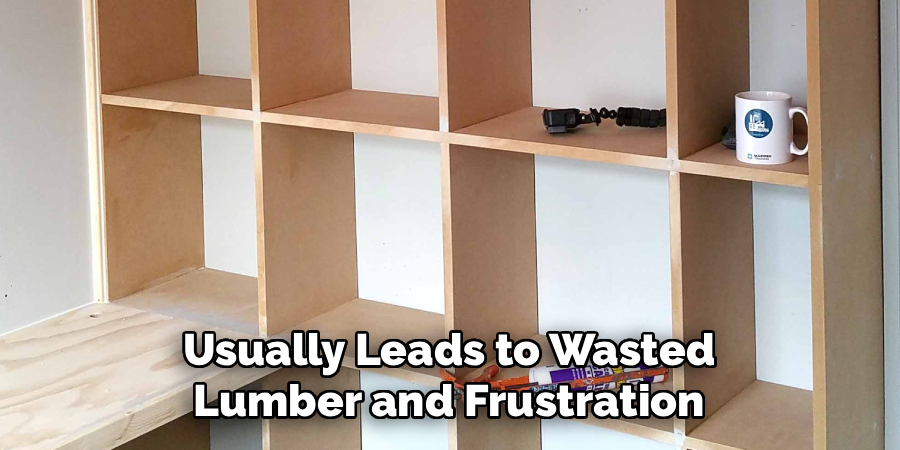
Before you make a single cut, you need a roadmap. Woodworking requires precision, and “winging it” usually leads to wasted lumber and frustration. Start by measuring the space where the bookshelf will live. Consider the height of the ceiling and the width of the floor space. Sketch your design on paper.
Determine how many shelves you want and the spacing between them. A standard book height is around 9 to 11 inches, but if you have vinyl records or large binders, you might need 13 inches or more. Calculate the exact length of every board you need—the two side panels, the top, the bottom, and the individual shelves. This creates your “cut list,” which acts as your bible for the next few steps.
Step 2: Select and Purchase Your Lumber
Head to your local lumber yard or home improvement store with your cut list in hand. Do not just grab the first board off the stack. Lumber can be warped, twisted, or bowed, which makes building square furniture nearly impossible. Sight down the length of the board like you are aiming an arrow to check for straightness. Avoid boards with large, loose knots that might fall out or compromise the structural integrity.
If you are a beginner, solid pine boards (often labeled as “common board”) are excellent because they are soft, easy to cut, and take stain well. If you are using plywood, ask the store to rip the large sheets down to your shelf depth (usually 10 or 12 inches) to make them easier to transport and handle.
Step 3: Measure and Mark Your Cuts
Once you are back in your workspace, it is time to transfer your plan to the wood. Use your tape measure to mark the lengths for your side panels, top, bottom, and shelves. Remember the carpenter’s golden rule: measure twice, cut once. Use a sharp pencil for a fine line rather than a thick marker, which can throw off your accuracy. After measuring the length, use your speed square to draw a straight line across the width of the board.
This line guides your saw. If you are making multiple shelves of the exact same length, measure the first one, cut it, and then use that cut piece as a template to mark the others. This ensures they are identical, even if your tape measure reading varies slightly.
Step 4: Cut the Wood to Size
Set up your saw in a safe, stable environment. If you are using a circular saw, support your lumber on sawhorses. Align your saw blade with the “waste side” of your pencil line—meaning the blade should cut into the scrap wood, not your measured piece. If you cut directly on the line, your board will be slightly shorter than intended due to the width of the saw blade (known as the kerf).
Cut your two tall side panels first, then the top and bottom pieces, and finally your shelves. Take your time and let the saw do the work; forcing it can cause splintering or kickback. After cutting, stack your shelves together to ensure they are perfectly uniform.
Step 5: Sand All Pieces Thoroughly
Sanding is often the step beginners skip or rush, but it is the secret to a professional finish. It is much easier to sand your boards now, while they are flat and disassembled, than after the bookshelf is built. Start with 80-grit sandpaper to remove any rough mill marks or splinters from the lumber yard.
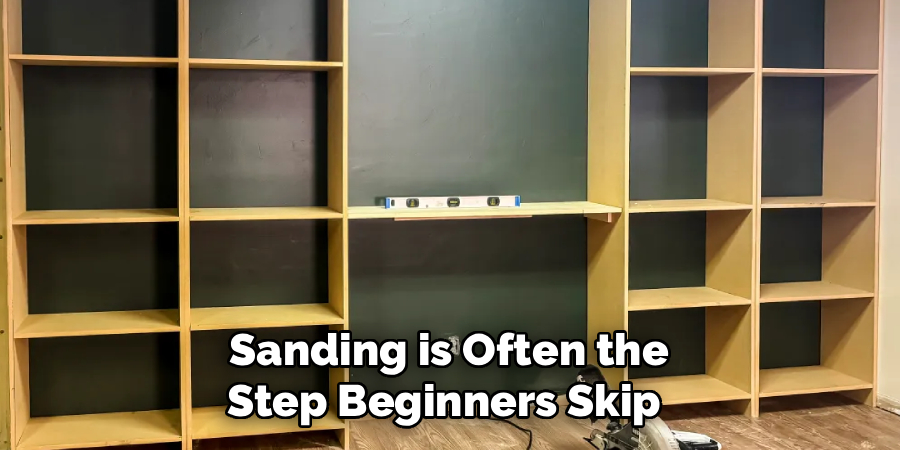
Use a random orbital sander if you have one, moving with the grain of the wood. Once the rough spots are gone, switch to 120-grit for smoothing. Finally, finish with 220-grit to prepare the surface for staining. Pay special attention to the cut ends, which soak up more stain than the face of the board; sanding them to a higher grit helps control this absorption.
Step 6: Create Pocket Holes or Pilot Holes
Joinery is how you connect the pieces. The two most common methods for DIYers are pilot holes or pocket holes. If you have a pocket hole jig, drill holes into the ends of your shelves and the top/bottom pieces. This allows you to hide the screws on the underside or inside of the shelf.
If you do not have a jig, you will screw through the outside of the side panels into the ends of the shelves. For this method, you must drill pilot holes first. A pilot hole is a small hole slightly smaller than your screw shank. It creates a path for the screw and prevents the wood from splitting, which is very common near the ends of boards.
Step 7: Assemble the Main Frame
Clear a large, flat area on the floor or a workbench. You will start by building the outer box. Lay one side panel flat and apply a bead of wood glue to the edge of the top piece. Position the top piece against the top of the side panel, ensuring the corners are flush and square using your speed square. Clamp it in place if possible.
Drive your screws through your pilot holes or pocket holes to secure the joint. Repeat this process for the bottom piece. Then, attach the second side panel to complete the rectangular frame. Wipe away any excess glue immediately with a damp rag; dried glue will not take stain and will leave ugly splotches on your finish.
Step 8: Install the Interior Shelves
With the outer frame built, stand the bookshelf upright or lay it on its back. Refer to your original design for shelf spacing. Mark the location of each shelf on the inside of both side panels. It is helpful to cut two blocks of scrap wood to the exact height of the space between shelves.

You can use these spacers to support the shelf while you screw it in, ensuring it is perfectly level without needing to juggle a measuring tape and a drill simultaneously. Apply glue to the ends of each shelf before sliding it into place. Drive your screws in to secure them. Ensuring these shelves are tight and level helps keep the entire unit square and stable.
Step 9: Attach the Backing
Many first-time builders think the thin backing board is just for looks, but it actually provides crucial structural stability. Without a back, a tall bookshelf can “rack,” or lean side-to-side like a parallelogram. Lay your assembled bookshelf face down on the floor. Place your cut sheet of ¼ inch plywood or hardboard over the back.
Ensure the unit is square by measuring diagonally from corner to corner—the measurements should be identical. If they aren’t, nudge the frame until they match. Once square, tack the backing board in place using small finishing nails or a staple gun, spacing them about every 6 inches along the sides and shelves.
Step 10: Finish and Seal Your Bookshelf
The construction is done; now it is time to make it look beautiful. Do a final check for any glue spots or rough patches you missed. If you are painting, apply a coat of primer followed by two coats of your chosen color. If you are staining, apply the stain with a rag or brush, wiping off the excess after a few minutes to achieve your desired depth of color.

Once the stain is dry, you must apply a protective clear coat, such as polyurethane. This protects the wood from scratches and moisture. Apply at least two coats, lightly sanding with high-grit sandpaper in between coats for a glass-smooth finish. Let it cure fully before loading it up with books.
Conclusion
How to make a wooden bookshelf is a journey that transforms raw materials into a cherished part of your home. It moves you from being a consumer to a creator. While the first cut might feel intimidating, breaking the project down into these manageable steps makes it accessible for anyone.
The minor imperfections in your first build aren’t mistakes; they are signatures of a handcrafted item.
So, grab your tape measure, clear your workspace, and start building something that will hold your stories for years to come.
About
Mike May is a distinguished figure in the world of woodworking and timber design, with a decade of expertise creating innovative and sustainable indoor solutions. His professional focus lies in merging traditional craftsmanship with modern manufacturing techniques, fostering designs that are both practical and environmentally conscious. As the author of Woodimber, Mike delves into the art and science of timber-craft, inspiring artisans and industry professionals alike.
Education
RMIT University (Melbourne, Australia)
-
Associate Degree in Design (Timber): Focus on sustainable design, industry-driven projects, and practical craftsmanship.
-
Gained hands-on experience with traditional and digital manufacturing tools, such as CAD and CNC software.
Nottingham Trent University (United Kingdom)
-
Bachelor’s in Woodworking and Product Design (Honors): Specialized in product design with a focus on blending creativity with production techniques.
-
Participated in industry projects, working with companies like John Lewis and Vitsoe to gain real-world insights.
Publications and Impact
In Woodimber, May shares his insights on timber design processes, materials, and strategies for efficient production. His writing bridges the gap between artisan knowledge and modern industry needs, making it a must-read for both budding designers and seasoned professionals.