 (1)")

Building your own props and historical replicas brings a special kind of satisfaction. Whether you need a costume piece for a weekend festival, a fun backyard project to enjoy with your family, or a decorative item for your wall, creating your own gear is incredibly rewarding. Working with lumber might seem intimidating at first, but the process is actually quite straightforward. You only need a few basic tools and a bit of patience to get great results.
If you have ever wondered exactly how to make a shield out of wood, you are in the perfect place. We will walk you through the entire process from selecting the right materials to adding the final straps. You do not need a professional workshop or advanced carpentry skills to succeed here. By following clear instructions, you can craft a sturdy and visually impressive piece. Gather your supplies, clear off a sturdy workbench, and let us dive into this exciting crafting adventure.
Step-By-Step Guide: How to Make a Shield Out of Wood
Step 1: Gather Your Necessary Supplies
Before you begin cutting or sanding, you must gather all the required materials in your workspace. Having everything within arm’s reach prevents frustrating interruptions later. You will need a sturdy piece of plywood, a jigsaw, a power sander or sandpaper blocks, wood glue, and heavy leather strips for the handles. You should also grab a tape measure, a pencil, and some sturdy clamps to hold the board secure.

Safety comes first, so make sure you have safety glasses and a dust mask ready to wear. Organizing your bench right now sets a calm, focused tone for the rest of the build.
Step 2: Choose and Prep the Plywood Board
Selecting the correct lumber determines the overall weight and durability of your project. A half-inch thick sheet of birch or pine plywood offers the best balance between strength and manageable weight. Thicker boards become incredibly heavy to hold on your arm, while thinner boards might warp or snap under pressure. Lay your chosen plywood flat on your workbench and wipe down the surface with a dry cloth to remove any dust. Inspect the board for deep scratches or knots that might cause problems during the cutting phase. Finding a clean, smooth section ensures your final piece looks fantastic.
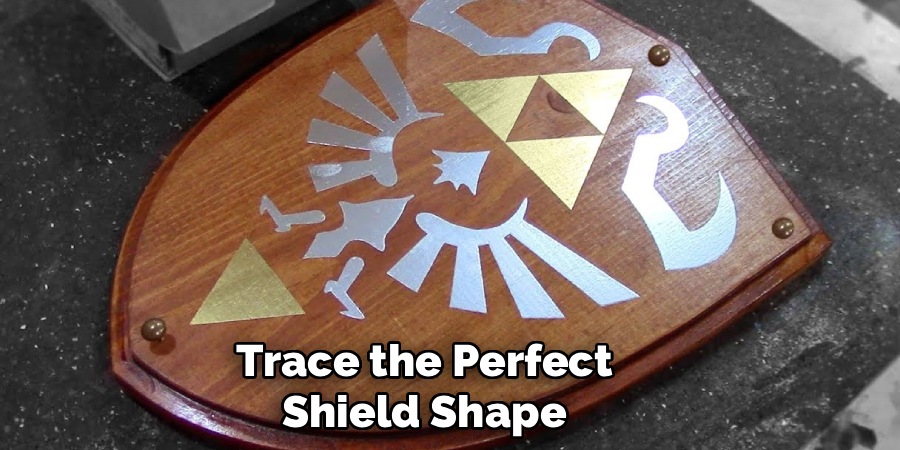
Step 3: Trace the Perfect Shield Shape
Drawing your design directly onto the wood requires a steady hand and a bit of planning. You can choose a classic round shape, a traditional kite style, or a flat-topped heater design. For a round design, tie a string to a pencil, pin the other end to the center of your board, and draw a perfect circle. If you prefer a kite shape, use a long ruler to measure and mark symmetrical lines down the center. Take your time during this step to ensure both sides look perfectly even. Darken your final pencil lines so you can see them clearly over the sawdust.
Step 4: Cut the Wood with a Jigsaw
When you research how to make a shield out of wood, cutting the shape is often the most intimidating part. You must secure your plywood to the edge of the workbench using heavy clamps. Put on your safety glasses and carefully align the jigsaw blade with your dark pencil line. Turn the saw on and let the tool do the work, pushing it slowly forward without forcing the blade. If you cut too quickly, the wood might splinter along the edges. Pause and reposition your clamps as needed to keep the board completely stable while you navigate around the curves.
Step 5: Sand the Edges for a Smooth Finish
After cutting out your shape, the edges will feel rough and likely contain sharp splinters. Grab a power sander with medium-grit sandpaper and gently run it along the entire perimeter. You want to round over the sharp corners to make the piece safe to handle and visually appealing. Once the edges feel smooth, switch to a fine-grit sandpaper and lightly buff the broad front and back faces of the board. This removes any leftover pencil marks and prepares the surface to absorb color evenly. Wipe the entire piece down with a slightly damp cloth to clear away the fine sawdust.
Step 6: Stain or Paint the Wood Surface
Applying color brings your creation to life and protects the material from moisture. If you want a rugged, historical look, apply a dark walnut or oak wood stain using a clean rag. Let the stain soak into the grain for a few minutes before wiping away the excess liquid. For a brighter, customized design, use high-quality acrylic paints to brush on your favorite patterns or family crests. Allow the first coat to dry completely before adding any secondary colors or detailed borders. Finishing the surface with a clear polyurethane spray seals the paint and adds a beautiful, protective shine.
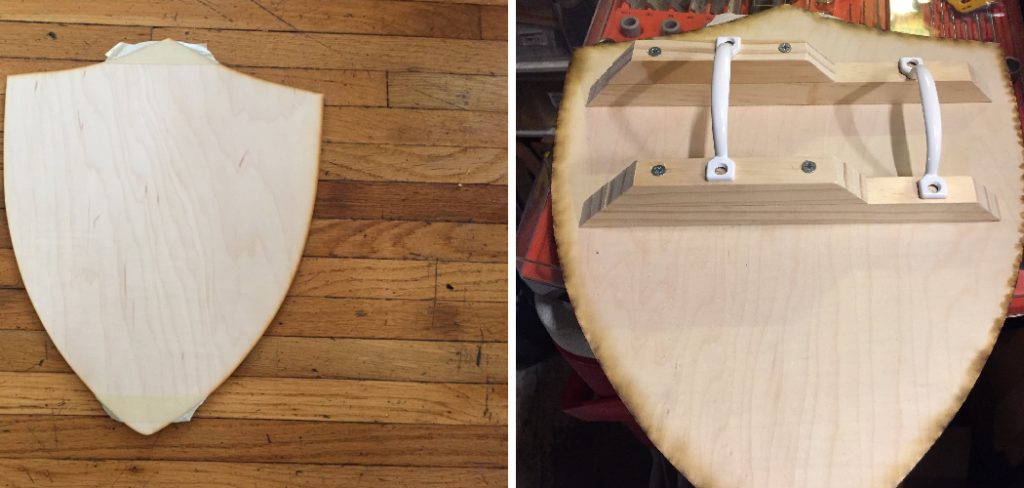
Step 7: Attach the Leather Arm Straps
Holding your finished piece requires sturdy and comfortable straps mounted to the back. Measure your forearm and cut two pieces of thick leather to serve as your handle and arm brace. Position the leather straps securely on the back of the board, ensuring they sit at a comfortable angle for your natural grip.
Fasten the leather strips down using short, wide-headed wood screws and metal washers to prevent the leather from tearing under pressure. Test the fit by sliding your arm through the straps, making any necessary adjustments to the tension before you tighten the screws completely.
Advanced Finishing Techniques
For advanced finishing techniques, consider sanding the edges of the board to achieve a smooth, rounded finish, which will improve both the look and feel of the device. Next, apply a wood stain or paint to enhance the board’s appearance and protect it from moisture and wear. If you opt for a stained finish, use multiple coats and sand lightly between applications to ensure an even tone and professional-level smoothness.
For maximum durability, seal the surface with a clear polyurethane or epoxy finish, as this will provide a glossy, resilient coating that resists scratches and environmental damage. To add a touch of customization, consider engraving designs into the surface or applying decals before the final sealant is applied. These steps will not only extend the lifespan of your board but also give it a polished and unique aesthetic.
Frequently Asked Questions
What Kind Of Wood Is Best For A Shield?
Plywood remains the absolute best choice for beginners making their first prop.
- Birch plywood offers a very smooth finish and excellent durability.
- Pine plywood is budget-friendly and easy to find at any hardware store.
- Solid wood planks can split easily down the grain, whereas plywood features cross-layered construction for maximum stability.
Can I Use Hand Tools Instead Of Power Tools?
You can absolutely complete this project using traditional hand tools if you prefer a quiet, manual approach.
- A hand saw or coping saw works perfectly for cutting out the main shape.
- Traditional sanding blocks will smooth the edges, though it requires more physical effort.
- Hand tools often provide greater control for beginners who feel nervous around loud power equipment.
How Do I Curve The Wood For A Realistic Look?
Creating a curved surface requires an advanced technique called wood bending.
- You must soak thin layers of wood in hot water to make them flexible.
- The wet wood is strapped over a curved mold and left to dry completely.
- Several thin, curved layers are then glued together to hold the permanent shape.
- Beginners should stick to flat designs first before attempting this complex process.
What Type Of Paint Works Best On Wooden Shields?
Acrylic paint serves as the most versatile and vibrant option for decorating lumber.
- It dries very quickly, allowing you to add multiple layers in a single afternoon.
- Acrylics bond tightly to sanded wood surfaces without chipping easily.
- You should always seal acrylic paint with a clear topcoat to protect your design from outdoor moisture and dirt.

How Thick Should The Wood Be For Durability?
Selecting the right thickness guarantees your project survives basic handling without breaking your arm.
- Half-inch thick plywood provides the perfect middle ground between toughness and weight.
- Quarter-inch wood feels too flimsy and might warp when you apply wet paint or stain.
- Three-quarter-inch wood offers incredible strength but quickly becomes too heavy to carry comfortably for long periods.
Conclusion
Creating your own props from scratch provides a wonderful opportunity to learn basic woodworking skills while producing something truly unique. From carefully selecting the right piece of plywood to securing the comfortable leather straps, every phase of the project allows you to express your personal creativity. The effort you put into sanding the edges and applying the perfect paint job directly translates into a beautiful finished product.
Now that you know how to make a shield out of wood, it is time to grab your materials and start building. Do not worry if your first attempt has a few imperfections; those small quirks just add character and history to your piece. Set up your workspace, double-check your measurements, and enjoy the relaxing process of shaping raw lumber into something spectacular.
About
Mike May is a distinguished figure in the world of woodworking and timber design, with a decade of expertise creating innovative and sustainable indoor solutions. His professional focus lies in merging traditional craftsmanship with modern manufacturing techniques, fostering designs that are both practical and environmentally conscious. As the author of Woodimber, Mike delves into the art and science of timber-craft, inspiring artisans and industry professionals alike.
Education
RMIT University (Melbourne, Australia)
-
Associate Degree in Design (Timber): Focus on sustainable design, industry-driven projects, and practical craftsmanship.
-
Gained hands-on experience with traditional and digital manufacturing tools, such as CAD and CNC software.
Nottingham Trent University (United Kingdom)
-
Bachelor’s in Woodworking and Product Design (Honors): Specialized in product design with a focus on blending creativity with production techniques.
-
Participated in industry projects, working with companies like John Lewis and Vitsoe to gain real-world insights.
Publications and Impact
In Woodimber, May shares his insights on timber design processes, materials, and strategies for efficient production. His writing bridges the gap between artisan knowledge and modern industry needs, making it a must-read for both budding designers and seasoned professionals.