 (1)")

Creating beautiful, perfectly symmetrical ribbons for gifts, wreaths, and holiday decorations often frustrates even the most dedicated crafters. Tying uniform loops by hand requires intense coordination and finger strength, which easily leads to hand cramps and uneven results. A specialized crafting jig solves this problem instantly by holding your ribbon securely in place while you work. When you figure out how to make a wooden bow maker, you unlock the ability to design professional-grade decorations right at your kitchen table.
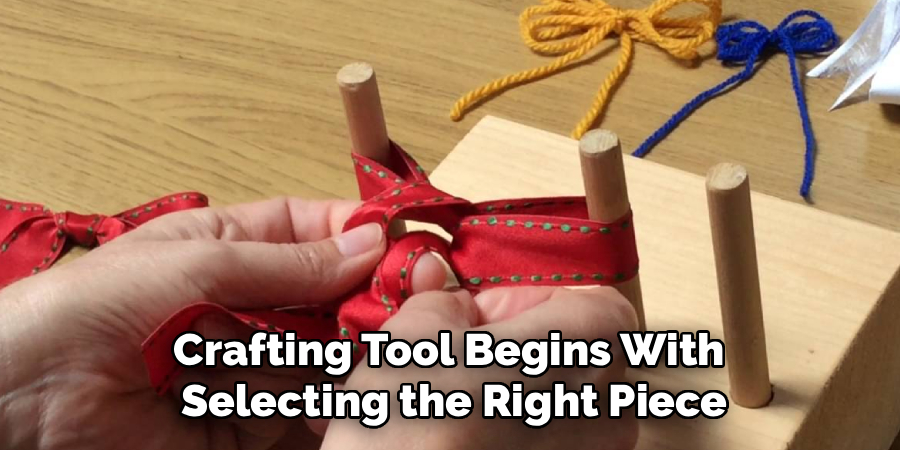
Crafting this simple device requires only basic materials and minimal woodworking experience. You do not need an extensive workshop or expensive machinery to achieve fantastic results. A solid base and a few well-placed dowels give you all the leverage needed to loop, twist, and tie complex ribbon arrangements. By building your own custom jig, you tailor the dimensions exactly to your specific crafting needs. We will walk you through the entire process from start to finish, ensuring you build a sturdy, reliable tool that lasts for years.
Why Build Your Own Bow Maker
Purchasing plastic crafting tools from a big-box craft store might seem like the easiest route, but those mass-produced devices often lack durability. Flimsy plastic bases bend under the tension of thick wire-edged ribbons, resulting in uneven loops and frustrating crafting sessions. Plastic pegs also snap off easily if you pull your binding wire too tight. Building a solid timber device gives you a heavy, stable foundation that will never shift around on your table while you work.
Creating your own tool also saves you a significant amount of money over time. You likely already have scrap lumber sitting in your garage that will work perfectly for this project. Instead of spending premium prices on branded crafting accessories, you can upcycle discarded materials into something incredibly useful. The satisfaction of using a tool you constructed yourself adds a wonderful layer of pride to every decorative piece you create.
Step-By-Step Guide To How to Make a Wooden Bow Maker
Step 1: Gather Materials
To get started with your wooden bow maker project, gather the following materials:
- Scrap lumber (preferably hardwood)
- Saw (hand or power saw)
- Sandpaper
- Clamps
- Drill and drill bits
- Wood glue
- Ruler or measuring tape
- Pencil or marker
Step 2: Design Your Bow Maker
Before cutting any wood, it’s important to have a clear plan for your bow maker. This will ensure that all pieces are cut accurately and fit together properly.
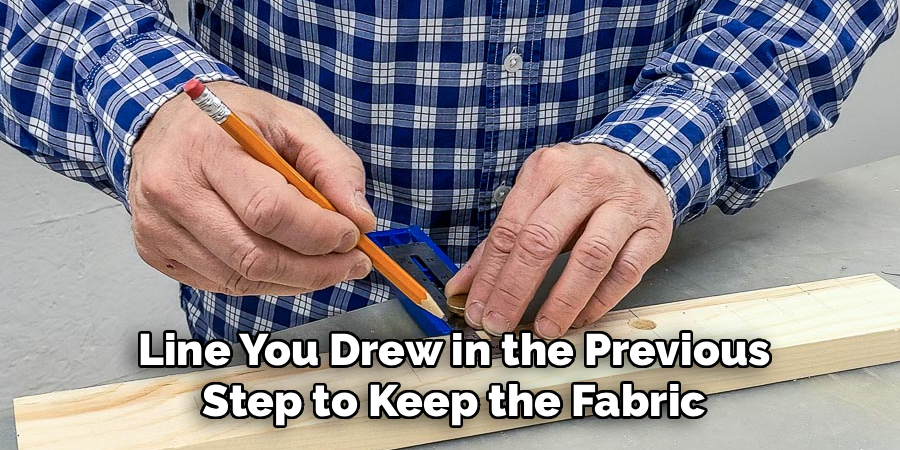
Sketch out your design on paper first, taking into consideration the size of bows you want to create and the dimensions of your scrap lumber. A basic design may include two long pieces
of wood for the base and a shorter piece across the top to hold the pegs. Make sure to mark where the pegs will be placed, as they will hold the ribbon securely while you create your bows. Double-check your measurements to ensure everything aligns properly before proceeding to the next step. Accurate planning at this stage will save time and reduce errors during assembly.
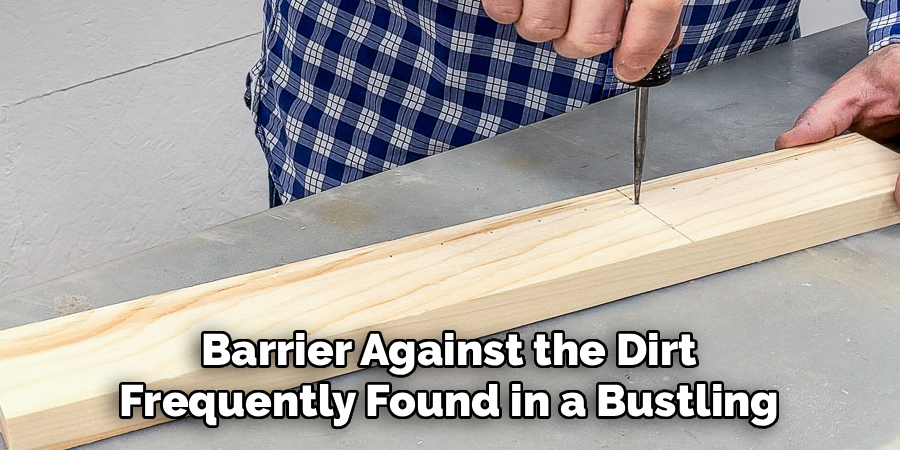
Step 3: Cut and Prepare Wood Pieces
Once you have your design a wood from raised beds and measurements finalized, it’s time to cut the wood pieces for your ribbon board. Use a saw to carefully cut the lumber according to your marked measurements. If you aren’t experienced with power tools, consider enlisting the help of someone who is or using pre-cut wooden pieces from a craft store.
After cutting the pieces, sand down any rough edges and corners to create a smooth surface. This not only gives the finished product a polished look but also helps prevent any splinters while handling the board.
Step 4: Assemble the Bow Maker
Once you have all the necessary materials and pieces, it’s time to assemble your ribbon board! Start by laying out the wooden pieces on a flat surface in front of you. Take two of the longer pieces and place them parallel to each other, with about 5 inches of space between them. These will serve as the vertical sides of your bow maker.
Next, take one of the shorter pieces and lay it across the top of the two vertical pieces, creating a “T” shape. Use wood glue or small nails to secure this piece in place on both sides.
Step 5: Optional Features
Once your basic ribbon board is assembled, you can add some optional features to make it even more functional. These features may include:
- Adding a dowel rod or small hooks along the bottom of the board for hanging spools of ribbon.
- Attaching a small basket or tray to one side of the board for holding scissors, tape, and other crafting supplies.
- Painting or staining the wood pieces to add color and personalization to your ribbon board.
- Adding decorative accents such as wooden cutouts or stenciled designs.
- Using different sizes and shapes of wood pieces to create unique patterns on your ribbon board.
Feel free to get creative and customize your ribbon board according to your specific needs and preferences.
Step 6: Drilling Holes Into The Base
You must drill the holes straight down so your upright pegs do not lean at awkward angles. Match your drill bit size exactly to the diameter of the dowel rod you purchased earlier. Carefully drill down into each pencil mark you made along the center line. Do not drill completely through the bottom of the board, as you want the pegs to rest firmly against a solid bottom. Stop drilling when you reach roughly half an inch into the thickness of the timber.
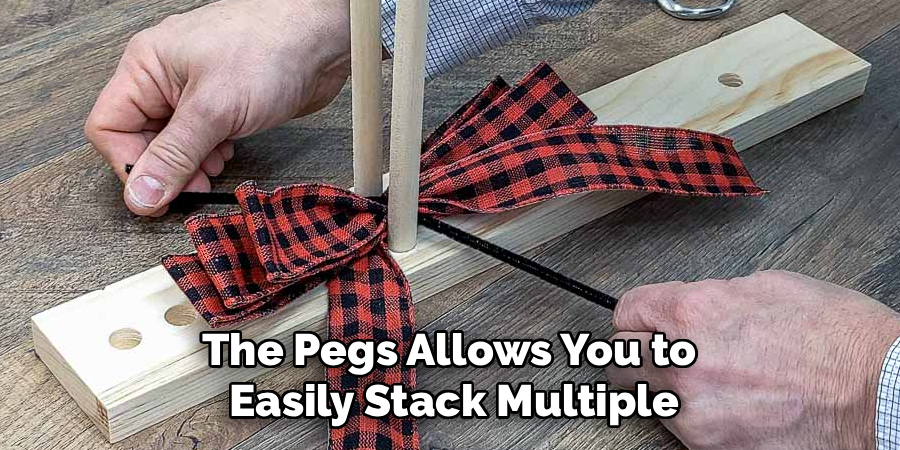
Step 7: Preparing And Inserting The Dowels
Take your long dowel rod and cut two identical pieces, each measuring roughly six to eight inches long. Use your sandpaper to smooth the tops of these freshly cut pegs so they slide smoothly against your delicate materials. Test the fit by pushing the pegs into the holes you drilled into the base board. They should fit snugly without wobbling, yet remain loose enough to pull out and move to different positions. If they feel too tight, lightly sand the bottom edges until they fit perfectly.
Step 8: Finishing Touches
The final assembly phase ensures your new device feels smooth and functions flawlessly for all your creative endeavors. Wipe the entire assembly down with a clean, dry cloth to remove any lingering sawdust from the surface. You can leave the timber entirely natural or rub a thin coat of mineral oil over the surface to protect it from drying out. Store the upright pegs in the center holes so they do not get lost between your crafting sessions. Your custom tool now stands completely ready for action.
Frequently Asked Questions
What Type Of Wood Works Best For This Project?
Hardwoods like oak, maple, or walnut provide the most stability and durability for this specific crafting tool. These dense materials offer a heavy base that actively prevents the device from sliding across your table while you pull tension on stiff ribbons. However, standard pine or whitewood serves as a perfectly acceptable alternative for beginners. Pine costs significantly less and remains much easier to cut and drill using basic household hand tools.
How Far Apart Should The Holes Be Drilled?
Spacing your adjustment holes exactly one inch apart provides the most versatile range of options for standard crafting projects. This uniform measurement allows you to scale your designs up or down with incredible precision. If you plan to create exceptionally small hair accessories, you might want to drill holes spaced half an inch apart near the center. Customizing the spacing entirely depends on the specific types of decorations you plan to build most frequently.
Do I Need Power Tools To Build This?
You do not absolutely need heavy machinery or expensive power tools to construct this simple device. A basic manual hand saw works perfectly fine for cutting the base board to your desired length. You will need a standard handheld power drill to create the holes for the pegs, as doing this manually takes considerable effort. Basic household tools easily handle the workload required for this straightforward weekend woodworking project.
How Thick Should The Dowel Rods Be?
A dowel rod measuring three-eighths of an inch in diameter provides the ideal balance between structural strength and practical usability. If you use a rod that is too thin, it will snap under the pressure of tight wire bindings. If you choose a rod that is overly thick, it creates awkward, bulky centers in your delicate ribbon arrangements. The three-eighths measurement holds up against heavy tension while allowing your fabric to wrap tightly.
Can I Paint Or Stain The Finished Tool?
You can certainly apply paint or wood stain to customize the appearance of your new crafting device. Many crafters enjoy painting their boards to match the decor of their creative workspace. If you choose to apply a finish, you must ensure it dries completely before letting it touch your expensive ribbons. Avoid getting thick paint inside the drilled holes, as this will prevent your dowel rods from fitting properly.
Conclusion
Building your own crafting jig completely transforms how you handle decorative ribbon and holiday arrangements. A sturdy timber base paired with adjustable upright pegs gives you the precise control needed to form flawless, symmetrical loops without hand fatigue. Once you master how to make a wooden bow maker, you eliminate the frustration of uneven, floppy decorations for good. Gather your scrap lumber, measure carefully, and assemble this incredibly useful device today. Your future self will appreciate the smooth, effortless crafting experience every time the holiday season arrives.
About
Mike May is a distinguished figure in the world of woodworking and timber design, with a decade of expertise creating innovative and sustainable indoor solutions. His professional focus lies in merging traditional craftsmanship with modern manufacturing techniques, fostering designs that are both practical and environmentally conscious. As the author of Woodimber, Mike delves into the art and science of timber-craft, inspiring artisans and industry professionals alike.
Education
RMIT University (Melbourne, Australia)
-
Associate Degree in Design (Timber): Focus on sustainable design, industry-driven projects, and practical craftsmanship.
-
Gained hands-on experience with traditional and digital manufacturing tools, such as CAD and CNC software.
Nottingham Trent University (United Kingdom)
-
Bachelor’s in Woodworking and Product Design (Honors): Specialized in product design with a focus on blending creativity with production techniques.
-
Participated in industry projects, working with companies like John Lewis and Vitsoe to gain real-world insights.
Publications and Impact
In Woodimber, May shares his insights on timber design processes, materials, and strategies for efficient production. His writing bridges the gap between artisan knowledge and modern industry needs, making it a must-read for both budding designers and seasoned professionals.