 (1)")

Restoring wood furniture is a rewarding process that can bring new life to old, worn-down pieces. Whether you have a treasured family heirloom or a thrift-store find, reconditioning wood furniture allows you to preserve its charm and functionality while enhancing its appearance.
With the right tools, techniques, and a bit of patience, you can transform scratched, faded, or damaged surfaces into beautiful, polished pieces that stand the test of time. This guide on how to recondition wood furniture will walk you through the essential steps to successfully recondition your wood furniture.
Signs That Your Wood Furniture Is Begging for Attention
Over time, even the most well-maintained wood furniture can start to show signs of wear and tear. Here are some common indicators that your furniture might be due for a little TLC:
- Surface Scratches and Scuffs: Small scratches or scuff marks can dull the appearance of wood furniture, making it look worn and less vibrant.
- Faded or Discolored Finish: Exposure to sunlight, heat, or moisture can cause the finish to fade or lose its luster over time.
- Water Rings and Stains: Persistent water rings, spills, or other stains can become an eyesore and may penetrate the finish if left untreated.
- Loose or Wobbly Joints: Furniture that creaks or wobbles often indicates loose joints or weakened structural integrity.
- Splintering or Cracks: Visible cracks or splintering in the wood may suggest the need for immediate attention to prevent further damage.
- Peeling or Flaking Varnish: When the varnish or protective coating begins to peel or flake, it leaves the wood susceptible to damage from environmental elements.
Recognizing these signs early can help you take action to preserve the beauty and functionality of your wood furniture, ensuring it remains a cherished item in your home for years to come.
What You’ll Actually Need (And Why You’ll Want It Handy)
To properly maintain and care for your wood furniture, there are a few essential items that you’ll want to have handy. These tools and products will help you keep your furniture looking its best and protect it from potential damage. Here’s what you’ll need:
Microfiber Cloths:
These soft, lint-free cloths are perfect for dusting and polishing delicate wood surfaces without scratching or leaving behind residue.
Wood Cleaner:
A gentle, non-abrasive wood cleaner is ideal for removing surface dirt and grime without causing damage to the finish of your furniture.
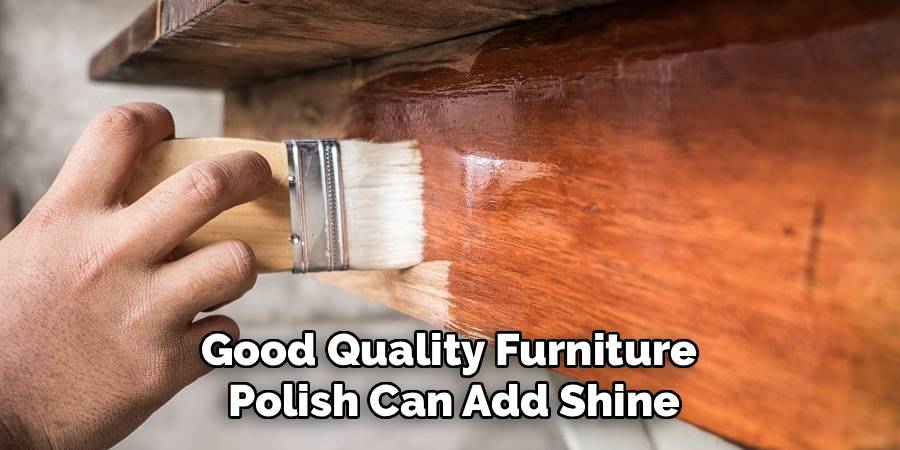
Furniture Polish:
A good quality furniture polish can add shine and protection to your wood furniture while also helping to repel dust and keep it looking new.
Beeswax or Carnauba Wax:
For a more natural, eco-friendly option, beeswax or carnauba wax can be used to condition and protect wood surfaces. These waxes are also great for adding a beautiful shine to your furniture.
7 Simple Steps on How to Recondition Wood Furniture
Step 1: Clean What’s Really There
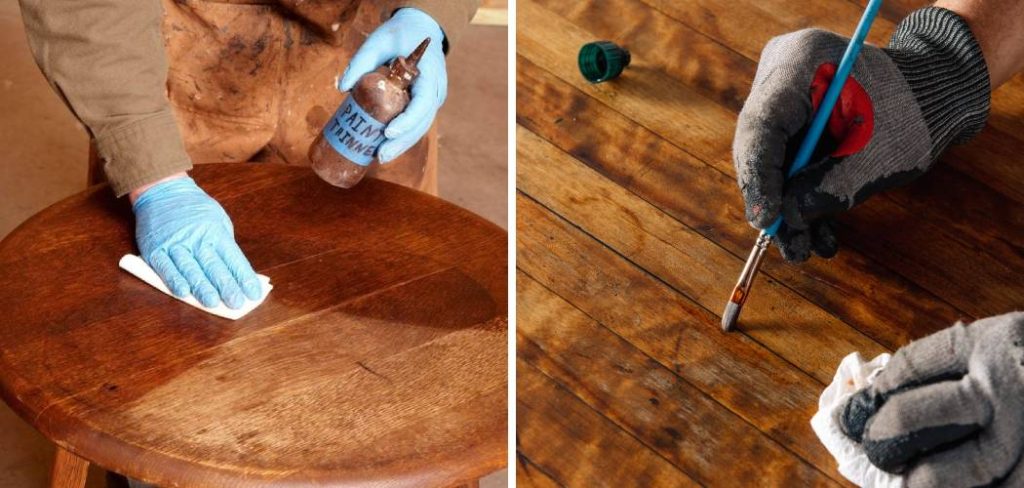
Start by facing whatever sticky, filmy situation is lingering on the surface. Years of “just dusting” rarely cut it. You want to take off the invisible grime—old oils, sweat, remnants of wax—before hoping for any real transformation. Throw a dash of mild dish soap into a bucket of warm water (not too soapy), and use a soft, wrung-out rag or—if you’re extra cautious—a non-abrasive sponge. The goal isn’t to soak the thing; keep water to a minimum. Wood and moisture are uneasy neighbors. After your initial pass, wipe it down with a rag dampened in clean water to whisk away leftover suds. Give it space and time to dry out—open a window, wait until it feels bone-dry to the touch. Rushing this bit tends to come back and haunt you.
Step 2: Patch, Glue, and Play Detective
This is your chance to poke, prod, and see what quirks the piece has picked up. A wobbly chair or a dresser with a suspicious lean? Wood glue and some clamps will sort most of that, provided you don’t mind a DIY project turning briefly into a lesson in patience—glue doesn’t rush for anyone. For deeper scratches or those strange dents that seem permanent, pack a bit of wood filler in with a putty knife. Don’t worry about being too neat: leave it slightly raised since most fillers shrink as they set. After it’s good and hard (and you’ve had coffee or gone to bed), sand the patched areas flat, so they seamlessly merge with the rest of the piece. It’s more about blending than perfection—no need to agonize over the invisible.
Step 3: Face the Finish—Remove What Needs Removing
If you’re dealing with crusty varnish or peeling paint, don’t bother tiptoeing around it. There’s freedom in admitting defeat and starting from scratch. Slap on a thick layer of chemical stripper (use whatever brush you’re happy to sacrifice), but follow safety instructions unless you fancy stinging eyes and regrets. You’ll notice the finish lifting and bubbling, usually within a quarter of an hour, sometimes sooner. Scrape with a plastic scraper (wood’s soft, and metal scrapes mistakes right through the layer you’re trying to save). Stubborn? Go again—a second coat often nudges ornery spots off. After the worst is gone, wipe it all down with mineral spirits to neutralize and clean off residue. Expect it to be a little messy.

Step 4: Sand Without Mercy (But With Sense)
Here’s where impatience can cost you. Begin with 120-grit sandpaper, knocking off whatever remains of the finish and smoothing out repairs. Sand with the grain. Going cross-grain is an easy way to create ugly lines that leap out after staining. Switch over to finer 220-grit for the last pass—aim for a slippery, velvety feel under your hand. This is also the moment to close your eyes and run your palm over the piece—you’ll pick up any roughness you might otherwise miss. Give everything a final swipe with a tack cloth to gather even the invisible dust.
Step 5: Don’t Skip the Conditioner (You’ll Thank Yourself)
It’s tempting to rush ahead—but prepping with a pre-stain conditioner keeps the end result from looking like a leopard’s coat. Especially with softer or unevenly grained timbers, you want color that soaks in evenly rather than in random, thirsty patches. Brush on the conditioner, soak it well, wait around fifteen minutes, then wipe away the excess. Most brands want you to stain pretty soon after, so get your rags and stain lined up before you start this bit.
Step 6: Stain—the Moment of Truth
Open the can, give it a gentle stir. Don’t shake it—bubbles are the enemy. Test your stain in a hidden spot if you’re nervous; different woods take color differently. Wipe or brush on the stain, following the grain. Wait a few minutes—five, maybe fifteen if you’re after a darker look—then wipe off what hasn’t soaked in. Deeper color can take another coat, but let the first dry completely first. Judging “done” is personal—don’t chase Instagram perfection; trust your eyesight and your lighting.

Step 7: The Long Game—Seal and Protect
A beautiful stain won’t fend off kids or coffee. Seal it—polyurethane works for most, wax if you prefer a softer finish and less glare. Gently stir (not shake) poly to keep things smooth. Brush on with patient, slow strokes. A single coat won’t protect much—two, even there, is ideal. Between coats, sand lightly with 220-grit, wipe down, and keep going. This isn’t about speed. That final finish? It’s a reward for being methodical, and it’ll keep your work safe from spills, slips, and ill-timed elbows for years to come.
Following these steps on how to recondition wood furniture, you will not only bring new life to old pieces but also save money and reduce waste by repurposing instead of buying new furniture. Not to mention, it’s a great way to add your personal touch and style to your home decor.
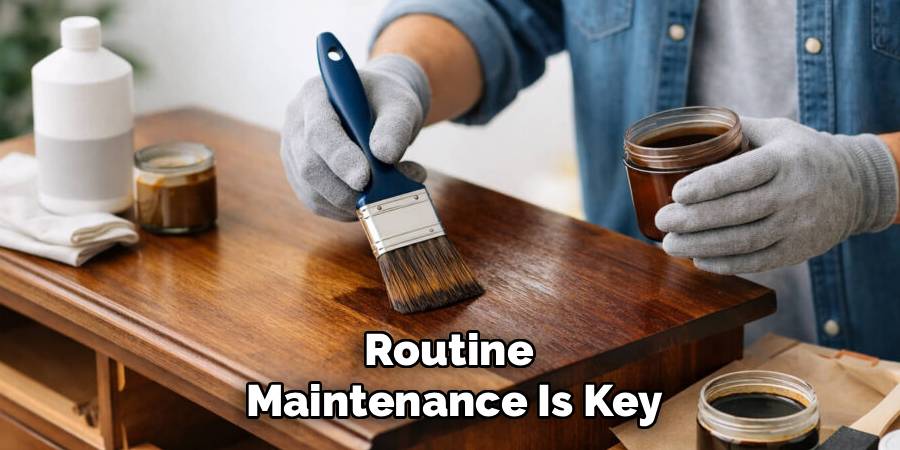
Maintenance Tips
To keep your reconditioned wood furniture looking its best, routine maintenance is key. Start by dusting regularly with a soft, lint-free cloth to prevent buildup that can scratch the surface. Avoid using harsh chemical cleaners; instead, opt for a mild soap solution or specialized wood cleaner. Protect wood furniture from direct sunlight, as prolonged exposure can cause fading or warping over time.
Additionally, using coasters and placemats can help prevent water rings and heat damage. For extra protection, consider applying a high-quality furniture wax or polish every few months. With these simple practices, your restored furniture will maintain its charm and durability for years to come.
Conclusion
Refinishing furniture is both an art and a practical skill that requires a balance of effort, creativity, and patience. By assessing the condition of each piece and choosing the right approach—whether a light refresh or a complete strip and refinish—you can breathe new life into old furniture and create something truly unique.
Remember to take your time, use the proper tools, and enjoy the process. The end result will not only reflect your hard work but also add character and charm to your space. Thanks for reading this guide on how to recondition wood furniture.
About
Mike May is a distinguished figure in the world of woodworking and timber design, with a decade of expertise creating innovative and sustainable indoor solutions. His professional focus lies in merging traditional craftsmanship with modern manufacturing techniques, fostering designs that are both practical and environmentally conscious. As the author of Woodimber, Mike delves into the art and science of timber-craft, inspiring artisans and industry professionals alike.
Education
RMIT University (Melbourne, Australia)
-
Associate Degree in Design (Timber): Focus on sustainable design, industry-driven projects, and practical craftsmanship.
-
Gained hands-on experience with traditional and digital manufacturing tools, such as CAD and CNC software.
Nottingham Trent University (United Kingdom)
-
Bachelor’s in Woodworking and Product Design (Honors): Specialized in product design with a focus on blending creativity with production techniques.
-
Participated in industry projects, working with companies like John Lewis and Vitsoe to gain real-world insights.
Publications and Impact
In Woodimber, May shares his insights on timber design processes, materials, and strategies for efficient production. His writing bridges the gap between artisan knowledge and modern industry needs, making it a must-read for both budding designers and seasoned professionals.