 (1)")

Have you ever wanted the warm, classic look of wood but didn’t want the cost or complexity of working with the real thing? There’s a creative solution that can transform almost any surface: painting a faux wood grain finish.
This technique allows you to mimic the beautiful, natural patterns of wood on furniture, doors, floors, and more. It’s a fantastic DIY project that combines a little bit of artistry with practical skill, letting you achieve high-end results with just paint and a few special tools.
This guide on how to paint wood grain will walk you through everything you need to know, from preparing your surface to adding the final touches, empowering you to create a stunning and convincing wood look all on your own.
What Will You Need?
Gathering all your tools and materials before you start will make the process much smoother. Here’s a list of what you’ll need for a successful project.
Materials:
- Base Coat Paint: A latex or acrylic paint in a light color that will serve as the background of your grain (e.g., tan, beige, or light gray). A satin or eggshell finish works best.
- Glaze: A clear, water-based acrylic glaze. This is mixed with your grain color to make it translucent and give you more time to work before it dries.
- Top Coat (Grain) Paint: A latex or acrylic paint in a darker color for the wood grain itself (e.g., dark brown, burnt sienna, or charcoal).
- Sandpaper: Medium-grit (120-150) and fine-grit (220) sandpaper.
- Primer: A high-quality primer appropriate for your surface (e.g., stain-blocking primer for wood, metal primer for metal).
- Painter’s Tape: To protect adjacent surfaces and create clean lines.
- Tack Cloth or Microfiber Cloth: For cleaning dust off the surface.
- Drop Cloths or Plastic Sheeting: To protect your work area.
- Clear Protective Topcoat: A water-based polyurethane or polycrylic in your desired sheen (satin, semi-gloss) to seal and protect the finish.
Tools:
- Paint Brushes: A standard brush for applying the base coat and another for the glaze mixture.
- Wood Graining Tool: This is the key tool for the effect. It’s a rubber rocker with a wood grain pattern. They often come in different sizes.
- Paint Tray and Liners: For holding your paint and glaze mixture.
- Mixing Containers and Stir Sticks: For mixing your glaze and top coat paint.
- Foam Brush or High-Quality Bristle Brush: For applying the final clear protective coat.
10 Easy Steps on How to Paint Wood Grain
Follow these steps carefully to achieve a professional-looking faux wood finish. The key is patience and a willingness to practice your technique.
Step 1: Prepare the Surface
Proper preparation is the most critical step for a durable and beautiful finish. No matter how good your painting technique is, it won’t last on a poorly prepared surface. Start by removing any hardware, like knobs or hinges, from your piece. Next, clean the surface thoroughly with a degreasing cleaner to remove any dirt, oil, or grime. Once clean, let it dry completely. If there are any holes or deep scratches, fill them with wood filler. After the filler has dried, sand the entire surface. Use a medium-grit sandpaper (around 120-150 grit) to scuff up the existing finish. This creates a “tooth” for the primer and paint to adhere to. The goal is not to remove the old finish entirely, but to dull it. After sanding, wipe away all the dust with a tack cloth or a damp microfiber cloth. Make sure the surface is perfectly clean and smooth before moving on.
Step 2: Apply Primer and Base Coat
With your surface prepped, it’s time for the foundational layers. Apply a coat of high-quality primer. The type of primer depends on your surface; use a stain-blocking primer for raw or stained wood to prevent bleed-through, or a specific primer for metal or plastic. Let the primer dry completely according to the manufacturer’s instructions. Once dry, lightly sand it with fine-grit sandpaper (220 grit) to smooth out any imperfections, and wipe away the dust. Now, apply your base coat. This will be the lighter color that shows through the “grain.” Apply one or two thin, even coats, allowing for proper drying time between each. A satin or eggshell finish is ideal as it has a slight sheen that mimics sealed wood. Let the base coat cure for at least 24 hours, so it’s hard enough to withstand the graining process.
Step 3: Mix Your Glaze
The glaze is what makes the wood-graining technique possible. It extends the drying time of your grain-colored paint, giving you the window you need to create the pattern before it sets. In a separate container, mix your glaze and your darker top coat paint. A common ratio is four parts glaze to one part paint (4:1), but you can adjust this. More glaze will create a more translucent, subtle grain, while less glaze will result in a more opaque, pronounced grain. Mix them thoroughly until you have a consistent color and texture. The mixture should be thinner than regular paint but not watery. Pour some of your mixture into a paint tray. It’s a good idea to test your mixture on a scrap piece of wood or cardboard to see if you like the transparency and color.
Step 4: Apply the Glaze Mixture
Working in small, manageable sections is key to success. Choose a section to start with, such as a single drawer front or a door panel. If you’re working on a large, flat surface like a tabletop, you might want to use painter’s tape to divide it into “planks” about 4-6 inches wide. This makes the project feel less overwhelming and also creates a more realistic planked wood look. Using a clean brush, apply a thin, even layer of your glaze mixture over the base coat in the section you’ve chosen. Don’t apply it too heavily; you just need enough to cover the base coat. Make sure your brush strokes all go in the same direction—the direction you want your final wood grain to run.
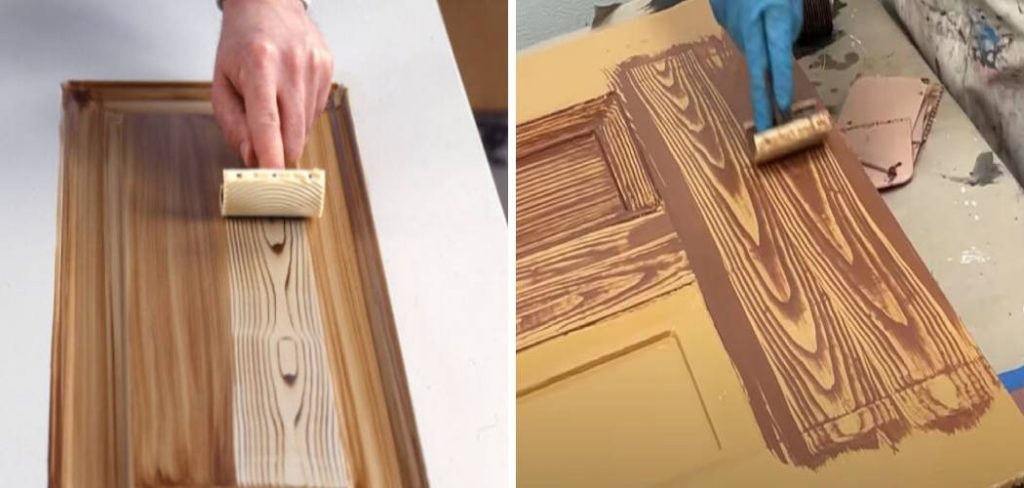
Step 5: Create the Wood Grain Pattern
This is the most creative and transformative part of the process. While the glaze is still wet, take your wood-graining tool. Place the tool at the top edge of your glazed section. With steady pressure, pull the tool down through the wet glaze. As you pull, gently rock the tool from top to bottom. This rocking motion is what creates the characteristic heart grain or “cathedral” pattern found in wood. Do not stop halfway down a section; pull the tool in one continuous, smooth motion from start to finish. The speed of your pull and the pressure you apply will affect the final look, so consistency is important. If you want a straighter grain, you can use a graining comb or even a dry-bristle brush to pull through the glaze instead of the rocker.
Step 6: Overlap and Vary the Pattern
To create a realistic look, you need to vary the pattern. On your next pull, you can start the rocking motion at a different point, creating a different shape. If you mess up a section, don’t worry! That’s the beauty of the glaze. You can simply wipe the wet glaze off with a rag, reapply it, and try again. Or, you can gently brush over the area to soften the grain and then re-drag your tool through it. As you move to adjacent sections or “planks,” slightly overlap the edges of your graining. This helps blend the sections naturally. Try to avoid creating patterns that look too repetitive or perfect. Natural wood is full of imperfections and variations, and your finish should reflect that.
Step 7: Soften and Add Detail
Once you’ve created the main grain with the rocker, you can add more subtle details for extra realism. While the glaze is still workable, you can use a soft, dry brush (called a “flogger” or “stippler” in decorative painting) to lightly drag through the grain. This softens any harsh lines from the graining tool and creates the finer, linear grain that runs between the main patterns. You can also use the corner of the brush or a smaller artist’s brush to add small “knots” or other characteristic marks. The goal is to build layers of texture and detail. Let this layer dry completely, which could take anywhere from a few hours to a full day, depending on the glaze and your environment.
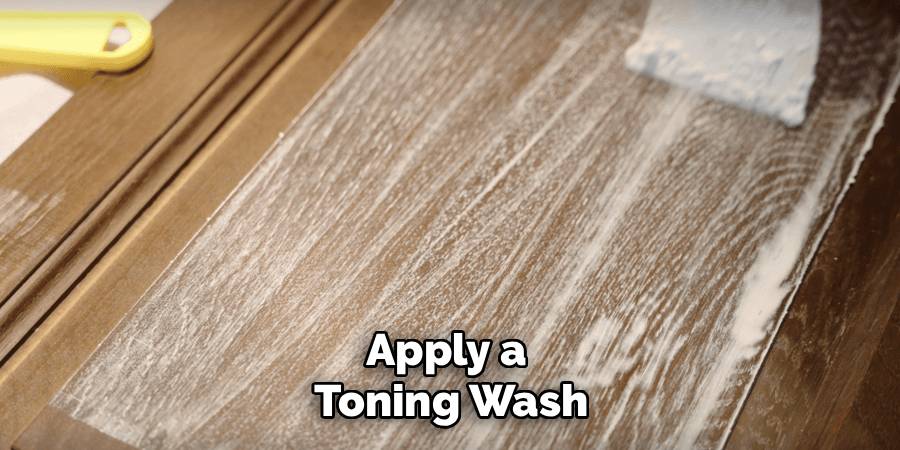
Step 8: Apply a Toning Wash (Optional)
For an even richer and more dimensional look, you can apply a toning wash. This step is optional, but it can take your project to the next level. A toning wash is a very thin, translucent layer of color that deepens the overall finish and helps unify the different grain patterns. To create it, mix a small amount of your dark grain color (or another complementary color like black or raw umber) with your clear glaze, but this time use a much higher ratio of glaze to paint, such as 10:1. You want it to be very sheer. Brush this toning wash over the entire piece and then immediately wipe most of it off with a clean, soft rag, leaving a subtle amount of color in the recesses of the grain.
Step 9: Seal with a Protective Topcoat
After all your paint and glaze layers are fully cured (wait at least 24-48 hours), it’s essential to protect your hard work. Applying a protective topcoat will guard the finish against scratches, moisture, and daily wear and tear. Use a clear, non-yellowing, water-based polyurethane or polycrylic. Choose a sheen that you like—satin is often a good choice as it provides a subtle luster similar to finished wood without being overly glossy. Apply the topcoat using a high-quality synthetic brush or a foam brush, using long, even strokes in the direction of your painted grain. Apply at least two or three thin coats, lightly sanding with 220-grit sandpaper between coats (and wiping away the dust) for the smoothest possible finish.
Step 10: Reassemble and Admire
Allow the final topcoat to cure completely. This is a crucial final waiting period. Check the manufacturer’s instructions, but this can take anywhere from 24 hours to several days for the finish to fully harden. Rushing this step can lead to smudges or damage. Once the surface is fully cured and no longer feels tacky, you can reinstall any hardware you removed at the beginning. Place your newly transformed piece back in its spot, step back, and admire your work. You’ve successfully turned a plain surface into a beautiful, wood-grained work of art.
Conclusion
Painting a faux wood grain is an incredibly rewarding DIY skill that can completely transform the look and feel of your home. It allows you to breathe new life into old furniture, update dated fixtures, and achieve a sophisticated, custom look on a minimal budget.
While it may seem complex, the process is just a series of simple, manageable steps. With careful preparation, the right tools, and a bit of practice, you can create a durable and convincingly beautiful wood finish that you’ll be proud of for years to come.
Hopefully, this guide on how to paint wood grain has given you a good overview of the basics of wood finishing.