 (1)")

We have all been there. You find a piece of furniture with the perfect dimensions at a thrift store or a big-box retailer, but the finish screams “plastic.” This is the reality of fake wood, often known as laminate or veneer. It is durable and affordable, but it rarely offers the rich, warm depth of real timber.

Here is the good news: you absolutely can stain fake wood. You just have to ignore the traditional rules of staining. You aren’t dyeing fibers; you are building a new surface layer. With the right products—specifically gel stain—and a little patience, you can transform a cheap, orange-toned laminate dresser into a piece that looks like high-end walnut or espresso-stained oak.
This guide on how to stain fake wood walks you through exactly how to achieve a professional finish that sticks, lasts, and looks authentic.
What Will You Need?
The Essentials:
- Gel Stain: This is the most critical item. It is thick, like pudding, and sits on top of the surface rather than soaking in.
- TSP (Trisodium Phosphate) or Degreaser: To remove oils and furniture polish.
- Sandpaper: 120-grit and 220-grit.
- Sanding Block or Orbital Sander: For even pressure.
- Painter’s Tape: To protect hardware or areas you don’t want stained.
- Foam Brushes or Natural Bristle Brushes: Cheap foam brushes work surprisingly well for gel stain application.
- Clean Rags/Lint-Free Cloths: For cleaning and wiping (old t-shirts work well).
- Tack Cloth: A sticky cloth used to pick up fine dust particles.
- Water-Based or Oil-Based Polyurethane: The final sealer to protect your work.
- Drop Cloths: To protect your floor.
- Gloves and Mask: For safety during sanding and staining.
10 Easy Steps on How to Stain Fake Wood
Step 1: Deep Clean the Surface
Before you even look at a piece of sandpaper, you must clean the furniture thoroughly. Fake wood furniture, especially older pieces, is often covered in invisible layers of furniture polish (like Pledge), oils from hands, and general grime. If you try to sand or stain over this, the oil will repel your new finish, leading to “fish eyes” or peeling later.
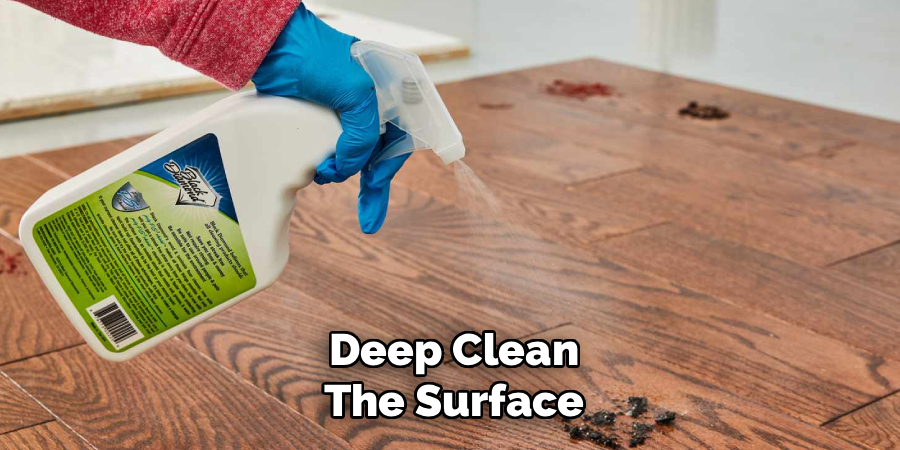
Mix TSP (Trisodium Phosphate) with warm water according to the box instructions. Wear gloves for this part, as TSP is strong. Scrub the entire piece down with a sponge. If you prefer a milder alternative, a heavy-duty degreasing dish soap mixed with water can work, but TSP is the gold standard for prep.
Step 2: Repair Scratches and Dents
Fake wood is essentially a picture of wood glued onto particle board. When it scratches, you often see the brown or white composite material underneath. Now is the time to fix this.
Inspect the piece for deep gouges or peeling corners. If the veneer is peeling, use a little wood glue to secure it back down and clamp it until dry. For chips or deep scratches, use a wood filler. Overfill the scratch slightly, as filler shrinks when it dries. Once dry, you will sand it flush in the next step. Do not skip this; stain highlights imperfections rather than hiding them.
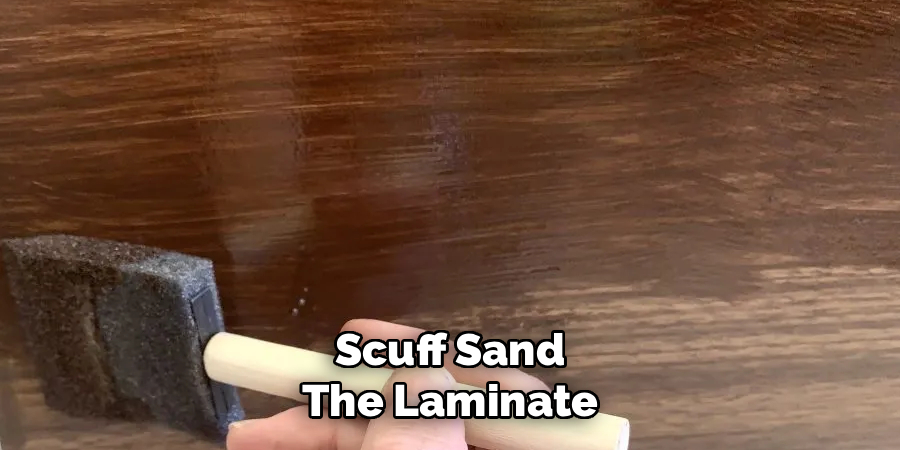
Step 3: Scuff Sand the Laminate
This is the most anxiety-inducing step for beginners, but it is vital. You are not trying to sand off the finish. If you sand too hard, you will rip through the thin paper layer that looks like wood and hit the particle board underneath. If that happens, the texture will be ruined.
Your goal is “scuff sanding.” Use 120-grit sandpaper or a sanding block. Apply medium pressure and sand the entire surface until the sheen is gone. You want the furniture to look dull, matte, and scratched up. This creates “teeth” for the gel stain to grab onto. Without this mechanical adhesion, the stain will slide right off the smooth plastic surface. Be extra careful on corners and edges where the finish is thinnest.
Step 4: Remove All Dust
Sanding creates a fine white powder that is the enemy of a smooth finish. You cannot simply blow this dust off. If dust remains on the surface, your stain will be bumpy and gritty.
First, use a vacuum with a hose attachment to suck up the bulk of the dust. Next, wipe the piece down with a slightly damp cloth to grab the finer particles. Finally, and most importantly, wipe the entire piece with a tack cloth. A tack cloth is sticky and will pick up microscopic dust that wet rags miss. Do this immediately before staining to ensure a pristine canvas.
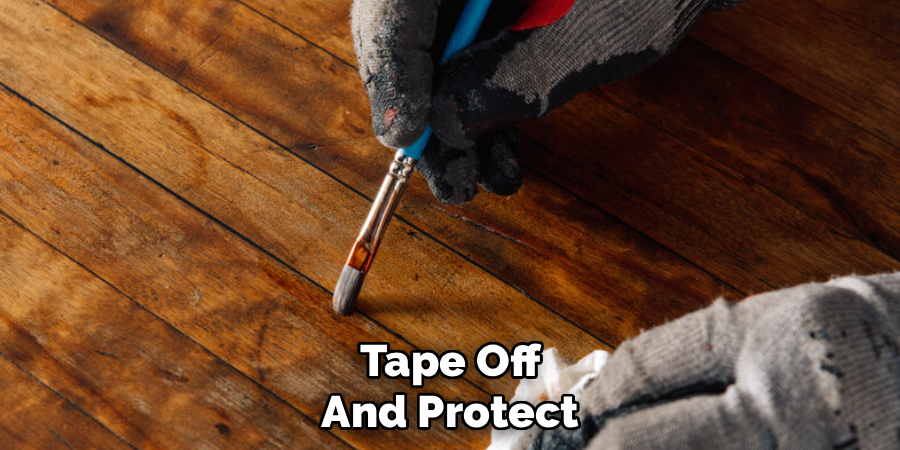
Step 5: Tape Off and Protect
Gel stain is notoriously difficult to remove from surfaces you didn’t intend to stain. It is thick, sticky, and highly pigmented.
Remove any hardware like knobs, handles, and hinges. It is always better to remove them than to try to tape around them. Place them in a labeled bag so you don’t lose the screws. Next, use high-quality painter’s tape to mask off any areas you want to keep the original color (like the inside of drawers or specific trim). Press the edges of the tape down firmly with a credit card or your fingernail to prevent the stain from bleeding under the tape.
Step 6: Apply the First Coat of Gel Stain
Open your can of gel stain and stir it thoroughly. Do not shake the can, as this creates bubbles. The pigment settles at the bottom, so you need to scrape the bottom and mix until the consistency is uniform.
Dip your foam brush or bristle brush into the stain. Apply a generous coat to the surface, moving in long strokes. Unlike traditional staining, where you wipe the excess off immediately, with fake wood, you are essentially painting with the stain. However, you don’t want it to be gloppy.
Step 7: Let the First Coat Dry Completely
This is where patience is tested. Because gel stain sits on top of the laminate rather than soaking in, it takes significantly longer to dry than standard stain.
Refer to the manufacturer’s instructions, but generally, you should let the first coat dry for at least 8 to 12 hours. If it is humid or cold, it may take 24 hours. Do not touch it to check stickiness; touch an inconspicuous spot near the leg if you must. If you apply a second coat while the first is still tacky, you will reactivate the first layer and drag it off, leaving bald spots and a messy texture.
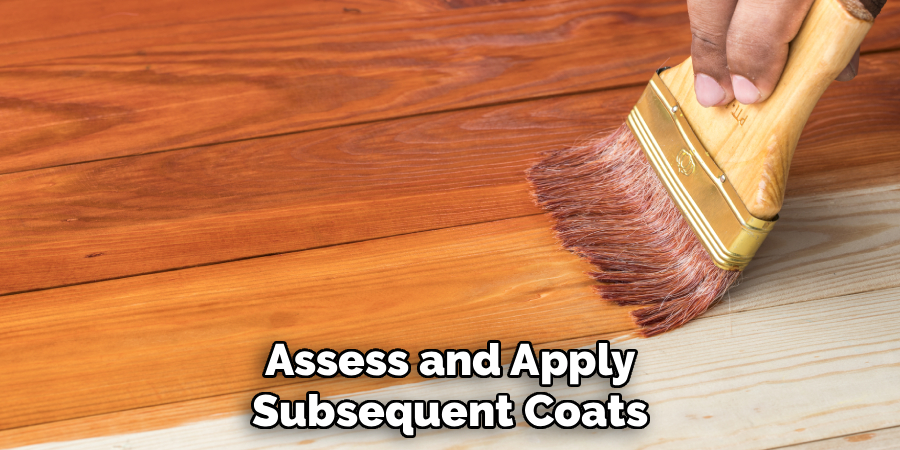
Step 8: Assess and Apply Subsequent Coats
Once the first coat is bone dry, assess the color. The first coat on laminate often looks streaky or semi-transparent. This is normal. Do not panic.
You will likely need 2 or 3 coats to get a solid, rich color. Apply the second coat exactly like the first. Use a light hand; you want to layer the color, not scrub the surface. If you notice any rough spots from dust settling in the first coat, you can very lightly sand with a high-grit (400) sandpaper before the second coat, but be extremely gentle so you don’t sand through the color. Let each subsequent coat dry fully.
Step 9: Apply the Top Coat (Sealer)
Gel stain dries hard, but it isn’t durable enough to withstand coffee cups, keys, and cleaning sprays on its own. You must seal it.
Choose an oil-based polyurethane for the most durability and a warm glow, or a water-based polycrylic if you want a crystal-clear finish that won’t yellow over time (white or grey stains usually require water-based sealers). Stir the poly gently. Apply a thin, even coat using a high-quality synthetic brush.
Step 10: Cure and Reassemble
Drying is different from curing. Your furniture might feel dry to the touch in a few hours, but the finish is still soft underneath.
Ideally, let the piece sit for 48 to 72 hours before putting the hardware back on or placing heavy objects on top. If you put a heavy lamp on the table too soon, it might sink into the soft finish and leave a permanent ring.
5 Things You Should Avoid
- Using Penetrating Stain: Never use “traditional” liquid stains (like Minwax Wood Finish) on laminate. They require wood fibers to absorb the pigment. On laminate, they will never dry and will remain a sticky, smeary mess forever. Stick to Gel Stain only.
- Oversanding: Do not use a belt sander or low-grit sandpaper (under 100 grit). Laminate surfaces are paper-thin. If you sand through to the particle board, you cannot fix it, and the stain will look blotchy and textured in that spot.
- Rushing the Dry Time: Gel stain takes a long time to dry. If you apply a top coat or a second layer of stain before the bottom layer is 100% dry, you will trap solvents underneath. This leads to a finish that stays tacky for months or peels off in sheets.
- Shaking the Can: Never shake your can of polyurethane or stain. Shaking introduces thousands of tiny air bubbles into the mixture. These bubbles will transfer to your furniture, creating a rough surface that looks like sand is trapped in the finish. Always stir.
- Applying Thick Layers of Polyurethane: It is tempting to pour on a thick layer of sealer to “get it over with.” Thick layers of poly take forever to dry and are prone to dripping and clouding. Three thin coats are infinitely stronger and better looking than one thick coat.
Conclusion
How to stain fake wood is one of the most satisfying DIY projects you can undertake because the before-and-after results are so dramatic. You don’t need to be a master carpenter or own expensive power tools to achieve a high-end look. By understanding the limitations of the material and using the right products—specifically gel stain—you can bypass the plastic look of laminate and enjoy the rich aesthetics of wood.
Remember, the secret to this project is patience. Do not rush the sanding, and certainly do not rush the drying times. Treat the process as a creative layering of color rather than a quick fix.
With these steps, you are well on your way to creating a custom piece of furniture that looks expensive, feels durable, and perfectly fits your style.
About
Mike May is a distinguished figure in the world of woodworking and timber design, with a decade of expertise creating innovative and sustainable indoor solutions. His professional focus lies in merging traditional craftsmanship with modern manufacturing techniques, fostering designs that are both practical and environmentally conscious. As the author of Woodimber, Mike delves into the art and science of timber-craft, inspiring artisans and industry professionals alike.
Education
RMIT University (Melbourne, Australia)
-
Associate Degree in Design (Timber): Focus on sustainable design, industry-driven projects, and practical craftsmanship.
-
Gained hands-on experience with traditional and digital manufacturing tools, such as CAD and CNC software.
Nottingham Trent University (United Kingdom)
-
Bachelor’s in Woodworking and Product Design (Honors): Specialized in product design with a focus on blending creativity with production techniques.
-
Participated in industry projects, working with companies like John Lewis and Vitsoe to gain real-world insights.
Publications and Impact
In Woodimber, May shares his insights on timber design processes, materials, and strategies for efficient production. His writing bridges the gap between artisan knowledge and modern industry needs, making it a must-read for both budding designers and seasoned professionals.