 (1)")

Commercial wood stains are fantastic for many projects, but sometimes you want a color that is more vibrant, unique, or completely natural. This is where wood dye comes in. Unlike stains that sit on top of the wood, dyes use microscopic particles to penetrate deep into the wood fibers, creating a rich, transparent color that makes the grain pop. It is a technique used by fine woodworkers to achieve stunning, jewel-toned finishes.
While you can buy pre-mixed wood dyes, creating your own is a fun and rewarding process that offers endless color possibilities using simple, often natural, ingredients. Learning how to make wood dye is a great skill for any DIY enthusiast, allowing you to transform ordinary lumber into a personalized work of art with colors you create yourself. This guide is perfect for beginners and will show you how to get started.
Why Make Your Own Wood Dye?
The primary advantage of making your own wood dye is the incredible control it gives you over the final color. You are no longer limited to the handful of shades available at the hardware store. By mixing primary colors or experimenting with natural ingredients like berries, coffee, or spices, you can create a truly custom palette that perfectly matches your vision. DIY wood dyes are also incredibly cost-effective.
A small amount of concentrated dye powder or even strong coffee can produce a large volume of dye for a fraction of the cost of commercial products. Furthermore, this approach allows you to work with non-toxic, all-natural ingredients, which is a significant benefit for those creating children’s toys, kitchen utensils, or who are simply sensitive to chemical fumes.
Step-by-Step Guide on How to Make Wood Dye
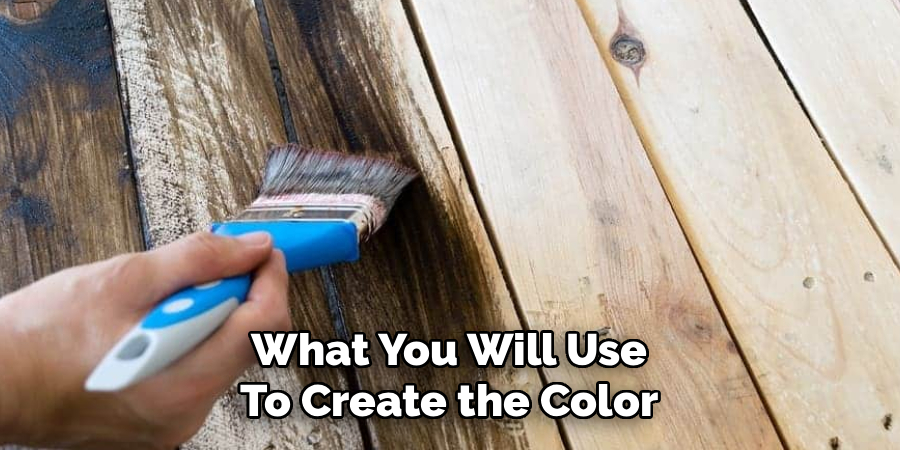
Step 1: Choose Your Dyeing Agent
Your first decision is what you will use to create the color. For the most predictable and vibrant results, aniline dye powders are an excellent choice. These are highly concentrated pigments designed specifically for wood. They come in a wide range of colors that can be mixed to create custom shades. For a more organic, rustic approach, you can turn to your kitchen pantry. Strong black coffee or tea creates beautiful brown and amber tones. Spices like turmeric produce a brilliant yellow, while beets or berries can yield reds and purples. This guide will focus on using dye powders, but the application principles remain the same for natural colorants.
Step 2: Select Your Solvent (Water or Alcohol)
Aniline dyes are typically soluble in either water or denatured alcohol, and your choice of solvent affects the final result. Water-based dyes are non-toxic, have low odor, and are very economical. However, they can raise the grain of the wood, which requires an extra sanding step. Alcohol-based dyes, on the other hand, dry much faster and do not raise the grain, which can save you time. The quick drying time can make it harder to avoid lap marks on large surfaces. For beginners, water is often the more forgiving and accessible option to start with when learning how to make wood dye.
Step 3: Prepare the Wood Surface
For any dye to work effectively, it must be able to penetrate the wood fibers evenly. This means starting with a perfectly clean and smooth surface. Begin by sanding your wood project with medium-grit sandpaper, such as 150-grit, to remove any old finish, mill glaze, or imperfections. Follow this with a final sanding using a finer grit, like 220, to create a smooth surface. It is crucial to sand evenly and with the grain. After sanding, use a vacuum and a tack cloth to remove every particle of dust. Any dust left behind will interfere with dye absorption and create blemishes in your finish.
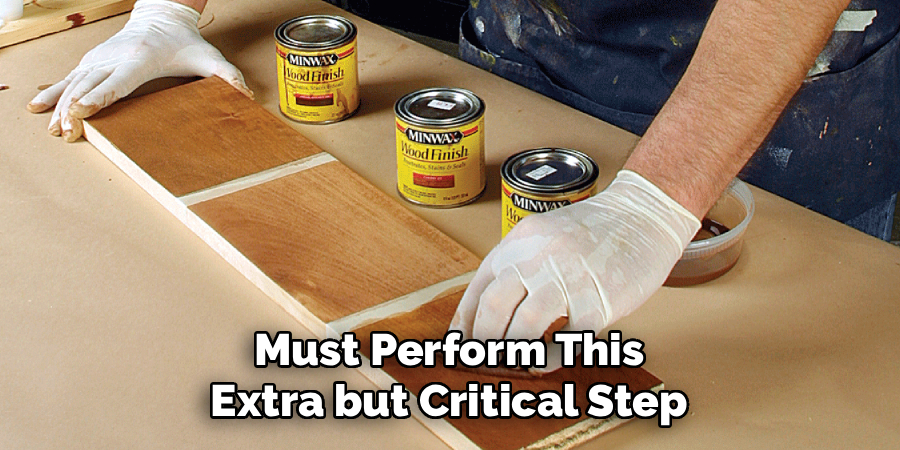
Step 4: Raise and Sand the Grain (for Water-Based Dyes)
If you have chosen to use a water-based dye, you must perform this extra but critical step. Wiping the wood with water causes the wood fibers to swell and stand up, a phenomenon known as “raising the grain.” If you apply your dye without addressing this, you will end up with a rough, fuzzy surface. To prevent this, simply wipe the sanded wood with a damp cloth. Let the wood dry completely. It will feel rough to the touch. Now, lightly sand the surface again with your fine-grit sandpaper to knock down the raised fibers. This pre-raises the grain so it will not happen when you apply your dye.
Step 5: Mix the Dye Solution
Now it is time to mix your color. Start with a clean glass or plastic container. Measure out your chosen solvent—water or denatured alcohol—into the container. It is best to start with warm water as it helps the powder dissolve more easily. Following the manufacturer’s ratio, slowly add the aniline dye powder to the liquid while stirring continuously. A common ratio is one ounce of powder per quart of solvent, but you can adjust this for a more or less saturated color. Stir until the powder is completely dissolved and there are no clumps. For the purest color, strain the mixed dye through a coffee filter or cheesecloth to remove any undissolved particles.
Step 6: Test Your Dye on Scrap Wood
This step is non-negotiable. Never apply a new dye directly to your finished project without testing it first. Different wood species absorb dye differently; a color that looks one way on maple will look completely different on oak. Use a piece of scrap wood from the same board as your project and prepare it in the exact same way, including sanding and grain-raising. Apply the dye to the scrap piece and let it dry to see the final color. This allows you to adjust the dye’s concentration or mix in other colors to get the exact shade you want before committing to your actual workpiece.
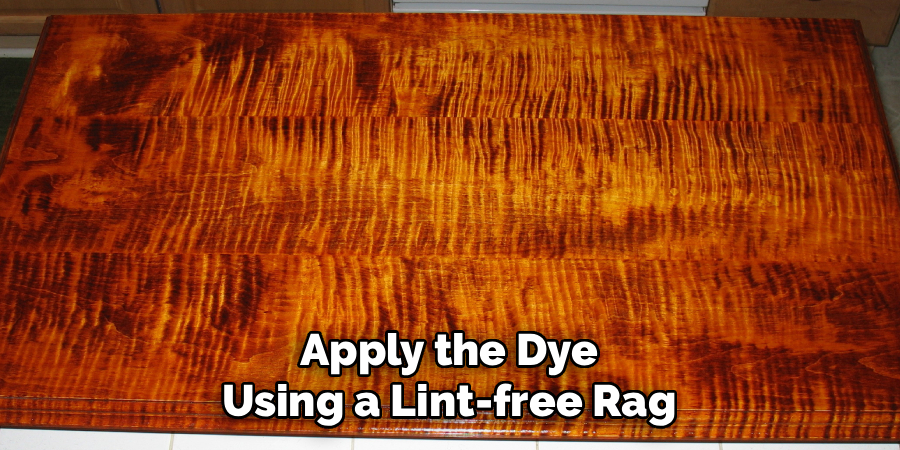
Step 7: Apply the Dye to the Wood
You can apply the dye using a lint-free rag, a foam brush, or a sprayer. For most beginners, a rag offers great control. Dip your rag into the dye and wring it out slightly so it is not dripping. Apply the dye liberally to the wood, working in long, even strokes with the grain. The key is to get the surface wet and then move on. Try to work quickly and maintain a wet edge to avoid lap marks where your strokes overlap. Unlike stain, you are not wiping the dye off; you are letting it soak in and dry. A key part of knowing how to make wood dye is understanding this application difference.
Step 8: Apply a Second Coat for Deeper Color
After the first coat has dried completely, assess the color. If it is lighter than you want, you can apply a second coat to deepen the saturation. Apply the second coat just as you did the first, ensuring the surface is evenly wetted. You can continue to add coats until you reach the desired depth of color, letting the wood dry between each application. This layering technique gives you precise control over the final look, allowing for a range of tones from a light wash to a deep, rich hue. Once you are satisfied with the color, allow the piece to dry thoroughly before moving to the final step.
Step 9: Seal the Wood with a Topcoat
Wood dye itself offers no protection to the wood. Once it is dry, the color can still be lifted by moisture or scuffed off. It is essential to lock in the color and protect the surface with a clear topcoat. Products like polyurethane, lacquer, or shellac work well over dyes. The topcoat will also make the color appear more vibrant and deep. Apply your chosen sealer according to the manufacturer’s directions, usually in two or three thin coats with light sanding in between. This final step ensures your beautifully dyed project is durable and will last for years.
Frequently Asked Questions
What Is the Difference Between Wood Dye and Wood Stain?
The main difference lies in how they color the wood.
- Dye: Consists of microscopic particles that penetrate deep into the wood fibers, coloring the wood from within. It enhances the grain and provides vibrant, transparent color.
- Stain: Contains larger pigment particles that sit in the surface pores of the wood. It can sometimes obscure the grain slightly but is generally easier to apply evenly.
Can I Use Food Coloring to Dye Wood?
Yes, you can use food coloring to make a simple wood dye, which is great for small crafts or kid-safe projects.
- Process: Mix several drops of food coloring into a small amount of water. The more coloring you add, the more intense the hue will be.
- Limitations: Food coloring is not very lightfast, meaning the color will fade significantly over time, especially if exposed to sunlight. It is not recommended for fine furniture or projects requiring long-term color stability.
Why Did My Dye Turn Out Blotchy?
Blotchiness is usually caused by uneven absorption and is a common issue with woods like pine, maple, and birch.
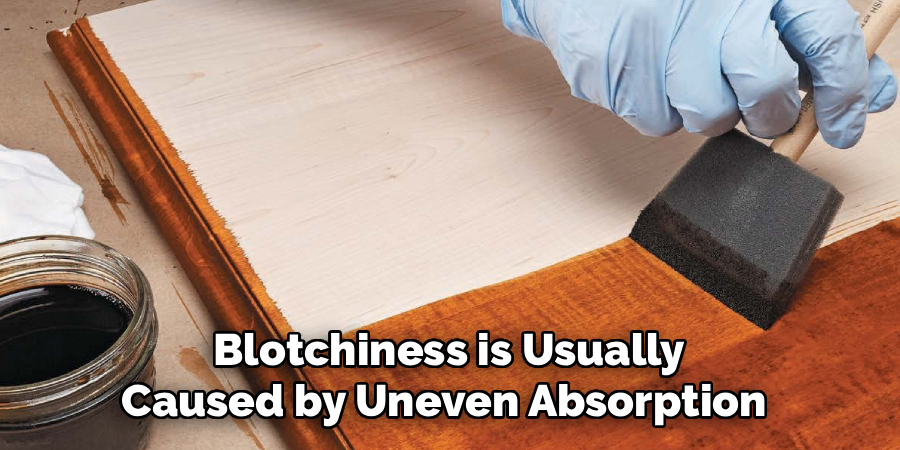
- Solution: Using a pre-stain wood conditioner before applying the dye can help even out absorption. Applying a “spit coat” of shellac (a very diluted 1-pound cut) can also seal the wood just enough to prevent blotching while still allowing the dye to penetrate.
Can I Mix Different Dye Colors?
Absolutely! This is one of the biggest advantages of using dye powders.
- Custom Colors: You can mix primary dye colors (red, yellow, blue) to create any secondary or tertiary color you can imagine. For example, mix yellow and blue to get green.
- Technique: It is best to mix the powders into their respective solvents separately and then combine the liquid dyes to achieve your desired shade. Always test your custom mix on scrap wood first.
What Is the Best Topcoat to Use Over Wood Dye?
The best topcoat protects the wood without altering the dye color.
- Water-Based Polyurethane: This is an excellent choice as it is crystal clear and will not add the slight yellow/amber tint that oil-based finishes do.
- Shellac: Provides a warm, traditional look and is compatible with most dyes.
- Lacquer: Offers a very durable, professional-looking finish but requires good ventilation for application. Avoid oil-based polyurethane if you want to keep a pure white or blue color from turning yellowish or greenish.
Conclusion
Creating your own wood dye opens up a new world of color and creativity for your woodworking projects. It frees you from the limitations of commercial products and allows you to achieve a depth and vibrancy that conventional stains cannot match. The process is simple, economical, and can be tailored to use either concentrated powders for brilliance or natural ingredients for a rustic charm. The key to success lies in meticulous wood preparation and testing your colors on scrap wood before committing to your final piece.
Now that you have a comprehensive guide on how to make wood dye, you are ready to start experimenting. Do not be afraid to mix colors and try different application techniques. The ability to create a custom finish is a rewarding skill that will elevate your DIY projects from homemade to handmade works of art.
About
Mike May is a distinguished figure in the world of woodworking and timber design, with a decade of expertise creating innovative and sustainable indoor solutions. His professional focus lies in merging traditional craftsmanship with modern manufacturing techniques, fostering designs that are both practical and environmentally conscious. As the author of Woodimber, Mike delves into the art and science of timber-craft, inspiring artisans and industry professionals alike.
Education
RMIT University (Melbourne, Australia)
-
Associate Degree in Design (Timber): Focus on sustainable design, industry-driven projects, and practical craftsmanship.
-
Gained hands-on experience with traditional and digital manufacturing tools, such as CAD and CNC software.
Nottingham Trent University (United Kingdom)
-
Bachelor’s in Woodworking and Product Design (Honors): Specialized in product design with a focus on blending creativity with production techniques.
-
Participated in industry projects, working with companies like John Lewis and Vitsoe to gain real-world insights.
Publications and Impact
In Woodimber, May shares his insights on timber design processes, materials, and strategies for efficient production. His writing bridges the gap between artisan knowledge and modern industry needs, making it a must-read for both budding designers and seasoned professionals.