 (1)")

A wood deck is a wonderful extension of your home, offering a perfect spot for summer barbecues, morning coffee, and relaxing evenings. However, being exposed to the elements—sun, rain, snow, and foot traffic—can take a serious toll on the wood.
Without protection, your beautiful deck can quickly turn gray, splinter, and even rot. This is where sealing comes in. Applying a quality sealant is the single most important maintenance task you can perform to protect your investment and keep your deck looking great for years to come.
Learning how to seal wood deck boards is a straightforward DIY project that saves you money and gives you a great sense of accomplishment. This guide is designed for beginners, providing a clear, step-by-step process from prep work to the final application. We will demystify the process and give you the confidence to protect and beautify your outdoor living space.
Why Sealing Your Deck is Non-Negotiable
Failing to seal a wood deck is like leaving a car out in a field to rust. Wood is a natural, porous material that is highly susceptible to two primary enemies: moisture and UV rays. When water soaks into unprotected wood, it causes the fibers to swell. As it dries, the fibers contract. This constant cycle of expansion and contraction leads to cracking, splitting, and warping. Moisture also invites mold, mildew, and rot, which can compromise the structural integrity of your deck.
Simultaneously, the sun’s ultraviolet rays break down the wood’s lignin, the natural glue that holds the fibers together. This photodegradation is what causes the wood to lose its rich color and turn to a dull, weathered gray. A quality deck sealant creates a protective barrier that repels water and contains UV inhibitors to shield the wood from sun damage, effectively preserving both its strength and its beauty.
A Step-by-Step Guide on How to Seal a Wood Deck
Step 1: Check the Weather Forecast
The success of your deck sealing project is entirely at the mercy of Mother Nature. Before you do anything else, check the weather forecast for the next 48 to 72 hours. You need a solid window of dry weather with moderate temperatures, ideally between 50 and 90 degrees Fahrenheit. Rain can wash away freshly applied sealant, while direct, scorching sun can cause it to dry too quickly, leading to a blotchy, uneven finish. A string of clear, low-humidity days with overcast skies provides the perfect conditions for the sealant to penetrate the wood and cure properly. Rushing this process against a bad forecast is a recipe for wasted time and materials.
Step 2: Clear the Deck and Protect Surroundings
To begin the preparation, you need a completely empty workspace. Remove all furniture, grills, planters, and rugs from the deck. Give the surface a thorough sweep to get rid of loose leaves, dirt, and other debris. Next, you must protect any surrounding areas you do not want the sealant to touch. Use painter’s tape and plastic sheeting to cover your home’s siding, door trim, and any nearby windows. Drape plastic over bushes, flowers, and any other vegetation that borders the deck. A little time spent on protection now will save you a lot of time on cleanup later.

Step 3: Thoroughly Clean the Deck Surface
You cannot apply sealant over dirt, mildew, or old, failing stain. The wood must be immaculately clean for the new coat to adhere properly. For this step, use a commercial deck cleaner specifically formulated to remove ground-in dirt and kill mold and mildew spores. Follow the manufacturer’s instructions, which typically involve applying the cleaner with a garden sprayer, letting it sit for a period, and then scrubbing the surface with a stiff-bristled deck brush. A pressure washer can also be effective, but use a low-pressure setting (around 600-800 PSI) and a wide-angle fan tip to avoid gouging and damaging the soft wood fibers. This deep clean is a critical part of knowing how to seal wood deck boards for a lasting finish.
Step 4: Make Any Necessary Repairs and Sand
Once the deck is clean and has had at least 24 hours to dry completely, inspect it for any damage. Use a hammer to countersink any popped nails that are sticking up. Replace any boards that are severely cracked or rotting. After making repairs, you should sand the deck to open up the wood’s pores and create a smooth surface. Use a pole sander or an orbital sander with 60- to 80-grit sandpaper. The goal is not to remove all the old finish but to scuff the surface and smooth out any splinters or rough patches. After sanding, vacuum or sweep away all the dust to ensure the surface is pristine.
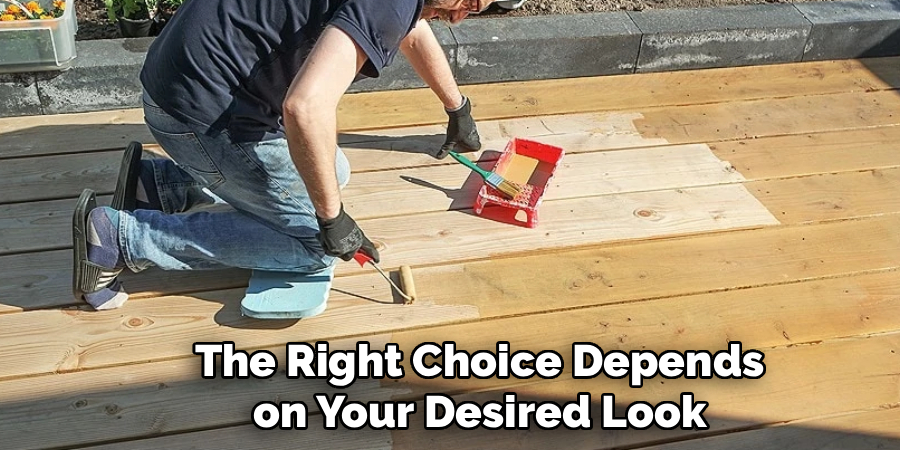
Step 5: Choose the Right Sealant for Your Needs
Deck sealants come in a few different types, and the right choice depends on your desired look and level of protection. A clear waterproofer offers excellent moisture protection with minimal color change but provides less UV protection. A toner adds a hint of color while still allowing the wood grain to show through prominently. A semi-transparent stain offers more color and better UV protection while still revealing some wood grain. An opaque or solid stain looks more like paint, completely covering the grain but offering the maximum level of durability and UV defense. For most homeowners, a semi-transparent stain offers the best balance of natural beauty and protection.
Step 6: Test the Sealant in an Inconspicuous Area
Before you commit to coating the entire deck, it is essential to test your chosen sealant. The final color can look very different on your specific type of wood than it does on the sample in the store. Choose a small, hidden spot, like the back of a stair tread or a corner that will be covered by furniture, and apply a small amount of the sealant. Let it dry completely so you can see the true final color and finish. This simple test ensures you will be happy with the result and prevents you from having to strip the entire deck if you do not like the color. This is a crucial step for anyone learning how to seal wood deck boards for the first time.
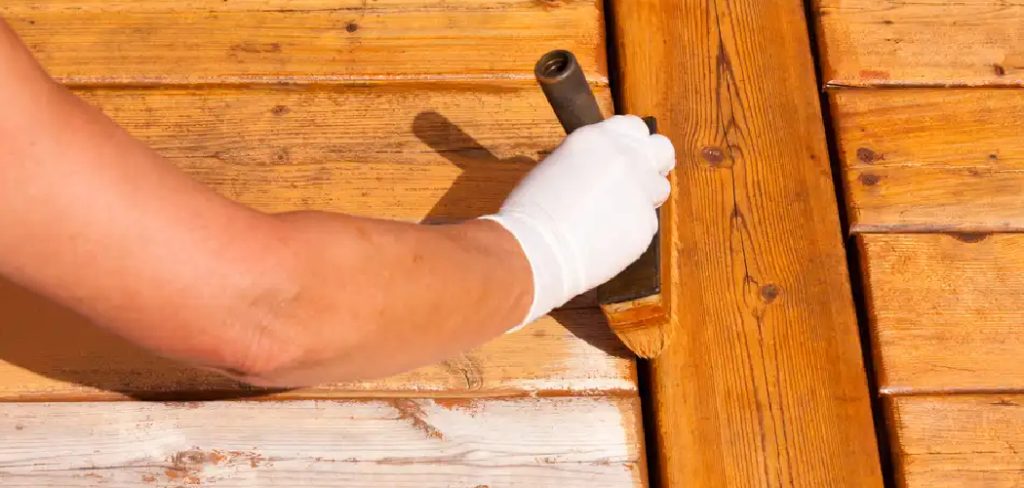
Step 7: Apply the Sealant to Railings
When you are ready to apply the sealant, always start with the vertical surfaces. This includes the railings, spindles, and stair risers. If you seal the flat floorboards first, you risk dripping sealant from the railings onto your freshly finished surface. Use a high-quality paintbrush to carefully apply the sealant to these detailed areas. A paint pad can also be very effective for spindles and posts. Work from the top down, catching any drips as you go. Applying the sealant evenly and avoiding puddles will ensure a professional-looking result on these highly visible parts of your deck.
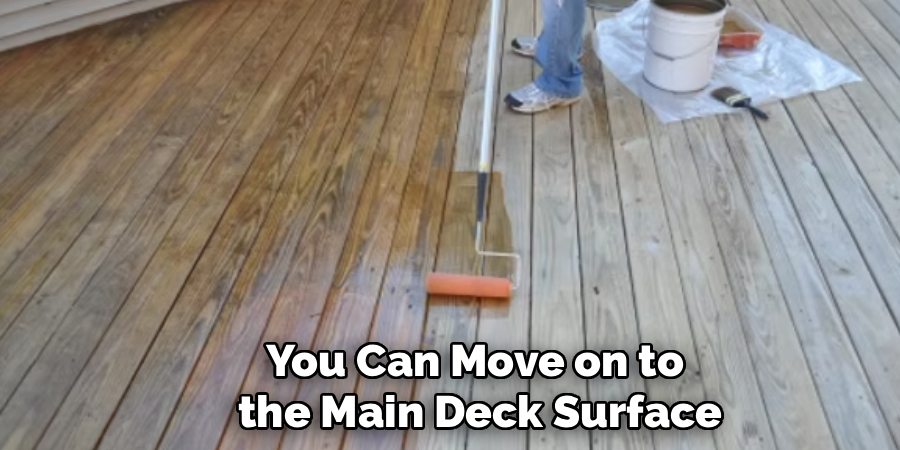
Step 8: Apply the Sealant to the Deck Floorboards
Once the railings are complete, you can move on to the main deck surface. The best tool for this job is a paint pad applicator attached to an extension pole. This allows you to work while standing up and apply a thin, even coat. Dip the pad in your paint tray and apply the sealant to a few boards at a time, working in long, smooth strokes from one end of the deck to the other. Always maintain a wet edge to prevent lap marks. Be careful not to apply the sealant too heavily; one thin coat is often all that is needed. Over-application can lead to a sticky, shiny surface that takes a long time to cure.
Step 9: Let the Sealant Dry Completely
After you have applied the final coat, the most important thing you can do is let the deck dry completely. Keep all foot traffic, furniture, and pets off the surface for at least 24 to 48 hours. The exact drying and curing time will depend on the product you used, the temperature, and the humidity, so check the instructions on the can for specific guidance. Rushing this final step can lead to scuffs, footprints, and smudges in your beautiful new finish. Allow the sealant to fully cure and harden to create the durable, protective barrier your deck needs.
Frequently Asked Questions
How Often Should I Seal My Deck?
The frequency depends on your climate and the type of product used.
- General Rule: Most experts recommend sealing your deck every 1 to 3 years.
- Water Test: A simple way to check is to sprinkle some water on the surface. If the water beads up, the sealant is still working. If it soaks into the wood, it is time to re-seal.
- Climate: Decks in harsh climates with heavy snow or intense sun may need sealing more often, sometimes annually.
What Is the Difference Between Sealing and Staining a Deck?
These terms are often used interchangeably, but there is a difference.
- Sealer: A clear or transparent finish designed primarily for moisture protection. It offers minimal UV protection and color change.
- Stain: Contains pigment to add color and provide UV protection. Stains can be transparent, semi-transparent, or solid. Most quality “stains” today contain sealants, combining both functions into one product.
Can I Seal a Brand New Wood Deck Right Away?
No, you should wait before sealing a new deck.
- Mill Glaze: New lumber has a “mill glaze” from the milling process that can prevent sealant from penetrating properly.
- Moisture Content: Pressure-treated wood is often sold with a high moisture content. You need to let the wood dry out.
- Wait Time: Most professionals recommend waiting anywhere from a few weeks to a few months before sealing a new deck. Let it weather naturally so the pores open up.
Is It Better to Use a Water-Based or Oil-Based Sealant?
Both have pros and cons.
- Oil-Based: Penetrates deeper into the wood for excellent durability and a rich finish. However, it has strong fumes and requires mineral spirits for cleanup.
- Water-Based: Offers easy soap-and-water cleanup, lower odor, and faster drying times. Modern water-based formulas have greatly improved and now offer durability that rivals oil-based products.
Can I Apply Sealant With a Sprayer?
Yes, a sprayer can be a very efficient way to apply sealant, but it requires care.

- Method: Use a pump sprayer or an airless paint sprayer to apply a thin coat. You must immediately go back over the sprayed area with a brush or roller (a technique called “back-brushing”) to work the sealant into the wood and ensure an even coat.
- Risks: Spraying can cause overspray onto your house, windows, and plants, so be extra diligent with your protective plastic sheeting.
Conclusion
Protecting your wood deck from the elements is not just an option; it is an essential part of home maintenance. While the process requires a weekend of dedicated effort, the reward is a beautiful, long-lasting outdoor space that you can enjoy for years. The keys to success lie in meticulous preparation—thorough cleaning, sanding, and repairing—and patient application. By choosing the right product and allowing for adequate drying time, you can achieve a professional-quality finish that defends against moisture and sun damage.
Now that you have a complete roadmap for how to seal wood deck boards, you are ready to tackle this project with confidence. The satisfaction of restoring your deck’s natural beauty and knowing it is protected for seasons to come is well worth the work.
About
Mike May is a distinguished figure in the world of woodworking and timber design, with a decade of expertise creating innovative and sustainable indoor solutions. His professional focus lies in merging traditional craftsmanship with modern manufacturing techniques, fostering designs that are both practical and environmentally conscious. As the author of Woodimber, Mike delves into the art and science of timber-craft, inspiring artisans and industry professionals alike.
Education
RMIT University (Melbourne, Australia)
-
Associate Degree in Design (Timber): Focus on sustainable design, industry-driven projects, and practical craftsmanship.
-
Gained hands-on experience with traditional and digital manufacturing tools, such as CAD and CNC software.
Nottingham Trent University (United Kingdom)
-
Bachelor’s in Woodworking and Product Design (Honors): Specialized in product design with a focus on blending creativity with production techniques.
-
Participated in industry projects, working with companies like John Lewis and Vitsoe to gain real-world insights.
Publications and Impact
In Woodimber, May shares his insights on timber design processes, materials, and strategies for efficient production. His writing bridges the gap between artisan knowledge and modern industry needs, making it a must-read for both budding designers and seasoned professionals.