 (1)")

Discovering original hardwood floors hidden beneath old, dusty carpeting is like winning the home improvement lottery. For decades, homeowners covered beautiful oak, maple, and pine floors with wall-to-wall carpeting, believing it added warmth and comfort. Today, however, we know that hardwood is not only more hygienic but also significantly increases property value. The prospect of revealing those vintage planks is exciting, but the physical work required to get there can seem daunting. Many people assume they need to hire expensive professionals to handle the demolition, but this is actually one of the most manageable DIY projects for a beginner.

Learning how to pull up carpet from hardwood floors safely is the key to preserving the treasure underneath. If you rip and tear without a plan, you risk scratching the wood or leaving behind stubborn staples that are a nightmare to remove. With the right tools and a bit of patience, you can strip a room in a single afternoon. This guide is designed to walk you through the process, ensuring you protect your lungs from dust and your floors from damage, setting the stage for a stunning room transformation.
Why Restoring Hardwood Floors Is Worth the Effort
There is a timeless elegance to natural wood that synthetic flooring simply cannot replicate. Hardwood floors bring warmth, character, and a sense of history to a home. Beyond aesthetics, they are far easier to clean than carpet, which traps allergens, dust mites, and pet dander deep within its fibers. For families with allergies, removing old carpet can lead to immediate health benefits and better air quality.
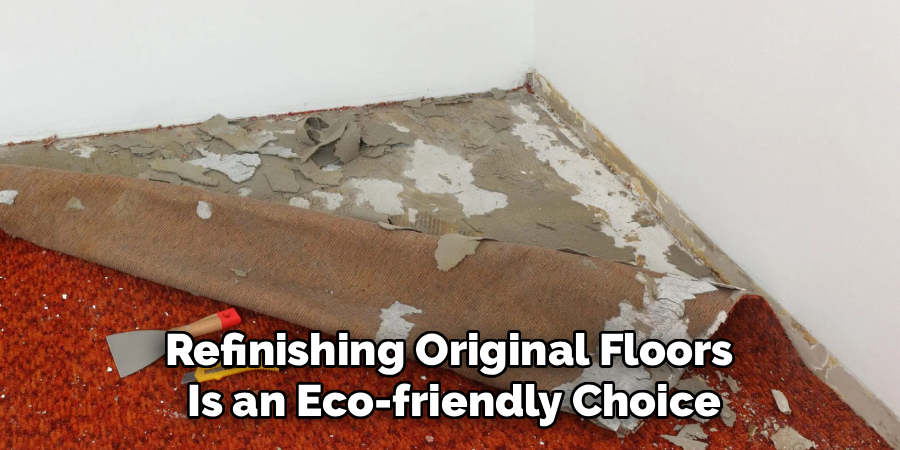
Furthermore, refinishing original floors is an eco-friendly choice. Instead of manufacturing new materials, you are restoring what is already there. Financially, the return on investment is substantial; prospective buyers almost always prefer hardwood over carpet, making this sweat equity pay off when it comes time to sell. While the removal process involves some elbow grease, the result is a durable, valuable, and beautiful foundation for your interior design.
Step-by-Step Guide on How to Pull Up Carpet from Hardwood Floors
Step 1: Clear the Room and Protect Yourself
Before you start tearing anything up, you must completely empty the room of all furniture, rugs, and decor. This might seem obvious, but trying to work around a heavy sofa or a bed frame will only slow you down and create tripping hazards. Once the room is clear, remove any doors that open into the room, including closet doors, as this gives you full access to the edges and makes removing the carpet rolls much easier. Personal protective equipment is non-negotiable for this job. Old carpets are notorious for trapping decades of dust and dirt, so wear a high-quality dust mask or respirator to protect your lungs. Safety glasses are also essential to shield your eyes from flying staples or tack strip debris, and heavy-duty work gloves will save your hands from the sharp tacks and rough carpet backing.
Step 2: Detach the Carpet from the Tack Strips
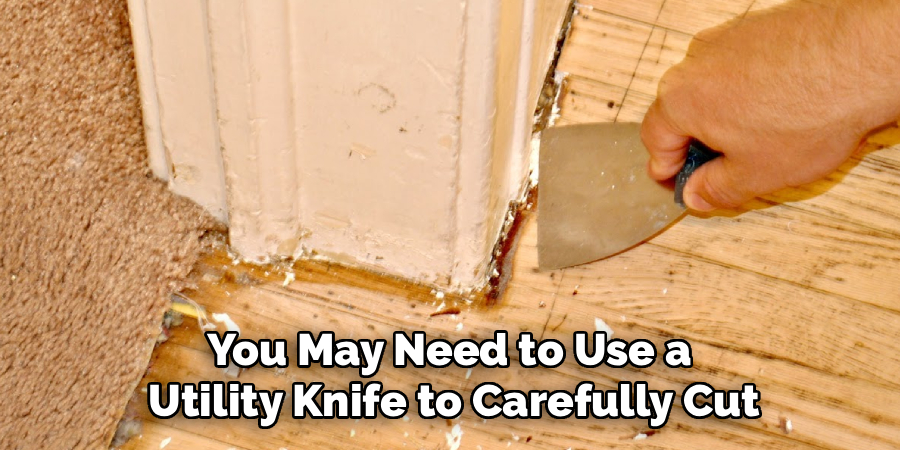
The carpet is held in place around the perimeter of the room by thin strips of wood covered in sharp tacks, known appropriately as tack strips. To begin removal, pick a corner of the room and use a pair of pliers to grab the carpet fibers. Pull upwards firmly to disengage the carpet from the tacks. If the carpet is stuck under a baseboard, you may need to use a utility knife to carefully cut a small slit to get a better grip. Be extremely gentle during this initial pull to avoid scratching the floor or damaging the baseboard. Once you have a corner free, pull along the entire wall to release that edge. You will hear a distinct ripping sound as the backing pulls away from the sharp tacks holding it down.
Step 3: Cut the Carpet into Manageable Strips
Trying to wrestle a giant, heavy roll of wall-to-wall carpet out of a room is a recipe for back pain. It is much smarter to cut the carpet into smaller, easier-to-handle strips before you roll it up. Fold back the section of carpet you just released to expose the backing. Using a sharp utility knife, slice through the backing from the underside to avoid dulling your blade on the thick pile fibers. Cut the carpet into strips that are about three to four feet wide. Be very careful not to slice all the way through and score the hardwood floor underneath. You can slide a thin piece of plywood or a specialized carpet hook under the carpet as you cut to create a protective barrier between your knife and the precious wood below.
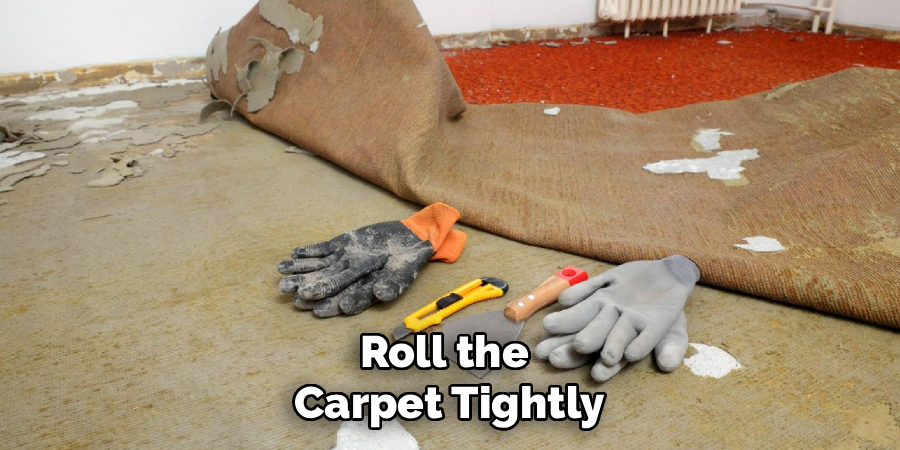
Step 4: Roll Up and Remove the Carpet Sections
Now that you have your manageable strips, start rolling them up one by one. Roll the carpet tightly, starting from the wall you detached and working your way across the room. As you roll, the weight of the carpet will help compress it into a compact bundle. Once a strip is fully rolled, secure it with heavy-duty duct tape or twine to keep it from unraveling. This makes carrying the rolls out to your vehicle or dumpster much safer and cleaner. If the carpet is particularly old or dirty, try to keep the rolls from banging against walls or door frames to prevent spreading dust throughout the rest of your house. Removing the bulk of the material gives you a clear view of the next layer you need to tackle: the carpet padding.
Step 5: Remove the Old Carpet Padding
Underneath the carpet, you will find a layer of foam padding, which is usually stapled or glued to the floor. This material often degrades over time, becoming crumbly or sticky. In many cases, the padding is held down by hundreds of staples. Simply grab a corner of the padding and pull it up, rolling it just like you did with the carpet. It is usually much lighter, so you may be able to roll larger sections at once. If the padding is stuck to the floor with old adhesive, do not force it, as you could gouge the wood. Instead, use a plastic putty knife to gently scrape it up. Bag the padding immediately in heavy-duty contractor trash bags to contain the dust and small particles that will inevitably flake off during removal.
Step 6: Carefully Pry Up the Tack Strips
The tack strips around the perimeter are dangerous and need to be removed carefully. Slide a sturdy pry bar or a specialized molding bar under the tack strip, positioning it next to the nails that hold the strip to the floor. Gently tap the end of the pry bar with a hammer to wedge it under the strip. Apply downward pressure to the handle to lift the strip, popping the nail loose. Do not pull too hard or fast, as this can splinter the wood floor or damage the baseboards. Work your way along the wall, popping each nail individually. Place the removed tack strips directly into a bucket or heavy box to prevent stepping on the sharp tacks. This is a crucial step in learning how to pull up carpet from hardwood floors without causing unnecessary damage to the wood or yourself.

Frequently Asked Question
What Tools Do I Need to Remove Carpet?
You will need a specific set of tools to make this job safe and efficient.
- Utility Knife: Essential for cutting the carpet into strips. Ensure you have plenty of fresh blades.
- Pry Bar and Hammer: Used for removing the tack strips carefully without damaging the floor or baseboards.
- Pliers: Heavy-duty pliers are needed to pull up the carpet from the tacks and remove stubborn staples.
- Safety Gear: A dust mask, safety glasses, and thick work gloves are mandatory to protect against dust and sharp objects.
- Duct Tape: To secure the rolled-up carpet for disposal.
How Do I Dispose of the Old Carpet?
Disposal depends on your local waste management regulations and the amount of carpet.
- Curbside Pickup: Some municipalities allow you to put carpet out with regular trash if it is cut into short lengths (usually under 4 feet) and bundled. Check your local rules first.
- Dumpster Rental: If you are doing a whole house, renting a dumpster is often the easiest solution.
- Hauling Services: Junk removal companies will come to your house and take the carpet away for a fee.
- Recycling: Some facilities accept old carpet for recycling; check online for centers near you.
Can I Remove Carpet Without Removing Baseboards?
Yes, you can absolutely remove carpet without taking off the baseboards, and it is usually the preferred method to save time.
- Cutting: You carefully cut the carpet near the edge, leaving enough to grab with pliers.
- Tack Strips: The tack strips are positioned slightly away from the wall. You can pry them up without disturbing the molding if you are gentle.
- Touch-ups: You might nick the paint on the baseboards during the process, so be prepared to do some minor touch-up painting afterwards.
What If There Is Glue on the Hardwood Floor?
Old carpet padding sometimes leaves behind stubborn adhesive residue or foam chunks stuck to the wood.
- Scraping: Use a plastic putty knife (not metal, to avoid scratches) to scrape up as much as possible.
- Solvents: Mineral spirits or commercial adhesive removers can soften the glue. Apply a small amount to a cloth and rub the spot gently.
- Sanding: If the glue is very hard and brittle, it might come off during the floor sanding process, but soft, gummy glue will clog sandpaper instantly and must be removed chemically first.
How Long Does It Take to Remove Carpet from a Room?
The time required depends on the size of the room and the method used to install the carpet.
- Standard Bedroom: For a roughly 12×12 room, expect the removal process (carpet, pad, and tack strips) to take about 2 to 4 hours for one person.
- Staple Removal: This is the wildcard. If the installer used hundreds of staples, add another 1 to 2 hours just for pulling them out.
- Preparation: Moving furniture and prepping the room adds time, so budget a full Saturday for a standard-sized room to be safe.
Conclusion
Revealing the hardwood floors beneath worn-out carpet is one of the most gratifying home improvement projects you can undertake. It instantly modernizes your space, improves air quality, and adds significant value to your home. While the process involves physical labor and creates a fair amount of dust, the steps are straightforward and require no specialized skills. By working methodically—cutting the carpet into strips, removing the padding, and carefully prying up the tack strips—you protect the wood underneath and ensure a successful renovation.
The most critical part is patience, especially during the tedious staple removal phase. Don’t rush; take the time to ensure every piece of metal is gone before you think about sanding or refinishing. Now that you understand how to pull up carpet from hardwood floors, you have the knowledge to reclaim the beauty of your home’s original architecture. Grab your gloves, put on your mask, and get ready to uncover the hidden potential of your floors.
About
Mike May is a distinguished figure in the world of woodworking and timber design, with a decade of expertise creating innovative and sustainable indoor solutions. His professional focus lies in merging traditional craftsmanship with modern manufacturing techniques, fostering designs that are both practical and environmentally conscious. As the author of Woodimber, Mike delves into the art and science of timber-craft, inspiring artisans and industry professionals alike.
Education
RMIT University (Melbourne, Australia)
-
Associate Degree in Design (Timber): Focus on sustainable design, industry-driven projects, and practical craftsmanship.
-
Gained hands-on experience with traditional and digital manufacturing tools, such as CAD and CNC software.
Nottingham Trent University (United Kingdom)
-
Bachelor’s in Woodworking and Product Design (Honors): Specialized in product design with a focus on blending creativity with production techniques.
-
Participated in industry projects, working with companies like John Lewis and Vitsoe to gain real-world insights.
Publications and Impact
In Woodimber, May shares his insights on timber design processes, materials, and strategies for efficient production. His writing bridges the gap between artisan knowledge and modern industry needs, making it a must-read for both budding designers and seasoned professionals.