 (1)")

A wooden ladder is a wonderfully versatile object, serving as both a functional tool and a charming piece of home decor. Whether you imagine a rustic blanket ladder leaning against your living room wall or a sturdy A-frame for reaching high shelves, building your own adds a personal touch that store-bought items lack.
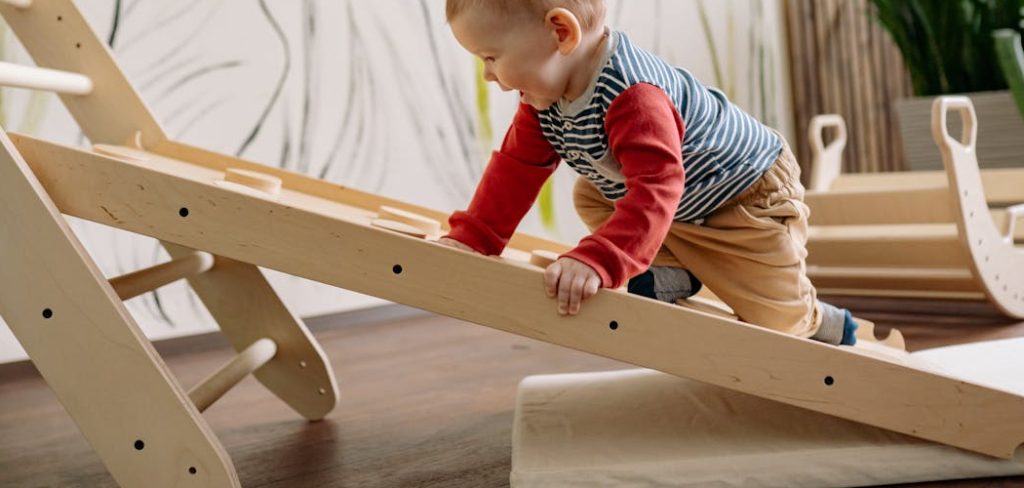
This project is a fantastic entry point into woodworking, teaching basic skills in measuring, cutting, and assembly. While the idea might seem daunting, learning how to make wood ladder is a surprisingly straightforward process that requires just a few common tools and some careful planning. This guide will walk you through every step, ensuring you create a beautiful and stable ladder you can be proud of, no matter your experience level.
Why a DIY Wood Ladder is a Great Project
Building your own wood ladder is a rewarding experience that offers benefits beyond just the finished product. It’s a cost-effective way to get a custom piece of furniture or a tool that perfectly fits your needs, often for less than the price of a mass-produced version. The project allows for complete creative freedom; you can choose the wood, the finish, and the exact dimensions to match your home’s style. Furthermore, constructing a ladder is an excellent way to practice fundamental woodworking skills like making accurate cuts and creating strong joints. It’s a project with a low barrier to entry that yields a highly functional and aesthetically pleasing result, boosting your confidence for more complex builds in the future.
Step-by-Step Guide on How to Make Wood Ladder
Step 1: Design Your Ladder and Gather Your Materials
Before you begin, decide on the ladder’s purpose. A decorative blanket ladder will have different requirements than a functional A-frame ladder meant to hold weight. For a simple leaning ladder, a height of 6 feet is common. Sketch your design, noting the overall height, width, and spacing of the rungs—typically 12 inches apart. Create a cut list based on your design. For the side rails, you will need two straight 2×4 boards. For the rungs, 1-inch or 1.25-inch thick dowels are a great choice. You will also need wood glue, 3-inch screws, a tape measure, a pencil, a power drill, and a saw.

Step 2: Cut the Side Rails to Length
The side rails are the backbone of your ladder, so they must be cut precisely. Using your tape measure, mark both of your 2×4 boards to the desired final height of your ladder. To create a stable base and allow the ladder to lean securely against a wall, it is best to cut the top and bottom of the rails at a slight angle. An angle of 5 to 10 degrees is standard. Use a miter saw or a circular saw with a guide to make these angled cuts. Ensure both side rails are identical in length and their angles mirror each other perfectly.
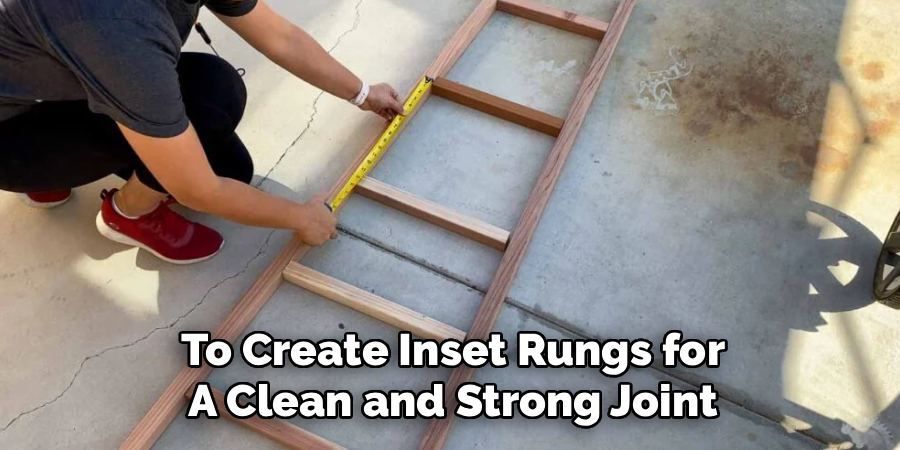
Step 3: Mark the Locations for the Rungs
With your side rails cut, lay them flat on the ground, parallel to each other. Use your tape measure to carefully mark the center points for each rung. A standard distance between rungs is 12 inches, but you can adjust this to your preference. Start your first measurement about 12 inches down from the top of the rails and continue marking every 12 inches until you reach the bottom. Use a square to draw a straight line across the face of each 2×4 at every mark. This ensures your rungs will be perfectly level when installed.
Step 4: Drill the Holes for the Rungs
This step requires precision. To create inset rungs for a clean and strong joint, you will use a Forstner bit or a spade bit that matches the diameter of your dowels. If you are using 1-inch dowels, use a 1-inch bit. Securely clamp one of the side rails to your workbench. At each marked center point, drill a hole that is about a half-inch deep. Be careful not to drill all the way through the wood. A piece of tape wrapped around your drill bit can act as a helpful depth guide. Repeat this process for all the marks on both side rails.
Step 5: Cut the Rungs to the Desired Width
Now it is time to cut the dowels that will become the rungs of your ladder. Determine the desired width of your ladder—a width of 18 to 20 inches is common for a decorative ladder. Remember to account for the depth of the holes you just drilled. For example, if you want a final width of 18 inches and you drilled half-inch deep holes on each side, you will need to cut your dowels to a length of 19 inches (18 inches + 0.5 inches + 0.5 inches). Use your saw to cut all the rungs to the exact same length.
Step 6: Assembling the Frame
This is where your project starts to look like a ladder. Lay one of the side rails on the floor with the drilled holes facing up. Apply a small amount of wood glue into each hole. Insert one end of each dowel rung into its corresponding hole, tapping it gently with a rubber mallet to ensure it is fully seated. Once all the rungs are in place, apply glue to the holes of the second side rail. Carefully align and place the second rail onto the exposed ends of the dowels, working from one end to the other until all rungs are seated.

Step 7: Secure the Rungs with Screws
While wood glue creates a strong bond, adding screws provides essential mechanical strength and safety. Once the ladder is assembled, stand it up and check that it is square. Then, from the outside of each side rail, drive a 3-inch screw through the rail and into the center of each dowel rung. This will lock the rungs in place and prevent them from ever twisting or pulling out. This reinforcement is especially critical if the ladder will ever be used to support any weight. Countersinking the screws slightly will allow you to fill the holes with wood putty for a cleaner finish.
Step 8: Sand and Finish Your Ladder
The final step is to give your ladder a smooth and protected finish. Use medium-grit sandpaper (around 120-grit) to sand the entire ladder, smoothing any rough edges and corners. Pay special attention to the areas around the screws if you filled them with putty. After the initial sanding, follow up with a finer grit sandpaper (220-grit) for a silky-smooth surface. Wipe away all the dust with a tack cloth. You can now apply your chosen finish, whether it is a clear protective coat, a wood stain to match your decor, or a coat of paint.
Frequently Asked Questions
What Is the Best Wood to Use for a Ladder?
For a strong, functional ladder, hardwoods like oak or maple are ideal due to their strength and durability. For a more affordable and lightweight decorative ladder, softwoods like pine or fir are excellent choices. They are easy to work with and take stain and paint well. Avoid using wood with knots, cracks, or warping, as these can compromise the ladder’s structural integrity.
What Is the Standard Spacing for Ladder Rungs?
The standard spacing for rungs on a utility ladder is 12 inches from the center of one rung to the center of the next. This spacing provides a comfortable and safe distance for climbing. For decorative ladders, you can adjust this measurement based on aesthetics, but 10 to 14 inches is a common range that looks proportional and balanced.
How Do I Make Sure My Ladder Is Safe to Climb?
Safety is paramount if your ladder will be used for climbing.
- Use Strong Wood: Choose high-quality hardwood free of defects.
- Reinforce Joints: Use both wood glue and screws to secure each rung.
- Correct Angle: When leaning the ladder, follow the “4-to-1 rule”: for every four feet of height, the base should be one foot away from the wall.
- Check for Stability: Before climbing, ensure the ladder is on a firm, level surface and does not wobble.
How Do You Cut Angles on the Ladder Legs Without a Miter Saw?
You can still cut accurate angles without a miter saw. Use a protractor or a speed square to mark your desired angle (usually 5-10 degrees) on the 2×4. Secure the board to a workbench with clamps. Then, using a handheld circular saw or even a handsaw, carefully follow your marked line to make the cut. Cutting slowly and precisely is key to getting a clean result.
Can I Make an A-Frame Ladder with This Method?
Yes, you can adapt this method to build an A-frame ladder. You would essentially build two identical straight ladders, but make the side rails narrower (e.g., using 2x3s instead of 2x4s). Then, you connect the two halves at the top using heavy-duty hinges. A folding metal bracket or a rope tied between the two sides can be added partway down to prevent the ladder from over-extending.

Conclusion
Building a wooden ladder is an incredibly satisfying project that combines practical skills with creative expression. It is a testament to the idea that you can create beautiful, functional items for your home with your own two hands. The process, from careful measurement to final assembly, reinforces the fundamentals of woodworking in a simple and accessible way. The most important takeaways are to prioritize precise cuts, create strong joints with both glue and screws, and always sand thoroughly for a professional-looking finish.
Now that you have a detailed guide on how to make wood ladder, you are ready to start building. Whether it becomes a stylish home for your blankets or a trusty tool for your workshop, the ladder you create will be a source of pride and utility for many years to come.
About
Mike May is a distinguished figure in the world of woodworking and timber design, with a decade of expertise creating innovative and sustainable indoor solutions. His professional focus lies in merging traditional craftsmanship with modern manufacturing techniques, fostering designs that are both practical and environmentally conscious. As the author of Woodimber, Mike delves into the art and science of timber-craft, inspiring artisans and industry professionals alike.
Education
RMIT University (Melbourne, Australia)
-
Associate Degree in Design (Timber): Focus on sustainable design, industry-driven projects, and practical craftsmanship.
-
Gained hands-on experience with traditional and digital manufacturing tools, such as CAD and CNC software.
Nottingham Trent University (United Kingdom)
-
Bachelor’s in Woodworking and Product Design (Honors): Specialized in product design with a focus on blending creativity with production techniques.
-
Participated in industry projects, working with companies like John Lewis and Vitsoe to gain real-world insights.
Publications and Impact
In Woodimber, May shares his insights on timber design processes, materials, and strategies for efficient production. His writing bridges the gap between artisan knowledge and modern industry needs, making it a must-read for both budding designers and seasoned professionals.