 (1)")

There is something deeply satisfying about running your hand across a smooth, sturdy surface that you built with your own two hands. Woodworking is more than just a hobby; it is a connection to a craft that has existed for centuries. When you build a piece of furniture, you aren’t just assembling materials—you are creating a legacy piece that will host family dinners, late-night study sessions, and morning coffees for years to come.
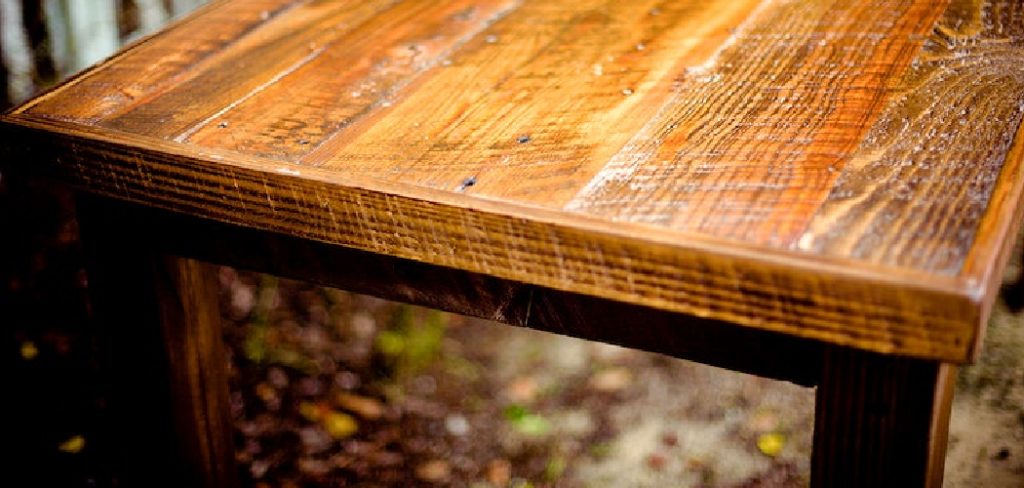
Building a wood table top might seem intimidating at first, especially when you look at the flawless finishes in high-end furniture stores. However, the process is far more accessible than most people realize.
This guide on how to build wood table top removes the mystery from the process, breaking down the construction of a classic wood table top into manageable actions.
What Will You Need?
Before you make your first cut, gather these essential tools and materials. Having everything ready will make the process smoother and safer.
Materials:
- Lumber: Choose a hardwood like oak, maple, walnut, or cherry for durability. Softwoods like pine are cheaper but dent easily. Buy about 20% more than you think you need to account for mistakes and waste.
- Wood Glue: A high-quality PVA wood glue (like Titebond II or III) is crucial for strong joints.
- Biscuits or Dowels (Optional): These help with alignment during the glue-up process.
- Sandpaper: A variety of grits ranging from 80 (coarse) to 220 (fine).
- Finish: Polyurethane, Danish oil, or stain depending on your preference.
- Clean Rags: For wiping away glue squeeze-out and applying finish.
Tools:
- Table Saw: To rip the boards to the correct width and ensure straight edges.
- Miter Saw: For cutting boards to length.
- Planer and Jointer: Essential for getting boards perfectly flat and square. If you don’t own these, many lumber yards will mill the wood for you for a fee.
- Pipe Clamps or Bar Clamps: You will need several of these—enough to span the width of your table, plus a few extra.
- Orbital Sander: To smooth the surface efficiently.
- Tape Measure and Pencil: For accurate layout.
- Square: To check that your ends are cut at perfect 90-degree angles.
10 Easy Steps on How to Build Wood Table Top
Step 1: Selecting and Preparing Your Lumber
The foundation of a great table is great wood. Visit a dedicated lumber yard rather than a big-box home improvement store if possible. You want to look for boards that are relatively straight and free of major defects like large knots, splits, or severe warping. When selecting your boards, consider the grain pattern.

You want the grain to flow naturally across the table top. Avoid boards that are twisted like a corkscrew, as these are notoriously difficult to flatten. Once you have your wood, let it acclimate to your shop or garage for a few days. Wood moves with humidity changes, and letting it settle before you start cutting helps prevent warping later on.
Step 2: Milling the Lumber Square
Rough lumber is rarely perfectly straight or flat. Milling is the process of making it so. This is arguably the most critical step for a seamless table top. You need to use a jointer to flatten one face of each board and square up one edge. Once you have a flat face and a square edge, use a planer to flatten the opposite face and bring the board to your desired thickness.
Finally, use your table saw to rip the board to its final width, using the jointed edge against the fence. The goal here is to have boards that are perfectly rectangular in cross-section. If the edges aren’t perfectly 90 degrees to the face, your table top will bow or cup when you glue it together. If you do not have these machines, ask your lumber supplier to “S4S” (Surface 4 Sides) the lumber for you. This saves time and ensures accuracy.
Step 3: Cutting to Rough Length
With your boards milled to the correct thickness and width, it is time to cut them to length. However, do not cut them to the exact final length just yet. Leave them about 2 to 3 inches longer than your final design requires. This extra length acts as a safety buffer. During the glue-up process, boards can shift slightly, or the ends might not align perfectly. Having extra material allows you to trim the entire table top to the precise length after it has been assembled, ensuring the ends are perfectly flush and square. Use a miter saw or a circular saw for this task.
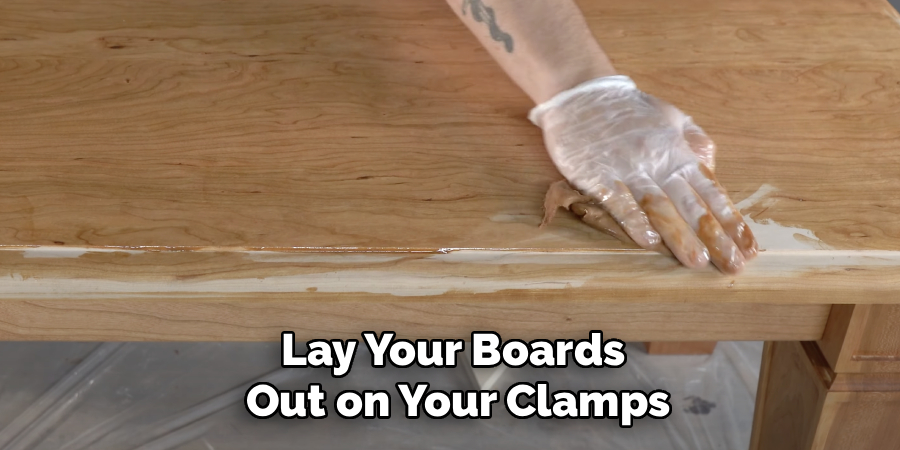
Step 4: Dry Fitting and Alignment Aids
Before you even touch the glue bottle, do a “dry run.” Lay your boards out on your clamps in the order you marked earlier. Check the seams where the boards meet. They should be tight with no visible gaps. If you see gaps, you may need to run the edges over the jointer again. This is also the time to add alignment aids if you choose to use them. While modern wood glue is incredibly strong—often stronger than the wood itself—keeping boards perfectly flat during clamping can be like wrestling an octopus.
Using biscuits, dowels, or dominoes helps keep the faces of the boards aligned flush with each other. This doesn’t necessarily add strength to the long-grain-to-long-grain joint, but it significantly reduces the amount of sanding you have to do later to get the table flat. Mark the locations for your biscuits or dowels and cut the slots now.
Step 5: The Glue-up Process
This is the moment of truth. Preparation is key because once the glue starts drying, the clock is ticking. Arrange your clamps on a flat surface. Spread a consistent bead of wood glue along the edge of the first board. You want enough glue to get “squeeze-out” (small beads of glue emerging from the joint) when clamped, but not so much that it drips everywhere.
Use a silicone brush or your finger to spread the glue to cover the entire edge surface. Bring the boards together one by one. If you are gluing a very wide table, it is often easier to glue it in sections (e.g., glue three boards together, then another three, and finally glue the two large sections together) rather than trying to panic-glue ten boards at once.
Step 6: Clamping Correctly
Proper clamping pressure is vital. You need enough pressure to close the joint tight, but not so much that you squeeze out all the glue, creating a “starved joint.” Start by applying light pressure with your clamps.
Check that the boards are sitting flat on the clamp bars. Alternate your clamps: place one clamp underneath the table, the next one on top, and so on. This alternating pattern helps prevent the table from bowing or cupping under the pressure. Once the clamps are positioned, tighten them gradually, working from the center out. Watch the seams; you should see a fine line of glue beads squeezing out evenly along the entire length.

Step 7: Removing Excess Glue
Dealing with glue squeeze-out is a topic of debate among woodworkers, but timing is generally the consensus. You do not want to wipe wet glue with a wet rag immediately, as this can push glue into the wood pores, which will show up as ugly splotches when you apply stain later. Instead, wait about 20 to 30 minutes until the glue becomes rubbery or “gelled.” At this stage, you can take a chisel or a paint scraper and easily peel the glue off in a single strip.
It is clean and efficient. If you miss this window and the glue hardens completely, you will have to scrape and sand it off, which is much more labor-intensive. Ensure you check the underside of the table as well; hardened glue drops on the bottom can interfere with how the table sits on its base.
Step 8: Flattening and Sanding
Once the glue has cured for at least 24 hours, remove the clamps. Even with your best efforts, the table top likely won’t be perfectly flat. You might have small ridges where the boards meet. Start with a coarse grit sandpaper (like 60 or 80 grit) on your orbital sander or belt sander to level these ridges. Move the sander slowly and evenly across the entire surface; don’t focus on one spot or you will create a depression.
Pencil marks can help here—scribble lightly over the whole table, and sand until the pencil marks are gone. This ensures you have covered every inch. Progress through the grits: 80, then 120, then 180, and finally 220. Between each grit, wipe off the dust. The surface should feel incredibly smooth to the touch by the time you finish with 220 grit.
Step 9: Trimming to Final Size
Now that your table top is glued and sanded, it is time to cut it to its final, perfect dimensions. Use a tape measure to mark your exact length. To get a perfectly straight cut across the width of a heavy table top, a track saw is the best tool. If you don’t have one, you can make a simple guide using a straight board clamped to the table top. Run your circular saw against this guide to trim the ends. This removes the uneven ends left from the rough cut in Step 3 and leaves you with crisp, square edges.
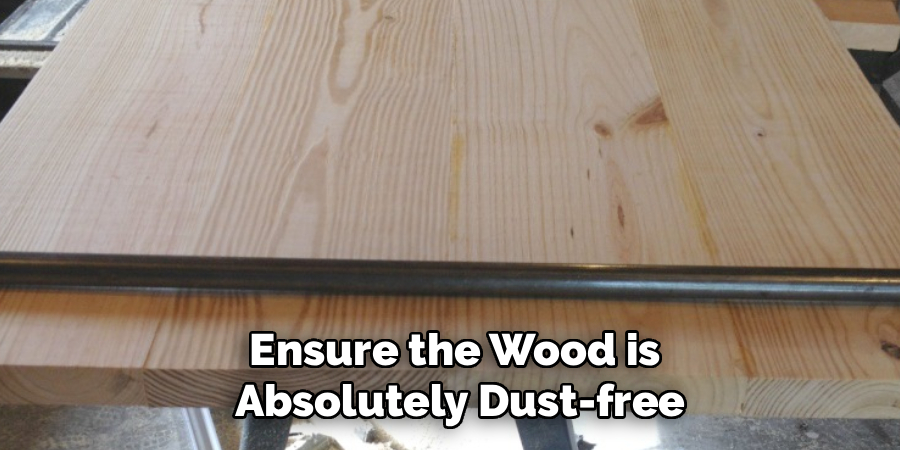
Step 10: Finishing the Table Top
The finish protects the wood and highlights its beauty. First, ensure the wood is absolutely dust-free. Use a tack cloth or compressed air to remove every speck of dust. Choose a finish that suits your lifestyle. For a dining table that will see spills and hot plates, a polyurethane (oil-based or water-based) is a great choice for durability.
If you want a more natural, matte look and don’t mind reapplying it occasionally, a hard wax oil (like Rubio Monocoat) is excellent. Apply the finish according to the manufacturer’s instructions. Usually, this involves applying a coat, letting it dry, lightly sanding with high-grit sandpaper (320+), and applying a second or third coat.
Conclusion
Building your own wood table top is a journey of patience and precision, but the destination is well worth the effort. By following these steps on how to build wood table top, you have moved from a pile of rough lumber to a functional piece of art that serves your home.
Don’t be discouraged if your first attempt isn’t perfect; even master woodworkers make mistakes. The character of a handmade piece lies in its story—the hours you spent in the shop, the challenges you solved, and the satisfaction of knowing you built it yourself.
So gather your tools, select your wood, and start building something that will last a lifetime.
About
Mike May is a distinguished figure in the world of woodworking and timber design, with a decade of expertise creating innovative and sustainable indoor solutions. His professional focus lies in merging traditional craftsmanship with modern manufacturing techniques, fostering designs that are both practical and environmentally conscious. As the author of Woodimber, Mike delves into the art and science of timber-craft, inspiring artisans and industry professionals alike.
Education
RMIT University (Melbourne, Australia)
-
Associate Degree in Design (Timber): Focus on sustainable design, industry-driven projects, and practical craftsmanship.
-
Gained hands-on experience with traditional and digital manufacturing tools, such as CAD and CNC software.
Nottingham Trent University (United Kingdom)
-
Bachelor’s in Woodworking and Product Design (Honors): Specialized in product design with a focus on blending creativity with production techniques.
-
Participated in industry projects, working with companies like John Lewis and Vitsoe to gain real-world insights.
Publications and Impact
In Woodimber, May shares his insights on timber design processes, materials, and strategies for efficient production. His writing bridges the gap between artisan knowledge and modern industry needs, making it a must-read for both budding designers and seasoned professionals.