 (1)")

Wood floors bring timeless warmth and character to any home. Over time, however, daily life can leave its mark. Scuffs, scratches, and a general dullness can diminish their natural beauty. Before you consider the costly and disruptive process of a full refinishing, know that there’s a simpler way.

This guide on how to revitalize wood floors will walk you through the process of revitalizing your wood floors, breathing new life into them with a straightforward, do-it-yourself approach.
You will learn how to prepare, clean, and restore your floors, transforming them from tired and worn to bright and beautiful.
What Will You Need?
Gathering all your tools and materials before you begin will make the process much smoother. Here’s a detailed list of what you’ll need for this project.
Cleaning & Preparation:
- Broom and dustpan
- Vacuum cleaner with a hard floor attachment (avoid beater bars)
- Microfiber mop or cloths
- Two buckets
- pH-neutral wood floor cleaner
- Mineral spirits or a designated wax remover (if your floor has wax buildup)
- Soft cloths or rags
- Painter’s tape
- Plastic sheeting or drop cloths
Repair & Restoration:
- Wood filler or putty matching your floor’s color
- Flexible putty knife
- Fine-grit sandpaper (220-grit or higher)
- Tack cloth
Finishing:
- Wood floor restorer or polish (choose a product compatible with your floor’s existing finish, e.g., polyurethane)
- Applicator pad (often included with the restorer) or a high-quality microfiber pad
Safety Gear:
- Knee pads
- Gloves
- Safety glasses
10 Easy Steps on How to Revitalize Wood Floors
Follow these steps carefully to achieve a professional-looking result. This process is designed to be thorough, so set aside a full day or a weekend to complete it without rushing.
Step 1: Empty and Prepare the Room
The first essential step is to create a completely clear workspace. Remove all furniture, rugs, plants, and any other items from the room. This not only gives you unobstructed access to the entire floor but also protects your belongings from cleaning products and dust. Once the room is empty, take the time to protect adjacent areas.
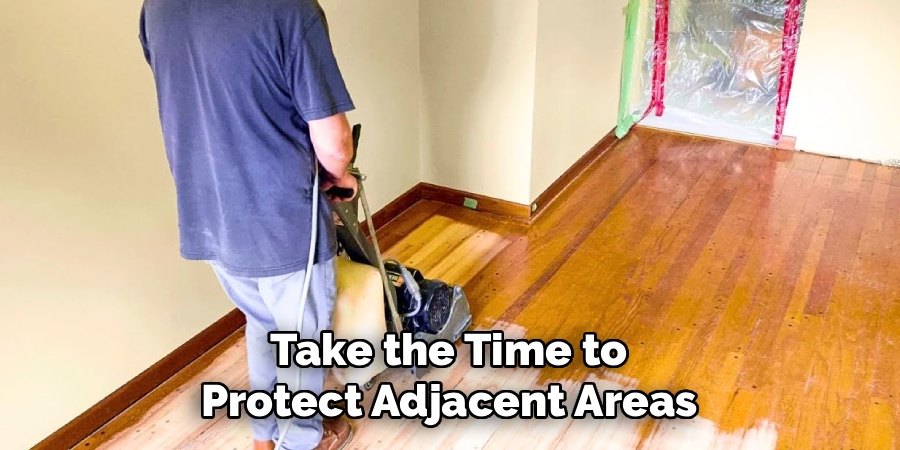
Use painter’s tape and plastic sheeting to cover baseboards, door thresholds, and any built-in cabinetry. This small effort will save you a lot of cleanup time later and prevent accidental damage to your trim. This is also a good time to ensure you have adequate ventilation by opening windows or setting up fans, which will be important for drying and curing.
Step 2: Thoroughly Sweep and Vacuum
Now, focus on removing all loose dirt and debris. Start by sweeping the entire floor with a soft-bristled broom, paying close attention to corners and edges where dust bunnies love to hide. Use a dustpan to collect the debris. Next, use a vacuum cleaner with a hard floor attachment. It is critical to use an attachment without a beater bar or rotating brushes, as these can scratch or damage the wood surface.
Go over the entire floor methodically, ensuring you vacuum along the direction of the wood planks to effectively lift dirt from the seams between the boards. A thorough vacuuming is crucial because any remaining grit can act like sandpaper during the mopping phase, causing new scratches.
Step 3: Deep Clean the Floor
With all loose debris gone, it’s time for a wet cleaning. Prepare two buckets. Fill one with a mixture of warm water and a pH-neutral wood floor cleaner, following the manufacturer’s dilution instructions precisely. Fill the second bucket with clean, cool water for rinsing. Dip your microfiber mop into the cleaning solution and wring it out until it is just damp, not soaking wet. Excess water is the enemy of wood floors.
Mop a small section of the floor at a time, moving with the grain of the wood. After cleaning a section, rinse the mop head thoroughly in the clean water bucket, wring it out completely, and go over the section again to remove any soap residue. Repeat this two-bucket process across the entire room.
Step 4: Address Wax Buildup (If Necessary)
This step is only for floors that have been previously treated with wax-based products, which can prevent the new finish from adhering properly. To test for wax, find an inconspicuous spot (like inside a closet) and apply a small drop of mineral spirits. Wait a few minutes, then wipe the spot with a clean, white cloth. If the cloth comes away with a yellowish or brownish residue, you have wax buildup that needs to be removed.
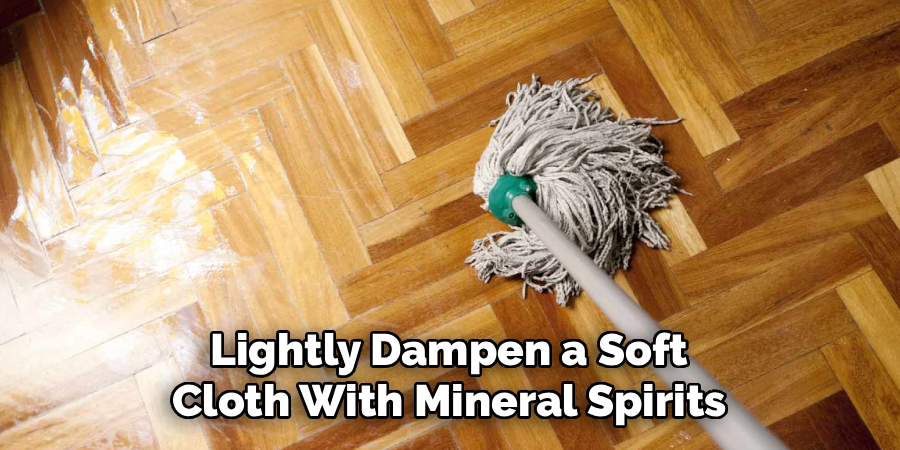
To do this, lightly dampen a soft cloth with mineral spirits and wipe down the floor in small, manageable sections. Use a second, clean cloth to immediately wipe the area dry. Work methodically and ensure the room is well-ventilated during this process.
Step 5: Allow the Floor to Dry Completely
Patience is key at this stage. Before you can proceed with any repairs or refinishing, the wood must be absolutely 100% dry. Any trapped moisture can cause clouding in the new finish or lead to long-term damage to the wood itself. Depending on the humidity and airflow in your home, this can take anywhere from a few hours to a full 24 hours. To be safe, it’s best to wait overnight. Opening windows or using fans (pointed away from the floor to avoid blowing dust onto it) can help speed up the drying process. You can test for dryness by touching the seams between planks, as this is where moisture tends to linger.
Step 6: Inspect and Repair Scratches
Once the floor is bone-dry, get down on your hands and knees and carefully inspect the entire surface for imperfections. Look for deeper scratches, gouges, or small cracks that the cleaning process didn’t fix. For minor surface scratches, you might be able to simply buff them out. For deeper marks, use a wood filler or putty that closely matches the color of your floor. Apply a small amount of the filler directly into the scratch using a flexible putty knife, pressing it in firmly. Scrape away any excess with the knife so the filler is flush with the wood surface. Allow the filler to dry completely according to the product’s instructions, which may take several hours.
Step 7: Sand the Repairs Smooth
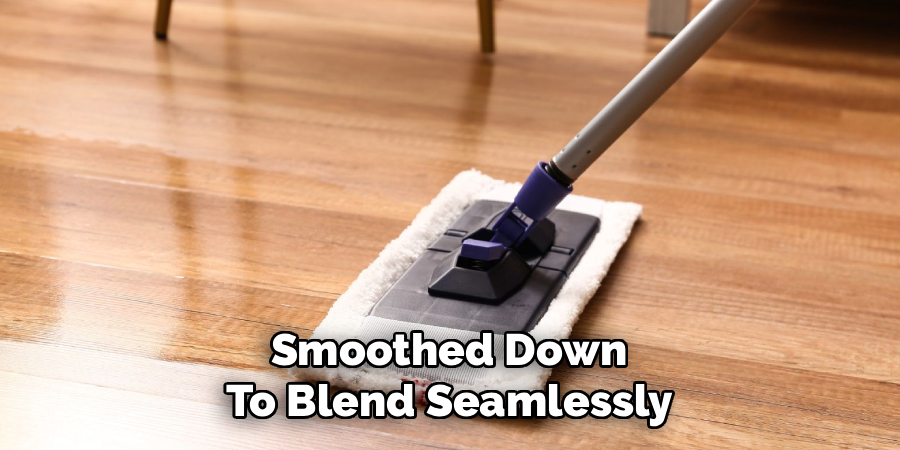
After the wood filler has fully cured, it will need to be smoothed down to blend seamlessly with the surrounding floor. Wrap a piece of fine-grit sandpaper (220-grit or higher is ideal) around a small sanding block. Gently sand only the filled area, using light pressure. Your goal is to make the repair level with the floor, not to sand the surrounding finish. Feather the edges of your sanding to create a smooth transition. Be careful not to sand too aggressively, as you could remove the finish from the wood around the repair.
Step 8: Final Dust Removal
Sanding, even on a small scale, creates fine dust. This dust must be completely removed before applying the new finish. Go over the repaired areas and the entire floor one last time with a tack cloth. A tack cloth is a sticky piece of cheesecloth designed to pick up very fine particles that vacuuming might miss. Wipe the floor gently, turning the cloth frequently to a clean side. This ensures you have a perfectly clean, dust-free surface, which is essential for achieving a smooth, flawless final coat. Do a final visual inspection under good light to make sure no dust remains.
Step 9: Apply the Wood Floor Restorer
Now for the transformative step. Pour the wood floor restorer or polish into a clean tray or directly onto the floor in an S-shaped pattern. Start in the corner of the room furthest from the door, so you can work your way out without stepping on the wet finish. Use a clean microfiber applicator pad and apply the product in a thin, even coat. Always move in the direction of the wood grain. Work in small, manageable sections (e.g., 5×5 feet) and be careful to maintain a “wet edge” to avoid lap marks where sections overlap. Do not overwork the product; simply apply it smoothly and move on.
Step 10: Let it Cure
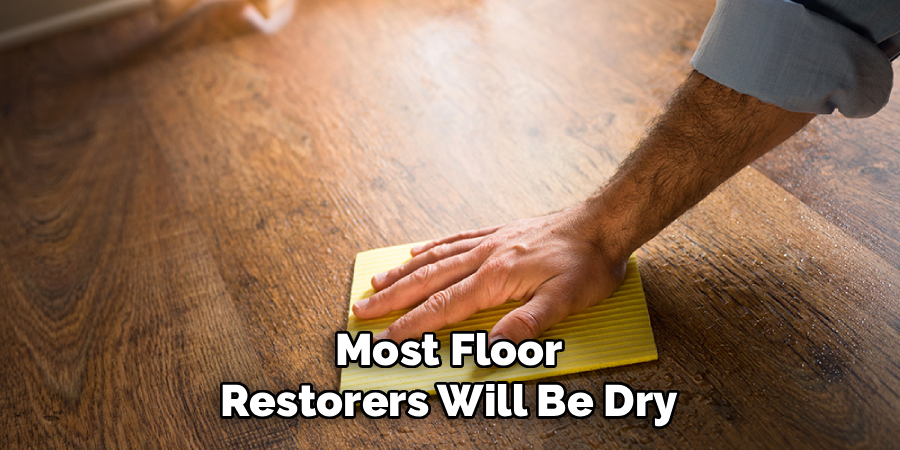
The final step is to let the new finish dry and cure completely. Most floor restorers will be dry to the touch within a few hours, but curing is a different process. Curing is when the finish hardens to its maximum durability. Follow the manufacturer’s instructions for drying and curing times. Typically, you should allow at least 24 hours before allowing light foot traffic and several days to a full week before moving furniture back into the room. Placing furniture back too soon can leave permanent indentations in the still-soft finish. Do not place area rugs back for at least one to two weeks.
5 Things You Should Avoid
Achieving a beautiful result is as much about what you don’t do as what you do. Avoid these common mistakes:
- Using Too Much Water: Never flood your wood floor with water. Excess moisture can seep between boards, causing them to warp, swell, or discolor. Always use a damp, not soaking wet, mop.
- Skipping Preparation: Rushing into the cleaning or restoring phase without thoroughly sweeping, vacuuming, and taping off the room is a recipe for a poor finish. Dust and grit will get trapped in the new coat, creating a rough, unsightly surface.
- Using the Wrong Cleaners: Avoid all-purpose cleaners, vinegar solutions, oil soaps, or steam mops. These products can strip the floor’s protective finish, leave a hazy residue, or introduce damaging moisture. Stick to a pH-neutral cleaner made specifically for wood floors.
- Applying a Thick Coat of Restorer: It may be tempting to apply a thick coat of restorer for more shine, but this is a mistake. A thick coat takes much longer to dry, can appear cloudy or milky, and is more prone to showing scuffs and scratches later on. Thin, even coats are always better.
- Not Allowing Proper Cure Time: Patience is a virtue. Moving furniture back or allowing heavy foot traffic before the finish has fully hardened can ruin all your hard work. Adhere strictly to the manufacturer’s recommended curing time for maximum durability.
Conclusion
Revitalizing your wood floors is one of the most rewarding DIY projects you can undertake. With a modest investment of time and the right materials, you can erase years of wear and tear, dramatically enhancing the look and feel of your home.
This process not only restores the floor’s shine but also adds a crucial layer of protection, extending its life and boosting your home’s value. By following these steps carefully, you can achieve a professional-quality finish and once again enjoy the timeless, natural beauty of your hardwood floors.
Hopefully, this guide on how to revitalize wood floors has provided you with the necessary knowledge and guidance to successfully refinish your hardwood floors.
About
Mike May is a distinguished figure in the world of woodworking and timber design, with a decade of expertise creating innovative and sustainable indoor solutions. His professional focus lies in merging traditional craftsmanship with modern manufacturing techniques, fostering designs that are both practical and environmentally conscious. As the author of Woodimber, Mike delves into the art and science of timber-craft, inspiring artisans and industry professionals alike.
Education
RMIT University (Melbourne, Australia)
-
Associate Degree in Design (Timber): Focus on sustainable design, industry-driven projects, and practical craftsmanship.
-
Gained hands-on experience with traditional and digital manufacturing tools, such as CAD and CNC software.
Nottingham Trent University (United Kingdom)
-
Bachelor’s in Woodworking and Product Design (Honors): Specialized in product design with a focus on blending creativity with production techniques.
-
Participated in industry projects, working with companies like John Lewis and Vitsoe to gain real-world insights.
Publications and Impact
In Woodimber, May shares his insights on timber design processes, materials, and strategies for efficient production. His writing bridges the gap between artisan knowledge and modern industry needs, making it a must-read for both budding designers and seasoned professionals.