

I doubt there’s anything quite like using outdoor furniture you’ve built yourself. There’s pride in it, admittedly—a table you didn’t just buy off the shelf, but cut, fitted, and assembled for lively weekend cookouts or lazy summer afternoons. If you’re after something that draws people together, an octagon picnic table might be the answer. Unlike rectangular setups where conversation leans one-sided, this eight-sided design puts everyone front and center—cozy, almost conspiratorial.
Admittedly, it’s also a way to suit your own backyard’s nooks or level patches of lawn. It’s tempting to rush through, but tallying up your cut list, visualizing those angled joints, methodically sealing every edge—these details shape a table that might, with care, last decades. Below, I’ll walk you through every phase, from slicing lumber straight to rubbing in the last coat of sealant. You don’t need to be a master woodworker, just willing to pay close enough attention. In this guide on how to build a octagon picnic table, we’ll use traditional woodworking techniques to create a long-lasting outdoor table that will be the perfect addition to any backyard or patio.
Tools and Materials Needed
Before you start measuring anything (seriously—don’t reach for the saw just yet), it pays to round up everything first. Running back and forth to the hardware store, usually mid-project, will wear down even the patient.
Materials:
- Pressure-treated lumber or cedar, mainly 2x4s and 2x6s
- 2.5-inch and 3-inch deck screws, rated for the outdoors
- 3/8-inch by 4-inch carriage bolts (washers and nuts with each)
- Exterior-grade wood glue (look for waterproof formulas)
- Wood stain or a clear, exterior sealant
- Grit sandpaper—both 80-grit and 120-grit varieties
Tools:
- Miter saw (or a circular saw, if that’s what you have handy)
- Power drill, plus screwdriver bits and drill bits matched to your hardware
- Socket wrench for tightening down carriage bolts
- Measuring tape and a decent carpenter’s square
- Safety glasses; grab hearing protection, too, if you’ll be at it for hours
- Orbital sander (this can be borrowed—don’t buy it just for this unless you want an excuse)
7 Simple Step-by-step Guidelines on How to Build a Octagon Picnic Table
Step 1: Cutting the Lumber to Size
Measure, pause, check, then cut—rush here and you’ll regret it at assembly (wobbly tables are no fun). Begin with your main frame and table legs: 2x4s will do for both, though some designs opt for 2x6s for chunkier legs. Mark out the angled cuts for the frame. The not-so-secret trick of octagons is those 22.5-degree miters at the ends of each border piece: without them, you’ll settle for an uneven, nearly-octagonal mess.
Set your miter saw with care (if you’ve never adjusted one, double-check: mistakes compound quickly), and label every cut. If you sketch an “S” for seat, “L” for leg, “F” for tabletop frame—future you, in the assembling stage, will thank present you for that simple act. Stack each group of cut boards together. This minor bit of organization has rescued countless hobbyists—myself included—from the agony of piecing mismatched parts together later on.
Step 2: Assembling the Inner Frame
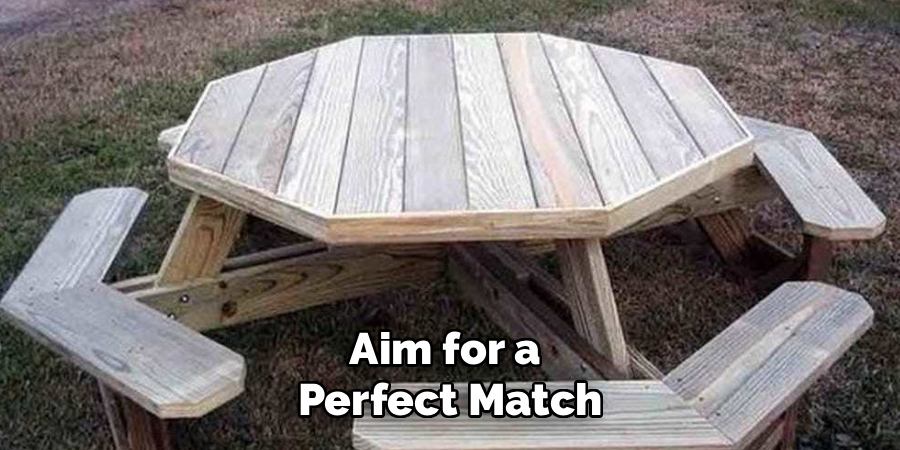
There’s a quiet satisfaction in laying out the octagon ring on a flat, forgiving surface, say the garage floor or a spacious patio. Aim for a perfect match where each end’s cut meets another. Any daylight between joints? Back up and recut. I’ve found it’s worth being picky now.
Squeeze a liberal line of waterproof wood glue on the angled ends before fitting pieces together. The glue may, in time, do as much as the screws to hold the table steady through wind, rain, or winter’s freeze-thaw. Screw the frame together (3-inch, exterior screws), but pre-drill everything—especially if your lumber is particularly hard. Wood split at this stage is, unless shallow, a real setback. Once the octagon ring is together, cross-brace the center: heavy planks intersecting at the middle, locked into the frame. This will support both platters and elbows later on. Take pains to keep the result square and flat.
Step 3: Constructing the Leg Assemblies
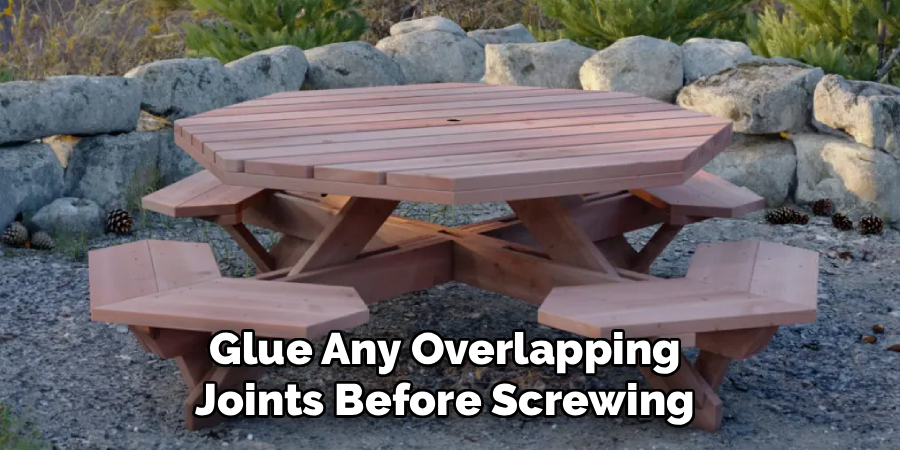
Now, the legs. Each assembly must hold not only a heavy table but, conceivably, enough adults to sink a canoe. The specifics will depend on your blueprint, but standard practice is to form either an A-shaped or X-shaped support for each quarter of the structure. Typically, you’ll need four leg “sets,” identical in height and angle, to ensure balance.
Glue any overlapping joints before screwing them tight, then reinforce with a carriage bolt through both layers—washer and nut included. You want bolts here for a reason: they’ll bear weight far better than screws alone, and guard against legs bowing out over time when seating is full. Clamp the sets, drill the holes, thread the bolts, and crank down with a socket wrench until everything feels properly unified. Check—repeatedly—for matching height. Any deviation here is glaring once the table stands upright.
Step 4: Attaching the Legs to the Frame
Rest the tabletop frame upside-down on your workspace. Place each leg assembly at its assigned spot, aligned with the cross-braces. Now, fussy as this sounds: measure from every tabletop edge to its nearest leg. If you fudge this, the finished table may rock—or even tip—during rough use. Clamp each assembly in place for security.
Drill right through the frame and leg at each mounting point; insert carriage bolts, washers, and nuts; then tighten. Only once you’re sure all four legs are fastened solid—and all sits flush—should you flip the contraption over (recruit help—this is no time for heroics). The table should stand without so much as a tremble.
Step 5: Installing the Seat Supports
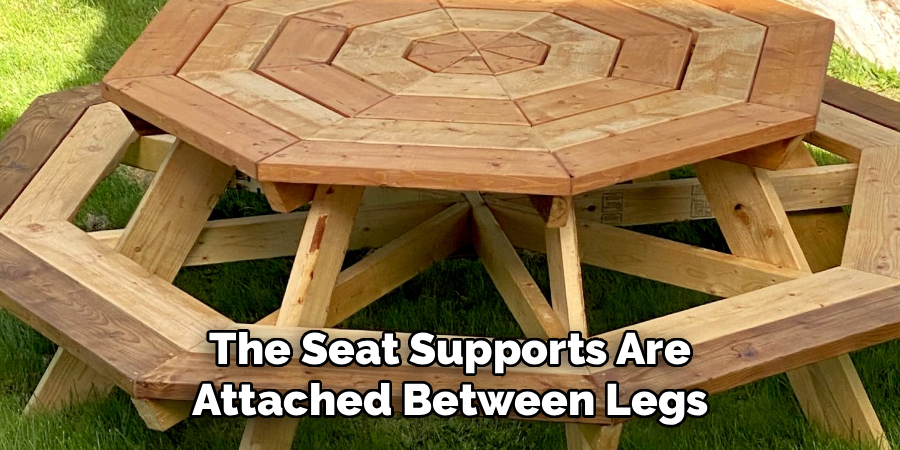
You’re well past the hardest phase, but don’t check out mentally here. The seat supports are attached between legs and radiate outward, forming the brackets where the seating planks will eventually rest. Mark your preferred seating height; the norm falls somewhere between 17 and 18 inches, but adjust if your family prefers stools or benches higher or lower.
Attach the supports with glue and secure each end with carriage bolts. These take a pounding from shifting bodies—screws alone won’t handle it over time. Each support must sit perfectly level—otherwise, seats will tilt, attracting ridicule (or worse: spilled drinks). Connect these supports at the perimeter with cross-bracing. This outer ring gives you the platform for finishing the seating areas, and frankly, it’s the difference between a table that lasts and one that sways under the first crowd.
Step 6: Securing the Tabletop and Seats
Now the exciting part—the table looks like more than a framework of planks. Start with the tabletop: set your cut 2x6s across the frame, radiating from the center. Mind the 1/4-inch gap between each board; these slits drain water and help the wood expand and contract with the weather (skip this and you’ll court rot or warped boards within a year). Fasten the boards with 2.5-inch deck screws, placing two screws at every cross-brace intersection.
Switch to the seats once the top is finished. Lay the angled seat boards, leaving slight gaps as above. Pre-drill the ends to avoid splitting, and be obsessive about lining up those outer cuts—clean angles are the hallmark of this design. Countersink the screws so clothes and bare legs stay safe. As you finish, pause and marvel, if only briefly.
Step 7: Sanding and Weatherproofing
Technically, you’ve got a table. But after all that work, rushing the finish would be a real loss. Equip an orbital sander with 80-grit paper and run it over every exposed edge, especially the seats and table rim. Take your time. Sandwiches and lemonade are better enjoyed without splinters. A second pass with 120-grit makes everything properly smooth.
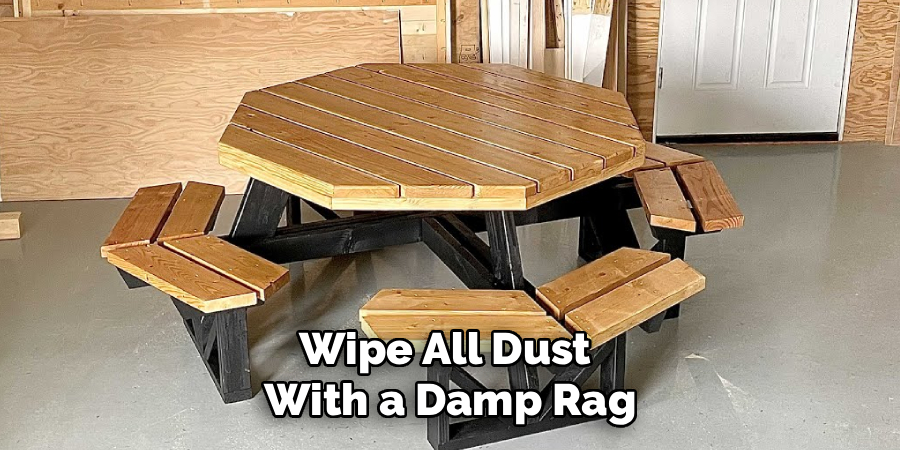
Wipe all dust with a damp rag—neglect this and your finish goes on gritty. Then, with a natural bristle brush, apply a thorough coat of high-grade exterior stain or clear sealant. Brush well into the grain, taking care not to miss the undersides or board gaps (where rot starts). This isn’t just vanity: an unsealed table will look gray and weather-slapped long before you’d planned. Dry time varies—read your product, don’t guess.
Following these steps on how to build a octagon picnic table, you will have a beautiful and sturdy addition to your outdoor space. Not only is it functional for meals and gatherings, but the unique shape adds a touch of charm to any backyard.
Safety Tips
Don’t treat safety as an afterthought. Wear proper eye protection whenever cutting—flying sawdust or chips appear out of nowhere. If you’re using noisy tools for a stretch, hearing protection is cheap insurance. Keep the working area tidy; power cords are classic tripping hazards, and keeping scrap off the floor was a lesson hard-learned for me.
Ask for help lifting or flipping heavy assemblies; nothing derails a Saturday quite like an avoidable injury. Above all, let the tools do the work—forcing blades typically ends badly for both saw and wood.
Common Mistakes to Avoid
A few errors crop up often, no matter your experience level. Forgetting to pre-drill, especially at the board ends? Almost guaranteed to split out your lumber.
Neglecting to allow for the width of your saw blade can, if you’re unlucky, make every piece just that little bit short. Overlapping boards too tightly, with no gap, compromises drainage and can halve your table’s life in wet weather.
Maintenance and Inspection
This isn’t a build-it-and-forget-it project. Each spring, look over the table—loose screws and bolts often emerge after freeze-thaw cycles. Fasten anything working loose. Rinse the surface with gentle soap and water, brushing off mildew and pollen.
Every few years, add a new coat of stain or sealant (check the finish—a bead of water should linger on the top). Basic upkeep ensures your handiwork remains a source of pride, not a weathered eyesore.
Cost and Time Estimate
If you’ve priced out patio sets recently, you’ll know this project is budget-friendly in comparison. Expect a range—$150 up to perhaps $300—depending on lumber costs near you and whether you opt for simple pine or go in for cedar. Already owning tools helps; if you need to buy or borrow the big-ticket items, the cost shifts.
Someone with basic comfort around woodworking tools could wrap up this table in a weekend. Figure 10 to 14 active hours from start to sit-down meal, with time for coffee and a little head-scratching in between.
Frequently Asked Questions
Q1: What Is The Best Wood For An Octagon Picnic Table?
If your main concern is longevity, cedar and redwood both contain oils that slow rot, discourage pests, and resist weathering. Pressure-treated pine is much friendlier on the wallet and, if properly sealed, handles outdoor life well enough. Whichever you choose, double-check that it’s rated for ground-contact and outdoor use. Cutting corners here will cost you in the long run.
Q2: Can I Adjust The Dimensions For A Smaller Yard?
Absolutely—one of the underrated joys of DIY is customizing to fit your own odd corners or tight patios. Just remember, shrinking the frame or seat supports changes all subsequent measurements. You’ll need to recalculate and still cut those 22.5-degree miters on the octagon borders, or the shape won’t come together cleanly. Measure, recalculate, measure again.
Enjoying Your New Outdoor Gathering Space
There’s something inherently gratifying about stepping back and seeing a table shaped by your own hands standing at the center of your backyard. The process can test your patience, for sure—lines are never as straight as the plan suggests, weather is not always cooperating. Still, what you end up with feels sturdier, more meaningful, than anything you could drive home in a box.
Gather your tools, choose lumber that will stand the test of time, and work through each stage thoughtfully. Once the finish dries, invite over a few friends, fire up the grill, and experience the rare pleasure of sharing a meal around a table that exists—quite literally—because you built it. Thanks for reading this guide on how to build a octagon picnic table.

About
Mike May is a distinguished figure in the world of woodworking and timber design, with a decade of expertise creating innovative and sustainable indoor solutions. His professional focus lies in merging traditional craftsmanship with modern manufacturing techniques, fostering designs that are both practical and environmentally conscious. As the author of Woodimber, Mike delves into the art and science of timber-craft, inspiring artisans and industry professionals alike.
Education
RMIT University (Melbourne, Australia)
-
Associate Degree in Design (Timber): Focus on sustainable design, industry-driven projects, and practical craftsmanship.
-
Gained hands-on experience with traditional and digital manufacturing tools, such as CAD and CNC software.
Nottingham Trent University (United Kingdom)
-
Bachelor’s in Woodworking and Product Design (Honors): Specialized in product design with a focus on blending creativity with production techniques.
-
Participated in industry projects, working with companies like John Lewis and Vitsoe to gain real-world insights.
Publications and Impact
In Woodimber, May shares his insights on timber design processes, materials, and strategies for efficient production. His writing bridges the gap between artisan knowledge and modern industry needs, making it a must-read for both budding designers and seasoned professionals.