

When you spend your mornings growing fresh organic herbs and tending to your flourishing backyard garden, bringing that natural beauty indoors feels incredibly rewarding. Preparing delicious meals from your homegrown harvest requires reliable kitchen tools, and crafting your own baking implements adds a deeply personal touch to your culinary routine. For passionate gardeners who appreciate sustainable living, learning how to make a wooden rolling pin is an immensely satisfying weekend project.

Instead of buying mass-produced plastic utensils, you can easily transform a simple piece of hardwood into a stunning, functional heirloom. This straightforward woodworking endeavor requires minimal tools and perfectly complements your hands-on lifestyle. Crafting your own baking equipment allows you to customize the length and thickness to match your specific cooking style, ensuring maximum physical comfort while pressing out fresh pie crusts or rustic bread dough. In this comprehensive guide, we will explore the absolute best methods for shaping, smoothing, and sealing your new favorite baking tool.
Step-By-Step Guide On How to Make a Wooden Rolling Pin
Step 1: Select the Perfect Hardwood Material
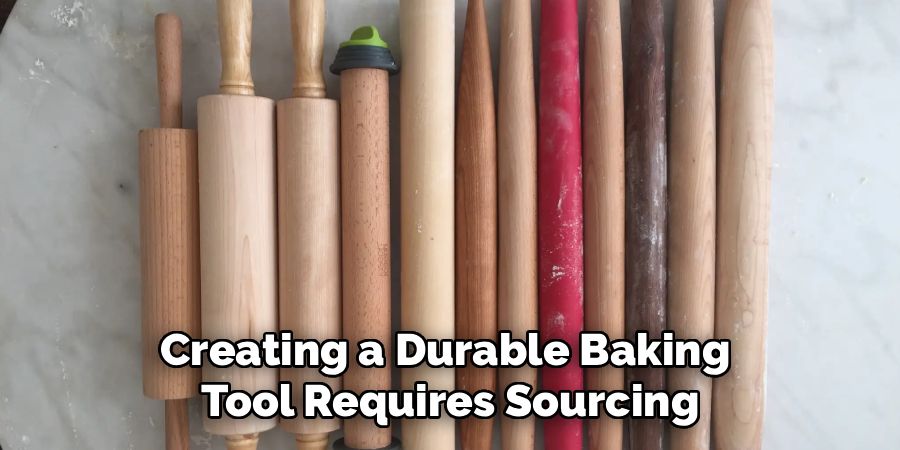
Creating a durable baking tool requires sourcing the correct type of organic material to ensure long-lasting performance. You must absolutely avoid porous softwoods like pine or cedar, as they easily dent and absorb harmful food bacteria. Instead, search for incredibly dense, tight-grained hardwoods like hard maple, cherry, or rich walnut. If you are a dedicated home gardener, you might even have a recently pruned apple or cherry tree branch resting in your yard that you can naturally repurpose. The wood must be completely dry and properly cured to prevent future warping when exposed to kitchen humidity. Selecting a perfectly straight, knot-free piece of hardwood guarantees a structurally sound foundation for your beautiful new culinary implement.
Step 2: Measure and Cut Your Chosen Blank
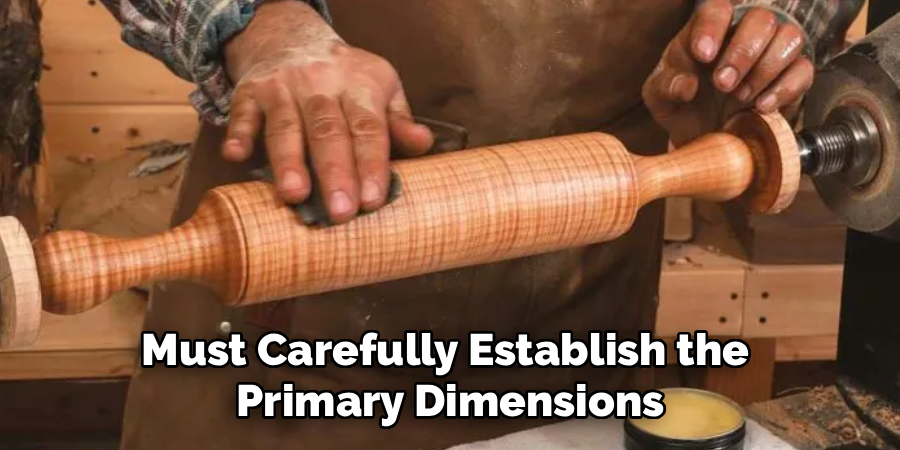
Once you secure the perfect piece of seasoned hardwood, you must carefully establish the primary dimensions for your project. Grab a standard measuring tape and mark a length between eighteen and twenty inches, which provides ample space for both the central barrel and the outer handles. Using a sharp hand saw or a reliable power miter saw, slice the ends perfectly straight across your pencil marks. Securing the wood tightly inside a sturdy workbench vise ensures your cuts remain completely even and prevents accidental slipping. Taking your time during this initial cutting phase creates a beautifully balanced blank canvas, saving you from performing tedious corrective adjustments later in the shaping process.
Step 3: Discover how to make a wooden rolling pin Smooth
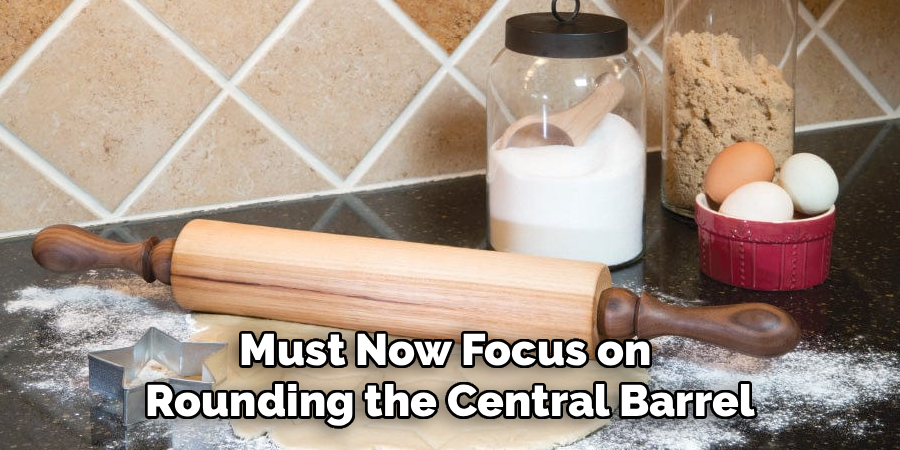
With your wooden blank cut to the proper length, you must now focus on rounding the central barrel completely smooth. If you own a specialized woodworking lathe, mount the blank securely between the metal centers and carefully round the spinning wood using a sharp roughing gouge. For those working entirely by hand, a traditional block plane or a sturdy drawknife works exceptionally well to shave away the square corners. You must continuously rotate the wood while removing thin ribbons of material, checking the overall cylindrical shape frequently. Maintaining a consistent, even diameter across the entire central section is incredibly crucial for ensuring your dough presses out perfectly flat and uniform during baking.
Step 4: Shape the Outer Handles for Comfort
After finalizing the smooth central barrel, you need to carve out comfortable grips on both ends of the implement. Mark roughly three inches inward from each flat end to visually establish exactly where the handles will begin. Carefully shave down the diameter of these outer sections until they fit comfortably inside your closed hands. Taper the transition area where the thin handle meets the thick barrel so your fingers rest naturally against the gentle curve without pinching. Smoothing out these specific gripping zones prevents painful blisters and severe hand fatigue, allowing you to easily manage heavy, stubborn bread doughs after a long afternoon spent pulling weeds in your vegetable garden.
Step 5: Sand the Entire Surface to Perfection
The physical shaping phase always leaves behind tiny gouges, rough tool marks, and sharp splinters that you must completely eliminate. Begin your intensive smoothing process using a coarse eighty-grit sandpaper, wrapping it tightly around the curved barrel and sliding it back and forth aggressively. Once the deepest tool marks vanish, gradually progress through medium one-hundred-and-twenty-grit paper, eventually finishing with an ultra-fine two-hundred-and-twenty-grit sheet. This meticulous, progressive sanding technique effectively closes the open wood pores and creates an incredibly slick, glassy surface. A flawlessly sanded exterior prevents sticky pastry dough from clinging to the wood, making your future kitchen baking sessions incredibly enjoyable and remarkably easy to clean up afterward.
Step 6: Wipe Away the Residual Fine Sawdust
Vigorous sanding produces a massive amount of microscopic dust that settles deeply into the tiny crevices of the organic material. Before you apply any protective moisture barriers, you must clean the exterior surface completely to ensure proper adhesion. Take a slightly damp microfiber cloth or a specialized sticky tack rag and wipe the entire length of the implement very carefully. You will immediately notice the beautiful natural grain pattern emerging as you lift away the cloudy layer of fine powder. Allow the clean wood to air dry for approximately ten minutes, ensuring no ambient moisture remains trapped in the cellular structure before you move directly onto the vital sealing phase.
Step 7: Apply a Nourishing Mineral Oil Finish
Because this handcrafted tool will continuously touch the food you eat, you must apply a completely non-toxic, food-safe protective finish. Never use standard chemical varnishes or household polyurethane, as these toxic coatings easily chip off directly into your fresh pastry dough. Instead, pour a generous amount of pure, food-grade mineral oil onto a soft paper towel and massage it deeply into the parched wood grain. The thirsty organic fibers will rapidly drink up the hydrating oil, immediately deepening the natural color and creating a powerful waterproof barrier. Applying this rich conditioner acts just like adding nutrient-dense compost to your garden soil, wonderfully rejuvenating and protecting the raw natural material.
Step 8: Let the Protective Sealant Cure Completely
After heavily coating the entire surface with your hydrating mineral oil, you must practice supreme patience before taking the tool into the kitchen. Prop the freshly oiled implement upright inside a clean glass jar or lay it perfectly flat across a wire baking rack in a dry, well-ventilated room. Allow the protective oils to cure and penetrate the deep cellular structure for at least twenty-four hours undisturbed. The next morning, grab a clean cotton rag and gently buff away any slick, greasy residue pooling on the exterior. Your beautifully crafted kitchen implement is now fully sealed, perfectly smooth, and completely ready to press out your favorite rustic garden vegetable tarts.

Frequently Asked Questions
What Is The Best Wood For Baking Tools?
- Hardwoods like maple, cherry, and walnut are the absolute best materials for crafting durable kitchen tools.
- These specific woods feature incredibly tight grain structures that resist absorbing moisture and harbor far fewer bacteria than softwoods.
- Maple is particularly popular because of its extreme durability and brilliant neutral color.
- You should completely avoid pine, cedar, or oak, as these porous woods dent easily and often transfer bitter, resinous flavors directly into your fresh pastry dough.
Do I Need A Lathe For This Project?
- While a powered woodworking lathe makes rounding the barrel significantly faster, it is absolutely not a strict requirement for beginners.
- You can successfully complete this entire project using basic hand tools like a traditional block plane, a sharp drawknife, or a heavy wood rasp.
- Shaping the cylinder by hand takes more time and physical effort, but it provides a deeply satisfying, rustic appearance that highlights the handmade nature of your kitchen accessory.
Can I Use Olive Oil To Seal The Wood?
- You must never use culinary oils like olive, vegetable, or canola oil to seal your raw wooden tools.
- These organic cooking fats are completely unstable and will eventually go rancid over time when continuously exposed to room-temperature oxygen.
- Once the oil turns rancid, it produces a foul odor that will permanently taint your food.
- Always stick strictly to inert, food-safe mineral oil or a specialized beeswax butcher block conditioner for safe, long-lasting protection.
How Should I Wash My Finished Implement?
- Cleaning your finished baking accessory requires a very gentle touch to preserve the protective oil barrier.
- After pressing out your dough, simply wipe the surface clean using a damp cloth and warm tap water.
- If sticky dough clings to the barrel, use a simple plastic bench scraper to gently lift it away.
- Never submerge the wood entirely in the sink or place it inside an automatic dishwasher, as extreme heat and moisture will instantly warp the material.
How Often Do I Need To Reapply The Oil?
- The frequency of your maintenance routine depends heavily on how often you actually bake throughout the year.
- As a general rule, you should rub a fresh coat of mineral oil into the grain every three to four months.
- Whenever the wood begins looking visibly pale, feels dry to the touch, or starts feeling slightly rough, it desperately needs immediate conditioning.
- Regular oiling completely prevents the fibers from cracking and keeps the barrel wonderfully non-stick.
Conclusion
Creating your very own baking equipment is a wonderfully fulfilling endeavor that beautifully bridges the gap between your outdoor garden and your bustling kitchen. By carefully selecting a durable hardwood, precisely shaping the central barrel, and applying a nourishing natural finish, you completely eliminate the need for flimsy, store-bought plastic tools. You now possess a highly customized, incredibly sturdy implement perfectly suited for rolling out heavy doughs and delicate garden herb flatbreads.
Taking the time to craft something with your own hands brings a deep sense of accomplishment to your everyday culinary routine. Now that you fully understand how to make a wooden rolling pin, you can confidently turn raw branches into spectacular functional art. Gather your measuring tools, select a beautiful piece of seasoned hardwood, and embrace the highly rewarding process of traditional woodworking today. Your beautifully handcrafted creation will undoubtedly serve your family perfectly for countless delicious meals to come.

About
Mike May is a distinguished figure in the world of woodworking and timber design, with a decade of expertise creating innovative and sustainable indoor solutions. His professional focus lies in merging traditional craftsmanship with modern manufacturing techniques, fostering designs that are both practical and environmentally conscious. As the author of Woodimber, Mike delves into the art and science of timber-craft, inspiring artisans and industry professionals alike.
Education
RMIT University (Melbourne, Australia)
-
Associate Degree in Design (Timber): Focus on sustainable design, industry-driven projects, and practical craftsmanship.
-
Gained hands-on experience with traditional and digital manufacturing tools, such as CAD and CNC software.
Nottingham Trent University (United Kingdom)
-
Bachelor’s in Woodworking and Product Design (Honors): Specialized in product design with a focus on blending creativity with production techniques.
-
Participated in industry projects, working with companies like John Lewis and Vitsoe to gain real-world insights.
Publications and Impact
In Woodimber, May shares his insights on timber design processes, materials, and strategies for efficient production. His writing bridges the gap between artisan knowledge and modern industry needs, making it a must-read for both budding designers and seasoned professionals.