

There’s nothing quite like sinking into steaming water while cool air nips at your face—especially when the tub itself is something you’ve built, board by board, right in your own backyard. The appeal goes beyond “rustic charm”; at a certain point, you become invested in the work, and the finished tub somehow feels like more than just a project—it’s a small act of stewardship.
Just be prepared: this is certainly a woodworking job (honest mistakes will likely meet you along the way), but the payout is significant—serenity, satisfaction, and quite possibly a gathering spot friends will remember. The money saved is very real, too. Most store-bought tubs cost a small fortune and offer little room for personal expression. With the homemade route, the shape, dimensions, and location are all yours to decide.
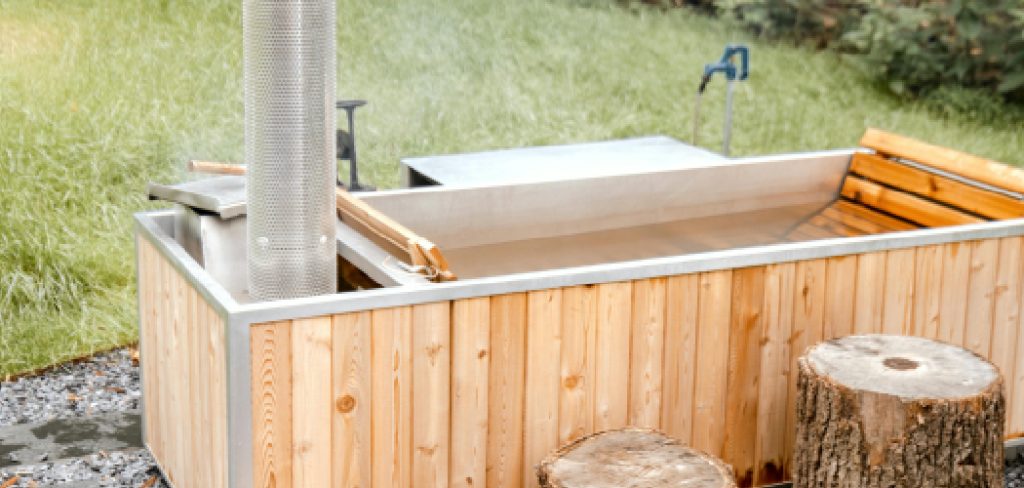
This guide on how to make a wood hot tub attempts to leave out none of the fussy, time-consuming steps (the ones usually glossed over in glossy magazine features), starting from the lumberyard—and ending with your first cautious, delighted plunge. Curious? Set aside a weekend, gather the supplies, and see if you come out the other side with something you’ll want to keep warm every winter.
Planning and Design
A haphazard approach rarely does favors in woodworking, and tubs are hardly forgiving. Pause at the planning stage. Where will the tub live? Wood, when filled with water, becomes astoundingly heavy—easily tipping the scales at several tons, especially if the shape is generous. You’ll need a spot that drains properly and stays reasonably private, unless you’re angling for a social experiment. Dragging hoses clear across the yard or carting buckets isn’t fun, so water access matters more than you might imagine.
Picking the right timber isn’t a ceremonial flourish; it will make or break the project’s longevity. Western Red Cedar and Redwood show up here for good reason: both refuse to rot quickly, and both swell up to seal against leaks—a trait you’ll come to value. Ask yourself: How many people should be able to fit, actually sitting down and not hugging their knees? Internal size and wall height are determined here, not after the boards are cut.
Your choice of heater weighs in, too. If an old-fashioned submersible stove appeals, note that it requires certain clearances. The arrangement and spacing of the internal structure must allow for safe heating and decent circulation, or your build will prove more hazardous than relaxing.
Tools and Materials You’ll Need
- Measuring tape: To get accurate measurements of the space you have.
- Level: To ensure that your structure is stable and safe to sit in.
- Saw: You’ll need this to cut the boards down to size.
- Drill and Screws: To secure the boards together.
- Stud finder: To locate load-bearing beams for hanging swings or attaching other equipment.
- Hammer and Nails: For any small adjustments or additional support needed.
- Sandpaper: Smooth out rough edges on the wood before assembly.
- Paint or Stain (optional): If you want a more decorative look, you can paint or stain your treehouse after it’s built.
Safety Considerations
Let’s be honest: mistakes here can be dangerous. A poorly supported base or sloppy construction could, in the worst case, result in a tub collapse—somewhere between embarrassing and catastrophic. Double-check your intended foundation’s capacity. Clay soil? Test it. Concrete pad? Excellent, as long as it’s level and strong enough for no less than 4,000 pounds—erring on the high side never hurt anyone here.

Planning to use a wood stove? Think beyond heat: install a chimney with a spark arrestor. Trees, fences, even your neighbor’s dry shed can go up if you’re careless. Hedging, it’s better to leave a wide berth. Splintered wood—unavoidable with rough lumber—turns a relaxing soak into a minor nightmare, so no shortcuts in sanding: run your hands along every surface, and if you hesitate to touch it, keep sanding.
7 Simple Step-By-Step Guidelines on How to Make a Wood Hot Tub
Step 1: Prepare the Foundation and Base
Nothing derails a build faster than a sinking foundation. Don’t fool yourself—water’s weight adds up astonishingly fast, and if the base shifts a centimeter, those meticulously-fitted staves start to leak. Flatten your chosen patch of earth, lay down a thick crush of gravel, and, if you’re cautious or the soil is questionable, pour a reinforced concrete pad. Use a long spirit level; bend down and squint along the boards. If in doubt, adjust before cutting anything.
A base frame of pressure-treated lumber lifts the tub above any creeping moisture, slowing rot and giving you a little room underneath for plumbing. Joists go close—this isn’t a spot for “good enough.” That small air gap beneath also allows you to sneak in the pipes for the drain.
Step 2: Cut and Rout the Staves
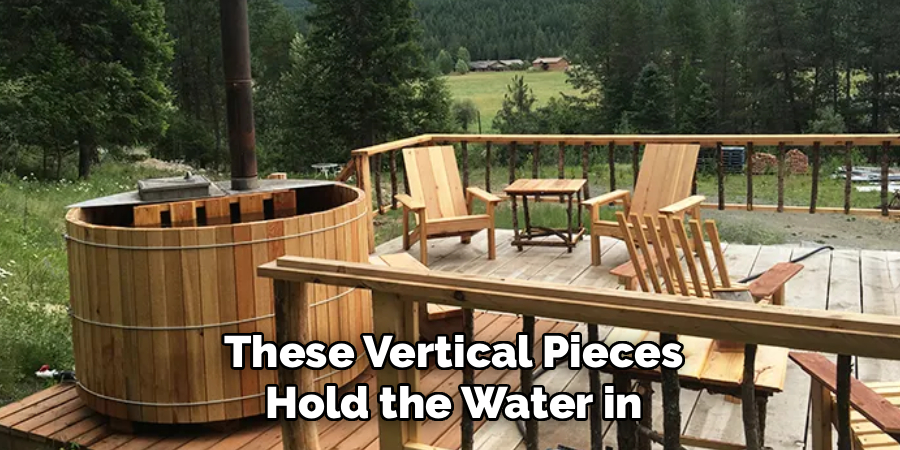
Time for the most precise work: the wall staves. These vertical pieces hold the water in, so even minor errors can compound tragically. Measure the height you want, then cut every cedar board—not almost, but exactly the same. Both long edges must be shaped to interlock, so run them through the router with a cove on one side, bead on the other—a little fussy, but it pays off later.
Things get trickier with the dado groove, which you’ll cut into the bottom inside edge of each stave. This is the notch where staves join the tub floor. Sizing matters: the groove should be just a bit wider than your intended floorboard thickness. Leave some tolerance for wood swelling. Check alignment carefully. If your staves don’t mate up well, leaks will be your ever-present companion.
Step 3: Assemble the Floor
Patience is required here, and those long clamps matter. Lay your floorboards on a genuinely flat work table (an old door sometimes does the trick), glue the edges, clamp them up, and vigilantly wipe away any glue ooze—dried glue stops swelling and encourages problems. Leave the clamped boards overnight, no shortcuts.
When dry, find the center of the flat panel and scribe a circle—the outer diameter of your planned tub—using whatever homemade trammel suits you. Cut the circle with a steady hand and a jigsaw, then sand it smooth. Don’t forget to drill for your drain fitting; a wiggle room of a millimeter or two is welcome here. Seal the opening with marine-grade silicone.
Step 4: Install the Wall Staves
This step feels like an act of faith the first time. Slot the groove of your first stave onto the edge of the floor. Tap gently (not forcefully) with a rubber mallet until it seats. If it leans or slips, a screwed-on block helps hold it upright for now.
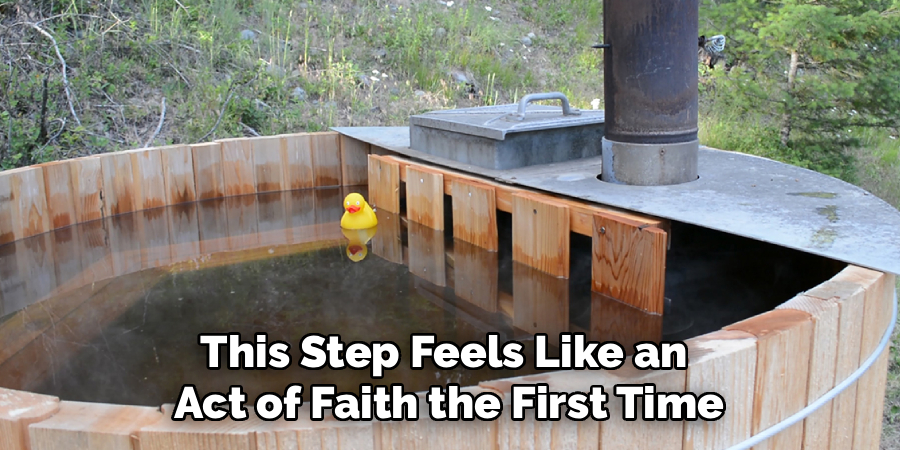
Add each subsequent stave, making sure the cove and bead edges interlock firmly. Tapping each one in place turns the wall into a careful circle, piece by piece. That last stave? It will almost never fit perfectly as-is, so expect to rip it down in width. Don’t force a too-wide piece. Lean into subtlety here; the last stave acts as your keystone, and closing it snugly is key to the final seal.
Step 5: Secure the Tension Bands
By now, the tub’s shape exists but is fragile. The tension bands—always stainless—go around the outside, clamping the assembly and preventing catastrophic unravelling. The lowest band should rest just above the floor, applying most pressure where leaks tend to start. Add more bands, spaced upward, and don’t be shy about temporarily taping them in place so they don’t slip.
Tighten each band incrementally, moving from one rod to the next, circling the tub a few times. Tapping the bands as you tighten helps the metal seat evenly. Avoid the temptation to overtighten; green cedar swells, and too much initial pressure will cause cracks rather than a watertight tub.
Step 6: Install the Heating System
The heating system distinguishes your hot tub from a chilly bath. Setting a submersible stove in place isn’t terribly difficult, but getting it to stay down (it will want to float if not secured) is less straightforward—bolt it into the floor, using stainless fasteners. The chimney must direct smoke away from bathers; read your stove’s instructions with care.
Searing-hot metal must be fenced off. A basic wooden partition, made of extra cedar scraps and positioned inside the tub, separates people from burns. This isn’t a mere suggestion—do it, and only use non-rusting hardware.
Step 7: Fill and Swell the Wood
Now comes a test of patience and nerve. Run a garden hose into the tub and watch as, predictably, water escapes from seemingly every seam. This is normal—if inconvenient. Expect drips, trickles, even minor streams. The wood hasn’t swelled yet. Leave the hose running for a few days if possible; shutting it off prematurely prolongs the agony.
Over two to five days—never quite the same time twice—the leaks begin to slow, and the bands tighten as the wood swells. Trying to intervene with caulks or sealants too soon tends to backfire, removing the natural swelling action you actually want. Eventually, it stops. A moment to mark: now, and only now, is your wood-fired hot tub ready for a first real soak.
Following these steps on how to make a wood hot tub, you can now enjoy your very own hot tub experience in the comfort of your backyard. But don’t forget to regularly maintain and clean your hot tub to keep it in good condition. Additionally, consider investing in a cover or shelter for your wood hot tub to protect it from the elements.
Common Mistakes to Avoid
Quite a few things can sabotage a wooden tub. Skipping a solid foundation means your tub will eventually lean, tip, or leak. Builders sometimes use galvanized or regular steel fasteners, perhaps out of habit, but regret it when rust streaks begin to show. Rushing the routing or skipping careful measurement allows water to sneak through mismatched joints, so patience pays dividends.
Leaking at first fill is almost inevitable—resist urges to “fix” this with quick-drying caulk or chemical sealants. Cedar needs to do its swelling trick, unimpeded.
Maintenance and Care
Immediate neglect will age your tub faster than time alone. Chlorine, while convenient in plastic spas, is a slow poison for wood, breaking down fibers over time. Instead, investigate mineral-based sanitizers, hydrogen peroxide blends, or ozone systems—not all low-maintenance, but much gentler.

Every couple of months, drain the tub, give it a gentle scrub with a soft brush and mild soap, then rinse thoroughly. On hot summer days, never leave the tub completely empty for more than a day or two. Dried-out wood will shrink, opening up gaps you worked so hard to close, and you’ll face the slow filling process all over again. A tightly fitted cover does much to keep out debris (and curious animals) while trapping heat.
Frequently Asked Questions
Q1: What Is The Best Wood For A Wooden Hot Tub?
Somewhat predictably, Western Red Cedar is nearly always the answer here. It contains natural oils that repel decay and insects, smells brilliant when heated, and—perhaps most importantly—swells to create a watertight seal you can count on for years.
Q2: How Long Does a Wooden Hot Tub Last?
With attentive care—especially avoiding aggressive chemicals and extended dry periods—a well-built cedar tub can last anywhere from 15 to 25 years. That’s not a guarantee, of course, but it’s a reasonable expectation if small maintenance routines are followed.
Q3: Do Wooden Hot Tubs Leak at First?
Yes, and it will likely be dramatic at first. The initial few fills test your nerves, not the tub. Dry cedar simply won’t seal until compelled by days of steady water exposure. Have patience. By the end of week one, most leaks settle down to the odd drip.
Conclusion
Finishing a wooden hot tub by hand—knowing exactly where each board sits, and how tightly each band is tightened—leaves a mark of satisfaction that no store-bought spa can offer. The subtle scent of heated cedar, the hiss of a wood stove, the first swirl of steam—these are hard things to price, and yet worth every minute.
Invite a friend. Bring towels and tea outside. Settle in, let your muscles unknot, and appreciate what you’ve accomplished. If you follow the care and maintenance advice above, there’s every reason to believe this tub will be a fixture in your backyard long after the last memory of winter fades. Thanks for reading this guide on how to make a wood hot tub.

About
Mike May is a distinguished figure in the world of woodworking and timber design, with a decade of expertise creating innovative and sustainable indoor solutions. His professional focus lies in merging traditional craftsmanship with modern manufacturing techniques, fostering designs that are both practical and environmentally conscious. As the author of Woodimber, Mike delves into the art and science of timber-craft, inspiring artisans and industry professionals alike.
Education
RMIT University (Melbourne, Australia)
-
Associate Degree in Design (Timber): Focus on sustainable design, industry-driven projects, and practical craftsmanship.
-
Gained hands-on experience with traditional and digital manufacturing tools, such as CAD and CNC software.
Nottingham Trent University (United Kingdom)
-
Bachelor’s in Woodworking and Product Design (Honors): Specialized in product design with a focus on blending creativity with production techniques.
-
Participated in industry projects, working with companies like John Lewis and Vitsoe to gain real-world insights.
Publications and Impact
In Woodimber, May shares his insights on timber design processes, materials, and strategies for efficient production. His writing bridges the gap between artisan knowledge and modern industry needs, making it a must-read for both budding designers and seasoned professionals.