

Have you ever walked into your bedroom and felt like something was missing? The bed is the focal point of any sleeping space, and the headboard sets the entire tone for the room.
Buying a brand-new, custom-upholstered piece of furniture often comes with a hefty price tag. But what if you could completely transform your existing wooden headboard with a weekend project? Reupholstering a headboard with a wood frame is a surprisingly straightforward DIY project that yields professional-looking results.
This comprehensive guide on how to reupholster a headboard with wood frame will walk you through every phase of the process, from gathering the right materials to executing the final finishing touches.
What Are the Benefits?
Taking on a DIY upholstery project offers incredible advantages over purchasing a brand-new bed. Here is why you should consider reupholstering your wooden headboard:
- Complete Customization
When you buy furniture from a store, you are limited to their available fabrics, colors, and textures. Reupholstering gives you ultimate creative control. You can choose a luxurious velvet, a crisp linen, or a bold geometric print that perfectly matches your unique interior design style. You can also dictate the thickness of the padding, ensuring your headboard is as plush and comfortable as you want it to be. - Massive Cost Savings
High-quality upholstered headboards easily cost hundreds or even thousands of dollars. By utilizing your existing wooden frame and purchasing only the raw materials—fabric, foam, and batting—you can achieve a high-end look for a fraction of the retail price. - Eco-Friendly and Sustainable
Upcycling old furniture is a fantastic way to reduce your carbon footprint. Instead of sending an old, perfectly structural wooden frame to the landfill, you are giving it a second life. This sustainable approach prevents unnecessary waste and reduces the demand for mass-produced furniture, making it a responsible choice for the environment. - Skill Building and Satisfaction
There is an unmatched sense of pride that comes from sleeping in a bedroom you helped create. Completing a reupholstery project builds your confidence in DIY home improvement. Once you master the staple gun and fabric tension on a headboard, you will feel empowered to tackle dining chairs, benches, and ottomans.
What Will You Need?
Before you begin, gather all your supplies. Having everything within reach will make the process smooth and enjoyable. Here is your essential materials list:
- A Wood Frame Headboard: Either your current one or a thrifted find.
- Upholstery Fabric: Heavyweight fabrics like velvet, canvas, or linen blends work best.
- Upholstery Foam: 1-inch or 2-inch thickness, depending on your desired plushness.
- Dacron Batting: This goes over the foam to smooth out edges and add softness.
- Heavy-duty Staple Gun: An electric or pneumatic stapler is easier on the hands, but a manual one works fine.
- Staples: 3/8-inch or 1/2-inch staples suited for your specific gun.
- Staple Remover or Flathead Screwdriver: Essential if you make a mistake or need to remove old fabric.
- Needle-nose Pliers: For pulling out stubborn staples.
- Fabric Scissors: Sharp scissors ensure clean, unfrayed cuts.
- Spray Adhesive: To temporarily hold the foam to the wood.
- Measuring Tape: For accurate cuts.
- Iron and Ironing Board: To remove wrinkles from your fabric before attaching it.
10 Easy Steps on How to Reupholster a Headboard With Wood Frame
Follow these steps carefully to achieve a smooth, professional finish on your headboard.
Step 1: Remove the Old Fabric and Staples
Start by stripping the headboard down to its bare wooden frame. If your headboard is already upholstered, use a flathead screwdriver or a specialized staple remover to pry up the existing staples. Grip stubborn staples with needle-nose pliers and pull them out completely. Take your time during this step to avoid gouging the wood or injuring your hands. Discard the old fabric, batting, and foam. Removing all old materials ensures you have a clean, smooth, and even surface for your new upholstery, which is critical for a professional-looking final product.
Step 2: Measure and Cut the Foam
Lay your bare wooden headboard flat on the ground. Unroll your upholstery foam and place it directly over the front of the wood frame. Using a permanent marker, trace the exact outline of the headboard onto the foam. Remove the foam from the frame and carefully cut along the traced line using a serrated knife or an electric carving knife. Electric knives provide the cleanest, straightest edges. Ensure the foam matches the dimensions of the front of the headboard perfectly, as this forms the structural cushion that dictates the final shape of your project.
Step 3: Attach the Foam to the Wood Frame
Once your foam is cut to the precise shape of your headboard, it is time to secure it in place. Take your headboard outside or to a well-ventilated area. Apply a generous, even coat of heavy-duty spray adhesive to both the bare wood frame and the back of the foam piece. Wait a minute or two for the glue to become tacky, then carefully align the foam and press it firmly onto the wood. Smooth it out with your hands to ensure there are no air bubbles or uneven bumps underneath the surface.
Step 4: Cut and Position the Batting
Dacron batting is essential for softening the harsh edges of the foam and giving your headboard a plush, rounded look. Lay your batting flat on a clean floor. Place the headboard face down onto the batting (so the foam side is touching the batting). Measure and cut the batting so that you have an extra four to six inches of material extending beyond all sides of the headboard. This excess allows you to easily pull the batting tightly around the edges of the wood frame and staple it securely to the back.
Step 5: Secure the Batting to the Frame
With the headboard still face down, begin pulling the excess batting tightly around to the back of the wooden frame. Starting in the center of the top edge, use your staple gun to secure the batting to the wood. Move to the center of the bottom edge, pulling the batting taut, and staple it. Repeat this process for the left and right sides. Work your way outward from the center of each side toward the corners, stapling every few inches. Keep the tension even to prevent any lumps or uneven spots on the front.
Step 6: Measure and Cut Your New Fabric
Fabric preparation is critical for a flawless finish. First, iron your chosen upholstery fabric to remove any creases or wrinkles; even a small fold will be noticeable once the fabric is stretched tight. Lay the pristine fabric face down on the floor. Measure the fabric so it extends at least six to eight inches past the edges of the headboard. You want plenty of excess fabric to grip and pull tightly. Once you have measured carefully, use sharp fabric scissors to cut the material to the appropriate size.
Step 7: Align and Pin the Fabric
Place your batting-covered headboard face down exactly in the center of your prepared fabric. If you are using a fabric with a distinct pattern, stripes, or a geometric design, this step is absolutely crucial. Stand the headboard up temporarily to check that the pattern is perfectly straight and centered across the front. Once you are satisfied with the alignment, lay it back down. You can use a few temporary staples or heavy-duty pins at the top and bottom to hold the fabric exactly in place before you begin the final stapling process.
Step 8: Staple the Fabric to the Frame
Begin the stapling process using the same technique you used for the batting. Start at the top center, pulling the fabric taut, and place one staple. Move to the bottom center, pull tight, and staple. Do the same for the left and right sides. Gradually work your way from the centers out toward the corners, placing a staple every one to two inches. Continually flip the headboard upright to check the front. Ensure the fabric is smooth, the tension is consistent, and the pattern remains perfectly aligned as you work around the perimeter.
Step 9: Finish the Corners and Edges
Corners are the most challenging part of any upholstery project, requiring patience and a neat folding technique. For standard square corners, pull the fabric diagonally toward the center of the back. Then, take the side pieces and fold them over neatly, similar to wrapping a tight present. Staple securely through all layers of the folded fabric. If your headboard has rounded corners, gently pull and pleat the fabric in small, overlapping sections, stapling each tiny fold to create a smooth, curved edge. Trim away any bulky excess fabric with your scissors.
Step 10: Reattach the Headboard to the Bed
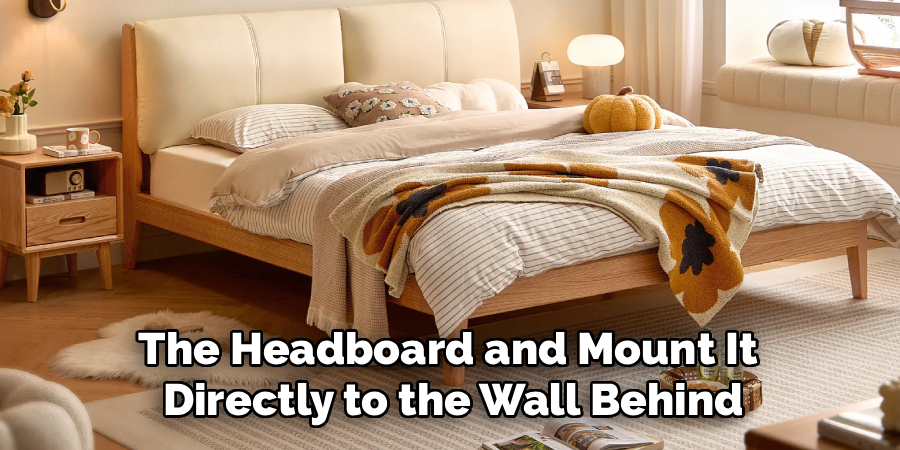
You have successfully upholstered your headboard, and now it is time for the final installation. If you plan to attach the headboard to your bed frame, use an awl or a screwdriver to puncture small holes through the new fabric exactly where the original hardware goes. Insert the bolts and tighten them securely to the metal or wood bed frame. Alternatively, if you prefer a floating look, attach heavy-duty French cleats to the back of the headboard and mount it directly to the wall behind your mattress.
Conclusion
How to reupholster a headboard with wood frame is a highly rewarding project that completely transforms the look and feel of your bedroom.
By investing a little bit of time and following these simple steps, you can create a luxurious, custom piece of furniture that reflects your personal style. Remember to take your time, double-check your measurements, and pull your fabric evenly. Do not be intimidated by the staple gun—once you get into a rhythm, the process becomes incredibly satisfying.
Gather your materials, clear out a workspace, and get ready to enjoy the beautiful, handcrafted results of your DIY upholstery project!

About
Mike May is a distinguished figure in the world of woodworking and timber design, with a decade of expertise creating innovative and sustainable indoor solutions. His professional focus lies in merging traditional craftsmanship with modern manufacturing techniques, fostering designs that are both practical and environmentally conscious. As the author of Woodimber, Mike delves into the art and science of timber-craft, inspiring artisans and industry professionals alike.
Education
RMIT University (Melbourne, Australia)
-
Associate Degree in Design (Timber): Focus on sustainable design, industry-driven projects, and practical craftsmanship.
-
Gained hands-on experience with traditional and digital manufacturing tools, such as CAD and CNC software.
Nottingham Trent University (United Kingdom)
-
Bachelor’s in Woodworking and Product Design (Honors): Specialized in product design with a focus on blending creativity with production techniques.
-
Participated in industry projects, working with companies like John Lewis and Vitsoe to gain real-world insights.
Publications and Impact
In Woodimber, May shares his insights on timber design processes, materials, and strategies for efficient production. His writing bridges the gap between artisan knowledge and modern industry needs, making it a must-read for both budding designers and seasoned professionals.