 (1)")

A round wooden box is not just a container; it is a testament to patience and precision. Whether you intend to use it as a jewelry holder, a keepsake container, or a unique gift box, the result is always striking. The absence of sharp corners gives the piece a soft, organic feel that invites handling. Unlike traditional box-making, which relies heavily on corner joinery like dovetails or box joints, making a round box often involves bending wood (steam bending) or stacking rings (lamination) and turning them.

This guide on how to make a round wooden box focuses on the accessible method of stacking rings and finishing them, perhaps with the aid of a lathe or careful sanding, to achieve that perfect cylindrical shape.
By the end of this project, you will not only have a beautiful wooden vessel but also a deeper understanding of wood grain, glue-ups, and finishing techniques.
What Will You Need?
Materials:
- Hardwood: Maple, walnut, or cherry work beautifully. You will need boards that are planed flat (approx. 3/4 inch thick).
- Wood Glue: High-quality PVA wood glue (like Titebond II or III).
- Sandpaper: Various grits ranging from 80 (coarse) up to 400 (fine).
- Finish: Tung oil, Danish oil, or a polyurethane wipe-on finish.
- Waste Block: A piece of scrap wood to mount the project to a faceplate.
Tools:
- Bandsaw or Jigsaw: For cutting the initial rough circles.
- Compass or Circle Cutting Jig: To mark your rings accurately.
- Clamps: A variety of clamps for gluing up the rings.
- Wood Lathe: The primary tool for shaping the inside and outside (optional but recommended for true roundness).
- Lathe Chisels: Bowl gouge, parting tool, and scraper.
- Drill Press (Optional): Helpful if using a circle cutter bit.
- Faceplate: To mount the wood to the lathe.
- Safety Gear: Face shield, dust mask/respirator, and safety glasses.
10 Easy Steps on How to Make a Round Wooden Box
Step 1: Design and Material Selection
Before you make a single cut, you must visualize the final product. The beauty of a round wooden box often comes from the contrast or continuity of the wood grain. You need to decide if you want a “segmented” look—where you glue many small trapezoids together to form a ring—or a “stacked ring” look, where you cut solid circles from a board and stack them. For this guide, we will focus on the stacked ring method as it is structurally robust and beginner-friendly.
Select a board that is flat and free of major knots or cracks. If you want a box that is 4 inches high, and your wood is 3/4 inch thick, you will need roughly five layers (plus a bottom and a lid). Draw out your plan on paper. Determine the outer diameter (how wide the box is) and the wall thickness.
Step 2: Marking and Cutting the Rings
Once you have your wood selected, use a compass to mark your circles directly onto the board. You will need a solid disc for the base, several rings for the body, and a solid disc for the lid. To save material and reduce the amount of wood you need to hollow out later, draw an inner circle on the body pieces. This creates a “doughnut” shape.
Using a bandsaw or jigsaw, carefully cut out these shapes. When cutting the outside of the circles, stay slightly outside your line (leaving about 1/16th of an inch). This extra material allows you room to true up the shape later on the lathe or sander. For the inner circles of the rings, cut slightly inside the line.
Step 3: The Glue-Up Process
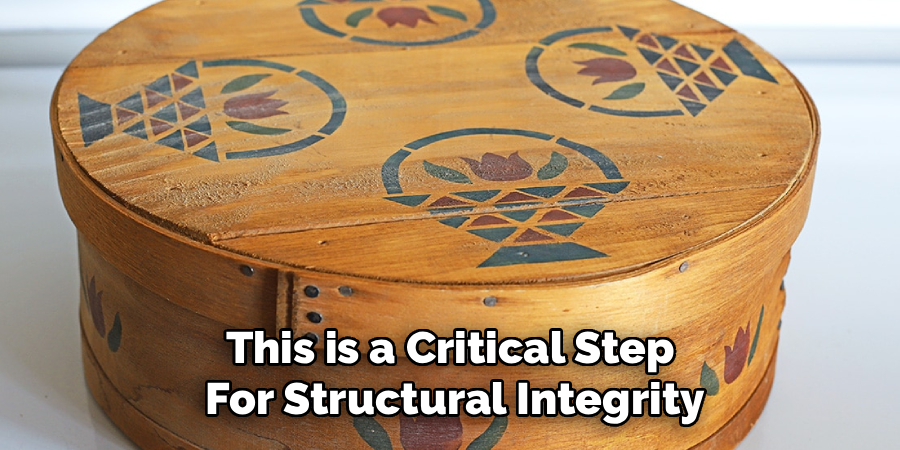
This is a critical step for structural integrity. You need to glue the rings onto the solid base piece to form the rough cylinder of the box. Do not glue the lid piece on yet! Apply an even layer of high-quality wood glue to the mating surfaces. It is vital to spread the glue to the edges but avoid excessive squeeze-out on the inside, which can be difficult to remove later.
Stack the rings carefully. Because they are rough cuts, it might be hard to align them perfectly. Try to center them as best as you can based on your drawn circles. Use plenty of clamps to apply even pressure. If the rings try to slide around (which wet glue often causes), you can sprinkle a tiny pinch of salt on the glue joint before mating the pieces; the salt bites into the wood and prevents sliding.
Step 4: Mounting the Blank
Now you have a rough, glued-up cylinder. To shape it, you need to mount it to your lathe. The safest way to do this is using a “waste block.” Glue a piece of scrap wood to the bottom of your box base. Make sure the joint between the waste block and your box base uses a piece of paper in between (a “paper joint”). This allows you to easily split the waste block off later without damaging the box bottom.
Screw your metal faceplate onto the waste block. Thread the whole assembly onto the lathe headstock. Before turning the machine on, rotate the piece by hand to ensure it clears the tool rest and doesn’t wobble dangerously.
Step 5: Roughing the Outside
Put on your face shield. Turn the lathe on at a moderate speed. Using a bowl gouge or a roughing gouge, begin to shape the outside of the cylinder. Your goal here is to remove the uneven edges from the bandsaw cuts and the glue steps. Gently shave away the wood until the exterior is perfectly round and smooth.

Step 6: Hollowing the Interior
Move the tailstock away; you will now be working on the inside, and you need access. This is the most delicate part of the process. Position your tool rest across the face of the opening. Using a bowl gouge, begin to remove material from the inside walls. Since you started with rings, much of the center is already empty, which saves you a lot of work!
You simply need to true up the inside walls so they match the outside curve. Aim for a consistent wall thickness. A heavy-bottomed box feels quality, but heavy walls can look clunky. Use calipers to check the thickness as you go deeper.
Step 7: Creating the Lid Recess (The Rabbet)
A box needs a lid that stays put. You need to create a “rabbet” or a small ledge on the top rim of your box where the lid will sit. Alternatively, you can put the ledge on the lid itself. Let’s put the ledge on the box rim for this guide.
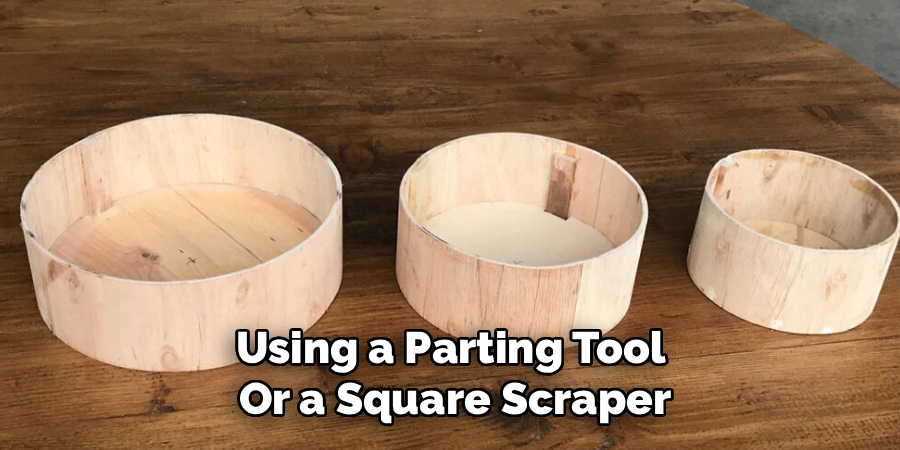
Using a parting tool or a square scraper, carefully cut a small step into the inner rim of the box opening. This step should be about 1/8 to 1/4 inch deep and wide. This needs to be precise. The vertical wall of this step must be perfectly straight so the lid fits snugly. Take your time here; a loose lid is disappointing, and a too-tight lid might crack the wood when humidity changes.
Step 8: Shaping and Fitting the Lid
Now, remove the box body from the lathe (or just set it aside if you have a second chuck). Mount your lid blank to a faceplate or screw chuck. Turn it around to the same diameter as your box. Now, you must cut the mating feature for the rabbet you just made.
Measure the opening of your box carefully. Transfer that dimension to your lid blank. Carefully cut the tenon (the part that sticks out) on the underside of the lid. Stop frequently and test the fit with the actual box. It should be a “friction fit”—tight enough to hold, but loose enough to remove easily.
Step 9: Sanding to Perfection
Sanding on the lathe produces an incredible finish, but it must be done correctly to avoid scratch marks. Start with 80 or 100 grit sandpaper to remove any tool marks. With the lathe spinning at a slow speed, hold the sandpaper against the wood, keeping it moving so you don’t create heat grooves.
Progress through the grits: 120, 150, 220, 320, and finally 400. Between each grit, turn off the lathe and wipe the wood down with a tack cloth or compressed air. This removes stray grit particles that could ruin the finer finish of the next step.
Step 10: Applying the Finish
The final step brings the wood to life. With the dust removed, apply your chosen finish. For a project like this, a penetrating oil like Danish Oil or Tung Oil is fantastic because it hardens in the wood, not just on top of it, preserving the tactile feel of the timber.
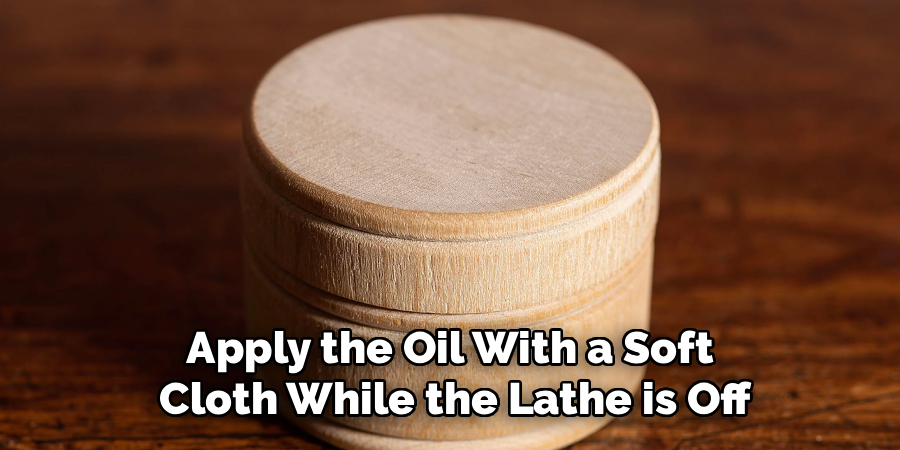
Apply the oil with a soft cloth while the lathe is off. Saturate the wood and let it soak in for a few minutes. Then, turn the lathe on at a very slow speed and use a clean cloth to buff off the excess. The friction from the cloth will generate a little heat, helping to cure the finish and create a soft sheen.
5 Things You Should Avoid
- Rushing the Glue-Up: Never rush the drying time of your glued rings. If you start turning before the glue is fully cured, the stress of the lathe can cause the box to explode apart, which is dangerous and ruins the project.
- Aggressive Material Removal: When hollowing out the inside, avoid pushing the gouge too hard. The walls of the box become thinner and more flexible as you work; aggressive cuts can cause the wood to flex and crack or shatter.
- Ignoring Grain Direction: When sanding, especially the final hand-sanding passes, avoid sanding across the grain. Even on a round object, cross-grain scratches stand out vividly once the finish is applied and are very hard to fix.
- Fitting the Lid Too Tightly: Avoid making the lid fit perfectly tight straight off the lathe. Wood moves with humidity; a “perfect” fit in a dry workshop might become impossibly stuck in a humid house. Aim for a slightly loose, easy fit.
- Neglecting Safety Gear: Never operate the lathe or saws without eye protection and a dust mask. Wood dust, especially from fine sanding, is harmful to your lungs, and a spinning workpiece carries kinetic energy that demands respect.
Conclusion
How to make a round wooden box is a journey of refinement. You start with raw, angular boards and, through a process of cutting, gluing, and shaping, reveal a continuous, flowing form. It is a project that teaches the importance of precision in the early stages—like the glue-up—and patience in the final stages, like the sanding and finishing.
The resulting box is more than just a storage item; it is a showcase of the natural beauty of wood, uninterrupted by corners or metal fasteners. Whether you keep it on your dresser or give it as a gift, it will serve as a lasting reminder of the skill and care you poured into its creation.
So, select your timber, sharpen your tools, and enjoy the rhythmic satisfaction of turning something truly beautiful.
About
Mike May is a distinguished figure in the world of woodworking and timber design, with a decade of expertise creating innovative and sustainable indoor solutions. His professional focus lies in merging traditional craftsmanship with modern manufacturing techniques, fostering designs that are both practical and environmentally conscious. As the author of Woodimber, Mike delves into the art and science of timber-craft, inspiring artisans and industry professionals alike.
Education
RMIT University (Melbourne, Australia)
-
Associate Degree in Design (Timber): Focus on sustainable design, industry-driven projects, and practical craftsmanship.
-
Gained hands-on experience with traditional and digital manufacturing tools, such as CAD and CNC software.
Nottingham Trent University (United Kingdom)
-
Bachelor’s in Woodworking and Product Design (Honors): Specialized in product design with a focus on blending creativity with production techniques.
-
Participated in industry projects, working with companies like John Lewis and Vitsoe to gain real-world insights.
Publications and Impact
In Woodimber, May shares his insights on timber design processes, materials, and strategies for efficient production. His writing bridges the gap between artisan knowledge and modern industry needs, making it a must-read for both budding designers and seasoned professionals.