 (1)")

There’s something undeniably charming about a sliding barn door. It brings a rustic yet modern farmhouse aesthetic to any room, saves precious floor space, and serves as a functional piece of art.
However, if you have ever shopped for pre-made barn doors, you know the price tag can be shocking. High-end solid wood doors often cost hundreds, if not thousands, of dollars. But here is the good news: you don’t need a carpenter’s workshop or an unlimited budget to get that high-end look.
How to build a barn door with plywood is one of the most rewarding and accessible DIY projects you can tackle. Plywood offers stability, affordability, and a surprisingly smooth finish that paints or stains beautifully.
With a little patience and the right plan, you can transform a few sheets of lumber into a custom architectural feature that will transform your living space.
What Will You Need?
Before you head to the hardware store, gather these supplies. Having everything ready will make the build process smooth and enjoyable.
Materials:
- 1 sheet of 3/4-inch Cabinet Grade Plywood (Birch or Maple is best for a smooth finish)
- 1×6 or 1×4 Pine Boards (for the trim and design overlay)
- Wood Glue (high quality)
- 1.25-inch Brad Nails
- 1-inch Wood Screws
- Wood Filler
- Sandpaper (120 and 220 grit)
- Primer and Paint or Wood Stain and Polyurethane
- Barn Door Hardware Kit (track, rollers, stops, and floor guide)
- Handle or Pull
Tools:
- Circular Saw or Table Saw
- Miter Saw (for cutting angles on trim)
- Power Drill
- Brad Nailer (pneumatic or battery-operated)
- Orbital Sander
- Clamps (various sizes)
- Tape Measure
- Level
- Pencil
- Speed Square
- Safety Glasses and Dust Mask
10 Easy Steps on How to Build a Barn Door With Plywood
Step 1: Measure Your Opening and Determine Door Size
The most critical step happens before you make a single cut. You need to size your door correctly. A barn door needs to be wider and taller than the opening it covers to block light and sightlines effectively. Measure the width of your door casing (trim) or the drywall opening.
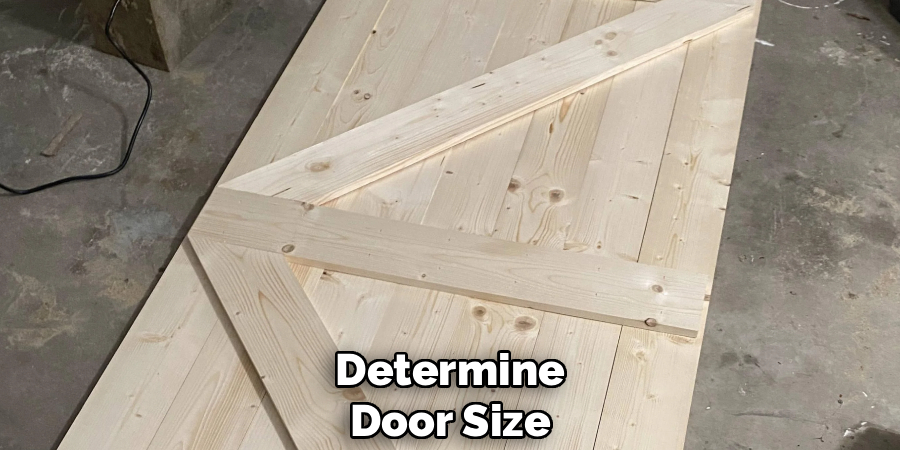
Add at least 2 to 4 inches to the width (1 to 2 inches of overlap on each side) and about 1 to 2 inches to the height. Write these dimensions down clearly. This final measurement will be the exact size of your plywood base. If you make it too small, you will have awkward gaps; too big, and it might look clumsy or hit adjacent walls.
Step 2: Cut the Plywood Base to Size
Now that you have your dimensions, it is time to cut the core of your door. Take your 3/4-inch plywood sheet and lay it on a stable work surface or sawhorses. Using your circular saw or table saw, cut the plywood to the exact height and width you calculated in Step 1.
To ensure a perfectly straight cut with a circular saw, clamp a straight edge or a long level to the plywood to guide your saw base. This plywood sheet acts as the backbone of your door, providing the structural integrity and flat surface needed for the overlay design.
Step 3: Plan and Cut the Vertical Stiles
The “stiles” are the vertical boards that frame the left and right sides of your door. Measure the full height of your plywood panel. Cut two pieces of your 1×6 (or 1×4, depending on your preference) pine boards to match this length exactly using your miter saw. These boards will create the vertical borders of your door design. Dry fit them onto the plywood to ensure they are flush with the edges. If your pine boards are slightly warped, you may need to wrestle them into place later, but cutting them to the correct length now is essential.
Step 4: Plan and Cut the Horizontal Rails
The “rails” are the horizontal boards that sit between the vertical stiles. To get the measurement for these, measure the distance between the two vertical stiles you just placed on the plywood. Do not just rely on math here; physical measurements are always more accurate. Cut your top and bottom rails from the pine boards.

If you want a middle rail (or multiple horizontal rails for a specific look), cut those now as well. Dry fit everything again to ensure your frame looks square and fits perfectly on the plywood backing.
Step 5: Attach the Border Frame to the Plywood
It is time to permanently attach the frame. Start with the vertical stiles. Apply a generous bead of wood glue to the back of one stile. Align it perfectly with the edge of the plywood. Using your brad nailer, secure the board in place with 1.25-inch nails spaced about every 6 to 8 inches. Repeat this for the other vertical stile, and then for the horizontal rails.
The glue does the heavy lifting for long-term strength, while the nails act as clamps to hold the wood in place while the glue dries. Wipe away any excess glue squeeze-out immediately with a damp rag.
Step 6: Design and Cut the Diagonal Braces
This is where you give the door its character. A classic barn door often features a diagonal “Z” brace, a “K” brace, or a British Brace (an “X” shape). Let’s assume you are doing a standard single diagonal or an “X” brace. Lay your uncut pine board diagonally across the area where it will go, creating the shape you want directly on top of the door.
Use your pencil to mark the exact angle where the brace meets the rails and stiles underneath. Take the board to your miter saw and cut along these lines. This “scribe and cut” method is often more accurate than trying to calculate complex angles with a protractor.
Step 7: Attach the Diagonal Braces
Once your diagonal pieces are cut and tested for a tight fit, attach them just like the frame. Apply wood glue to the back of the brace and press it firmly into position. Secure it with brad nails.
Be mindful of where you place your nails; try to keep them in a consistent pattern or hide them in the grain if you plan to stain the door. If you are doing an “X” design, you will likely have one long diagonal piece and two shorter pieces that abut the center. Ensure the intersection is tight for a professional look.

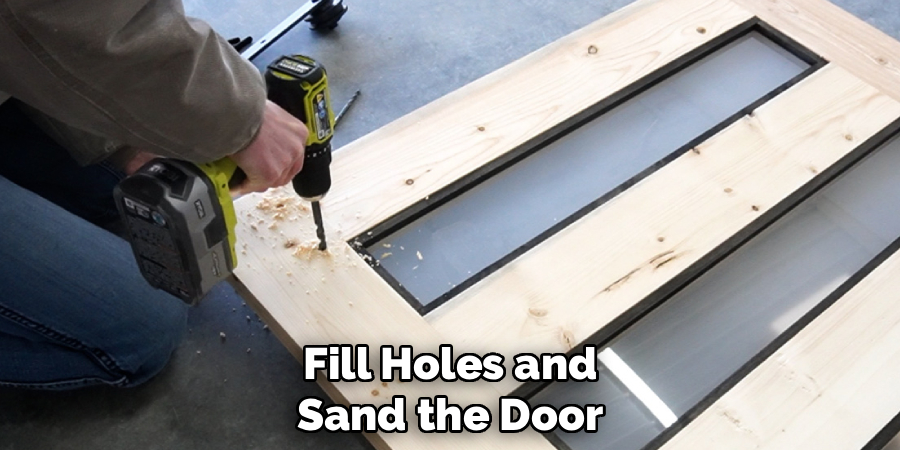
Step 8: Fill Holes and Sand the Door
With all the wood attached, your door is structurally complete, but it likely looks rough. Use wood filler to fill all the small holes left by the brad nails. Also, fill any small gaps where your trim boards meet. Overfill slightly, as the filler shrinks when it dries. Once the filler is completely dry, use your orbital sander. Start with 120-grit sandpaper to smooth out the filler and level any uneven joints between the plywood and the trim. Finish with 220-grit sandpaper for a furniture-grade smoothness. Pay special attention to the edges of the plywood—you want them to feel smooth to the touch, not sharp or splintery.
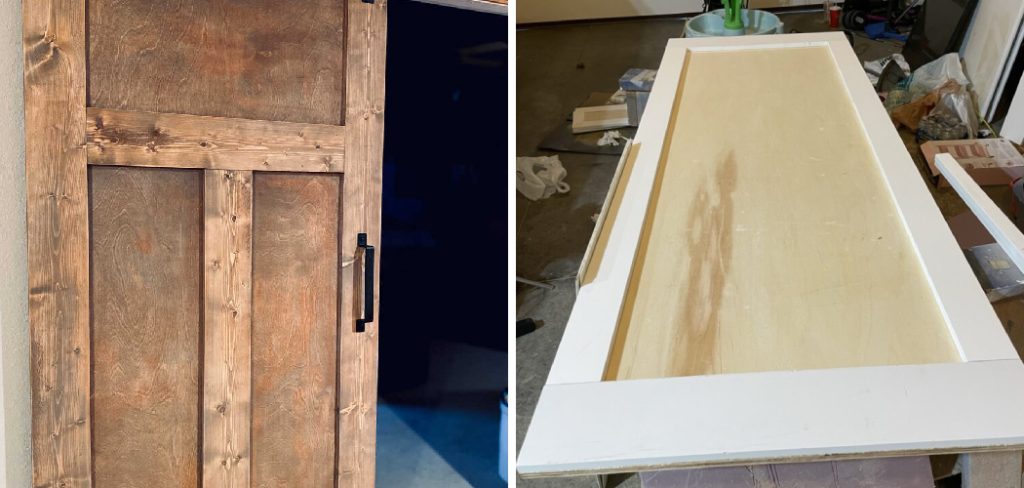
Step 9: Prime and Paint (or Stain)
If you are painting, apply a high-quality primer first. Plywood and pine absorb paint differently, and primer ensures an even finish. Once the primer is dry, lightly sand it with fine-grit paper, wipe off the dust, and apply your topcoat of paint. Two coats are usually necessary for a rich, solid color.
If you are staining, use a pre-stain wood conditioner first to prevent the pine from looking blotchy, then apply your stain and seal it with polyurethane. Don’t forget to paint or stain the back of the door as well, as it will be visible from inside the room when the door is closed.
Step 10: Install the Hardware and Hang the Door
Follow the instructions provided with your specific hardware kit to mount the rollers to the top of your door. Typically, these are bolted through the stile and plywood for maximum strength. Next, locate the studs in your wall and mount the metal track header board (if needed) and the metal track itself.
Ensure the track is perfectly level—if it isn’t, your door will slide open or closed on its own! Lift the door onto the track. Finally, install the floor guide at the bottom to prevent the door from swinging out, and attach the handle. Stand back and admire your handiwork!
5 Things You Should Avoid
When building a barn door, a few common mistakes can ruin the functionality or aesthetics of your project.
- Ignoring the Baseboard: Do not forget that your door needs to clear existing baseboards or trim on the wall. If you mount the track directly to the drywall, the door might hit the baseboard. You often need to install a “header board” (a 1×4 or 1×6 wood board) onto the wall studs first, then mount the track to that, creating the necessary clearance gap.
- Using Warped Lumber: Avoid buying the first boards you see at the store. Take the time to “sight” down the length of every pine board. If a board is twisted, bowed, or cupped, it will not sit flat on your plywood, creating unsightly gaps that glue and nails cannot fix.
- Skimping on Hardware: Avoid buying the cheapest hardware kit available without checking the weight rating. While plywood doors are lighter than solid wood, they are still heavy. Cheap rollers can feel gritty, make noise, or fail under the weight. Look for kits with ball-bearing wheels and solid steel rails.
- Forgetting the Floor Guide: Never skip installing the floor guide. Without it, the bottom of the door will swing freely, banging against the wall and potentially damaging your drywall or the door itself. It also poses a safety hazard for fingers and toes.
- Measuring Only Once: Avoid the “measure once, cut once” mentality. Always measure your opening at the top, middle, and bottom. Walls are rarely perfectly plumb and floors are rarely perfectly level. Build your door based on the largest measurement to ensure full coverage.
Conclusion
Building your own plywood barn door is a fantastic way to introduce custom style into your home without breaking the bank. By utilizing a simple plywood base and layering it with pine trim, you achieve the robust look of a traditional door with far less hassle.
How to build a barn door with plywood empowers you to control the dimensions, the design, and the finish, ensuring the final product fits your space perfectly.
With the right tools, a bit of patience, and adherence to these steps, you will create a stunning focal point that you can proudly say you built yourself. Happy building!
About
Mike May is a distinguished figure in the world of woodworking and timber design, with a decade of expertise creating innovative and sustainable indoor solutions. His professional focus lies in merging traditional craftsmanship with modern manufacturing techniques, fostering designs that are both practical and environmentally conscious. As the author of Woodimber, Mike delves into the art and science of timber-craft, inspiring artisans and industry professionals alike.
Education
RMIT University (Melbourne, Australia)
-
Associate Degree in Design (Timber): Focus on sustainable design, industry-driven projects, and practical craftsmanship.
-
Gained hands-on experience with traditional and digital manufacturing tools, such as CAD and CNC software.
Nottingham Trent University (United Kingdom)
-
Bachelor’s in Woodworking and Product Design (Honors): Specialized in product design with a focus on blending creativity with production techniques.
-
Participated in industry projects, working with companies like John Lewis and Vitsoe to gain real-world insights.
Publications and Impact
In Woodimber, May shares his insights on timber design processes, materials, and strategies for efficient production. His writing bridges the gap between artisan knowledge and modern industry needs, making it a must-read for both budding designers and seasoned professionals.