 (1)")

Staining wood is a fantastic way to enhance its natural beauty, add character, and protect its surface. While many people turn to commercial stains, there’s a simple, eco-friendly, and surprisingly effective alternative sitting in your kitchen pantry: coffee and tea.
Using these everyday beverages, you can create a beautiful, rich, and non-toxic finish for your woodworking projects. This guide on how to stain wood with coffee or tea will walk you through everything you need to know to achieve a stunning, custom-colored wood stain using items you already have at home.
It’s a creative process that is not only rewarding but also safe for you and the environment.
What Will You Need?
Before you begin, gather the following materials:
- Wood: Unfinished, bare wood works best. Any finish or paint must be removed first.
- Sandpaper: A few different grits (e.g., 120, 180, and 220) for preparing the wood surface.
- Coffee or Tea: For coffee, strong grounds are ideal. For tea, use black tea bags for the darkest color.
- Steel Wool: Grade #0000 is preferred.
- White Vinegar: This will be used to create a pre-stain solution.
- Glass Jars: You’ll need at least two for mixing your solutions.
- Brushes or Rags: Foam brushes, natural bristle brushes, or clean, lint-free cloths work well for application.
- Clean Rags: For wiping away excess stain.
- Gloves: To protect your hands from staining.
- Wood Finish/Sealer: A clear coat like polyurethane, wax, or oil to protect the final stain.
10 Easy Steps on How to Stain Wood with Coffee or Tea
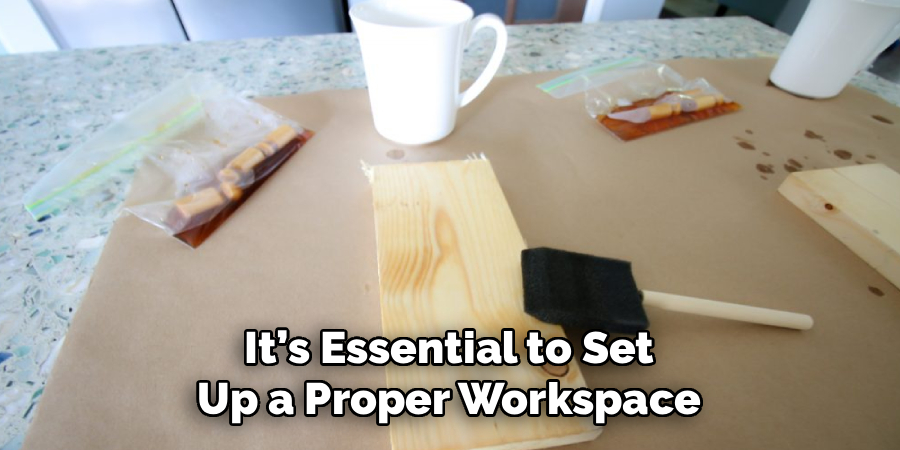
Step 1: Prepare Your Workspace
Before you start mixing stains or sanding wood, it’s essential to set up a proper workspace. This project, while natural, can still be messy. Choose a well-ventilated area, like a garage with the door open, a workshop, or even an outdoor space on a calm, dry day. Lay down a drop cloth, old newspapers, or a plastic sheet to protect your floor or worktable from spills and dust. Having all your supplies organized and within reach will make the process much smoother.
Keep your sandpaper, jars, brushes, rags, and protective gear nearby. This preparation step ensures that you can work efficiently and safely, preventing any accidental stains on your surroundings and allowing you to focus completely on your project. A little organization at the beginning saves a lot of cleanup and potential frustration later on.
Step 2: Prepare the Wood
The quality of your final stain is directly related to how well you prepare the wood surface. Start with a piece of unfinished, raw wood. If your wood has an existing paint, varnish, or sealer, you will need to remove it completely using a stripper or by sanding it down to the bare wood. Once you have a raw surface, begin sanding. Start with a lower grit sandpaper, like 120-grit, to smooth out any major imperfections.
Move with the grain of the wood, not against it, to avoid creating scratches. After the initial pass, wipe away the dust with a clean cloth. Then, switch to a finer grit, such as 180 or 220, for a final, smooth finish. A perfectly smooth surface will absorb the stain more evenly, preventing a blotchy appearance. This step is crucial and should not be rushed; a well-sanded piece of wood is the foundation for a professional-looking result.
Step 3: Create the Pre-Stain Solution
A pre-stain solution helps the wood absorb the coffee or tea stain more deeply and evenly, resulting in a richer, more durable color. This is achieved by creating an iron acetate solution, which sounds complicated but is incredibly simple. Take one of your glass jars and place a pad of #0000 steel wool inside. Fill the jar with enough white vinegar to completely submerge the steel wool.
Loosely place the lid on the jar or cover it with a cloth; do not seal it tightly, as the chemical reaction will release gas that needs to escape. Let this mixture sit for at least 24 hours, though leaving it for a few days will create a more potent solution. You’ll notice the steel wool starting to dissolve and the vinegar turning a rusty, brownish color. This solution reacts with the tannins in the coffee or tea (and the wood itself), which will “ebonize” the wood, darkening it significantly.
Step 4: Brew Your Stain
While your pre-stain solution is reacting, it’s time to brew the star of the show: your coffee or tea stain. The strength of your brew will determine the darkness of your stain. For a dark coffee stain, a strong brew is necessary. Use at least one cup of ground coffee for every two cups of boiling water. A French press or percolator works well, but you can also simply pour boiling water over the grounds in a jar and let it steep for several hours, or even overnight. For tea, use black tea bags for the most color.

Use about 10-15 black tea bags per two cups of boiling water. Let the tea steep until the water is completely cool and very dark. The longer you let either mixture steep, the more concentrated and darker your stain will be. Once brewed, strain the liquid through a coffee filter or fine-mesh sieve to remove all grounds or tea leaves, leaving you with a pure, liquid strain.
Step 5: Apply the Pre-Stain Solution
After your wood is sanded smooth and your vinegar-steel wool solution has had time to mature, it’s time to apply the pre-stain. Put on your gloves to protect your hands. Using a foam brush or a clean rag, apply a light, even coat of the iron acetate solution to the entire wood surface. Be sure to cover all the nooks and crannies. The wood may not change color immediately, or it might turn a light grayish hue.
This is normal. The real magic happens when this solution interacts with the tannins from the coffee or tea stain you will apply next. Let the wood dry completely after applying this coat. This can take an hour or two, depending on the humidity and temperature of your workspace. Applying this solution is a key step for achieving a deep, aged look rather than just a surface-level tint.
Step 6: Apply the First Coat of Stain
Now the fun part begins. With your wood dry from the pre-stain solution, you can apply your coffee or tea stain. Using a clean foam brush or rag, apply a generous, even coat of your brewed stain over the entire surface. Work in the direction of the wood grain for the best absorption and a uniform appearance.
As you apply the stain, you will start to see the color develop as the tannins in the brew react with the iron acetate. Don’t be shy with the application; you want the wood to soak up the liquid. Ensure you cover the entire piece, including edges and corners. Once the piece is fully coated, let it sit for about 15-20 minutes to allow the stain to penetrate the wood fibers.
Step 7: Wipe Away the Excess
After letting the first coat of stain sit and penetrate the wood, it’s important to wipe away any excess liquid from the surface. Use a clean, dry, lint-free rag for this step. Wiping off the excess prevents the stain from drying into a sticky or uneven film on top of the wood. It also helps to reveal the wood grain underneath and gives you a better sense of the true color you’ve achieved so far.

Wipe gently, following the direction of the wood grain. This action helps to evenly distribute the pigment that has soaked into the wood, ensuring a consistent finish. Your goal is to leave behind the color that has been absorbed by the wood, not a layer of liquid sitting on top of it.
Step 8: Build the Color with More Coats
One coat of stain will likely result in a very light color. The beauty of this natural staining process is your ability to build up the color to your desired shade. To achieve a darker, richer finish, you’ll need to apply additional coats. Let the wood dry completely after wiping off the excess from the first coat.
This can take anywhere from one to several hours. Once dry, repeat the process: apply another even coat of your coffee or tea stain, let it sit for 15-20 minutes, and then wipe away the excess. You can repeat this process as many times as you like. Each layer will subtly darken the wood, allowing you complete control over the final look. Three to five coats are often enough to achieve a beautiful, deep color.
Step 9: Let it Dry Completely
Patience is key in the final stages of your project. After you have applied your last coat of stain and are satisfied with the color, you must let the wood dry completely. This is not a step to be rushed. Depending on the type of wood, the number of coats applied, and the humidity in your workspace, this could take anywhere from 24 to 48 hours.
The wood should feel completely dry to the touch, with no hint of moisture or coolness. Proper drying ensures that the sealer you apply in the next step will adhere correctly and cure properly. If you apply a sealer over wood that is still damp, you risk trapping moisture, which can lead to a cloudy finish, peeling, or long-term damage to the wood.
Step 10: Seal the Wood
Once your beautifully stained piece is thoroughly dry, the final step is to protect it with a sealer. An unsealed coffee or tea stain can be susceptible to water spots and fading over time. Applying a top coat will lock in the color and protect the wood from moisture, scratches, and daily wear and tear. You can choose from several types of clear finishes, such as a water-based polyurethane for a durable, clear finish, a finishing wax for a soft, natural sheen, or a tung oil for a rich, water-resistant surface.

Apply the sealer according to the manufacturer’s instructions, which usually involves applying one or more thin, even coats with a brush or cloth. Allow the sealer to cure completely before using your finished piece. This final step ensures your hard work is preserved for years to come.
Conclusion
Staining wood with coffee or tea is a simple, fulfilling, and environmentally conscious way to bring new life to your woodworking projects. This method gives you the power to create custom, beautiful finishes with items you already own.
By following these steps on how to stain wood with coffee or tea—from careful preparation and brewing to patient application and sealing—you can transform a plain piece of wood into something with rich color and unique character.
This process not only yields a wonderful result but also connects you more closely to the materials you work with, turning a simple project into a truly handcrafted piece.
About
Mike May is a distinguished figure in the world of woodworking and timber design, with a decade of expertise creating innovative and sustainable indoor solutions. His professional focus lies in merging traditional craftsmanship with modern manufacturing techniques, fostering designs that are both practical and environmentally conscious. As the author of Woodimber, Mike delves into the art and science of timber-craft, inspiring artisans and industry professionals alike.
Education
RMIT University (Melbourne, Australia)
-
Associate Degree in Design (Timber): Focus on sustainable design, industry-driven projects, and practical craftsmanship.
-
Gained hands-on experience with traditional and digital manufacturing tools, such as CAD and CNC software.
Nottingham Trent University (United Kingdom)
-
Bachelor’s in Woodworking and Product Design (Honors): Specialized in product design with a focus on blending creativity with production techniques.
-
Participated in industry projects, working with companies like John Lewis and Vitsoe to gain real-world insights.
Publications and Impact
In Woodimber, May shares his insights on timber design processes, materials, and strategies for efficient production. His writing bridges the gap between artisan knowledge and modern industry needs, making it a must-read for both budding designers and seasoned professionals.