 (1)")

Bringing natural wood into a bathroom is a bold design choice that instantly elevates the space. The warmth, texture, and organic feel of timber can turn a sterile, tiled room into a spa-like sanctuary. However, water and wood have historically been enemies. The high humidity and direct water exposure in a shower environment pose significant challenges, including warping, rot, and mold growth.
Fortunately, with the right preparation and treatment, you can successfully install wood in your shower. It isn’t just about slapping on a coat of varnish; it requires a systematic approach to waterproofing and sealing that rivals boat-building techniques.
This guide on how to treat wood for shower walls will walk you through the precise process of treating wood for shower walls so it remains beautiful and durable for years to come.
The Benefits of Wood Shower Walls
Choosing wood over traditional tile or acrylic isn’t just an aesthetic decision; it changes the entire atmosphere of your bathroom.
- Aesthetic Warmth: Wood offers a natural, calming vibe that cold tiles simply cannot match. It softens the hard lines of a bathroom and brings a biophilic element indoors.
- Unique Character: No two wooden boards are identical. The grain patterns, knots, and color variations ensure your shower is truly one-of-a-kind.
- Acoustic Insulation: Wood is naturally sound-absorbing, which can make your shower feel quieter and more private compared to the echo-chamber effect of tile.
- Thermal Comfort: Unlike cold ceramic, wood feels warmer to the touch, making for a more comfortable showering experience.
What Will You Need?
Before starting, gather all necessary tools and materials. Treating wood for a wet environment is a chemical process that requires safety gear and specific applicators.
Materials:
- High-quality timber (Teak, Cedar, or Hinoki Cypress are best)
- Penetrating epoxy sealer (Marine-grade recommended)
- Marine varnish or Spar Urethane
- Wood filler (waterproof)
- Sandpaper (80, 120, and 220 grit)
- Tack cloths
- Acetone or denatured alcohol
Tools:
- Natural bristle brushes or foam brushes
- Orbital sander
- Respirator mask (rated for organic vapors)
- Safety goggles and nitrile gloves
- Clean rags
- Drop cloths
10 Easy Steps on How to Treat Wood for Shower Walls
Properly treating wood for a shower is a labor of love. It requires patience, as rushing the drying times can compromise the waterproof barrier. This section details the process to ensure a watertight finish.
Step 1: Selecting and Acclimating Your Timber

The success of your project starts before you open a can of sealer. You must choose a wood species naturally resistant to rot and moisture. Teak, Cedar, and Redwood are top choices because they contain natural oils that repel water. Once you have purchased your lumber, do not install it immediately. Let the wood sit in the room where it will be installed (or a room with similar humidity) for at least 72 hours. This process, called acclimation, allows the wood to expand or contract to the ambient moisture levels, reducing the risk of warping after installation. If the wood is “green” or wet, it must be kiln-dried before you can seal it effectively.
Step 2: Pre-Sanding the Surface
Before applying any chemical treatments, the wood must be smooth and free of mill glaze. Mill glaze is a shiny surface texture caused by the heat of the planer blades during manufacturing, and it can prevent sealers from penetrating deep into the fibers. Using an orbital sander, start with 80-grit sandpaper to open up the pores of the wood. Move to 120-grit for a smoother finish. Do not go too fine at this stage; if the wood is polished too smooth (like with 400-grit), the epoxy sealer won’t have enough “tooth” to grip onto. Ensure you sand all sides of the boards, not just the face that will be visible.
Step 3: Cleaning and Degreasing
Dust is the enemy of a good finish. After sanding, use a vacuum with a brush attachment to remove the bulk of the sawdust. However, vacuuming isn’t enough. You must wipe down the wood with a tack cloth to pick up fine particles. If you are using an oily wood like Teak, you have an extra step: wipe the surface with a rag soaked in acetone. This removes the natural surface oils that might interfere with the adhesion of the epoxy or varnish. Allow the acetone to evaporate completely, which usually takes about 15 to 20 minutes, before moving to the next step.
Step 4: Applying the First Coat of Penetrating Epoxy
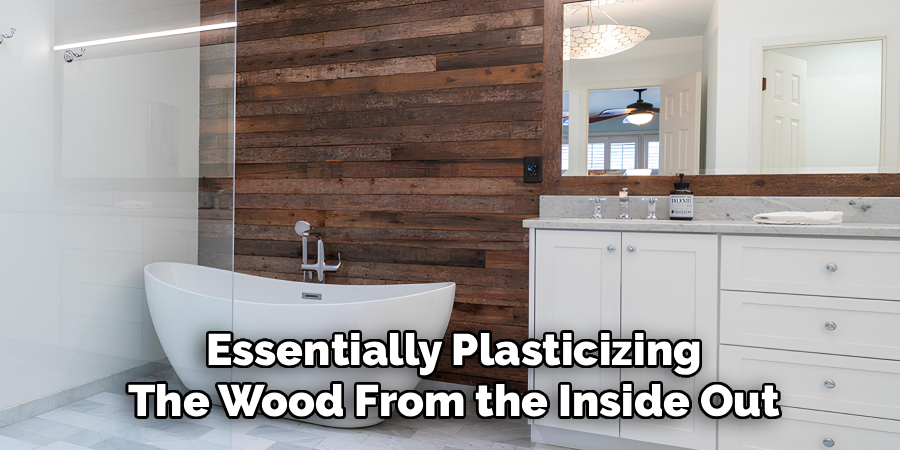
This is the most critical step for waterproofing. A penetrating epoxy sealer soaks deep into the wood fibers and hardens, essentially plasticizing the wood from the inside out. Mix your marine-grade epoxy according to the manufacturer’s instructions. It is vital to measure the resin and hardener precisely. Apply the epoxy generously using a foam brush or roller. You want the wood to drink up as much as it can. Treat this step as if you are trying to saturate the wood, not just paint it. Pay special attention to the end grain (the cut ends of the boards), as this is where water is most likely to wick in like a straw.
Step 5: Sealing the Back and Edges
Many DIYers make the fatal mistake of only sealing the front of the wood. In a shower, moisture exists as steam and can easily get behind the walls. If the back is unsealed, it will absorb moisture, causing the wood to cup or rot from the back forward. Apply the penetrating epoxy to the back, sides, and edges of every single board. The goal is complete encapsulation. Think of each board as an island that needs to be completely surrounded by protection. Allow this coat to cure fully, which may take 24 to 48 hours, depending on the brand and temperature.
Step 6: Sanding the Epoxied Surface
Once the epoxy has cured hard, the surface will likely feel rough. Wood fibers often stand up (grain raising) when they get wet with the sealer. You need to knock this down to ensure your final finish is smooth. Lightly sand the surfaces with 220-grit sandpaper. You are not trying to remove the epoxy; you are simply scuffing it to smooth out imperfections and create a mechanical bond for the next layer. Wear your respirator during this step, as epoxy dust is hazardous to inhale. Wipe the surface clean with a tack cloth or a rag dampened with denatured alcohol.
Step 7: Filling Holes and Imperfections

Inspect the boards closely. Are there any knots, cracks, or nail holes? These are potential entry points for water. Mix a waterproof wood filler or a thickened epoxy putty. Press this firmly into any voids, slightly overfilling them as the filler may shrink slightly when it dries. Once the filler has set, sand it flush with the surface using your 220-grit paper. This ensures a perfectly flat surface where water cannot pool or enter. If you are using screws to install the wood, you should countersink them and fill the holes over the screw heads during installation, but prepping other defects happens now.
Step 8: Applying the First Topcoat of Varnish
While epoxy provides the waterproofing, it often lacks UV protection and can degrade if left exposed. You need a topcoat like Spar Urethane or Marine Varnish to protect the epoxy and provide the aesthetic sheen. Apply a thin, even coat of your chosen varnish. Brush with the grain of the wood to minimize stroke marks. Do not overload the brush; several thin coats are far superior to one thick, drippy coat. Ensure you are working in a well-ventilated area, as these finishes have strong fumes. Let this coat dry completely according to the can’s directions.
Step 9: Scuff Sanding Between Coats
Adhesion between layers of varnish is key to longevity. Once the first topcoat is dry, lightly sand it with 220-grit or 320-grit sandpaper. This scuff sanding removes dust nibs and creates microscopic scratches that the next coat of varnish will lock into. It helps prevent the layers from peeling apart later. Wipe away the white dust completely with a tack cloth. If you skip this step, your finish may look cloudy or feel rough to the touch. It is tedious, but it is the difference between a professional job and an amateur one.
Step 10: The Final Coats and Cure Time
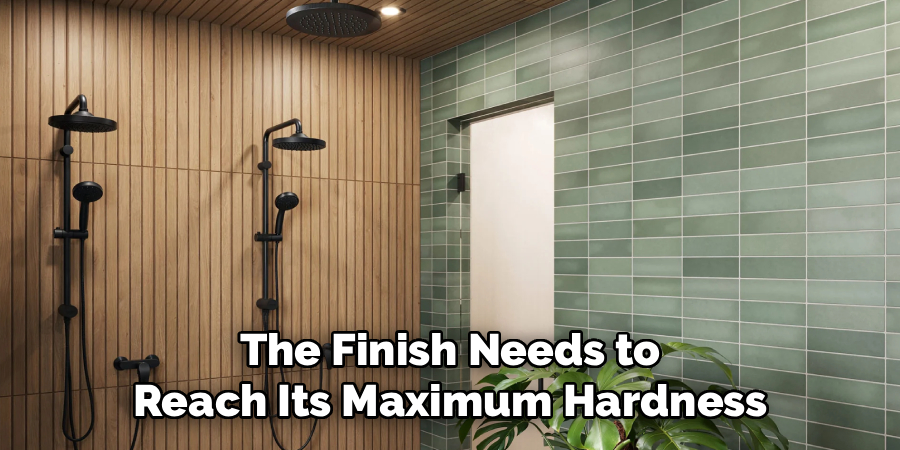
For a shower environment, one topcoat is not enough. You need to build up a significant film thickness. Repeat the “apply varnish, dry, scuff sand, clean” cycle for at least 3 to 5 coats. The more coats you apply, the deeper and more lustrous the finish will look, and the better protected the wood will be. On the very final coat, do not sand it. Let the wood cure for several days—preferably a week—before using the shower. The finish needs to reach its maximum hardness and water resistance before it faces hot water and soap.
5 Things You Should Avoid
- Skipping the Backside: Never install wood without sealing the back. Moisture vapor travels through walls, and unsealed backsides will absorb water, causing the wood to warp, cup, and pull away from the wall.
- Using Interior Polyurethane: Avoid standard interior polyurethane. It forms a rigid shell that cracks as wood expands and contracts with heat. You must use Spar Urethane or Marine Varnish, which are flexible and move with the wood.
- Rushing Drying Times: Do not recoat before the previous layer is fully dry. Trapping solvents between layers leads to a soft, gummy finish that will peel and whiten when exposed to hot shower water.
- Ignoring the End Grain: Avoid leaving the cut ends of the boards lightly treated. The end grain absorbs water 20 times faster than the face grain; it must be soaked in epoxy until it cannot hold any more.
- Using Softwoods like Pine: Avoid using cheap softwoods like Pine or Spruce. They are too porous and prone to rot. Stick to dense, oily woods like Teak, Ipe, or Cedar, which have natural defenses against decay.
Conclusion
How to treat wood for shower walls is an exacting process that bridges the gap between carpentry and boat building. While it requires more effort than tiling, the result is a bathroom feature of unmatched beauty and warmth.
By rigorously following the steps of acclimation, epoxy saturation, and multiple layers of marine varnish, you create a barrier that allows the wood to thrive in a wet environment.
Remember, maintenance is key; keep an eye on your finish, and your wooden shower will remain a luxurious retreat for decades.
About
Mike May is a distinguished figure in the world of woodworking and timber design, with a decade of expertise creating innovative and sustainable indoor solutions. His professional focus lies in merging traditional craftsmanship with modern manufacturing techniques, fostering designs that are both practical and environmentally conscious. As the author of Woodimber, Mike delves into the art and science of timber-craft, inspiring artisans and industry professionals alike.
Education
RMIT University (Melbourne, Australia)
-
Associate Degree in Design (Timber): Focus on sustainable design, industry-driven projects, and practical craftsmanship.
-
Gained hands-on experience with traditional and digital manufacturing tools, such as CAD and CNC software.
Nottingham Trent University (United Kingdom)
-
Bachelor’s in Woodworking and Product Design (Honors): Specialized in product design with a focus on blending creativity with production techniques.
-
Participated in industry projects, working with companies like John Lewis and Vitsoe to gain real-world insights.
Publications and Impact
In Woodimber, May shares his insights on timber design processes, materials, and strategies for efficient production. His writing bridges the gap between artisan knowledge and modern industry needs, making it a must-read for both budding designers and seasoned professionals.