 (1)")

Wood furniture adds warmth, character, and timeless elegance to any home. Whether it’s a cherished heirloom passed down through generations or a modern piece that complements your décor, maintaining its beauty requires proper care and attention. Over time, dust, grime, and everyday wear can dull the finish and obscure the natural beauty of the wood. However, cleaning wood furniture doesn’t have to be complicated or risky.

Many homeowners worry about damaging the finish when cleaning their wood furniture, and rightfully so. Using harsh chemicals or incorrect techniques can strip away protective coatings, leaving the wood vulnerable to scratches, stains, and moisture damage. The good news is that with the right approach, you can keep your wood furniture looking pristine without compromising its finish. In this guide on how to clean wood furniture without removing finish, we’ll walk you through everything you need to know about safely cleaning wood furniture, from understanding different types of finishes to implementing a step-by-step cleaning process that preserves the integrity and luster of your cherished pieces.
Understand Your Wood Furniture
Before you begin cleaning, it’s essential to identify what type of finish your furniture has. Different finishes require different care approaches, and using the wrong method could cause irreversible damage. The most common finishes include polyurethane, lacquer, shellac, varnish, and oil finishes. Each has unique characteristics that determine how it should be cleaned and maintained.
To identify your furniture’s finish, start by examining its appearance and feel. Polyurethane finishes create a hard, protective layer that’s resistant to water and scratches, often appearing glossy or satin. Lacquer finishes have a thin, hard surface with a high-gloss appearance. Shellac produces a warm, amber tone and dissolves in alcohol. Oil finishes penetrate the wood rather than sitting on top, giving a natural, matte appearance. If you’re unsure about your furniture’s finish, test a small, inconspicuous area with a drop of denatured alcohol—if the finish softens, it’s likely shellac or lacquer.
Understanding your wood type is equally important. Hardwoods like oak, maple, and walnut are denser and more durable, while softwoods like pine and cedar are more susceptible to scratches and dents. Antique or vintage pieces may have older finishes that are more delicate and require gentler cleaning methods. Taking the time to understand these characteristics will help you choose the most appropriate cleaning approach.
Gather Cleaning Materials
Having the right cleaning materials is essential to keeping your wooden furniture looking its best. Here are some must-have items for cleaning wood furniture:
- Soft cloths or microfiber towels
- Mild soap or detergent
- White vinegar
- Mineral spirits
- Furniture polish or wax (optional)
It’s important to note that while commercial furniture cleaners may seem convenient, they often contain harsh chemicals that can damage your wood. Stick with mild, natural cleaners for the best results.
7 Simple Step-By-Step Guidelines on How to Clean Wood Furniture Without Removing Finish
Step 1: Remove Surface Dust and Debris
Begin by removing all items from the furniture surface, including decorative objects, lamps, and books. This gives you complete access to the entire piece and prevents you from accidentally knocking things over during cleaning. Use a vacuum cleaner with a soft brush attachment to gently remove dust from the surface and any crevices, carved details, or joints where dust tends to accumulate.

After vacuuming, take a dry microfiber cloth and wipe down the entire surface using long, smooth strokes that follow the grain of the wood. This initial dusting step is crucial because it removes loose particles that could scratch the finish if you were to wipe over them with a damp cloth. Pay special attention to corners, edges, and any decorative elements where dust loves to hide. For intricate carvings or hard-to-reach areas, a soft-bristled paintbrush can help dislodge stubborn dust without causing damage.
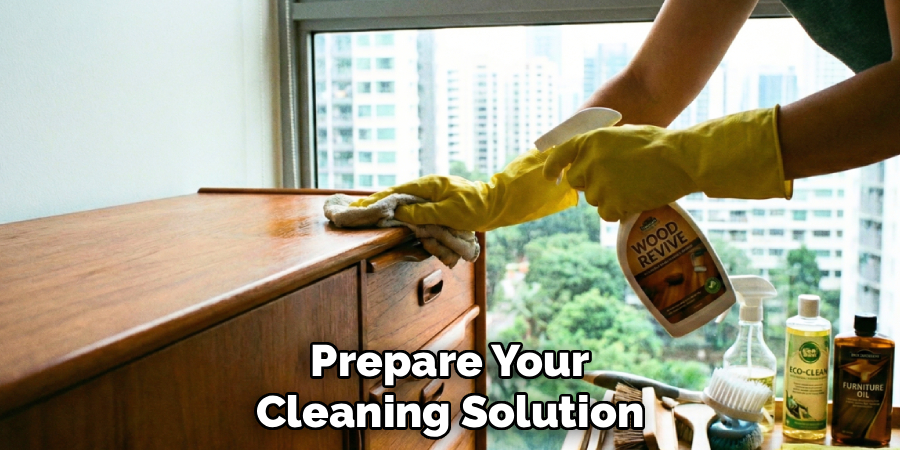
Step 2: Prepare Your Cleaning Solution
Mix your cleaning solution in a bowl or bucket, using either a few drops of mild dish soap in warm water or a mixture of one part white vinegar to three parts water. The solution should be very mild—remember, you’re not trying to strip anything away, just gently remove dirt and grime. Stir the mixture gently to combine without creating excessive suds.
Test your cleaning solution on an inconspicuous area of the furniture first, such as the underside of a table or the back of a chair leg. Apply a small amount with a cloth, wait a few minutes, and check for any adverse reactions like discoloration, dulling, or finish softening. If the test area looks fine after drying, you’re safe to proceed with cleaning the entire piece. This testing step might seem tedious, but it’s a small investment of time that can save you from ruining a valuable piece of furniture.
Step 3: Dampen Your Cloth Properly
Dip your cleaning cloth into the solution, then wring it out thoroughly until it’s just barely damp—not wet. This is perhaps the most critical step in the entire process. Excess water is wood’s enemy, as it can seep into seams, cause warping, or cloud the finish. The cloth should feel slightly cool to the touch but shouldn’t drip or leave moisture behind when you wipe.
If you’re uncertain whether your cloth is too wet, press it firmly against a dry towel. If it leaves a wet mark, wring it out more. The goal is to have just enough moisture to lift dirt without saturating the wood. Some professionals describe the ideal dampness level as “damp as a wrung-out sponge” or “barely moist.” Getting this right prevents water damage while still providing effective cleaning power.
Step 4: Wipe Following the Wood Grain
Begin wiping the furniture surface with your damp cloth, always moving in the direction of the wood grain. This technique is important because wiping against the grain can push dirt into the wood’s pores and create visible streaks. Use gentle, even pressure and work in small sections, approximately two feet square at a time.
As you clean each section, periodically rinse your cloth in the cleaning solution and wring it out again to remove accumulated dirt. A dirty cloth will simply redistribute grime rather than removing it. For stubborn spots or sticky residue, hold the damp cloth over the area for a few seconds to soften the debris before gently wiping it away. Avoid scrubbing harshly, as this can damage the finish. If a spot won’t come clean with gentle pressure, it may require a specialized cleaner or professional attention.
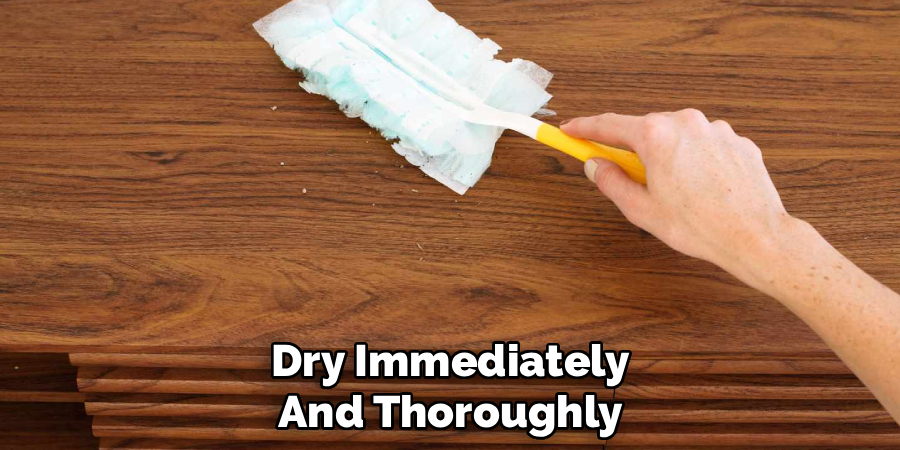
Step 5: Dry Immediately and Thoroughly
As soon as you’ve cleaned a section, immediately follow with a clean, dry cloth to remove any remaining moisture. This step cannot be skipped or delayed—leaving even small amounts of water on wood furniture can cause white rings, cloudiness, or other damage to the finish. Use a fresh, dry microfiber cloth and wipe in the direction of the grain with moderate pressure.
Pay special attention to edges, corners, and any joints or seams where water might collect. These areas are particularly vulnerable to moisture damage. If you notice any water pooling or sitting on the surface, dry it immediately. Continue this clean-and-dry process section by section until you’ve covered the entire piece. The furniture should be completely dry to the touch before you move on to the next step.
Step 6: Address Stubborn Stains Carefully
For spots that didn’t come clean with your mild soap or vinegar solution, you may need to use slightly more aggressive methods—but always proceed with caution. For water rings or white haze, try rubbing gently with a cloth dampened with mineral spirits, always working with the grain. For sticky residue from tape or labels, a small amount of cooking oil can help dissolve the adhesive without harming the finish.
Grease spots sometimes respond well to a paste made from baking soda and water, applied gently and wiped away quickly. For ink marks, try rubbing alcohol on a cotton swab, testing first in an inconspicuous spot. Whatever method you use for stubborn stains, work slowly and check your progress frequently. It’s better to repeat a gentle treatment several times than to use too much force or too harsh a product once. If a stain persists despite your best efforts, consider consulting a professional furniture restorer rather than risking damage to the finish.
Step 7: Buff and Polish for Shine
Once the furniture is completely clean and dry, you can enhance its appearance with a light buffing. Take a clean, dry microfiber cloth and rub the surface in circular motions, then finish by buffing with the grain. This simple step can restore luster and create a beautiful, smooth finish that highlights the wood’s natural beauty.
If desired, you can apply a small amount of furniture polish or wood conditioner at this stage, but it’s not necessary for every cleaning. If you do use polish, apply it sparingly to your cloth—never directly to the furniture—and buff it in thoroughly until no residue remains. Quality furniture polish can add an extra layer of protection and make future cleaning easier, but using too much will create a sticky buildup that attracts dust. Many experts recommend polishing only every few months rather than with every cleaning.
Following these steps on how to clean wood furniture without removing finish will help maintain the appearance and longevity of your treasured pieces. However, it’s important to note that certain stains or damage may require professional attention. If you encounter stubborn stains or scratches on your wood furniture, consult a furniture restoration expert for guidance on how to properly treat and restore the piece.
Preventive Maintenance Tips
Regular maintenance is the key to keeping wood furniture looking beautiful for years to come. Dust your furniture at least once a week with a dry microfiber cloth to prevent buildup that can dull the finish over time. Use coasters, placemats, and table runners to protect surfaces from moisture, heat, and scratches. Rotate decorative items periodically so sunlight exposure is distributed evenly, preventing uneven fading.
Maintain consistent humidity levels in your home, ideally between 40-45%, as extreme dryness or moisture can cause wood to crack or warp. Keep furniture away from direct sunlight, heating vents, and air conditioning units, which can dry out wood and fade finishes. When moving furniture, always lift rather than drag to prevent scratches on both the furniture and your floors. Address spills immediately by blotting—never wiping—with a clean, dry cloth to prevent moisture from penetrating the finish.
Common Mistakes to Avoid
Even with the best intentions, it’s easy to make mistakes when cleaning wood furniture. Never use all-purpose cleaners, window cleaners, or products containing ammonia or bleach, as these can strip or damage finishes.
Avoid excessive water or leaving surfaces damp, which can cause serious damage over time. Don’t use abrasive materials like rough sponges, paper towels, or scouring pads that can scratch the finish. Resist the urge to over-polish, as this creates buildup that attracts dirt and makes furniture look dull and sticky. Finally, never skip the step of testing cleaning products in an inconspicuous area first—this simple precaution can save you from costly mistakes.
Frequently Asked Questions
Q: How Often Should I Deep Clean My Wood Furniture?
A: Deep cleaning frequency depends on how heavily your furniture is used and your home environment. For most households, a thorough cleaning every three to six months is sufficient to maintain wood furniture’s beauty and integrity. High-traffic pieces like dining tables or desks may benefit from monthly deep cleaning, while decorative pieces in guest rooms might only need attention once or twice a year. Between deep cleanings, regular dusting and immediate spill cleanup will keep your furniture looking its best. If you notice the surface beginning to look dull or feel slightly sticky to the touch, it’s time for a cleaning, regardless of your schedule.
Q: Can I Use Olive Oil or Other Household Oils to Clean Wood Furniture?
A: While olive oil and similar household oils are sometimes recommended for wood furniture care, they’re generally not the best choice for finished pieces. These oils don’t actually clean dirt or grime—they simply add shine temporarily. Over time, they can become sticky, attract dust, and create a buildup that’s difficult to remove. Oils can also turn rancid, creating unpleasant odors. For furniture with an oil finish (rather than polyurethane, lacquer, or varnish), specialized wood oils or conditioners designed for furniture care are a better option. For finished furniture, stick with the mild soap and water method outlined in this guide, followed by occasional use of quality furniture polish if desired.

Conclusion
Maintaining the beauty of your wood furniture doesn’t require expensive products or complicated techniques—just patience, the right approach, and regular care. By following these seven simple steps on how to clean wood furniture without removing finish and avoiding common mistakes, you can keep your wood furniture looking stunning for decades without risking damage to the finish. Remember that gentle, consistent care is always better than aggressive or sporadic cleaning attempts.
Your wood furniture represents an investment in quality and style, and proper maintenance protects that investment while ensuring these pieces continue to bring warmth and elegance to your home. Start implementing these cleaning techniques today, and you’ll be rewarded with furniture that looks as beautiful as the day you brought it home. For more expert tips on caring for your home’s furnishings and maintaining a beautiful living space, explore our other guides and resources designed to help you become a confident and capable homeowner.
About
Mike May is a distinguished figure in the world of woodworking and timber design, with a decade of expertise creating innovative and sustainable indoor solutions. His professional focus lies in merging traditional craftsmanship with modern manufacturing techniques, fostering designs that are both practical and environmentally conscious. As the author of Woodimber, Mike delves into the art and science of timber-craft, inspiring artisans and industry professionals alike.
Education
RMIT University (Melbourne, Australia)
-
Associate Degree in Design (Timber): Focus on sustainable design, industry-driven projects, and practical craftsmanship.
-
Gained hands-on experience with traditional and digital manufacturing tools, such as CAD and CNC software.
Nottingham Trent University (United Kingdom)
-
Bachelor’s in Woodworking and Product Design (Honors): Specialized in product design with a focus on blending creativity with production techniques.
-
Participated in industry projects, working with companies like John Lewis and Vitsoe to gain real-world insights.
Publications and Impact
In Woodimber, May shares his insights on timber design processes, materials, and strategies for efficient production. His writing bridges the gap between artisan knowledge and modern industry needs, making it a must-read for both budding designers and seasoned professionals.