 (1)")

Installing hardwood flooring can transform any room into an elegant, timeless space. While the thought of laying hardwood floors might seem intimidating at first, understanding the proper techniques and following a systematic approach makes this project entirely achievable for DIY enthusiasts and homeowners alike.
Whether you’re renovating your home or simply upgrading worn-out flooring, hardwood remains one of the most popular choices due to its durability, aesthetic appeal, and ability to increase property value. This comprehensive guide on how to start laying hardwood floor will walk you through everything you need to know about starting your hardwood floor installation, from selecting the right materials to executing each step with confidence. By the end of this article, you’ll have the knowledge and roadmap necessary to begin your flooring project successfully.
Understand Hardwood Flooring Options
Before you begin the installation process, it’s crucial to understand the different types of hardwood flooring available. Solid hardwood flooring consists of planks milled from a single piece of timber, offering authenticity and the ability to be refinished multiple times over its lifespan. Engineered hardwood, on the other hand, features a real hardwood veneer bonded to layers of plywood or high-density fiberboard, providing enhanced stability in varying humidity conditions.
Your choice between solid and engineered hardwood will depend on several factors, including your budget, the room’s location, and your climate. Solid hardwood works beautifully in living areas and bedrooms,s but should be avoided in basements or areas with high moisture. Engineered hardwood offers more versatility and can be installed in nearly any room, including below-grade spaces. Consider the wood species as well—oak, maple, cherry, and walnut each bring distinct grain patterns and color tones that will influence your room’s overall aesthetic.
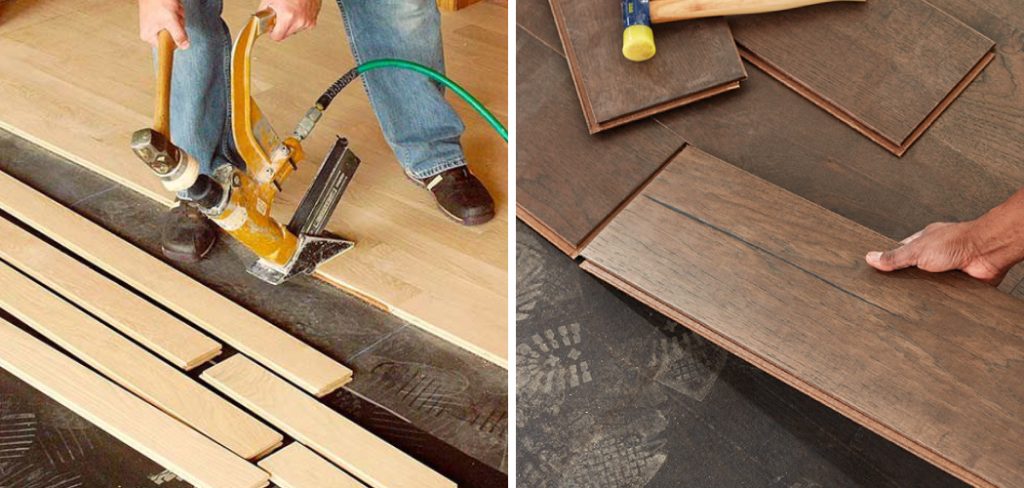
Additionally, you’ll need to decide on the installation method: nail-down, glue-down, or floating floor. Nail-down installation is traditional and works best with solid hardwood over a wood subfloor. Glue-down methods provide stability on concrete subfloors, while floating floors click together without adhesive and can be installed over various surfaces. Understanding these options upfront ensures you select materials compatible with your installation method and subfloor type.
Materials You’ll Need
- Hardwood flooring planks
- Underlayment
- Adhesive or nails (depending on installation method)
- Tapping block and hammer
- Saw for cutting planks to size
- Spacers to maintain a proper expansion gap
7 Simple Step-By-Step Guidelines on How to Start Laying Hardwood Floor
Step 1: Prepare Your Subfloor
The foundation of any successful hardwood floor installation lies in proper subfloor preparation. Begin by thoroughly cleaning the subfloor, removing all debris, dust, and old adhesive residue. Any irregularities in the subfloor will telegraph through your finished floor, so this step cannot be rushed.

Check the subfloor for levelness using a long straightedge or level. Any variations greater than 3/16 inch over a 10-foot span need correction. Low spots can be filled with leveling compound, while high spots should be sanded down. For wood subfloors, ensure all boards are securely fastened and replace any damaged sections. If you’re working with concrete, test for moisture using a moisture meter or plastic sheet test—excessive moisture will damage your hardwood over time and must be addressed before proceeding.
Step 2: Install Underlayment or Moisture Barrier
Underlayment serves multiple purposes: it provides a moisture barrier, reduces noise transmission, and offers minor leveling properties. For installations over concrete, a vapor barrier is absolutely essential to prevent moisture from seeping up into your hardwood. Roll out the underlayment perpendicular to the direction your flooring will run, overlapping seams by several inches and taping them securely.
If your hardwood manufacturer specifies a particular underlayment type, follow those recommendations precisely to maintain your warranty. Some engineered hardwood products come with underlayment already attached, simplifying this step. For solid hardwood over wood subfloors, rosin paper or felt paper traditionally serves as a moisture barrier and prevents squeaking between the flooring and subfloor.
Step 3: Plan Your Layout
Strategic layout planning prevents awkward, narrow pieces from being placed against walls and ensures your floor looks professionally installed. Measure the width of your room perpendicular to how you’ll run the boards, then divide by the width of your flooring planks. If the final row is narrower than two inches, adjust your starting point so both the first and last rows are similar widths—this creates a balanced, intentional appearance.
Hardwood floors typically run parallel to the longest wall in rectangular rooms, or perpendicular to floor joists in the case of nail-down installations over wood subfloors. Use a chalk line to mark your starting line, ensuring it’s perfectly straight and square with the room. This reference line is critical—if your first row isn’t straight, every subsequent row will compound that error. Consider the most visible areas of the room and plan to minimize or hide shorter end pieces in less conspicuous locations, like closets or under furniture.
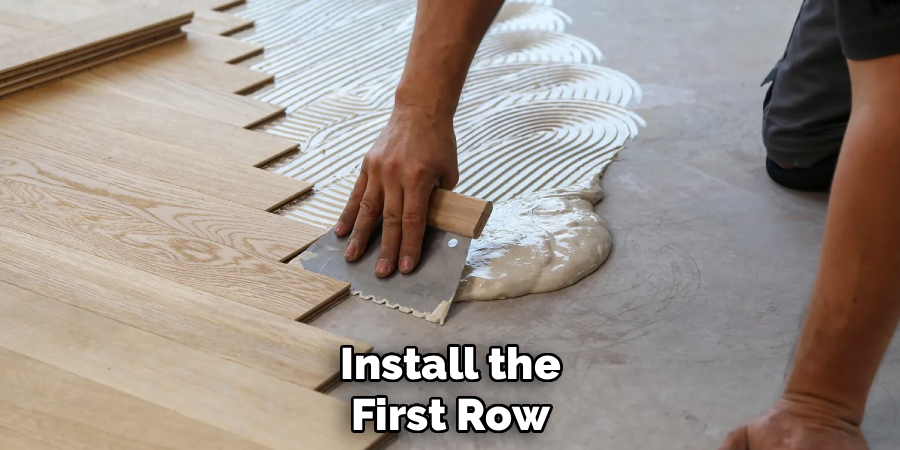
Step 4: Install the First Row
The first row establishes the foundation for your entire floor, so take your time and get it right. Position the first board with the groove side facing the wall, using spacers to maintain a 1/2-inch expansion gap between the flooring and wall. This gap allows the wood to expand and contract with seasonal humidity changes without buckling.

Face-nail through the top of the board near the wall, where your baseboard or quarter-round will cover the holes. Th, nailil at a 45-degree angle through the tongue of each plank. If you’re using a pneumatic nailer, adjust the pressure so nails sit flush without overdriving. Check frequently with your level to ensure the first row remains straight—any deviation now will be magnified as you progress across the room.
Step 5: Continue Installing Subsequent Rows
Working from your established first row, continue laying planks row by row. Stagger the end joints between rows by at least six inches to create a random, natural appearance and maximize structural integrity. Most installers aim for a stagger pattern where no end joints align within two rows of each other.
Apply a small bead of wood glue along the tongue before fitting each new plank—this isn’t always required, but it adds stability and reduces squeaking. Tap boards together firmly using a tapping block to ensure tight seams without gaps. As you work, maintain consistent use of your nailer, placing fasteners every 8-10 inches along each plank and within 3 inches of each end. Periodically step back and inspect your work, checking for consistent spacing and that rows remain straight and parallel.
Step 6: Navigate Around Obstacles
Doorways, vents, and other obstacles require careful measurement and precise cuts. For door frames, use a jamb saw to undercut the casing so flooring can slide beneath it, creating a clean, professional transition. When working around vents or pipes, create a template using cardboard, then transfer those measurements to your flooring plank.
Complex cuts may require a jigsaw or coping saw for curved edges. Always measure twice and cut once—hardwood isn’t forgiving of mistakes. For doorway transitions, use appropriate transition strips or T-molding to bridge the height difference between your hardwood and adjacent flooring types. These details separate amateur installations from professional-looking results.
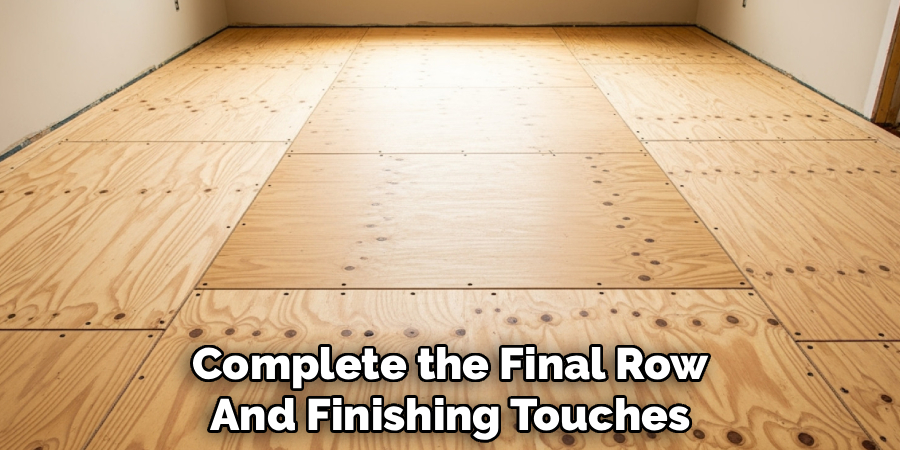
Step 7: Complete the Final Row and Finishing Touches
The last row often requires ripping boards lengthwise to fit the remaining space while maintaining your expansion gap. Measure carefully at multiple points along the wall, as few walls are perfectly straight. Use a table saw or circular saw with a straightedge guide for accurate, straight cuts.
Installing the final row typically requires a pry bar and creativity since you won’t have room to use your nailer. Apply adhesive to the tongue and groove connections, then use the pry bar against the wall to force the last boards tightly into place. Face-nail near the wall where molding will cover. Once complete, remove all spacers and install your baseboards and quarter-round molding. Fill any visible nail holes with wood putty matching your floor’s color, and perform a final cleaning with a hardwood floor cleaner to remove installation residue.
Following these steps on how to start laying hardwood floor will ensure a seamless and professional finish to your flooring project. However, the process of laying a hardwood floor is just the beginning. Maintaining your hardwood floors is crucial for their longevity and beauty.
Common Mistakes to Avoid
Several common pitfalls can compromise your hardwood floor installation. Skipping the acclimation period ranks among the most frequent mistakes—rushing this step often results in gaps or buckling as the wood adjusts post-installation. Similarly, inadequate subfloor preparation creates an unstable foundation that leads to squeaks, movement, and premature wear.
Always maintain proper expansion gaps around the room’s perimeter; without this space, your floor has nowhere to expand during humid months and will buckle. Inconsistent fastening patterns or incorrect nailer settings can cause boards to work loose over time. Finally, failing to stagger end joints sufficiently creates weak points and an amateurish appearance that detracts from your beautiful hardwood investment.
Frequently Asked Questions
Q1: Can I Install Hardwood Flooring Over Existing Flooring?
A1: While it’s technically possible to install hardwood over existing flooring in some circumstances, it’s generally not recommended. Installing over old flooring raises the floor height, which creates issues with door clearances, transitions to adjacent rooms, and appliance fit. Additionally, any problems with the existing floor—moisture issues, unevenness, or instability—will transfer to your new hardwood installation. The best practice involves removing old flooring to assess and properly prepare the subfloor. However, engineered hardwood floating floors can sometimes be installed over existing vinyl or tile if the surface is level, stable, and properly prepared. Always consult your hardwood manufacturer’s installation guidelines, as installing over existing flooring typically voids product warranties.
Q2: How Long Should I Wait Before Moving Furniture Back?
A2: After completing your hardwood floor installation, patience is essential before returning furniture and rugs to the space. For nail-down or glue-down installations, wait at least 24 hours before walking on the floor with light foot traffic, and 72 hours before placing furniture back in the room. This allows adhesives to cure properly and fasteners to set securely.
If you’ve applied a finish coat or polyurethane, follow the manufacturer’s recommended cure time, which typically ranges from 24 hours for light traffic to two weeks for full curing. When moving furniture back, use felt pads under all legs and lift rather than drag pieces across your new floor.
For heavy items like pianos or refrigerators, place plywood or hardboard underneath during the move to distribute weight and prevent denting. Taking these precautions protects your investment and ensures your beautiful new hardwood floor remains pristine for years to come.
Conclusion
Installing hardwood flooring represents a significant investment in both time and money, but the rewards—a stunning, durable floor that enhances your home’s value and beauty—make the effort worthwhile. By understanding your flooring options, gathering the right materials, properly preparing your subfloor, and methodically following each installation step on how to start laying hardwood floor, you can achieve professional-quality results. Remember that patience and attention to detail during critical phases like acclimation, layout planning, and the first row installation will determine your project’s ultimate success.
Ready to transform your space with beautiful hardwood floors? Start by carefully measuring your room and selecting the perfect hardwood style that complements your home’s aesthetic. With the knowledge you’ve gained from this guide, you’re well-equipped to begin your flooring journey with confidence. Take your time, follow best practices, and soon you’ll be enjoying the timeless elegance and warmth that only real hardwood flooring can provide.
About
Mike May is a distinguished figure in the world of woodworking and timber design, with a decade of expertise creating innovative and sustainable indoor solutions. His professional focus lies in merging traditional craftsmanship with modern manufacturing techniques, fostering designs that are both practical and environmentally conscious. As the author of Woodimber, Mike delves into the art and science of timber-craft, inspiring artisans and industry professionals alike.
Education
RMIT University (Melbourne, Australia)
-
Associate Degree in Design (Timber): Focus on sustainable design, industry-driven projects, and practical craftsmanship.
-
Gained hands-on experience with traditional and digital manufacturing tools, such as CAD and CNC software.
Nottingham Trent University (United Kingdom)
-
Bachelor’s in Woodworking and Product Design (Honors): Specialized in product design with a focus on blending creativity with production techniques.
-
Participated in industry projects, working with companies like John Lewis and Vitsoe to gain real-world insights.
Publications and Impact
In Woodimber, May shares his insights on timber design processes, materials, and strategies for efficient production. His writing bridges the gap between artisan knowledge and modern industry needs, making it a must-read for both budding designers and seasoned professionals.