 (1)")

Custom-built cabinets and storage units add incredible value and personality to a home, but the cost of solid wood doors can be prohibitive. Plywood offers a strong, stable, and budget-friendly alternative that can be finished to look just as beautiful. Whether you are building new kitchen cabinets, a garage storage system, or a simple bookcase, creating your own doors gives you complete control over the style and fit.

Many DIYers feel that woodworking projects like this are beyond their skill level, but the process is more straightforward than you might think. Learning how to make plywood doors is an empowering skill that unlocks a new world of custom projects. This guide will walk you through the entire process, from selecting the right materials to applying the finishing touches, ensuring you can build professional-quality doors with basic tools and a bit of patience.
Why Build Your Own Plywood Doors?
Opting to build your own plywood doors for cabinets or furniture is a smart decision for several reasons. First and foremost is the cost savings. Custom cabinetry can be one of the most expensive parts of a home renovation, and building the doors yourself drastically reduces that expense. Plywood is significantly more affordable than solid hardwood, yet it provides excellent strength and stability.
Unlike solid wood, high-quality plywood is resistant to warping, shrinking, and swelling with changes in humidity, making it an ideal material for environments like kitchens and bathrooms. This project also offers complete customization. You can build doors to fit any non-standard opening, choose the exact wood grain you want for the veneer, and finish them to perfectly match your decor. The sense of accomplishment that comes from building something functional and beautiful for your own home is an invaluable bonus.
Step-by-Step Guide on How to Make Plywood Doors
Step 1: Measure Your Openings and Plan Your Cuts
The foundation of a good door is an accurate measurement. Carefully measure the height and width of the cabinet opening where the door will hang. For inset doors that sit inside the frame, you will want to subtract about 1/8 inch from both the height and width to create an even gap all around.
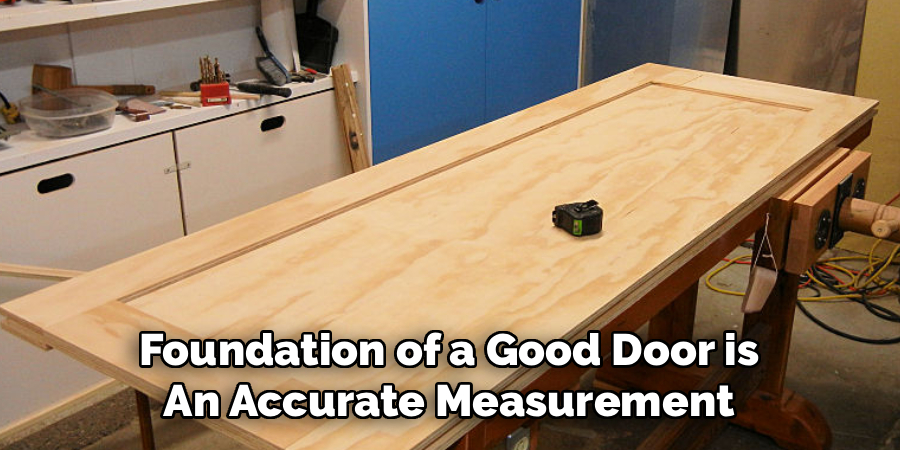
For overlay doors that sit on top of the frame, add your desired overlay amount to each dimension, typically 1/2 inch on all sides. Once you have your final dimensions, plan your cuts on a standard 4×8 sheet of plywood. Use a diagram to lay out the door shapes, maximizing your use of the material to minimize waste. Double-check all your numbers before you pick up the saw.
Step 2: Choose the Right Plywood
Not all plywood is created equal. For doors that will be visible, you should choose a high-quality, cabinet-grade plywood. This type of plywood has a smooth, attractive hardwood veneer on the face (like oak, maple, or birch) and more internal layers (plies) for greater stability. Look for a grade of “A” on the face side, which means it will be free of knots and blemishes.
For shop cabinets or utility storage, a lower-grade “B” or “C” plywood is a more economical choice. The thickness is also important; 3/4-inch plywood is the standard for cabinet doors as it provides excellent rigidity and is substantial enough to hold hinge screws securely.
Step 3: Cut the Plywood to Size
Cutting large sheets of plywood accurately can be challenging. The best tool for this job is a track saw, which ensures a perfectly straight and clean cut every time. If you do not have a track saw, a circular saw guided by a straightedge clamped to the plywood is a great alternative. To prevent the wood veneer from splintering on the top surface, you can apply painter’s tape along your cut line before you saw.
It is also helpful to set your saw blade depth so it only cuts about 1/4 inch deeper than the thickness of the plywood. Make your cuts slowly and steadily, ensuring you follow your measured lines precisely for a square and accurate door panel.
Step 4: Add Edge Banding for a Finished Look
The exposed, layered edges are the biggest giveaway that a door is made from plywood. To give your doors a professional, solid-wood appearance, you must cover these edges. The easiest way to do this is with iron-on wood veneer edge banding that matches the species of your plywood face. Cut a piece of banding slightly longer than the edge you are covering.
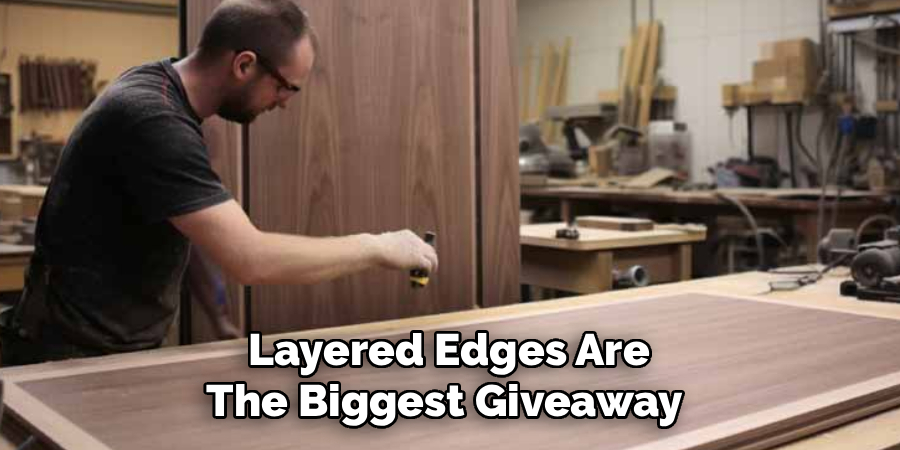
Using a standard household iron on a high setting, press and move the iron along the banding to activate the heat-sensitive adhesive. Follow immediately with a small block of wood, pressing down firmly to ensure a strong bond. This step in the process of how to make plywood doors is critical for a high-end look.
Step 5: Trim the Excess Edge Banding
Once the glue has cooled, you need to trim the overhanging edge banding so it is perfectly flush with the face and back of the door. There are specialized edge-banding trimmer tools that make this job quick and easy, neatly slicing off the excess on both sides in one pass. Alternatively, you can use a sharp utility knife held at a low angle, being careful not to dig into the plywood veneer.
After trimming, the edges will be sharp. Gently sand the corners of the banding with a 220-grit sanding block to slightly soften them. This prevents the veneer from catching on things and creates a clean, seamless transition from the face to the edge.
Step 6: Sand the Door for a Smooth Finish
Proper sanding is the key to a beautiful final finish, whether you are painting or staining. Using a random orbital sander with 150-grit sandpaper, sand the entire face, back, and all four edges of the door. Keep the sander moving constantly to avoid creating divots or swirl marks.
This initial sanding will smooth the surface and remove any minor imperfections. Follow up with a second pass using a finer 220-grit sandpaper. This will polish the wood surface, making it feel silky smooth and preparing it to accept paint or stain evenly. After sanding, remove all the dust with a vacuum followed by a tack cloth.
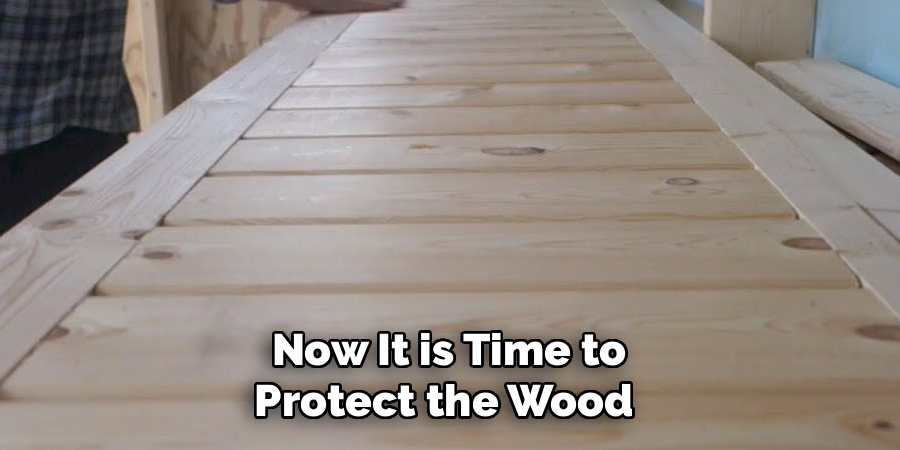
Step 7: Apply Your Desired Finish
Now it is time to protect the wood and add color. If you are painting, start with a high-quality wood primer to seal the wood and provide a good base for the paint. Apply two coats of your chosen paint, sanding lightly between coats with fine-grit sandpaper for a smooth finish. If you are staining, apply a pre-stain wood conditioner first to prevent a blotchy appearance, especially on woods like birch or pine.
Apply the stain with a rag, let it penetrate, then wipe off the excess. Regardless of your choice, you must apply a durable topcoat like polyurethane to protect the doors from moisture and wear. This is the final step in learning how to make plywood doors that last.
Step 8: Install Hinges and Mount the Doors
The final step is to install the hardware and hang your newly made doors. The type of hinge you use will depend on whether your doors are inset or overlay. European-style concealed hinges are a popular choice for a clean, modern look and are highly adjustable. These require drilling a large, shallow hole in the back of the door with a special Forstner bit. Follow the hinge manufacturer’s instructions carefully for placement.
Once the hinges are attached to the doors, hold the door in place on the cabinet and screw the other half of the hinge to the cabinet frame. Add your knobs or pulls, and your project is complete.
Frequently Asked Questions
What Is the Best Plywood for Cabinet Doors?
For a high-quality, paint-grade or stain-grade finish, you should use 3/4-inch thick cabinet-grade hardwood plywood.
- Species: Birch, maple, and oak are popular choices because they have smooth, attractive veneers.
- Grade: Look for plywood with at least one “A” grade face, which will be smooth and free of knots or voids.
- Core: A veneer core (made of multiple wood layers) is generally more stable than an MDF core for doors.
How Do I Prevent Plywood from Splintering When I Cut It?
Splintering, or “tear-out,” can be minimized with a few simple techniques.
- Use the Right Blade: A fine-tooth plywood blade (60-80 teeth) will produce a much cleaner cut than a standard construction blade.
- “Zero-Clearance” Insert: Place a sacrificial piece of wood or foam board under your plywood to support the wood fibers as the blade exits.
- Tape the Cut Line: Applying painter’s tape over your cut line helps hold the surface veneers in place during the cut.
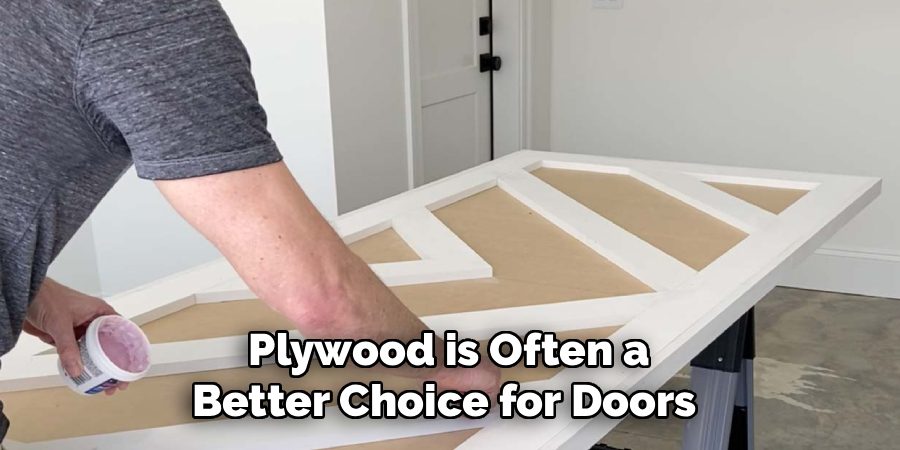
Is Plywood Strong Enough for Doors?
Absolutely. In fact, plywood is often a better choice for doors than solid wood. Its cross-laminated construction makes it incredibly strong and dimensionally stable. This means it is much less likely to warp, twist, or crack due to changes in humidity, which is a common problem with solid wood doors, especially in kitchens and bathrooms. The 3/4-inch thickness provides plenty of rigidity and strength for everyday use.
Can I Make Plywood Doors Without Edge Banding?
You can, but the exposed plywood edges will be very noticeable. For a rustic or industrial style, you might choose to leave the edges exposed and simply sand them smooth. However, for a traditional or modern cabinet look where you want to mimic solid wood, edge banding is essential. It creates a clean, finished appearance and also helps to seal the edges from moisture.
Is It Cheaper to Build or Buy Cabinet Doors?
It is almost always significantly cheaper to build your own plywood doors. A single 4×8 sheet of cabinet-grade plywood can cost between $60 and $100 and can yield several doors. In contrast, ordering custom solid wood doors can cost $50 to $150 per door, depending on the wood species and style. While you have to factor in the cost of tools and supplies, the material savings are substantial, especially for a full kitchen project.
Conclusion
Building your own plywood doors is an incredibly rewarding project that combines practical woodworking skills with creative design. It offers a cost-effective solution for upgrading cabinets and furniture, providing a durable and stable alternative to solid wood without sacrificing style.
The keys to success lie in careful measurement, proper material selection, and patience during the finishing stages. From cutting the panels to applying the edge banding and the final protective coat, each step contributes to a professional-quality result.
Armed with the knowledge of how to make plywood doors, you are no longer limited by standard sizes or expensive custom orders. You have the power to create beautiful, functional pieces that are tailored perfectly to your home and your budget. So head to the lumberyard, pick out a beautiful sheet of plywood, and get ready to transform your space.
About
Mike May is a distinguished figure in the world of woodworking and timber design, with a decade of expertise creating innovative and sustainable indoor solutions. His professional focus lies in merging traditional craftsmanship with modern manufacturing techniques, fostering designs that are both practical and environmentally conscious. As the author of Woodimber, Mike delves into the art and science of timber-craft, inspiring artisans and industry professionals alike.
Education
RMIT University (Melbourne, Australia)
-
Associate Degree in Design (Timber): Focus on sustainable design, industry-driven projects, and practical craftsmanship.
-
Gained hands-on experience with traditional and digital manufacturing tools, such as CAD and CNC software.
Nottingham Trent University (United Kingdom)
-
Bachelor’s in Woodworking and Product Design (Honors): Specialized in product design with a focus on blending creativity with production techniques.
-
Participated in industry projects, working with companies like John Lewis and Vitsoe to gain real-world insights.
Publications and Impact
In Woodimber, May shares his insights on timber design processes, materials, and strategies for efficient production. His writing bridges the gap between artisan knowledge and modern industry needs, making it a must-read for both budding designers and seasoned professionals.