 (1)")

Finding a beautiful piece of mid-century modern furniture at a thrift store feels like striking gold, until you notice the peeling, chipped, or water-stained surface. Many people mistake this damage for the end of the road, assuming the piece is solid wood that has been ruined beyond repair. However, most quality furniture from the last century is actually made with wood veneer—a thin layer of hardwood bonded to a cheaper base.

The good news is that this construction often makes repairs easier than you might think. Learning how to restore wood veneer can save these vintage treasures from the landfill and add incredible character to your home. With a little patience and the right techniques, you can lift stains, patch chips, and reglue lifting edges, bringing the original luster back to life. This process is a rewarding DIY project that transforms tired, neglected tables and dressers into stunning focal points that look like they cost a fortune.
Why Restoring Veneer is Worth the Effort
Veneer has a bad reputation in some circles, often associated with cheap, peeling particleboard furniture. But true wood veneer is a traditional craftsmanship technique used on high-end antiques and designer pieces. It allows furniture makers to use rare, exotic woods like walnut, teak, or mahogany in grain patterns that would be unstable or impossibly expensive in solid wood. When you restore these pieces, you are preserving a slice of design history.
Restoration is also an eco-friendly choice. By repairing what already exists, you reduce the demand for new timber and keep bulky items out of waste streams. Financially, the benefits are obvious; a restored mid-century credenza can be worth thousands of dollars, while the unrestored version might cost you fifty bucks at a yard sale. The satisfaction of smoothing out a scratch or watching a water ring disappear is unmatched. It connects you to the object in a way that simply buying new furniture never can.
Step-by-Step Guide on How to Restore Wood Veneer
Step 1: Assess the Damage and Identify the Finish
Before you pick up a single tool, you must understand exactly what you are dealing with. Examine the piece closely under good lighting. Is the veneer peeling up at the corners? Are there dark black water rings or just white heat marks? Is the surface actually wood, or is it a plastic laminate that looks like wood? Real wood veneer will have a grain texture and will absorb a drop of water, whereas plastic will be smooth and repel it.

You also need to determine if the existing finish is lacquer, varnish, or oil. Test a small, hidden spot with a cotton swab dipped in lacquer thinner; if the finish softens, it is lacquer. Knowing the material and the extent of the damage dictates your entire restoration strategy, preventing you from making costly mistakes like sanding through a paper-thin layer.
Step 2: Clean and Prep the Surface Thoroughly
Over decades, furniture accumulates layers of dirt, furniture polish, wax, and nicotine smoke that can obscure the wood’s true condition. You need to strip this grime away to see what needs fixing. Use a mild cleaner like dish soap mixed with warm water, or a specialized wood cleaner if the buildup is heavy. Dampen a soft cloth—do not soak it—and wipe down the entire piece. Dry it immediately with a separate clean towel.
Avoid harsh chemical strippers at this stage unless you plan to refinish the entire piece, as they can damage the glue holding the veneer down. A clean surface allows you to see the color variations and grain patterns clearly, which is essential for matching repairs later. It also ensures that any glue you use for repairs will bond properly to the wood fibers rather than to a layer of old wax.
Step 3: Repair Loose and Lifting Veneer
One of the most common issues with old veneer is lifting, usually caused by moisture breaking down the hide glue over time. If you find a loose edge or a bubble in the middle of a surface, do not break it off. Instead, gently lift the loose section with a putty knife and scrape out any old, dried glue debris. Apply a high-quality wood glue into the gap using a syringe or a thin blade.
Press the veneer back down firmly. To ensure a flat bond, place a piece of wax paper over the repair to prevent sticking, then clamp a flat block of wood on top. If clamps won’t reach, use heavy weights like books or bricks. Let the glue cure for at least 24 hours. This structural repair is critical before you attempt any cosmetic work.
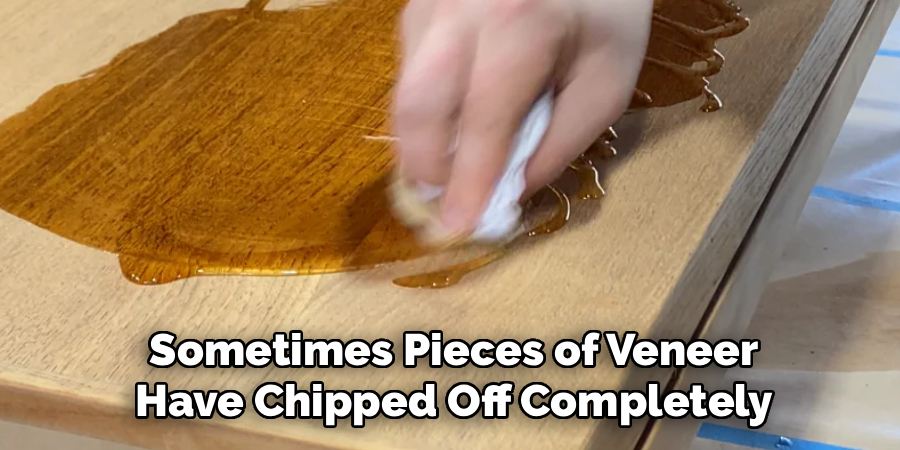
Step 4: Patch Missing Chips and Gaps
Sometimes pieces of veneer have chipped off completely, leaving an unsightly hole. To fix this, you need to create a patch. Find a piece of matching veneer—you can often harvest a small strip from the back or bottom of the furniture piece itself, or buy a small sheet of veneer that matches the species. Place the new veneer over the damaged area and trace a diamond shape around the hole.
A diamond shape is better than a square because the angled cuts blend better with the wood grain. Use a sharp utility knife to cut through both the new veneer and the old veneer on the furniture. Remove the damaged section and glue the perfectly fitting new patch in its place. Sand it gently once dry to level it with the surrounding surface. This is a pro technique for learning how to restore wood veneer seamlessly.
Step 5: Remove Water Rings and Stains
White rings are usually moisture trapped in the finish, while black rings mean water has penetrated the wood itself. For white rings, you can often buff them out with a mild abrasive like baking soda mixed with toothpaste, or even fine steel wool (0000 grade) with a little lemon oil. Rub gently with the grain until the mark disappears.
Dark stains are harder; they often require oxalic acid, which is a wood bleach. If you are stripping the piece, apply the oxalic acid solution to the bare wood stain. It will chemically react with the iron in the water stain and lighten it. You may need to treat the entire surface to keep the color even. Neutralize the acid with a baking soda and water mixture afterward. Patience is key here; rushing can result in blotchy, uneven coloring.
Step 6: Sand the Surface Carefully
Sanding veneer is the most nerve-wracking part of the process because the wood layer is often less than a millimeter thick. If you sand too aggressively, you will burn right through to the cheap substrate underneath, a mistake that is nearly impossible to fix without replacing the entire sheet. Use a fine-grit sandpaper, starting with 220-grit and moving to 320-grit. Always use a sanding block to keep the pressure even and sand strictly with the grain, never against it or in circles.
Check your progress constantly by wiping away the dust. You are not trying to remove significant material; you are just smoothing out your repairs, removing the old finish, and preparing the fibers to accept a new topcoat. If the veneer is extremely thin, you might skip sanding entirely and use a chemical stripper and a scraper instead.
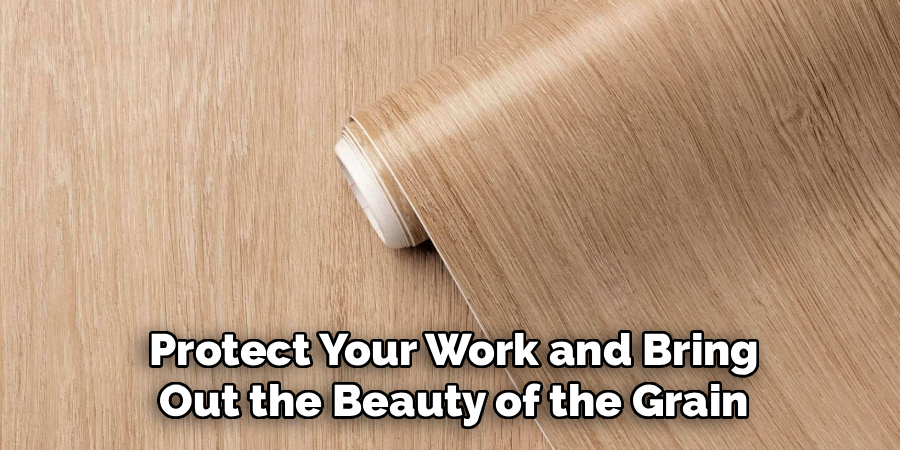
Step 7: Apply a New Finish
Now that the repairs are done and the surface is smooth, it is time to protect your work and bring out the beauty of the grain. You have several options depending on the look you want. Danish oil or tung oil are excellent for beginners because they are easy to wipe on and create a warm, matte finish that feels very natural. They soak into the wood and harden.
For a more durable, glossy table top, you might choose a wipe-on polyurethane. Apply the finish in thin coats, letting each dry completely and lightly sanding with very fine steel wool between coats to remove dust nibs. This final step seals the veneer, prevents future moisture damage, and gives the piece that professional, restored glow.
Frequently Asked Question
Can I Sand Veneer with an Electric Sander?
It is highly risky and generally not recommended for beginners.
- Thinness: Veneer is paper-thin (often 1/40th of an inch). An electric orbital sander can eat through this layer in seconds.
- Control: Hand sanding gives you tactile feedback and precise control that a machine lacks.
- Edges: Electric sanders are notorious for rounding over edges or cutting through corners instantly. Stick to a sanding block and manual effort for safety.
What If I Sand Through the Veneer?
This is the dreaded “burn-through,” and it is difficult to hide.
- Faux Painting: You can try to paint the exposed substrate to match the surrounding grain using artist brushes and gel stains.
- New Veneer: If the damage is extensive, you may need to apply a completely new sheet of veneer over the entire surface.
- Patching: You can cut out the damaged section and patch it, but blending it perfectly is challenging.
How Do I Identify What Kind of Wood Veneer I Have?
Identifying wood species takes some practice.
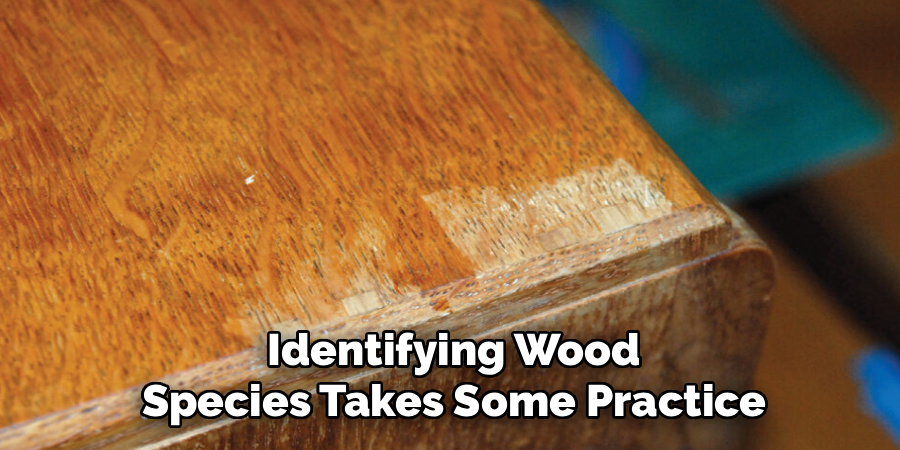
- Walnut: Often a rich chocolate brown with straight grain, common in mid-century pieces.
- Teak: Has a golden-honey tone and an oily texture.
- Mahogany: Usually reddish-brown with a tight, straight grain.
- Oak: Distinctive, open grain pattern with “rays” or flecks.
- Reference: Compare your piece to online photos of furniture from the same era or style.
Is It Better to Repair or Replace the Veneer?
Repair is almost always the better first option.
- Originality: Keeping the original wood preserves the piece’s value and history.
- Difficulty: Replacing veneer involves removing the old layer, prepping the substrate, and gluing down a large, fragile sheet, which requires specialized tools and clamps.
- Cost: Buying large sheets of quality veneer is expensive. Only replace if the damage covers more than 30% of the surface.
Can I Use Wood Filler on Veneer?
Yes, but you must choose the right type.
- Color Matching: Wood filler does not absorb stain the same way real wood does. Buy a filler that matches the finished color of your wood, or one that is specifically labeled “stainable.”
- Texture: Filler has no grain. For large repairs, it will look like a flat blob. Use it only for very small gouges or cracks where grain texture isn’t critical.
Conclusion
Restoring veneer is a delicate dance between preservation and renovation. It requires a gentle touch and a respect for the materials, but the results are undeniably worth the effort. By systematically cleaning, gluing, patching, and refinishing, you can reverse decades of wear and tear. You don’t need a professional workshop to save these pieces; you just need the knowledge of how to restore wood veneer and the patience to see it through. Whether you are fixing a family heirloom or flipping a flea market find, the skills you learn in this process will serve you for a lifetime of DIY projects. So, grab your sanding block and your glue, and give that beautiful old wood a second chance to shine.
About
Mike May is a distinguished figure in the world of woodworking and timber design, with a decade of expertise creating innovative and sustainable indoor solutions. His professional focus lies in merging traditional craftsmanship with modern manufacturing techniques, fostering designs that are both practical and environmentally conscious. As the author of Woodimber, Mike delves into the art and science of timber-craft, inspiring artisans and industry professionals alike.
Education
RMIT University (Melbourne, Australia)
-
Associate Degree in Design (Timber): Focus on sustainable design, industry-driven projects, and practical craftsmanship.
-
Gained hands-on experience with traditional and digital manufacturing tools, such as CAD and CNC software.
Nottingham Trent University (United Kingdom)
-
Bachelor’s in Woodworking and Product Design (Honors): Specialized in product design with a focus on blending creativity with production techniques.
-
Participated in industry projects, working with companies like John Lewis and Vitsoe to gain real-world insights.
Publications and Impact
In Woodimber, May shares his insights on timber design processes, materials, and strategies for efficient production. His writing bridges the gap between artisan knowledge and modern industry needs, making it a must-read for both budding designers and seasoned professionals.