 (1)")

A beautiful bed frame is the centerpiece of any bedroom, but designer upholstered beds can come with a hefty price tag. If you have a basic wooden or metal frame that feels a little lackluster, or you simply crave a change, a DIY upholstery project can completely transform your space. It allows you to choose the exact fabric, color, and texture to match your decor, creating a custom piece for a fraction of the cost of buying new.
Learning how to upholster a bed frame is a surprisingly achievable project for a beginner with a bit of patience and the right tools. This guide will walk you through every step, from selecting your materials to making those final, professional-looking folds. Get ready to turn your standard bed into a soft, luxurious retreat that reflects your personal style.
Why Upholstering Your Bed Frame is a Great DIY Project
Tackling an upholstery project might sound intimidating, but a bed frame is one of the best pieces to start with for a beginner. The components—side rails and a footboard—are typically flat and rectangular, making them much easier to work with than a complex armchair with lots of curves. The process gives you a high-end, custom look on a budget, instantly adding softness, texture, and a sense of luxury to your bedroom.
It is also an excellent way to upcycle an old, scuffed, or outdated frame that is still structurally sound. You get complete creative control over the final product, from choosing a bold velvet to a neutral linen, ensuring the result is a perfect match for your design vision. The satisfaction of sleeping in a bed you transformed with your own hands is an incredible reward.
Step-by-Step Guide on How to Upholster a Bed Frame
Step 1: Measure Your Frame and Gather Materials
Before you can begin, you need a clear plan. Start by carefully measuring the length and height of the side rails and footboard—the pieces you intend to cover. Add several inches to each measurement for wrapping the fabric around the back. This will help you calculate how much foam, batting, and fabric you need to purchase.

For a standard queen or king bed, you will typically need about two inches of high-density foam for padding, a roll of quilt batting for softness, and several yards of your chosen upholstery fabric. You will also need a heavy-duty staple gun, extra staples, spray adhesive, and sharp fabric scissors. Having all your materials ready before you start ensures the project goes smoothly without last-minute trips to the hardware store.
Step 2: Disassemble the Bed Frame
Working on a fully assembled bed is nearly impossible. You need to disassemble the frame into its individual components. This usually involves unscrewing the side rails from the headboard and footboard. Keep all the hardware—screws, bolts, and brackets—together in a labeled bag or container so you do not lose any crucial pieces. Lay the rails and footboard flat on a large, clean workspace, like the garage floor or a large table.
This gives you clear access to all sides of each piece, making it much easier to attach the padding and stretch the fabric evenly. If your frame has legs, you will need to decide if you want to upholster around them or remove them and reattach them later.
Step 3: Cut and Attach the Foam Padding
The foam provides the substantial, padded feel of a high-end upholstered bed. Roll out your high-density foam and place a side rail on top of it. Use a marker to trace the exact size of the rail onto the foam. Cut the foam using a long serrated knife, like a bread knife, or an electric carving knife for the cleanest edge. Next, use a spray adhesive designed for foam and fabric to attach the cut foam piece to the front face of the wooden rail.
Spray a light, even coat on both the wood and the foam, wait a moment for it to get tacky, and then press them firmly together. Repeat this process for all the rails and the footboard, creating the soft foundation for your upholstery.
Step 4: Add a Layer of Soft Batting
The quilt batting is the secret ingredient that smooths out the edges of the foam and gives your finished bed a soft, plush look. If you skip this step, the edges can look sharp and angular under the fabric. Lay your batting on your work surface and place a foam-covered rail face down on top of it.
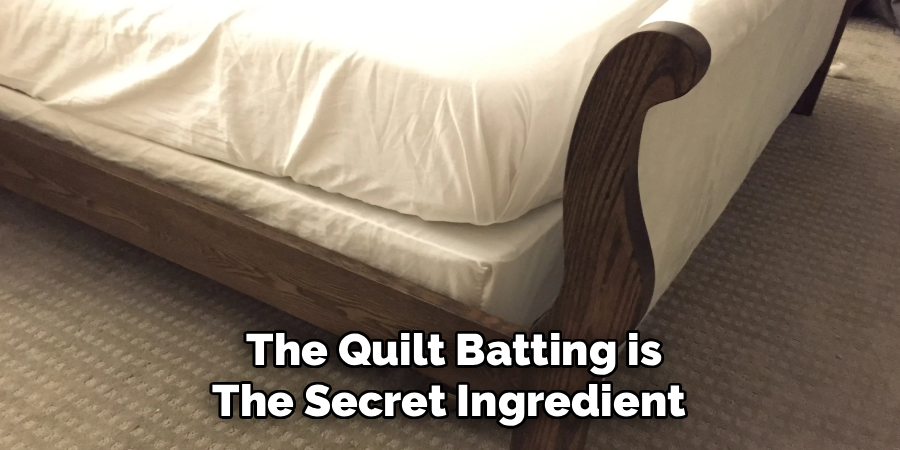
Cut the batting so that it is wide enough to wrap completely around the rail and be stapled to the back. Pull the batting taut, but not so tight that you compress the foam too much. Use your staple gun to secure the batting to the back of the rail, placing staples every few inches. This step is a crucial part of learning how to upholster a bed frame because it creates the professional, rounded finish.
Step 5: Cut Your Upholstery Fabric
Now it is time to work with your final fabric. Before cutting, iron your fabric to remove any wrinkles or creases from being on the bolt. Lay the fabric face down on your clean workspace. Place one of the batting-wrapped rails on top of it. Just like with the batting, you need to cut the fabric large enough to wrap all the way around and be stapled to the back.
It is always better to cut it a little too big than too small; you can always trim the excess later. Pay attention to the direction of the pattern if your fabric has one, ensuring it runs consistently across all the pieces. Take your time with this step, as precise cutting leads to a much cleaner final product.
Step 6: Attach the Fabric and Pull Tightly
This is the most critical step for achieving a professional look. Starting in the middle of a long rail, pull the fabric taut and place one staple on the back. Move to the opposite side, pull the fabric firmly, and place another staple directly across from the first one. This creates even tension. Continue this process, working from the center out toward the corners and alternating sides.
Keep the fabric smooth and taut as you go, placing staples every inch or two for a secure hold. Avoid pulling so hard that you warp the fabric’s pattern. A staple gun with an easy-squeeze trigger will save your hands a lot of fatigue during this repetitive process.
Step 7: Bed Frame with Neat Corners
Creating clean, sharp corners is what separates amateur work from a professional job. When you reach a corner, fold the fabric as you would when wrapping a gift. Pull the fabric at the end of the rail straight over the edge and staple it down securely on the back. This will leave you with two triangular “wings” of fabric on either side.
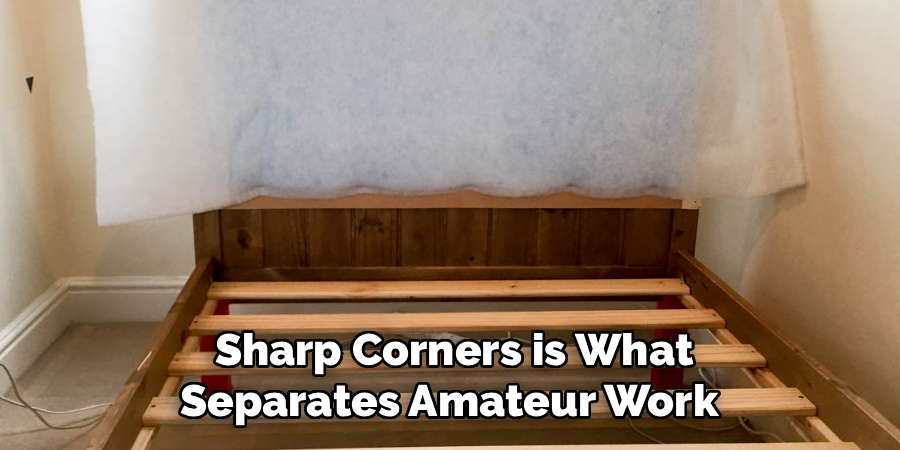
Take one wing, pull it tightly toward the center, and fold it down to create a neat, 45-degree angle. Staple this fold in place. Repeat with the other wing, folding it over the first one. Trim any excess bulk fabric with your scissors to ensure the corner lies flat and does not interfere with the bed’s hardware when you reassemble it.
Step 8: Reassemble Your Newly Upholstered Bed
Once all the rails and the footboard are covered and the corners are finished, it is time to put your masterpiece back together. Carefully inspect the back of each piece and use a utility knife to cut small slits in the fabric where the hardware and brackets need to go. This allows you to reattach the pieces without tearing or bunching up your new upholstery.
With a helper, hold the pieces in place and reinsert the bolts and screws you saved earlier. Tighten everything securely. Stand back and admire your work. You have successfully transformed a boring bed frame into a stunning, custom piece of furniture.
Frequently Asked Questions
What Is the Best Fabric for Upholstering a Bed Frame?
The best fabric combines durability with aesthetics.
- Performance Fabrics: These are treated to resist stains and fading, making them a great choice for longevity.
- Velvet/Chenille: These offer a luxurious, soft feel but can be harder to clean.
- Linen/Cotton Blends: Provide a more casual, breathable look but may wrinkle more easily.
- Avoid: Very thin fabrics like silk or quilting cotton, as they will not stand up to the tension and wear.
How Much Foam and Batting Do I Need?
This depends on the size of your bed and the desired plushness.
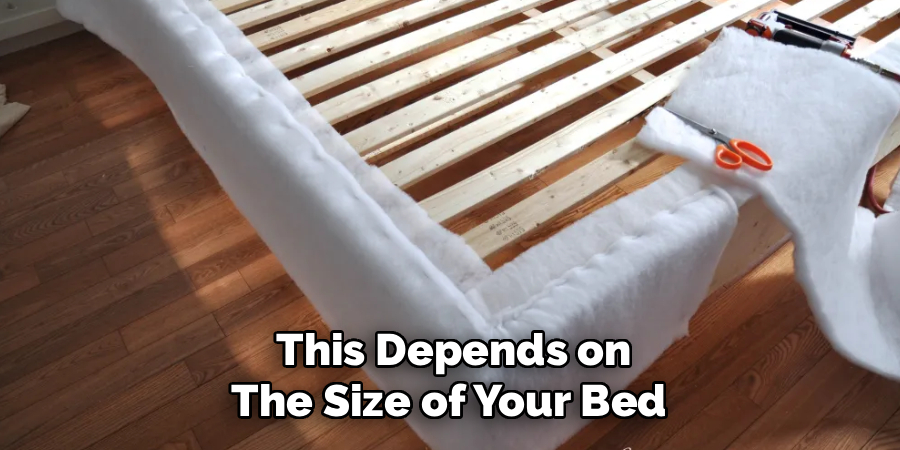
- Foam: For a standard queen or king frame, a 2-inch thick, 24-inch wide roll of high-density foam is usually sufficient to cover the side rails and footboard.
- Batting: A queen-size quilt batting roll should provide more than enough material to wrap all the pieces. It is better to have too much than too little.
Can I Upholster a Metal Bed Frame?
Yes, but it requires an extra step. You will first need to attach a wooden base to the metal frame.
- Process: Cut thin plywood or MDF boards to the size of the metal rails.
- Attachment: Secure these boards to the metal frame by drilling holes through both materials and bolting them together.
- Upholstery: Once you have a wooden surface, you can follow the same steps of adding foam, batting, and fabric with a staple gun.
Do I Need a Pneumatic Staple Gun?
A pneumatic (air-powered) staple gun is not necessary, but it makes the job much easier.
- Manual Gun: A heavy-duty manual or electric staple gun will work just fine for this project.
- Staple Size: Ensure you are using staples that are short enough that they do not poke through the front of your wood frame (typically 1/4″ to 3/8″ staples are sufficient).
How Do I Clean My Upholstered Bed Frame?
Cleaning methods depend on the fabric you choose.
- Check the Code: Most upholstery fabrics come with a cleaning code (W, S, W/S, or X). Always follow these instructions.
- Regular Maintenance: Vacuum the frame regularly with an upholstery attachment to remove dust and debris.
- Spot Cleaning: For spills, blot the area immediately with a clean, dry cloth. Use a mild soap and water solution or a solvent-based cleaner according to the fabric’s code.
Conclusion
Upholstering a bed frame is a transformative project that allows you to infuse your personal style directly into your bedroom’s main feature. By breaking the process down into manageable steps—from gathering materials and wrapping the foam to stretching the fabric and folding perfect corners—you can achieve a high-end look without the designer price tag.
The key is to work methodically and pull the fabric tight for a smooth, taut finish. This project proves that you don’t need to be an expert to create beautiful, custom furniture. Now that you have a complete guide on how to upholster a bed frame, you are ready to pick out your favorite fabric and turn your bedroom into the stylish sanctuary you’ve always wanted.
About
Mike May is a distinguished figure in the world of woodworking and timber design, with a decade of expertise creating innovative and sustainable indoor solutions. His professional focus lies in merging traditional craftsmanship with modern manufacturing techniques, fostering designs that are both practical and environmentally conscious. As the author of Woodimber, Mike delves into the art and science of timber-craft, inspiring artisans and industry professionals alike.
Education
RMIT University (Melbourne, Australia)
-
Associate Degree in Design (Timber): Focus on sustainable design, industry-driven projects, and practical craftsmanship.
-
Gained hands-on experience with traditional and digital manufacturing tools, such as CAD and CNC software.
Nottingham Trent University (United Kingdom)
-
Bachelor’s in Woodworking and Product Design (Honors): Specialized in product design with a focus on blending creativity with production techniques.
-
Participated in industry projects, working with companies like John Lewis and Vitsoe to gain real-world insights.
Publications and Impact
In Woodimber, May shares his insights on timber design processes, materials, and strategies for efficient production. His writing bridges the gap between artisan knowledge and modern industry needs, making it a must-read for both budding designers and seasoned professionals.