 (1)")

Discovering the natural beauty of wood is a rewarding experience. While commercial stains offer a quick fix, they often contain harsh chemicals and can mask the wood’s inherent grain and character.

Fortunately, there are several effective, natural methods to darken wood, giving it a rich, aged, and unique finish. This guide on how to make wood darker without stain will walk you through a simple yet powerful technique using common household items, allowing you to achieve a beautiful, custom look for your woodworking projects without resorting to store-bought stains.
This process, often called ebonizing or creating an iron acetate solution, uses a chemical reaction between iron (from steel wool) and tannins present in the wood.
What are the Benefits?
Choosing to darken wood without traditional stains comes with several advantages. First and foremost, it’s a non-toxic and environmentally friendly approach. You avoid inhaling volatile organic compounds (VOCs) commonly found in commercial products, making it safer for you and your family. This method is also incredibly cost-effective, utilizing inexpensive items you might already have at home.
Beyond safety and savings, the results are truly unique. Unlike a surface-level stain that can look painted on, this natural process reacts with the tannins inside the wood itself. This means the color penetrates the fibers, creating a depth and richness that highlights the grain rather than hiding it. The final shade is beautifully unpredictable, varying based on the type of wood and the strength of your solution, ensuring a one-of-a-kind finish.
What Will You Need?
Before you begin, gather these simple materials. Having everything ready will make the process smooth and enjoyable.
- White vinegar
- Fine grade steel wool (#0000 is ideal)
- A glass jar with a lid
- Disposable gloves
- Safety glasses
- Sandpaper (medium and fine grit)
- Clean cloths or rags
- A paintbrush or foam brush
- A drop cloth or plastic sheeting to protect your work area
- Strong black tea (optional, for woods low in tannins)
- A top coat sealer (like tung oil, linseed oil, or polyurethane)
10 Easy Steps on How to Make Wood Darker Without Stain
Follow these steps carefully to achieve a beautiful, naturally darkened wood finish.
Step 1: Prepare Your Workspace
Start by setting up your work area in a well-ventilated space, like a garage with the door open or an outdoor patio. Lay down a drop cloth to protect the floor or table from any spills. This is especially important because the iron acetate solution can stain surfaces permanently. Organize all your tools and materials so they are within easy reach.

Wearing safety glasses and gloves is highly recommended from this point forward to protect your eyes and skin from the acidic vinegar solution and potential splinters from the steel wool. A clean and organized space ensures a safer and more efficient project.
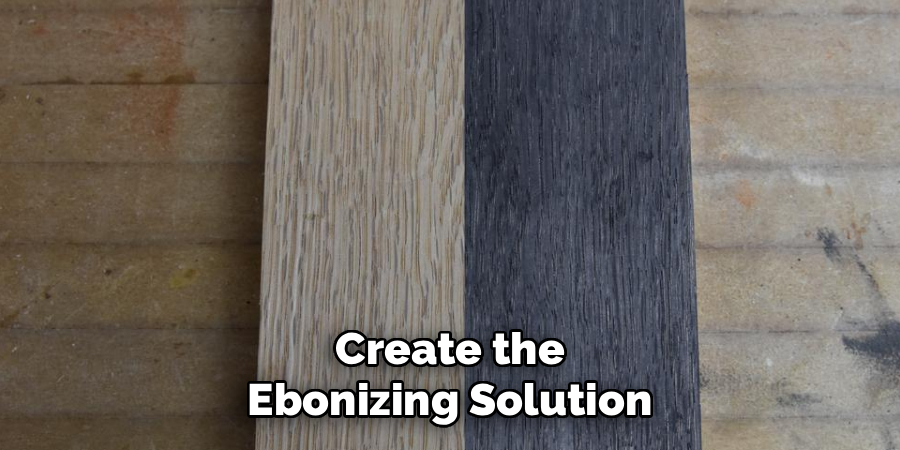
Step 2: Create the Ebonizing Solution
This is where the magic begins. Take your glass jar and place one pad of #0000 steel wool inside. If you only have coarser steel wool, be sure to clean off any manufacturing oils with a degreaser first. Pour enough white vinegar into the jar to completely submerge the steel wool.
You should see some bubbling almost immediately as the acetic acid in the vinegar starts to dissolve the iron in the steel wool. Loosely place the lid on the jar—do not tighten it. The chemical reaction releases gas, and a sealed container could build up pressure and burst.
Step 3: Let the Solution Brew
Patience is key. The solution needs time to develop. Let the jar sit for at least 24 to 48 hours. The longer it sits, the more concentrated and potent it will become. Over time, the vinegar will turn a murky brown or black as the steel wool dissolves, creating iron acetate. A more potent solution will darken the wood more quickly and dramatically.
For a very dark, almost black finish, you can let it brew for a week or more. Check on it periodically; if the steel wool has completely dissolved, you can add more to strengthen the mix.
Step 4: Prepare the Wood Surface
While your solution is brewing, it’s time to get your wood ready. Proper preparation is crucial for an even, professional-looking finish. Start by sanding the entire surface with a medium-grit sandpaper (around 120-grit) to remove any old finishes, blemishes, or rough spots.
Always sand in the direction of the wood grain to avoid creating scratches. After the initial sanding, wipe away all the dust with a clean, dry cloth. For a smoother finish, follow up with a fine-grit sandpaper (like 220-grit).
Step 5: Test the Solution
Never apply a new finish directly to your project without testing it first. Find a scrap piece of the same wood or use an inconspicuous area of your project, like the underside of a tabletop. Use a foam brush or a clean rag to apply a small amount of your iron acetate solution to the test area. The color change will not be instant. It can take several minutes to fully develop as the solution reacts with the tannins in the wood. This test will show you the exact color you can expect, allowing you to adjust the solution’s strength if needed.
Step 6: Boost Tannins if Necessary (Optional)
Some woods, like pine or poplar, are naturally low in tannins and won’t react strongly with the iron acetate solution. If your test piece doesn’t darken much, you can give it a boost. Brew a very strong batch of black tea by steeping several tea bags in hot water for at least an hour. Let it cool completely, then apply a coat of the tea to your prepared wood surface with a brush. The tannic acid from the tea will soak into the wood. Let it dry completely before moving on to the next step. This pre-treatment provides the necessary tannins for the iron acetate to react with.
Step 7: Apply the First Coat of the Darkening Solution
With your wood prepped and your solution tested, you are ready for the main event. Dip your foam brush or a clean rag into the iron acetate solution. Apply a thin, even coat across the entire wood surface, working in long, smooth strokes that follow the wood grain. Be careful to avoid drips and pooling, as these can cause dark spots. The wood will begin to change color as you apply the solution, but the full effect will appear as it dries. Don’t be alarmed if it looks gray or splotchy at first; the color will deepen and even out.

Step 8: Let it Dry and Re-Apply if Desired
Allow the first coat to dry completely, which can take one to two hours depending on humidity and airflow. Once dry, assess the color. If you want a darker, richer tone, you can apply a second or even a third coat. Each subsequent layer will react with the remaining tannins, further deepening the color. Always let the wood dry completely between coats to accurately judge the shade. Remember that the color will look slightly different once a top coat sealer is applied, so it’s better to build the color gradually.
Step 9: Neutralize the Surface
The vinegar in your solution is acidic, and leaving it on the wood can potentially damage the fibers over time. To neutralize the acid, prepare a simple mixture of baking soda and water (about one tablespoon of baking soda to one cup of water). Gently wipe down the entire darkened surface with a rag dipped in this solution. You might see some slight bubbling, which indicates the acid is being neutralized. After wiping it down, use a separate cloth dampened with clean water to wipe away any baking soda residue.
Step 10: Seal the Wood
This final step is essential for protecting your beautifully darkened wood and bringing out its true depth and luster. Once the neutralized surface is completely dry, apply a protective top coat of your choice. Finishes like tung oil, linseed oil, or Danish oil will penetrate the wood and create a natural, matte look. For more durability, especially on high-traffic surfaces like tables, a polyurethane or lacquer finish is a good option. Apply the sealer according to the manufacturer’s instructions, and enjoy your custom-finished piece.

5 Things You Should Avoid
- Skipping the Test: Never apply the solution to your final piece without testing it on a scrap piece of the same wood first. The results vary dramatically between wood species.
- Using a Metal Container: Do not mix or store your iron acetate solution in a metal container (other than the steel wool itself). The acid will corrode the metal and contaminate your mixture. Always use a glass jar.
- Sealing the Jar Tightly: The chemical reaction between vinegar and steel wool produces gas. Sealing the jar tightly can cause pressure to build, potentially leading to the jar breaking or bursting.
- Applying to Unprepared Wood: Applying the solution to wood that hasn’t been properly sanded and cleaned will result in a blotchy, uneven finish. All previous finishes and dirt must be removed.
- Forgetting to Neutralize: The acidic nature of the vinegar can weaken wood fibers over time. Skipping the step of neutralizing the surface with a baking soda solution can compromise the long-term integrity of your project.
Conclusion
Creating a rich, dark finish on wood doesn’t require a trip to the hardware store for a can of chemical-laden stain.
By harnessing a simple chemical reaction with household items like vinegar and steel wool, you can achieve a stunning, professional-grade result. This method is not only safe, affordable, and eco-friendly, but it also produces a unique, deep color that enhances the wood’s natural grain.
Hopefully, this guide on how to make wood darker without stain has given you the inspiration and confidence to try out this technique on your own wood projects.
About
Mike May is a distinguished figure in the world of woodworking and timber design, with a decade of expertise creating innovative and sustainable indoor solutions. His professional focus lies in merging traditional craftsmanship with modern manufacturing techniques, fostering designs that are both practical and environmentally conscious. As the author of Woodimber, Mike delves into the art and science of timber-craft, inspiring artisans and industry professionals alike.
Education
RMIT University (Melbourne, Australia)
-
Associate Degree in Design (Timber): Focus on sustainable design, industry-driven projects, and practical craftsmanship.
-
Gained hands-on experience with traditional and digital manufacturing tools, such as CAD and CNC software.
Nottingham Trent University (United Kingdom)
-
Bachelor’s in Woodworking and Product Design (Honors): Specialized in product design with a focus on blending creativity with production techniques.
-
Participated in industry projects, working with companies like John Lewis and Vitsoe to gain real-world insights.
Publications and Impact
In Woodimber, May shares his insights on timber design processes, materials, and strategies for efficient production. His writing bridges the gap between artisan knowledge and modern industry needs, making it a must-read for both budding designers and seasoned professionals.