 (1)")

Outdoor wooden structures like decks, fences, and garden furniture add natural beauty and functionality to your home’s exterior. However, these investments are constantly exposed to harsh elements like sun, rain, and fluctuating temperatures, which can cause them to fade, crack, and rot over time. Applying a fresh coat of stain is one of the most effective ways to protect your wood from this damage while enhancing its natural grain and color. It’s a project that not only beautifies your space but also significantly extends the life of your wooden features.

Learning how to stain outdoor wood is a rewarding DIY task that can save you a significant amount of money compared to hiring a professional. While it requires careful preparation and some patience, the process is straightforward enough for any beginner. This guide will provide a clear, step-by-step path to achieving a durable, professional-looking finish that will keep your outdoor wood looking fantastic for seasons to come.
Why Staining Your Wood is a Crucial Outdoor Project
Applying stain to your outdoor wood is about much more than just aesthetics; it’s a critical act of preservation. Wood is a porous, organic material that is vulnerable to the elements. Unprotected wood absorbs moisture from rain and humidity, which causes it to swell, warp, and eventually rot. Conversely, the sun’s ultraviolet (UV) rays break down the wood fibers, leading to a gray, weathered appearance and making the surface brittle and prone to splintering.
A high-quality outdoor stain acts as a protective shield. It contains pigments that offer UV protection, similar to how sunscreen protects your skin, preventing the wood from turning gray. It also includes water-repellent properties that seal the wood’s pores, forcing rain to bead up and roll off rather than soak in. By preventing both sun and water damage, staining maintains the structural integrity and natural beauty of your deck, fence, or furniture, ensuring you can enjoy your outdoor space for many years.

Step-by-Step Guide on How to Stain Outdoor Wood
Step 1: Check the Weather Forecast
The success of your staining project is highly dependent on Mother Nature. You will need a continuous window of dry weather with moderate temperatures, ideally between 50 and 90 degrees Fahrenheit. Avoid staining in direct, intense sunlight, as this can cause the stain to dry too quickly, leading to an uneven application and visible lap marks. Likewise, high humidity will significantly slow down the drying process and can result in a sticky, tacky finish. Plan your project for a period of at least two to three clear days to allow for proper cleaning, drying, staining, and curing time without the threat of rain.
Step 2: Thoroughly Clean the Wood Surface
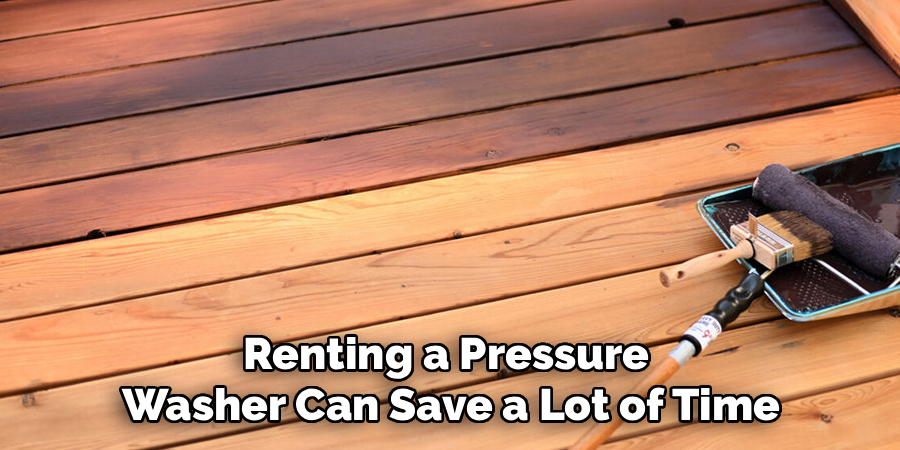
You can never apply new stain over dirt, mildew, or old, peeling finish. Start by sweeping the surface to remove loose debris like leaves and dirt. For general grime, a stiff brush and a bucket of deck cleaner or a simple oxygen bleach solution will work well. If you have stubborn green or black spots, you are likely dealing with algae or mildew, which requires a specialized cleaner to kill the spores. For large areas like a deck, renting a pressure washer can save a lot of time, but use a low-pressure tip and keep it moving to avoid gouging the wood.
Step 3: Remove Any Old or Flaking Finish
If your wood has an old, failing coat of paint or stain, it must be removed to allow the new stain to penetrate properly. A pressure washer might remove some of it, but you will likely need to use a chemical stripper for a complete job. Apply the stripper according to the manufacturer’s directions and let it sit until the old finish softens. Use a paint scraper or a stiff brush to scrub away the residue. You may also need to do some heavy sanding with medium-grit sandpaper (60- to 80-grit) to get rid of any remaining stubborn spots. Your goal is to get back to bare, absorbent wood.
Step 4: Sand for a Smooth and Absorbent Surface
Once the wood is clean and completely dry, sanding is the final preparation step that ensures a professional-looking result. Use a pole sander or a random orbital sander with 80- to 120-grit sandpaper to smooth out any rough spots, splinters, or “fuzzies” raised during the cleaning process. This step does more than just make the wood feel smooth; it also opens up the wood’s pores, allowing the stain to soak in evenly and deeply. After sanding, vacuum or sweep away all the dust, as any remaining particles will get trapped in your finish. A pristine surface is essential to how to stain outdoor wood for a flawless finish.

Step 5: Choose the Right Stain for Your Project
Outdoor stains come in a variety of transparencies, and the one you choose depends on the condition of your wood and your desired look. A transparent stain has very little pigment and showcases the natural wood grain beautifully, but offers the least UV protection. A semi-transparent stain has more pigment, adding noticeable color while still allowing the grain to show through. A solid color stain looks more like paint, completely covering the grain, and is excellent for older, heavily weathered wood with imperfections you want to hide. Oil-based stains offer deeper penetration, while water-based stains provide easier cleanup and faster drying times.
Step 6: Apply the Stain with a Brush, Roller, or Sprayer
Now it is time to apply the color. For the best control, use a natural bristle brush, which is ideal for working the stain into the wood grain. For larger surfaces like a deck floor, a pad applicator or a roller with a thick nap can speed up the process significantly. A paint sprayer is the fastest method of all but requires careful masking to protect surrounding plants and siding from overspray. Whichever tool you use, apply a thin, even coat and always work in the direction of the wood grain. Maintain a wet edge to avoid creating dark lap marks where your strokes overlap.
Step 7: A Guide on How to Stain Outdoor Wood Evenly
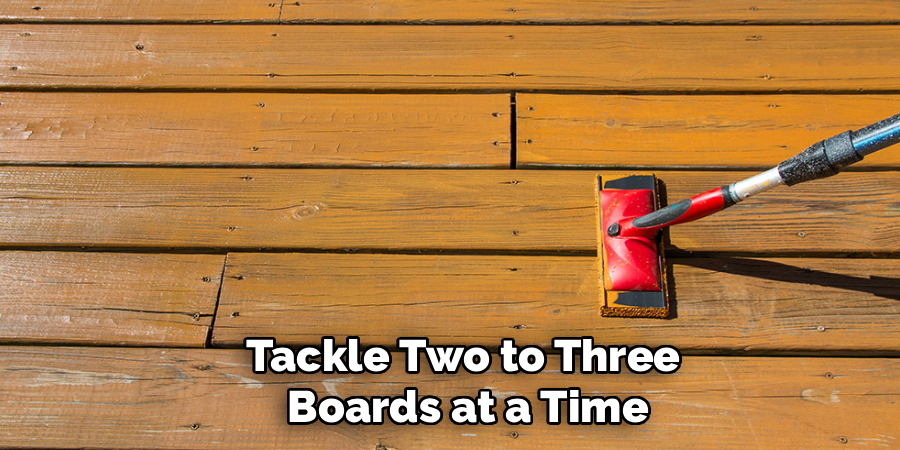
The key to an even application is to work in manageable sections. For a deck, tackle two to three boards at a time, running their full length. Apply the stain, then go back over the section with a clean rag or a dry brush to remove any excess product that is pooling on the surface. Stain is meant to penetrate the wood, not sit on top of it like paint. Any excess left on the surface will become a sticky, shiny mess that will not cure properly. This “back-brushing” technique ensures a uniform color and professional finish.
Step 8: Apply a Second Coat if Necessary
Check the manufacturer’s instructions to see if a second coat is recommended. For many semi-transparent stains, one coat is sufficient. If you desire a deeper color or if the first coat appears uneven, a second coat may be necessary. Wait for the first coat to dry completely according to the specified re-coat time on the can. Apply the second coat just as you did the first, keeping it thin and wiping away any excess. Do not apply a second coat if the first coat is not fully absorbed, as this will create a film on the surface that is prone to peeling.
Step 9: Allow Adequate Curing Time
Your project is not finished once the last brush stroke is complete. The stain needs time to cure, which is the process of it fully hardening and reaching its maximum durability. The surface may feel dry to the touch within a few hours, but it can take 24 to 72 hours, or even longer in cool or humid weather, to cure completely. Avoid walking on the deck or placing furniture back on it during this time. Rushing this final step can lead to scuffs, smudges, and a compromised finish that will not last as long.
Frequently Asked Questions
What Is the Best Temperature to Stain Outdoor Wood?
The ideal temperature range for staining is between 50°F and 90°F (10°C to 32°C).
- Too Cold: If the temperature is too low, the stain will not penetrate or dry correctly.
- Too Hot: Staining in direct sunlight or on a very hot day will cause the stain to dry too quickly, resulting in lap marks and an uneven finish. An overcast, mild day is perfect.
How Long Should I Wait to Stain New Wood?
You should wait several weeks to a few months before staining new pressure-treated wood.
- Reasoning: New pressure-treated lumber contains high moisture content from the chemical treatment process. If you stain it too soon, the stain cannot penetrate the wet wood.
- The Sprinkle Test: Sprinkle some water on the wood. If it soaks in quickly, the wood is dry enough to stain. If it beads up, you need to wait longer.
What’s the Difference Between Stain and Paint for Outdoor Use?
Stain and paint protect wood differently and offer distinct looks.
- Stain: Penetrates into the wood fibers, highlighting the natural grain. It fades over time rather than peeling.
- Paint: Forms a thick film on top of the wood, completely covering the grain. It offers excellent UV protection but can chip, crack, and peel, requiring more intensive prep work for re-coating.
How Long Does Outdoor Stain Typically Last?
The lifespan of your stain depends on the stain’s transparency and the wood’s exposure to the elements.
- Transparent Stains: May need to be reapplied every 1-2 years.
- Semi-Transparent Stains: Typically last 2-4 years.
- Solid Color Stains: Can last 5-7 years or more, as their high pigment content provides the most UV protection. Horizontal surfaces like deck floors will wear out faster than vertical surfaces like fences.
Do I Need to Apply a Sealer After Staining?
Most modern outdoor stains are a combination “stain and sealer” product.
- All-in-One Products: These stains contain everything needed to both color and protect the wood from water and UV damage. You do not need a separate topcoat.
- Check the Label: Always read the product label. If it specifies that it is a stain and sealer, an additional step is not necessary. Applying a separate sealer on top can sometimes cause adhesion issues.
Conclusion
Staining your outdoor wood is a project that pays dividends in both beauty and longevity. It is the single best way to protect your fences, decks, and furniture from the damaging effects of sun and rain. While the preparation work—cleaning, stripping, and sanding—requires the most effort, it is the foundation for a finish that will last for years. Rushing these initial steps will only lead to a finish that fails prematurely.
By choosing the right product for your needs and applying it with care, you can achieve a rich, beautiful result that rivals a professional job. Now that you have a complete roadmap for how to stain outdoor wood, you are ready to protect your investment, enhance your home’s curb appeal, and enjoy the deep satisfaction of a job well done.
About
Mike May is a distinguished figure in the world of woodworking and timber design, with a decade of expertise creating innovative and sustainable indoor solutions. His professional focus lies in merging traditional craftsmanship with modern manufacturing techniques, fostering designs that are both practical and environmentally conscious. As the author of Woodimber, Mike delves into the art and science of timber-craft, inspiring artisans and industry professionals alike.
Education
RMIT University (Melbourne, Australia)
-
Associate Degree in Design (Timber): Focus on sustainable design, industry-driven projects, and practical craftsmanship.
-
Gained hands-on experience with traditional and digital manufacturing tools, such as CAD and CNC software.
Nottingham Trent University (United Kingdom)
-
Bachelor’s in Woodworking and Product Design (Honors): Specialized in product design with a focus on blending creativity with production techniques.
-
Participated in industry projects, working with companies like John Lewis and Vitsoe to gain real-world insights.
Publications and Impact
In Woodimber, May shares his insights on timber design processes, materials, and strategies for efficient production. His writing bridges the gap between artisan knowledge and modern industry needs, making it a must-read for both budding designers and seasoned professionals.