 (1)")

Wooden floors bring warmth, character, and timeless elegance to any home. Over time, however, they can lose their luster, becoming scratched, stained, or dull.
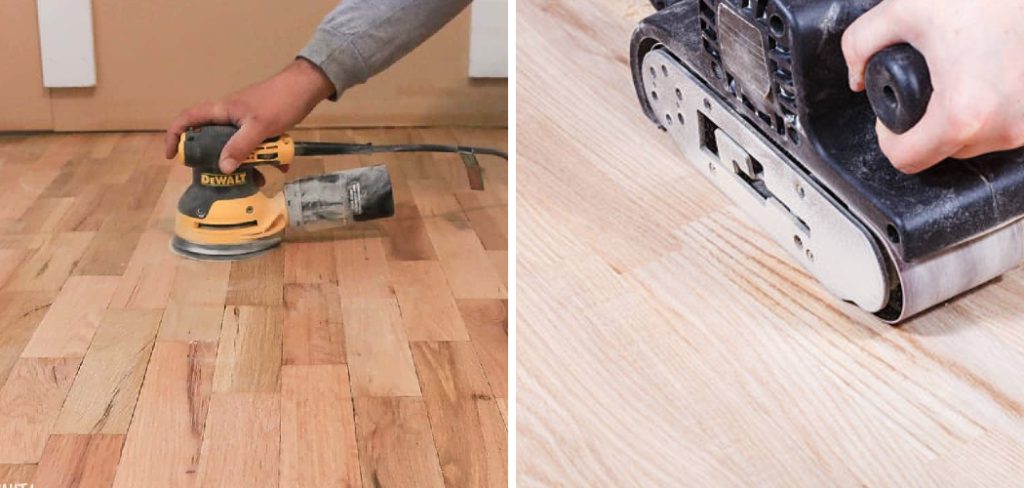
While many homeowners turn to powered sanders for floor refinishing, sanding by hand offers a level of control and precision that machines simply can’t match—especially in tight corners, around intricate moldings, or for smaller projects.
Sanding a wooden floor by hand requires patience and effort, but the results can be incredibly rewarding. Whether you’re restoring a vintage hardwood floor or preparing a surface for a fresh finish, this guide on how to sand a wooden floor by hand will walk you through the entire process.
By the end, you’ll have the knowledge and confidence to transform your tired wooden floors into beautiful, smooth surfaces that look professionally refinished.
Materials You’ll Need
To start, gather all the necessary materials for sanding a wooden floor by hand. These include:
- Sandpaper in varying grits (typically 36, 60, and 80)
- Sanding block or sanding sponge
- Dust mask
- Safety goggles or glasses
- Earplugs or earmuffs
- Vacuum cleaner or broom and dustpan
- Tack cloth
7 Simple Step-By-Step Guidelines on How to Sand a Wooden Floor by Hand
Step 1: Prepare the Room and Inspect the Floor
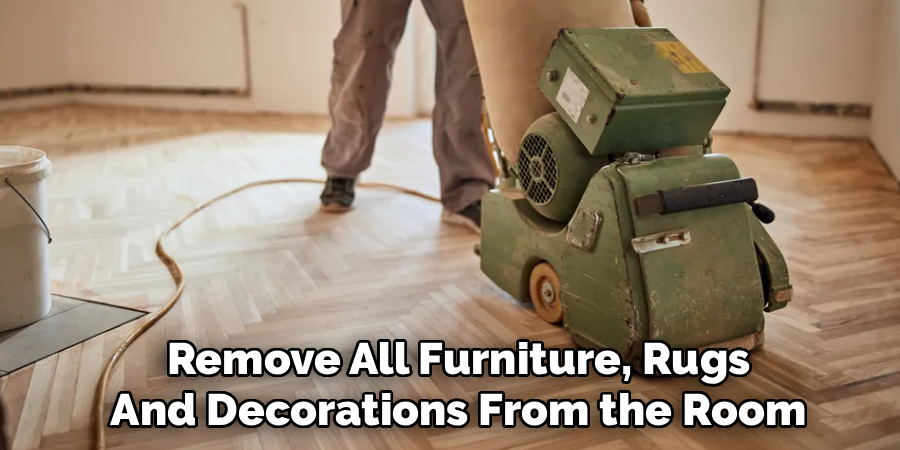
The first step in any floor sanding project is proper preparation. Remove all furniture, rugs, and decorations from the room to create a clear workspace. This not only gives you room to move but also prevents damage to your belongings from dust and debris. Once the room is empty, thoroughly sweep or vacuum the floor to remove loose dirt, pet hair, and grit that could interfere with the sanding process.
Next, carefully inspect the entire floor surface. Look for protruding nails, staples, or screws that could tear your sandpaper or cause injury. Use a hammer to tap down any raised nails or remove them entirely if they’re loose. Check for deep gouges, cracks, or missing pieces of wood—these imperfections should be filled with wood filler before you begin sanding. Allow the filler to dry completely according to the manufacturer’s instructions, as sanding wet filler will create a mess and compromise the repair.
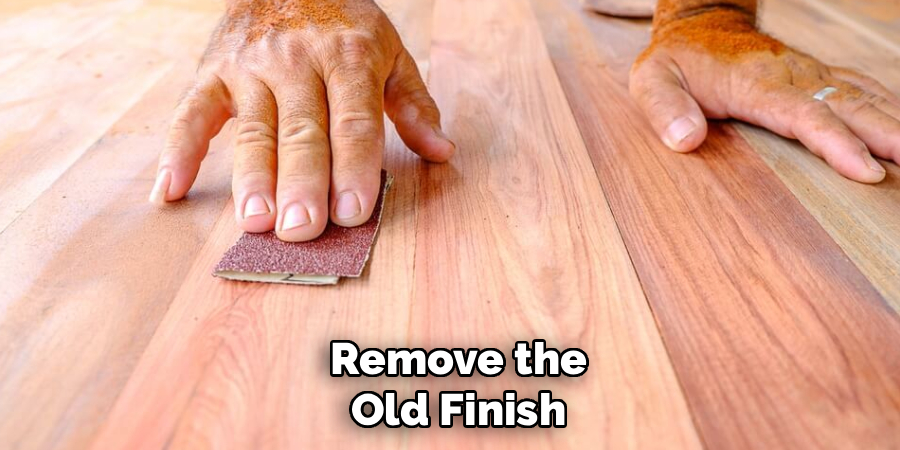
Step 2: Remove the Old Finish
If your wooden floor has an existing finish such as varnish, polyurethane, or wax, you’ll need to remove it before sanding down to bare wood. Start by testing a small, inconspicuous area with a paint scraper or chemical stripper to determine the best approach. For thick, stubborn finishes, a chemical stripper may be necessary—apply it according to the product directions, allow it to work for the specified time, then scrape away the softened finish.
For thinner finishes or areas where chemical strippers aren’t practical, you can begin with very coarse sandpaper (40-60 grit) to gradually remove the coating. Work in the direction of the wood grain to minimize scratches and damage to the wood fibers beneath.
This initial stage is the most labor-intensive part of the process, so take breaks as needed and work systematically across the floor in manageable sections. Remember to vacuum or sweep frequently to prevent dust buildup, which can clog your sandpaper and reduce its effectiveness.
Step 3: Begin Coarse Sanding
Once the old finish is removed, it’s time to start the actual sanding process with coarse-grit sandpaper. Attach 40-60 grit sandpaper to your sanding block and begin working in the direction of the wood grain. This is crucial—sanding against the grain creates deep scratches that will be visible even after finer sanding stages. Use firm, consistent pressure and long, overlapping strokes to ensure even coverage.
Focus on one section of the floor at a time, typically working in areas of about three to four square feet before moving on. This methodical approach helps you maintain control and ensures you don’t miss any spots. Pay special attention to high-traffic areas that may have deeper scratches or more wear. The coarse grit will remove surface imperfections, level out uneven areas, and create a uniform surface for the next sanding stage. Check your progress regularly by running your hand over the sanded area—it should feel noticeably smoother than the unsanded portions, though still somewhat rough to the touch.
Step 4: Progress to Medium-Grit Sanding
After completing the coarse sanding stage across the entire floor, thoroughly vacuum or sweep to remove all dust and debris. This step is essential because any particles left on the surface will interfere with the smoother sanding stages and can create unwanted scratches. Once the floor is clean, switch to medium-grit sandpaper (80-100 grit) and repeat the sanding process.
The medium grit will refine the surface, smoothing out the scratches left by the coarser paper and further leveling the wood. Continue working with the grain using the same systematic approach as before, maintaining consistent pressure throughout each stroke. You’ll notice the floor beginning to take on a smoother appearance and feel.
This intermediate stage bridges the gap between the heavy material removal of coarse sanding and the final polishing that comes with fine-grit paper. Take your time during this phase, as rushing can result in an uneven surface that will be noticeable once you apply the finish.
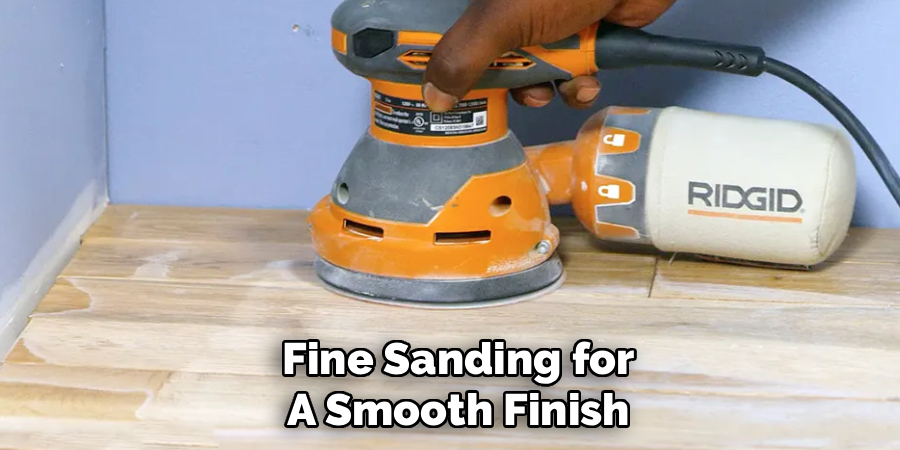
Step 5: Fine Sanding for a Smooth Finish
The fine sanding stage is where your wooden floor truly begins to shine. After another thorough cleaning to remove all dust from the medium-grit sanding, switch to fine-grit sandpaper (120-150 grit). This final sanding pass will create the smooth, polished surface that’s ready to receive stain or finish. The technique remains the same—work with the grain using long, overlapping strokes and consistent pressure.
At this stage, you may want to use a sanding sponge or very fine steel wool for hard-to-reach areas like corners, edges, and around door frames. These tools provide greater flexibility and control in tight spaces where a sanding block might be too cumbersome.
As you work through this final sanding stage, periodically check your progress by feeling the surface with your bare hand. The wood should feel silky smooth with no rough patches or noticeable scratches. Any imperfections that remain after fine sanding will be magnified once you apply a finish, so don’t rush this crucial step.
Step 6: Final Cleaning and Inspection
Once you’ve completed all sanding stages, the floor requires a meticulous final cleaning before you can apply any finish. Begin by vacuuming the entire floor multiple times, paying special attention to corners, edges, and any crevices where dust tends to accumulate. Use the brush attachment on your vacuum to gently clean baseboards and moldings, as dust often settles on these surfaces and can fall back onto your freshly sanded floor.
After vacuuming, wipe down the entire floor with a tack cloth—a specially treated cloth designed to pick up fine dust particles that regular cleaning might miss. Work in sections, folding the cloth frequently to expose clean surfaces.
For large floors, you may need multiple tack cloths to ensure thorough dust removal. Once the floor is completely clean, do a final inspection under good lighting. Look for any remaining rough spots, missed areas, or imperfections that need additional attention. Address any issues now, as it’s much easier to make corrections before applying the finish than after.
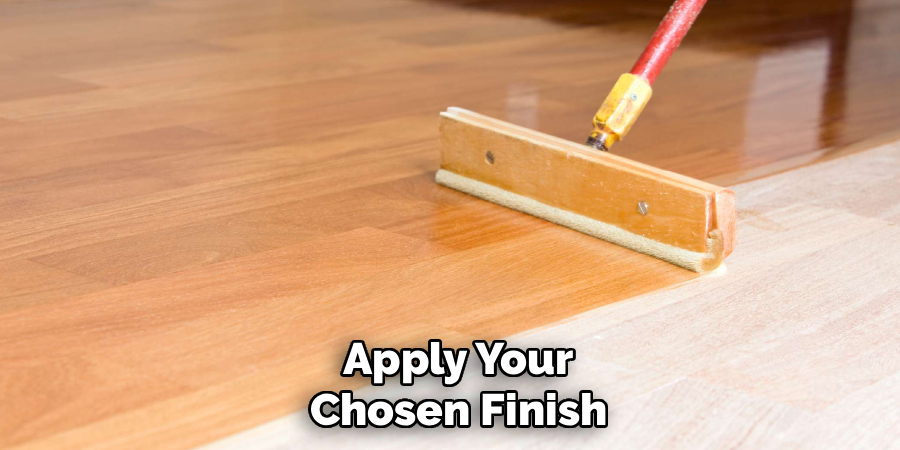
Step 7: Apply Your Chosen Finish
With your wooden floor perfectly sanded and cleaned, you’re ready to apply the finish of your choice. Whether you opt for polyurethane, oil-based finish, water-based finish, or natural oils, follow the manufacturer’s application instructions carefully. Most finishes require multiple coats, with light sanding using very fine sandpaper (220 grit) between coats to ensure proper adhesion and a smooth final surface.
Apply the finish in thin, even coats using a high-quality brush, roller, or applicator pad, always working with the grain. Maintain good ventilation throughout the application process, and allow adequate drying time between coats as specified by the product instructions. Depending on your chosen finish, you may need anywhere from two to four coats for optimal protection and appearance. Once the final coat is completely dry and cured, your hand-sanded wooden floor will be ready to enjoy for years to come.
Following these steps on how to sand a wooden floor by hand will ensure that the process is done correctly and efficiently.
Common Mistakes to Avoid
Even experienced DIYers can make mistakes when sanding wooden floors by hand. One of the most common errors is sanding against the grain, which creates deep scratches that are difficult to remove and will be visible through the finish. Always work with the grain, taking time to identify the direction of the wood fibers before you begin.
Another frequent mistake is skipping grit levels—jumping from coarse directly to fine sandpaper without the intermediate medium grit step will leave visible scratch marks that the fine paper can’t fully remove. Be patient and progress through each grit level systematically for the best results.
Do You Need to Use Professionals?
Deciding whether to tackle floor sanding yourself or hire professionals depends on several factors. Hand sanding is perfectly suitable for small rooms, single rooms, or targeted repairs where you want maximum control over the process.
It’s also ideal for vintage floors with delicate inlays or soft woods that might be damaged by aggressive power sanding. However, for large areas—entire homes or commercial spaces—hand sanding becomes impractical due to the time and physical effort required.
Professional floor refinishers have industrial equipment that can complete in hours what might take you days or weeks by hand. They also bring expertise in dealing with challenging situations like severely damaged floors, multiple wood species, or complex patterns. If you’re uncertain about your skills, concerned about damaging valuable flooring, or simply don’t have the time to invest, professional services may be the better choice.
How Much Will It Cost?
The cost of hand-sanding a wooden floor is significantly lower than hiring professionals or renting power equipment, but it’s important to budget for all necessary materials. Sandpaper will be your primary expense—expect to spend $30-60, depending on the size of your floor and how many grit changes you’ll need.
A quality sanding block costs $10-20, while scrapers range from $5-15. Wood filler runs about $8-15 per container, and you’ll need cleaning supplies, including tack cloths ($5-10) and potentially a quality vacuum if you don’t already own one.
Protective gear—dust masks, goggles, and knee pads—will add another $20-30 to your total. Finally, the finish itself can range from $30 for basic products to $100 or more for premium options, depending on coverage area and quality. All told, you can expect to spend $150-300 for a DIY hand-sanding project, compared to $1,000-3,000 or more for professional refinishing of a typical room.
Frequently Asked Questions
Q: How Long Does It Take to Sand a Wooden Floor by Hand?
A: The time required to sand a wooden floor by hand varies considerably based on the room size, condition of the existing floor, and your experience level. For a small room of approximately 100-150 square feet, expect to invest 8-12 hours of actual sanding time spread across multiple days.
This doesn’t include preparation time, drying time for wood filler, or finish application. Larger spaces will naturally require proportionally more time. The coarse sanding stage typically takes the longest, as you’re removing the old finish and addressing imperfections. Medium and fine sanding stages progress more quickly.
Remember that quality matters more than speed—rushing through the process will result in a subpar finish that you’ll regret once the floor is complete.
Q: Can You Sand a Floor by Hand Without a Sanding Block?
A: While it’s technically possible to sand a floor using only sandpaper wrapped around your hand, this approach is not recommended for several important reasons. A sanding block provides even pressure distribution across the sandpaper surface, resulting in more uniform sanding and reducing the risk of creating uneven spots or dips in the wood.
Without a block, certain fingers naturally apply more pressure than others, creating an irregular sanding pattern that becomes visible once the finish is applied. Sanding blocks also protect your hands from blisters and fatigue, allowing you to work for longer periods with greater comfort.
For small touch-up areas or very tight corners where a block won’t fit, hand-sanding without a block may be acceptable, but for the main floor surface, always use a proper sanding block or hand sander to ensure professional-quality results.
Conclusion
Sanding a wooden floor by hand is undoubtedly a labor-intensive project, but it offers unmatched control, precision, and satisfaction.
By following these detailed steps on how to sand a wooden floor by hand—from proper preparation through final finish application—you can restore your wooden floors to their original beauty without expensive equipment or professional services. The key to success lies in patience, attention to detail, and working methodically through each stage of the process.
Ready to transform your worn wooden floors into stunning surfaces that will be the pride of your home? Gather your materials, set aside adequate time, and begin your floor restoration journey today. Your beautifully refinished floors will serve as a testament to your craftsmanship and dedication for years to come.
About
Mike May is a distinguished figure in the world of woodworking and timber design, with a decade of expertise creating innovative and sustainable indoor solutions. His professional focus lies in merging traditional craftsmanship with modern manufacturing techniques, fostering designs that are both practical and environmentally conscious. As the author of Woodimber, Mike delves into the art and science of timber-craft, inspiring artisans and industry professionals alike.
Education
RMIT University (Melbourne, Australia)
-
Associate Degree in Design (Timber): Focus on sustainable design, industry-driven projects, and practical craftsmanship.
-
Gained hands-on experience with traditional and digital manufacturing tools, such as CAD and CNC software.
Nottingham Trent University (United Kingdom)
-
Bachelor’s in Woodworking and Product Design (Honors): Specialized in product design with a focus on blending creativity with production techniques.
-
Participated in industry projects, working with companies like John Lewis and Vitsoe to gain real-world insights.
Publications and Impact
In Woodimber, May shares his insights on timber design processes, materials, and strategies for efficient production. His writing bridges the gap between artisan knowledge and modern industry needs, making it a must-read for both budding designers and seasoned professionals.