 (1)")

The appeal of rustic, weathered wood has a firm grip on modern interior design. There’s a certain warmth and history embedded in a piece of timber that has been shaped by time and the elements. Farmhouse tables, coastal-inspired shelving, and industrial accent walls all rely on the character of aged wood to feel authentic.
Yet, sourcing genuine reclaimed barn wood can be a difficult and expensive affair. Finding clean, pest-free boards of the right dimension is a challenge, and the cost often puts them out of reach for many DIY projects. What if you could capture that same rustic charm without the scavenger hunt or the hefty price tag?
Fortunately, you can. It’s possible to accelerate the aging process, transforming cheap, new lumber from the hardware store into something that looks like it has been telling stories for decades. This guide is designed to teach you exactly how to make wood look weathered using simple, accessible techniques and common household materials.
We will explore both the physical act of distressing the wood to mimic years of wear and the chemical processes that can create a beautiful, silvery-gray patina, giving you complete control over the final look of your project.
Understanding the Weathered Wood Aesthetic
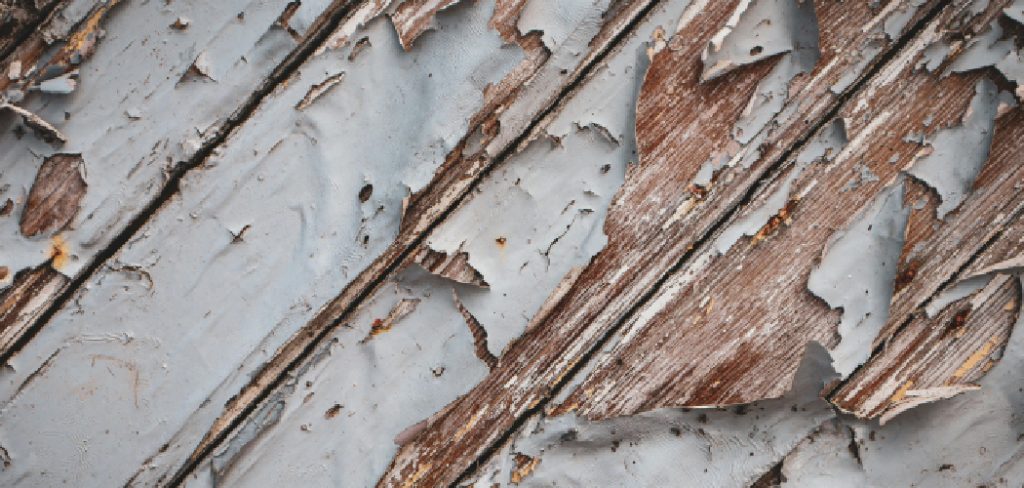
To successfully replicate something, you must first understand what you are trying to create. The unique character of naturally weathered wood is a product of its environment. Over many years, exposure to sun, rain, and wind fundamentally alters the wood’s color and texture, creating a complex and beautiful surface. This isn’t just a surface-level change; it’s a structural transformation.
The Role of Patina and Color
When raw wood is left outdoors, the sun’s UV rays break down the lignin, which is the organic polymer that gives wood its rigidity and color. This process, known as photo-oxidation, bleaches the wood, gradually shifting its color from warm browns and yellows to the cool, silvery grays that are so highly prized.
Rain washes away extractives in the wood, and the combination of moisture and sun can encourage the growth of micro-fungi, which contribute to the development of a rich, mottled patina. The final color is a complex tapestry of gray, silver, and sometimes dark brown tones that simply cannot be replicated with a single coat of gray paint or stain.
Texture and Imperfections
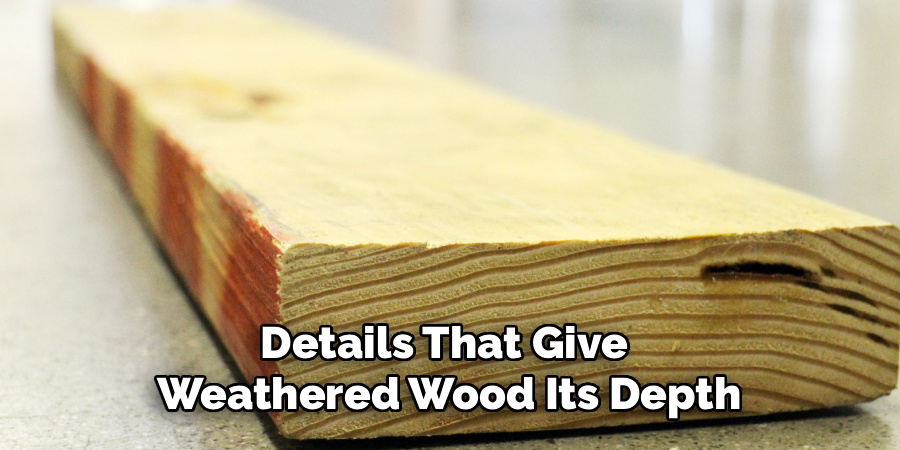
Time is not gentle. Naturally aged wood bears the scars of its history. The surface texture is often rugged and uneven because the softer parts of the wood (the “earlywood”) erode faster than the harder parts (the “latewood”), leaving a raised grain pattern. Decades of being handled, bumped, and exposed to the elements also create a random assortment of dents, scratches, and gouges. Even tiny holes from long-gone insects contribute to the overall impression of authenticity. These imperfections are not flaws; they are the very details that give weathered wood its depth and character.
Choosing the Right Wood for Your Project
The success of any wood aging project begins with selecting the proper raw material. Different species of wood react to distressing and chemical treatments in vastly different ways, and choosing the right board can make the process significantly easier and the results far more convincing. For the best outcome, it is almost always recommended to start with raw, unfinished lumber that has no pre-existing paint, stain, or sealer.
Softwoods vs. Hardwoods
For the purpose of creating a weathered look, softwoods are your greatest ally. Woods like pine, cedar, and fir are ideal candidates for several reasons. First, their cellular structure is less dense, which means they physically dent and scratch much more easily, allowing you to create realistic distressing with minimal effort. Second, their porous nature allows them to absorb liquid stains and aging solutions deeply and evenly. Common pine boards from a home improvement store are an excellent, budget-friendly choice for practicing these techniques.
Hardwoods such as oak, maple, or cherry, while beautiful in their own right, present significant challenges for this type of project. Their density makes them resistant to physical distress, meaning you have to work much harder to create convincing dents and dings. Furthermore, their tight grain can cause them to absorb aging solutions unevenly, which may result in a blotchy, unnatural appearance.
The Importance of Wood Grain
When selecting your boards, pay attention to the grain pattern. Wood with a prominent, visible grain will yield a more dramatic and realistic weathered effect. This is because the techniques used to raise the grain, such as wire brushing, will have a more pronounced visual impact. The contrast between the hard and soft parts of the grain becomes a key feature of the final piece, adding to its rustic texture.
Essential Tools and Materials for Aging Wood
One of the most appealing aspects of this DIY project is that it does not require a workshop full of expensive, specialized equipment. Most of the necessary tools and ingredients are either common garage staples or readily available household items. It’s best to gather everything you need before you start to ensure a smooth, uninterrupted workflow. The materials can be organized into two main categories: those for physical distressing and those for the chemical aging process.
Mechanical Distressing Tools
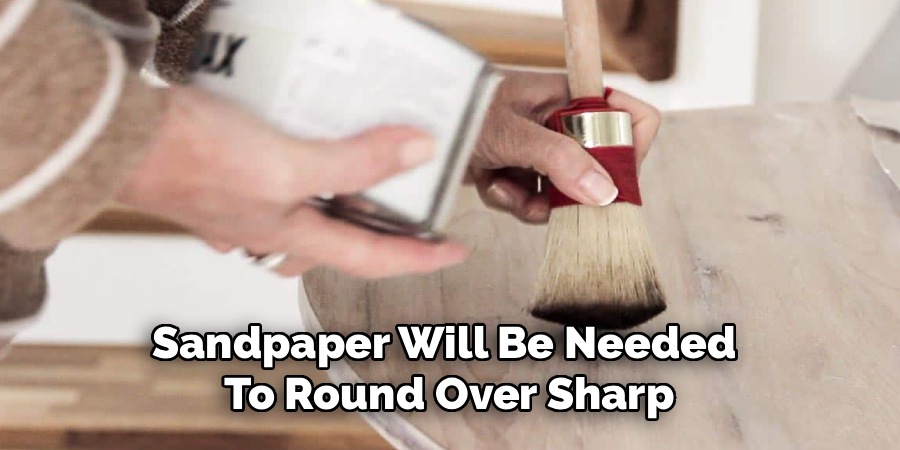
To mimic decades of physical wear and tear, you will need a few simple but effective tools. A hammer is essential for creating dents and softening the edges of the board. A heavy length of chain can be used to create a random pattern of dings and gouges. For more specific marks, an awl, a screwdriver, or even a bag filled with screws and nails can be used to create simulated wormholes and other imperfections. A stiff wire brush is perhaps the most important tool for creating texture, as it is used to scrape out the soft wood and raise the grain. Finally, some coarse sandpaper will be needed to round over sharp, factory-cut edges.
Chemical Aging Ingredients
The magic of creating an authentic, silvery-gray patina comes from a simple chemical reaction. You will need a jar of standard white vinegar and a pad of fine steel wool (grade #0000). When combined, these two ingredients create iron acetate, an oxidizing solution that reacts with tannins in the wood. To ensure the wood has enough tannins for a strong reaction, especially with new pine, you will also need a few bags of black tea. A simple paintbrush or foam brush will be used for application.
Safety First: Prepping Your Workspace
While the tools and chemicals involved are relatively low-risk, taking a few simple safety precautions is always a prudent measure. Distressing wood can be a messy process, generating both sawdust and small wood splinters, so it’s best to set up your workspace in an area that is easy to clean, such as a garage or an outdoor patio.
Protective Gear
Protecting yourself is paramount. When sanding or wire-brushing the wood, fine dust particles will become airborne. Wearing a dust mask will prevent you from inhaling this particulate matter. Safety goggles are also non-negotiable, as they will protect your eyes from flying debris and accidental splashes of the vinegar solution. A pair of sturdy work gloves can help prevent scrapes and splinters while you are physically distressing the boards.
Protecting Your Surroundings
To avoid damaging your work surface or floor, it’s a good idea to lay down a protective covering. A canvas drop cloth or even a large piece of scrap cardboard will suffice. This will not only catch the dust and drips from the aging solution but also absorb the impact if you are using a hammer or chain with significant force, preventing you from accidentally denting your concrete garage floor or workbench.
How to Make Wood Look Weathered: Step-by-Step Guide
This is where the real transformation takes place. This step-by-step process combines the physical and chemical techniques into a logical sequence. Each step builds upon the last to create a layered, multi-dimensional finish that looks authentically old. Patience is key; allow each stage to be completed fully before moving on to the next.
Step 1: Preparing and Sanding the Surface
Begin with your piece of raw, unfinished lumber. New boards from a hardware store come with sharp, perfectly square edges that are a dead giveaway of their age. Use a piece of medium-grit sandpaper (around 80 to 120 grit) to manually sand down these sharp corners. The goal is to create a soft, rounded-over edge that looks like it has been handled and worn down over many years. This initial sanding also helps to open up the pores of the wood, which will help it better absorb the tea and vinegar washes later on.

Step 2: Creating Mechanical Damage
Now, it’s time to add some history to the board. This is a creative process, and the goal is to be random. Take your heavy chain and strike the surface of the wood in various places. Use your hammer to create larger dents and to pound on the edges and corners, which are areas that would naturally see the most abuse. Don’t be too uniform; authentic wear is irregular. Vary the force and location of your strikes for a more natural look.
Step 3: Adding Authentic Details like Wormholes
To add another layer of realism, you can simulate the look of insect damage. Take an awl or a nail and create small, irregular clusters of tiny holes. Concentrate these “wormholes” in a few areas rather than scattering them evenly across the board. You can also use the sharp edge of a screwdriver or a paint can opener to drag a few deep scratches or gouges along the grain, mimicking damage from tools or other objects over the years.
Step 4: Brewing the Vinegar and Steel Wool Solution
This step should be done at least 24 hours before you plan to stain the wood. Take a pad of fine steel wool, pull it apart slightly, and place it into a glass jar. Pour enough white vinegar into the jar to completely submerge the steel wool. Loosely place the lid on the jar (do not seal it tightly, as the reaction can produce gas) and let it sit. Over the next day or two, the vinegar will dissolve the steel wool, creating a solution of iron acetate. The solution is ready when the steel wool has mostly disintegrated, and the liquid has a murky, brownish color.
Step 5: Applying the Black Tea Wash
This is a critical step, especially for new pine, which is low in natural tannins. Brew a very strong batch of black tea using two or three tea bags in a cup of hot water. Let it steep for at least 10-15 minutes. Once it has cooled, use a paintbrush to generously apply the tea wash over the entire surface of your distressed wood. The tea infuses the wood with tannins, which are the compounds that will react with the iron acetate solution to create the aged color. Allow the wood to dry completely.
Step 6: Brushing on the Iron Vinegar Solution
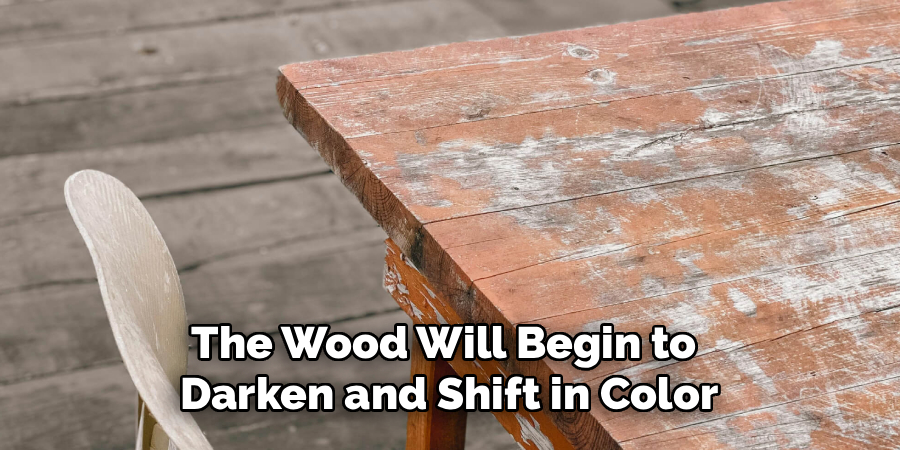
Once the tea wash is dry, it’s time for the chemical magic. Strain your vinegar and steel wool mixture through a coffee filter or cheesecloth to remove any remaining solid bits. Using a clean brush, apply the iron vinegar solution directly over the tea-stained wood. The reaction will happen almost instantly. The wood will begin to darken and shift in color, turning into a rich, complex shade of gray-brown right before your eyes.
Step 7: Allowing the Wood to Dry and Oxidize
Set the board aside and let it dry thoroughly. The color will continue to develop and change as the wood dries. What might look dark and muddy when wet will often lighten to a beautiful silvery-gray as the moisture evaporates. The final color will depend on the type of wood, the strength of your tea, and how long your vinegar solution is steeped. The process is beautifully unpredictable, which adds to its charm.
Alternative Methods for Distressing Wood
The tea and vinegar oxidation method is fantastic for creating a specific barn-wood gray, but it’s not the only way to make wood look rustic. If you’re aiming for a different style, such as a sun-bleached coastal look or a chippy farmhouse finish, you can use techniques involving paint.
The Whitewashing Technique
Whitewashing is a simple technique that can give wood a soft, faded appearance, as if it has been sitting in the sun for years. To create a whitewash, simply dilute white latex or acrylic paint with water. A ratio of one part paint to one part water is a good starting point, but you can adjust it for a more or less opaque finish. Brush the wash onto the wood and then immediately wipe most of it off with a clean rag. The paint will catch in the grain and the distressed areas, leaving a subtle, bleached effect.
Using Specialized Wood Accelerators
For those who prefer a ready-made solution, several commercial products on the market are designed to weather wood. These “wood accelerators” or “aging solutions” work on a similar principle to the DIY vinegar stain, using proprietary chemical formulas to react with the wood and rapidly create an aged patina. They can be a good option if you are short on time or want a more predictable color outcome.
Sealing and Protecting Your Weathered Wood
Once you have achieved the perfect rustic look, you may want to apply a protective topcoat. This is especially important if your weathered wood will be used for a functional surface like a tabletop, shelf, or bench. However, the choice of sealer is critical. The wrong topcoat can completely ruin the matte, aged illusion you’ve worked so hard to create.
Choosing a Matte Polyurethane
The number one rule is to avoid any finish that has a gloss or even a semi-gloss sheen. A shiny surface will instantly make your weathered wood look fake. Instead, opt for a clear topcoat that is specifically labeled as “matte” or “flat.” A water-based polyurethane is an excellent choice, as it dries crystal clear and will not add the amber tint that oil-based finishes often do. Apply one or two thin coats to protect the wood from moisture and daily wear without adding any unwanted shine.
Applying Furniture Wax
For decorative pieces that won’t see a lot of heavy use, such as picture frames or accent wall paneling, a finishing wax is another great option. Paste wax is available in clear, dark, and colored varieties. It’s easy to apply—you simply rub it on with a cloth and then buff it to a soft, mellow sheen. A dark wax can be particularly effective, as it will settle into the cracks and dents of your distressed wood, further enhancing the texture and adding another layer of dimension to the finish.
Creative Ways to Use Your Aged Wood
Once you have mastered the art of weathering wood, a whole world of DIY home decor projects opens up. You are no longer limited by the cost or availability of authentic reclaimed lumber. You can now create custom, high-end-looking pieces on a very small budget.
Home Decor Projects
The possibilities for using your newly aged wood are nearly endless. You can bundle several boards together to create a stunning, texture-rich accent wall in a bedroom or living room. A single, thick plank can be transformed into a beautiful floating shelf for a kitchen or bathroom. You can also use smaller pieces to build rustic picture frames, decorative serving trays, or custom signboards.
Furniture Makeovers
This technique is also perfect for building or transforming furniture. You can construct a farmhouse-style dining table or coffee table from scratch using cheap pine boards that you have aged to perfection. You could also use the weathered planks to clad the front of a boring kitchen island, instantly turning it into a rustic centerpiece. Even a simple headboard made from aged wood can completely change the character of a bedroom.
Conclusion
The process of transforming a pristine piece of new lumber into something that looks like it has weathered a century of seasons is an incredibly satisfying one. By combining simple physical distressing with a clever bit of kitchen chemistry, you can create a finish that is rich with texture and authentic color. It proves that you don’t need expensive materials to create a high-end, designer look in your home.
Learning how to make wood look weathered is more than just a DIY trick; it’s a skill that empowers you to create custom pieces that are perfectly tailored to your personal style. It encourages you to see the potential in the most basic materials and to add a touch of handcrafted history to your modern life. So, grab a piece of scrap wood, test out the techniques, and start creating.
About
Mike May is a distinguished figure in the world of woodworking and timber design, with a decade of expertise creating innovative and sustainable indoor solutions. His professional focus lies in merging traditional craftsmanship with modern manufacturing techniques, fostering designs that are both practical and environmentally conscious. As the author of Woodimber, Mike delves into the art and science of timber-craft, inspiring artisans and industry professionals alike.
Education
RMIT University (Melbourne, Australia)
-
Associate Degree in Design (Timber): Focus on sustainable design, industry-driven projects, and practical craftsmanship.
-
Gained hands-on experience with traditional and digital manufacturing tools, such as CAD and CNC software.
Nottingham Trent University (United Kingdom)
-
Bachelor’s in Woodworking and Product Design (Honors): Specialized in product design with a focus on blending creativity with production techniques.
-
Participated in industry projects, working with companies like John Lewis and Vitsoe to gain real-world insights.
Publications and Impact
In Woodimber, May shares his insights on timber design processes, materials, and strategies for efficient production. His writing bridges the gap between artisan knowledge and modern industry needs, making it a must-read for both budding designers and seasoned professionals.