 (1)")

There is a distinct, almost psychological warmth that a brilliantly polished hardwood floor brings to a home. When light hits a perfectly smooth wood surface, it reflects cleanly, creating an illusion of expansive space and meticulous cleanliness. However, the slow passage of time often seems to steal this luster. You might suddenly notice that the rich, honeyed tones of your oak or maple have retreated behind a cloudy, gray haze.

The original gleam is gone, replaced by a dull, lifeless expanse that no amount of frantic sweeping seems to cure. Restoring that sought-after gloss is not necessarily a matter of brute force. Rather, it requires a measured understanding of wood finishes, chemical interactions, and proper technique. This comprehensive guide will explain the mechanics of floor degradation and teach you exactly how to make wooden floors shine with professional-grade clarity.
Understanding Why Your Wooden Floors Have Lost Their Shine
Before attempting to restore a surface, one must first analyze why the degradation occurred. The dulling of a hardwood floor is rarely a spontaneous event. It usually points to a gradual accumulation of micro-damage and chemical residue. Understanding this underlying pathology helps in selecting the correct restorative approach and preventing the issue from immediately recurring.
The Impact of Wear and Tear
The surface of most modern hardwood floors is protected by a thin, transparent layer of polyurethane. When this layer is pristine, it acts like a mirror. However, daily foot traffic introduces millions of microscopic silica particles—dirt and sand tracked in from outdoors—across this finish. As shoes drag these particles over the floor, they carve microscopic scratches into the polyurethane.
While a single scratch is invisible to the naked eye, a dense network of these micro-abrasions causes incoming light to scatter in multiple directions rather than bouncing straight back. This optical scattering is what the human eye perceives as a dull, matte finish. Over several years, this protective wear layer physically breaks down, fundamentally altering the floor’s refractive index.
Choosing the Right Cleaner
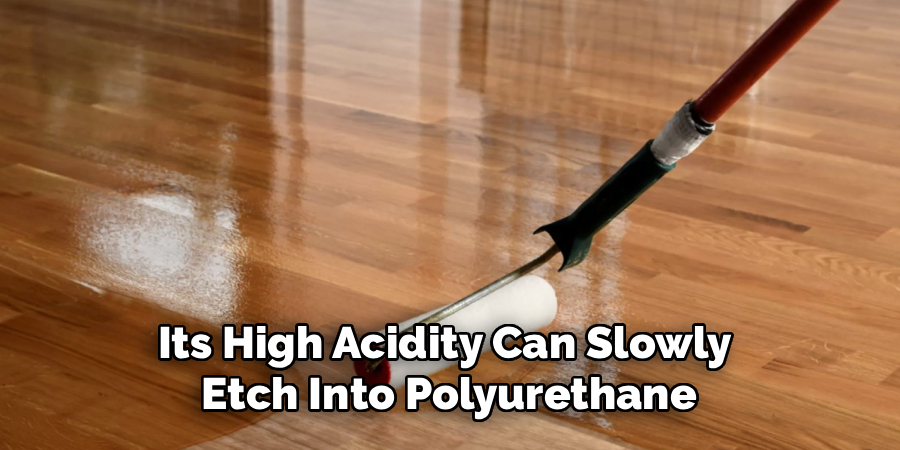
The degradation of your floor’s appearance might also suggest a purely chemical problem. Many homeowners inadvertently destroy their floor’s shine by applying improper cleaning agents. Vinegar, for example, is frequently touted as a natural cleaning miracle.
Yet, its high acidity can slowly etch into polyurethane, permanently dulling the finish over time. Similarly, heavy oil-based soaps or wax-laden grocery store cleaners often leave behind a microscopic sticky film. With each successive mopping, this film thickens, trapping airborne dust and turning into a stubborn, opaque haze.
Gathering Your Floor-Shining Arsenal
Restoring optical clarity to a scuffed surface requires a highly specific set of materials. Attempting this project with makeshift tools generally leads to uneven, streaky results. You will need to assemble a small collection of specialized implements designed to clean, smooth, and coat the wood without introducing excess moisture.
For the preparatory phase, secure a soft-bristle broom, a vacuum equipped with a bare-floor setting to avoid scratching, and a flat-head microfiber mop. You will also need a commercial hardwood floor cleaner formulated to have a strictly neutral pH. For the restoration itself, you must procure a high-quality wood floor polish or restorer.
Polish vs. Wax: What’s the Difference?
It is entirely possible to permanently ruin a floor’s finish by confusing polish with wax. Modern wood floors built after the 1970s are almost universally sealed with surface finishes like polyurethane. These floors require a liquid acrylic polish, which fills in micro-scratches and cures into a hard, glossy shell. Conversely, antique floors manufactured before this era often rely on penetrating oils.
These older floors require a traditional paste wax containing carnauba to maintain their sheen. Applying a modern acrylic polish over an old wax finish typically results in a disastrous, peeling mess, as the acrylic cannot adhere to the greasy wax layer. Always test your floor’s finish type before proceeding.
Safety and Preparation Gear
The physical demands of floor restoration should not be underestimated. The process requires extended periods of kneeling and bending. Investing in a thick pair of professional knee pads could save you from significant joint discomfort. Additionally, while modern water-based polishes emit fewer volatile organic compounds than their historical counterparts, ensuring adequate room ventilation by opening windows remains a sensible precaution.

Initial Preparation: The Foundation for a Great Shine
The actual application of polish is merely the final step in a long chain of preparatory actions. The success of the entire endeavor hinges on the absolute cleanliness of the surface prior to coating. Any microscopic debris left on the floor will be permanently entombed in the new acrylic layer, creating a rough texture and visual blemishes.
You must begin by completely evacuating the room. Remove all chairs, tables, area rugs, and floor lamps. Attempting to polish around heavy furniture inevitably leads to uneven buildup and visible lap marks.
A Deep First Clean
Once the geography of the room is entirely clear, commence a systematic removal of dry debris. Vacuum the entire space methodically, paying special attention to the baseboards and corners where dust bunnies congregate. Following the vacuuming, proceed to a wet clean using your pH-neutral cleaner and a microfiber mop. The objective here is to dissolve accumulated cooking oils, foot oils, and environmental pollutants. The mop pad should be changed frequently; pushing a saturated, dirty pad across the room merely redistributes the grime.
Spot-Treating Stubborn Scuffs
During this deep clean, you will likely uncover stubborn black scuff marks left by rubber-soled shoes. These marks generally resist standard mopping. To gently lift them without aggressively sanding the wood, you might try rubbing the scuff briskly with a clean, dry tennis ball. The rubber matrix of the tennis ball creates just enough localized friction to erase the mark without compromising the underlying polyurethane.
7 Step-by-Step Instructions on How to Make Wooden Floors Shine
With the surface fully prepared, you can begin the chemical restoration of the floor’s luster. This operation requires patience, a methodical pacing, and strict adherence to drying times. Rushing the application will almost certainly introduce air bubbles or hazy streaks into the final coat.
Step 1: Perform a Thorough Cleaning
Even if you just completed your deep clean, it is wise to do one final, rapid pass with a barely damp microfiber mop. Ensure the mop is wrung out almost completely. Excess water is the natural enemy of hardwood, capable of seeping into the seams between planks and causing the cellulose structure to swell and warp. The surface must be analytically clean.
Step 2: Let the Floor Dry Completely
Moisture trapped beneath a layer of acrylic polish will try to evaporate, resulting in a milky, cloudy finish that is notoriously difficult to remove. You must allow the floor to dry absolutely completely. Depending on the ambient humidity and indoor temperature, this might take upwards of an hour. The wood should feel entirely dry and room-temperature to the touch before you proceed.

Step 3: Test the Polish in an Inconspicuous Area
Despite careful planning, unpredictable chemical reactions can occasionally occur between a new polish and an older, unknown floor finish. To mitigate disaster, apply a small, coin-sized drop of the polish in an inconspicuous area—perhaps inside a shallow closet or beneath the designated footprint of a large sofa. Allow it to dry for a few hours to ensure it adheres smoothly and provides the specific degree of gloss you desire without peeling.
Step 4: Applying the Floor Polish
Do not attempt to coat the entire room simultaneously. Mentally divide the floor space into small, manageable grids, roughly five feet by five feet in dimension. Gently invert the bottle of polish to mix the polymers, but refrain from shaking it vigorously, as this introduces microscopic air bubbles into the liquid. Pour a modest amount of polish directly onto the floor in a serpentine “S” pattern within your first mental grid.
Step 5: Spreading the Polish Evenly
Using a dedicated, brand-new flat-head microfiber mop pad, begin spreading the puddle of polish. The mechanical action here is critical. You must always move the mop in the exact direction of the wood grain. Spreading polish against the grain highlights the applicator strokes and disrupts the natural visual flow of the wood. Keep the mop head relatively flat against the floor, smoothing the liquid into a remarkably thin, uniform layer. Thick puddles of polish will not cure properly and may remain perpetually tacky.
Step 6: Work Your Way Out of the Room
Once the first grid is perfectly smooth, step backward and repeat the process in the adjacent section. You must plan your physical trajectory carefully. Always start at the corner of the room furthest from your intended exit. Working systematically backward ensures that you never trap yourself in a corner or are forced to walk over the freshly laid, wet acrylic to escape the room. Maintain a “wet edge” by blending the new grid slightly into the border of the previously finished grid to avoid visible seams.
Step 7: Allow for Proper Drying Time
Once you have exited the room, the chemical curing process begins. The polymers within the liquid must cross-link and harden. Follow the manufacturer’s precise drying guidelines. Typically, the floor will be safe for light, sock-footed traffic after several hours. However, you should generally wait a full twenty-four hours before dragging heavy furniture back into the space or allowing pets to walk across the surface.

Advanced Techniques for an Extra-Glossy Finish
For certain interior design aesthetics, a standard satin or semi-gloss finish might not suffice. Some homeowners pursue a profound, mirror-like gloss that heavily reflects ambient light. Achieving this heightened level of refraction requires moving beyond simple liquid applications and introducing mechanical friction.
Using a Floor Buffer or Polisher
If your goal is an absolute high-gloss finish, you might consider renting a residential-grade floor buffer. After the initial polish has fully cured, a buffer equipped with a soft polishing pad uses rapid rotational friction to physically heat and smooth the acrylic layer. This microscopic leveling of the polish surface dramatically increases its capacity to reflect light, resulting in a crystalline, glass-like appearance. This technique requires practice, as lingering in one spot for too long can burn the finish.
Applying a Second Coat of Polish
Alternatively, building up the refractive depth of the floor often requires multiple thin layers of polish rather than a single thick one. If the first coat dries and appears somewhat uneven or insufficiently glossy, a second coat may be applied. The first coat must be entirely chemically cured before the second application begins. Applying wet polish over a tacky base layer will essentially dissolve the foundation, creating a ruined, sticky mess.
What to Do if Your Floors Still Aren’t Shining
Occasionally, despite meticulous cleaning and careful application of high-grade polish, the floor remains dull. This usually suggests that the physical damage to the floor has surpassed the restorative capabilities of a simple liquid topcoat.
The Limits of Polishing
Floor polish is essentially a cosmetic filler. It possesses the viscosity to flow into microscopic scratches and level out minor surface dullness. However, it cannot repair deep, physical trauma to the wood. If your floors feature deep gouges from dog claws, severe dents from dropped heavy objects, or dark stains where water has penetrated deep into the cellulose fibers, polish will simply coat these defects. It will not hide them.
When to Consider Refinishing
If the polyurethane wear layer has been completely worn away by decades of foot traffic, leaving raw, splintering wood exposed to the elements, polishing is a futile exercise. At this stage of degradation, the floor requires a complete mechanical refinishing. This involves using heavy drum sanders to grind away the remaining damaged finish and a fraction of a millimeter of the wood itself, exposing a pristine layer of timber that must then be re-stained and sealed.
Long-Term Maintenance for Lasting Shine
Once you have successfully restored the optical brilliance of your wood, your strategy must pivot from restoration to preservation. A glossy floor is highly susceptible to dulling if neglected. Implementing a stringent, proactive maintenance routine is the only way to ensure your hard work lasts for years.
Daily and Weekly Cleaning Routines
The vast majority of floor damage is caused by abrasive friction. Therefore, dust control is paramount. You should commit to sweeping the floor daily with a soft-bristle broom to remove the microscopic grit tracked in from outside. Every week, clean the surface with a damp microfiber mop and a dedicated, pH-neutral wood floor cleaner. Never use a traditional string mop and bucket, as the excessive water will degrade the acrylic polish you just carefully applied.
Protective Measures
Prevention is highly effective. You might consider placing high-quality, dense doormats at all exterior entrances to capture grit before it enters the home. Furthermore, apply heavy-duty felt pads to the feet of every chair, table, and sofa in the room. This simple intervention prevents the agonizing screech and subsequent gouging that occurs when heavy furniture is dragged across a pristine surface. Finally, ensure that any liquid spills are wiped up instantaneously to prevent chemical etching.
Conclusion
Reviving a dull, exhausted hardwood surface requires patience, a methodical approach, and an understanding of the delicate interaction between wood, chemical finishes, and environmental wear. By carefully clearing the room, executing a rigorous deep clean, and applying a specialized polymer coating with precise technique, you can fundamentally alter the way light behaves in your space.
The transformation from a hazy, muted surface to a brilliant, reflective expanse is deeply satisfying. Ultimately, mastering exactly how to make wooden floors shine not only preserves the structural integrity of your home’s architecture but also restores a profound sense of warmth, elegance, and pristine beauty to your daily living environment.
About
Mike May is a distinguished figure in the world of woodworking and timber design, with a decade of expertise creating innovative and sustainable indoor solutions. His professional focus lies in merging traditional craftsmanship with modern manufacturing techniques, fostering designs that are both practical and environmentally conscious. As the author of Woodimber, Mike delves into the art and science of timber-craft, inspiring artisans and industry professionals alike.
Education
RMIT University (Melbourne, Australia)
-
Associate Degree in Design (Timber): Focus on sustainable design, industry-driven projects, and practical craftsmanship.
-
Gained hands-on experience with traditional and digital manufacturing tools, such as CAD and CNC software.
Nottingham Trent University (United Kingdom)
-
Bachelor’s in Woodworking and Product Design (Honors): Specialized in product design with a focus on blending creativity with production techniques.
-
Participated in industry projects, working with companies like John Lewis and Vitsoe to gain real-world insights.
Publications and Impact
In Woodimber, May shares his insights on timber design processes, materials, and strategies for efficient production. His writing bridges the gap between artisan knowledge and modern industry needs, making it a must-read for both budding designers and seasoned professionals.