 (1)")

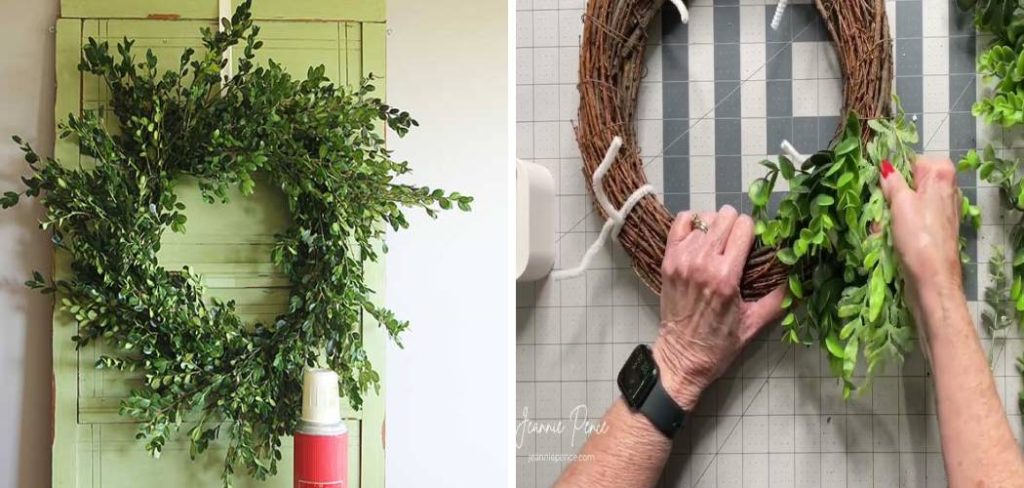
Creating a beautiful boxwood wreath brings a touch of classic elegance to your home. While fresh boxwood looks wonderful, it quickly dries out, turns brittle, and loses its vibrant green color.
Preserving the branches allows you to capture that fresh look for months, or even years, without the constant need for replacement. Preserving plant material might sound like a complex scientific process, but it is actually a straightforward project you can easily complete at home.
This comprehensive guide on how to preserve boxwood for a wreath will walk you through everything you need to know to preserve boxwood for a stunning, long-lasting wreath.
What Will You Need?
Before you begin clipping away at your shrubs, gather the necessary materials. Having everything prepared makes the preservation process smooth and efficient.
- Fresh boxwood clippings (preferably cut the same day)
- Sharp garden pruners or shears
- A hammer or small mallet
- Liquid vegetable glycerin (found online or in craft and pharmacy stores)
- Very hot water
- Large plastic buckets or deep glass jars
- Green floral dye or food coloring (highly recommended to maintain color)
- Paper towels or old newspapers
- A stirring spoon
- Gardening gloves
10 Easy Steps on How to Preserve Boxwood for a Wreath
Step 1: Select the Best Branches
The foundation of a beautiful wreath starts with high-quality clippings. Go out to your garden and inspect your boxwood shrubs. You want to look for entirely healthy branches, free from disease, and showing no signs of insect damage or browning. Choose stems that have a vibrant, lush green color and dense leaf coverage. Avoid new, tender growth at the very tips of the branches, as these young leaves often lack the structural integrity to absorb the glycerin properly and may wilt. Instead, opt for mature, woody stems. The ideal branches should be thick enough to draw up the liquid but flexible enough to bend into a circular wreath form later.

Step 2: Harvest at the Right Time
Timing matters when cutting plant material for preservation. The absolute best time to cut your boxwood is in the early morning, right after the morning dew has evaporated but before the afternoon sun heats up the plant. During this morning window, the plant is fully hydrated, and its internal vascular system is primed for moving fluids. Use a pair of sharp, clean garden pruners to make clean cuts. Dull blades will crush the stem tissue, hindering the plant’s ability to drink up the preserving liquid. Cut the branches slightly longer than you think you will need for your wreath, usually around six to eight inches.
Step 3: Clean and Prep the Cuttings
Once you have harvested your boxwood, bring it inside and prepare it for the glycerin bath. Gently shake each branch to dislodge any dirt, dust, or tiny insects hiding among the leaves. If the branches are particularly dirty, you can rinse them lightly under cool water, but be sure to pat them completely dry with paper towels afterward. Next, strip the lower leaves off the bottom two inches of each stem. You do not want any foliage submerged beneath the liquid line, as submerged leaves will quickly rot and ruin your entire batch of solution. Stripping the lower leaves also provides a clean, bare stem section that will easily slide into your wreath base once the preservation process is complete.
Step 4: Smash the Stems
This step might seem counterintuitive, but it is a critical secret to successful preservation. Boxwood has woody stems with tight cellular structures that resist taking up thick liquids like glycerin. To help the branches drink the solution, you need to expose their inner capillaries. Place the bare bottom inch of each stem on a hard, sturdy surface, such as a cutting board or an outdoor concrete step. Take a hammer or a small mallet and gently tap the bottom of the stem until the wood splinters and frays slightly. You do not want to obliterate the stem into mush, but you do want to crack the outer bark and open up the woody core.

Step 5: Mix the Glycerin Solution
Now it is time to prepare the preserving bath. The standard ratio for preserving foliage is one part liquid vegetable glycerin to two parts water. It is crucial to use very hot water for this step. Hot water thins the thick, syrupy glycerin, allowing the two liquids to bind together smoothly. Pour the hot water into your large plastic bucket or deep glass jar, then slowly pour in the glycerin. Stir the mixture continuously with a long spoon until the liquid becomes completely clear and uniform. If the water is too cold, the glycerin will settle at the bottom of the container, and your branches will only absorb water, leading to dried-out, brittle leaves in a matter of days.
Step 6: Add Floral Dye (Optional)
While glycerin does an amazing job of keeping boxwood soft and pliable, it does have one side effect: it naturally alters the color of the plant. Without dye, preserved boxwood slowly fades into a yellowish-brown or golden-tan hue. If you want a rustic, autumnal wreath, you can skip this step. However, if you want your wreath to look fresh and vibrantly green, you must add dye to the solution. Pour green floral dye or heavy-duty food coloring directly into your hot glycerin mixture. Do not be shy with the dye; the liquid should look dark and concentrated. The stems will pull this dye up along with the glycerin, depositing the green pigment directly into the leaf cells. Stir the mixture well to ensure the color is evenly distributed throughout the bath.
Step 7: Arrange the Branches in the Solution
With your green glycerin bath ready, it is time to introduce the boxwood. Carefully place the smashed ends of your prepped stems into the liquid. The solution should cover the bottom two to three inches of the stems. Make sure that no leaves are touching the liquid. Arrange the branches loosely in the container. Do not cram too many stems into a single bucket. Overcrowding prevents proper air circulation around the upper leaves and can cause the branches to sweat and develop mold. If you have a large harvest, it is much better to divide the branches across multiple containers. Make sure the container is stable and will not easily tip over, as the dyed glycerin can stain floors and countertops.

Step 8: Store in a Cool, Dark Place
The environment where you store your branches during the preservation process heavily impacts the final result. Move your buckets to a cool, dry, and dark location. A basement, a cool closet, or a shaded pantry works perfectly. Direct sunlight is the enemy of the preservation process. The sun will cause the water in the branches to evaporate faster than the stem can pull up the glycerin, resulting in crispy, curled leaves. Additionally, high humidity can invite mold growth. Keep the area well-ventilated if possible. Once you have placed the containers in their resting spot, leave them alone. Resist the urge to constantly pull the branches out of the liquid to check on them, as this interrupts the capillary action pulling the fluid up the stems.
Step 9: Monitor the Absorption Process
Preserving boxwood is an exercise in patience. The process typically takes anywhere from two to three weeks, depending on the thickness of the branches and the humidity of your home. Check the liquid level every few days. You will notice the level dropping as the branches drink up the solution. If the liquid drops below the frayed ends of the stems, mix up a small batch of the 1:2 glycerin-to-water ratio (with dye) and top off the container. You can tell the preservation is working by feeling the leaves. Start at the bottom of the branch and work your way up. The leaves should feel slightly rubbery, soft, and flexible. Once the leaves at the very top tips of the branches feel soft and pliable, the preservation process is complete.
Step 10: Remove, Drain, and Dry
Once you confirm that the glycerin has reached the very tips of the branches, it is time to remove them from the bath. Take the stems out of the bucket and gently wipe the sticky excess liquid off the bottoms with a paper towel. If the very ends of the smashed stems feel mushy or rotten, simply snip them off with your pruners to reveal clean wood. Lay the preserved branches out flat on a layer of old newspaper or paper towels in a dry, well-ventilated area. Allow them to air dry for three to five days. This resting period lets any surface moisture evaporate and allows the glycerin to fully set within the plant cells.

Conclusion
Preserving boxwood for a wreath is a highly rewarding project that turns fresh garden clippings into enduring home decor.
By following these steps on how to preserve boxwood for a wreath—from selecting the right branches and smashing the stems to properly mixing your hot glycerin and dye solution—you guarantee beautiful, soft, and flexible foliage. Avoid common mistakes like storing the branches in sunlight or using incorrect mixture ratios to ensure success.
With a little patience and the right technique, you will create a gorgeous, professional-quality boxwood wreath that brings natural charm to your living space for years to come.
About
Mike May is a distinguished figure in the world of woodworking and timber design, with a decade of expertise creating innovative and sustainable indoor solutions. His professional focus lies in merging traditional craftsmanship with modern manufacturing techniques, fostering designs that are both practical and environmentally conscious. As the author of Woodimber, Mike delves into the art and science of timber-craft, inspiring artisans and industry professionals alike.
Education
RMIT University (Melbourne, Australia)
-
Associate Degree in Design (Timber): Focus on sustainable design, industry-driven projects, and practical craftsmanship.
-
Gained hands-on experience with traditional and digital manufacturing tools, such as CAD and CNC software.
Nottingham Trent University (United Kingdom)
-
Bachelor’s in Woodworking and Product Design (Honors): Specialized in product design with a focus on blending creativity with production techniques.
-
Participated in industry projects, working with companies like John Lewis and Vitsoe to gain real-world insights.
Publications and Impact
In Woodimber, May shares his insights on timber design processes, materials, and strategies for efficient production. His writing bridges the gap between artisan knowledge and modern industry needs, making it a must-read for both budding designers and seasoned professionals.