 (1)")

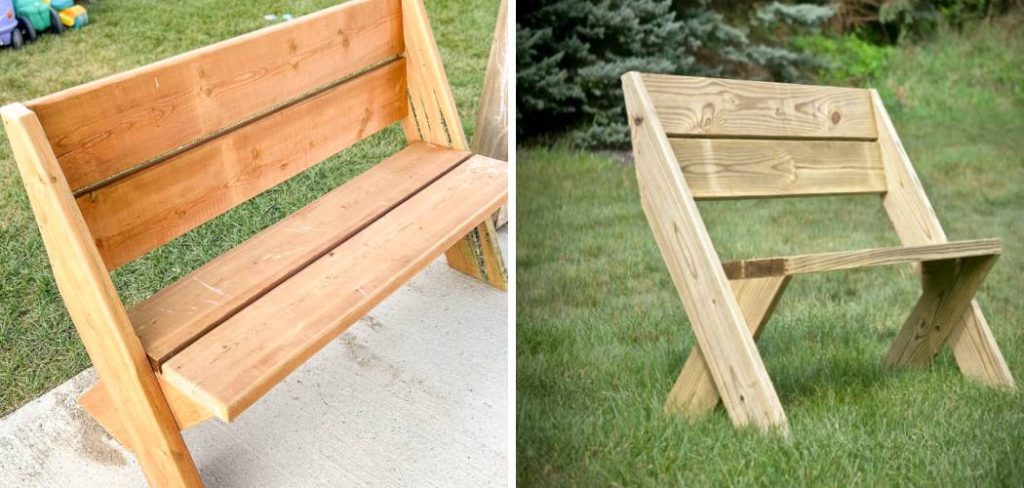
Building your own furniture is a rewarding experience that combines creativity, skill, and practicality. A wooden bench with a back is a fantastic starting point for any aspiring woodworker or a satisfying weekend project for a seasoned DIY enthusiast.
It offers a place to relax in your garden, a stylish addition to your entryway, or extra seating on your patio. This guide on how to build a wooden bench with back will walk you through every stage of the process, from gathering your materials to applying the final coat of finish.
With clear instructions and helpful tips, you can create a beautiful, sturdy, and functional piece of furniture that you’ll be proud of for years to come.
What Will You Need?
Materials:
- Lumber: The heart of your project. For an outdoor bench, consider weather-resistant woods like cedar, redwood, or pressure-treated pine. For an indoor bench, common pine, fir, or oak are excellent choices.
- Four 2×4 boards, 8 feet long (for legs and supports)
- Five 2×6 boards, 8 feet long (for the seat and backrest slats)
- One 1×4 board, 8 feet long (for armrests, optional)
- Fasteners & Adhesives:
- 3-inch exterior-grade deck screws (for frame assembly)
- 2.5-inch exterior-grade deck screws (for attaching slats)
- Waterproof wood glue
- Finishing:
- Sandpaper (medium 120-grit and fine 220-grit)
- Exterior wood stain, sealer, or paint of your choice
- Rags or paintbrushes
Tools:
- Tape measure
- Pencil
- Safety glasses
- Hearing protection
- Carpenter’s square or speed square
- Miter saw, or circular saw
- Power drill/driver with bits
- Random orbit sander or sanding block
- Clamps (at least two, 4-inch or larger)
- Level
10 Easy Steps on How to Build a Wooden Bench With Back
Step 1: Cut Your Lumber to Size
The first step is to accurately cut all the pieces for your bench frame and slats. Using a miter saw will provide the most precise cuts, but a circular saw with a guide will also work well. Measure twice and cut once to avoid wasting wood. Double-check your measurements against this cut list before you begin.
Here are the pieces you will need to cut:
- From the 2×4 boards:
- Four leg pieces at 16.5 inches each.
- Two front/back apron pieces at 45 inches each.
- Two side apron pieces at 14 inches each.
- Two backrest support pieces at 24 inches each. You will cut a 15-degree angle on one end of each of these pieces later. For now, cut them to length.
- From the 2×6 boards:
- Five seat slat pieces at 48 inches each.
- Two backrest slat pieces at 48 inches each.
- From the 1×4 board (optional armrests):
- Two armrest pieces at 19 inches each.
After cutting, it’s a good practice to lightly sand the cut ends to remove any splinters. This will make handling the pieces safer and assembly easier.

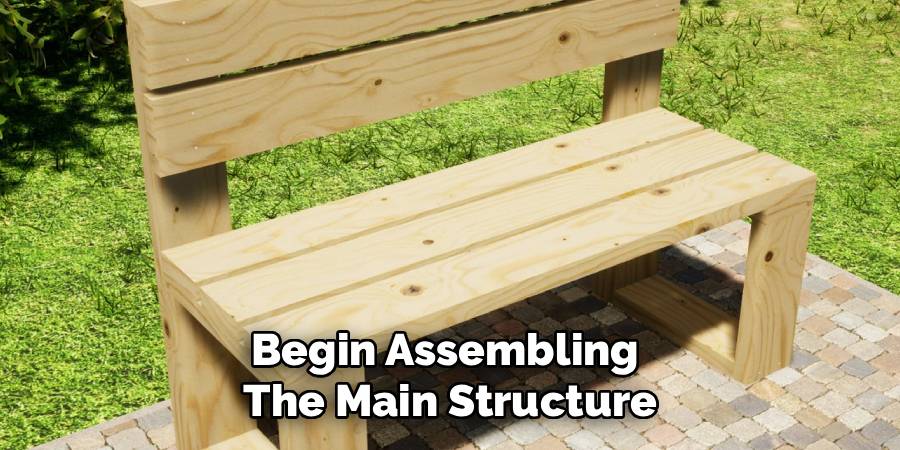
Step 2: Assemble the Front and Back Frames
Now you will begin assembling the main structure of the bench. You will create two identical rectangular frames that will form the front and back supports for the seat. Take two of the 16.5-inch leg pieces and one 45-inch apron piece. Lay them out on a flat, level surface to form a long “H” shape. The 45-inch apron will be the horizontal bar connecting the two vertical legs.
Ensure the top edge of the apron is flush with the top ends of the legs. Use a carpenter’s square to make sure the corners are perfectly 90 degrees. This is crucial for a stable and non-wobbly bench. Once everything is aligned, apply a thin bead of waterproof wood glue to the ends of the apron where it meets the legs. Then, use clamps to hold the pieces tightly together. Drill two pilot holes through the outside of each leg and into the end of the apron to prevent the wood from splitting. Secure the joint by driving two 3-inch deck screws through the pilot holes. Repeat this entire process to build the second, identical frame. You now have the front and back assemblies for your bench.
Step 3: Connect the Frames
With the front and back frames built, it’s time to connect them to form the base of your bench. Stand the two frames up, with the aprons facing each other. You will need the two 14-inch side apron pieces for this step. Position one side apron between the front and back legs on one side, ensuring its top edge is flush with the top of the front and back aprons. It should fit snugly between the legs.
Apply wood glue to both ends of the side apron. Use clamps to hold it securely in place. Check for squareness again at this new corner. Drill pilot holes through the outside of the leg and into the end of the side apron, then drive two 3-inch screws to secure it. Repeat this process on the other side with the second 14-inch side apron. Your bench base should now be a sturdy, box-like frame that can stand on its own. Use a level to check that the frame is level across the top before moving on.
Step 4: Prepare and Attach the Backrest Supports
The backrest supports provide the angle and structure for the back of your bench. Take the two 24-inch 2×4 pieces you cut earlier. On one end of each piece, use your miter saw or a protractor and circular saw to cut a 15-degree angle. This slight angle will create a more comfortable, reclined backrest. After cutting, sand the angled ends smooth.
Now, you will attach these supports to the inside of the back frame. Position one support against the inside of a back leg and the back apron. The straight-cut end should rest flat on the floor (or align with the bottom of the leg), and the angled cut should be at the top. The support should be flush against the leg. Apply wood glue to the surfaces where the support meets the leg and the back apron.
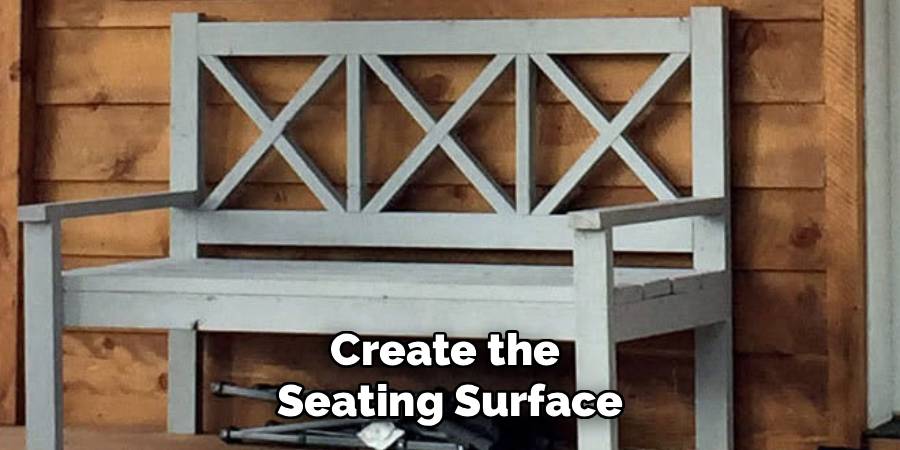
Step 5: Install the Seat Slats
Your bench frame is now complete, and it’s time to create the seating surface. You will use the five 48-inch 2×6 slats for this. Start by placing the first slat along the front of the bench frame. It should overhang the frame by 1.5 inches on each side and be flush with the front apron. This overhang adds a nice visual detail.
To attach it, drill two pilot holes through the slat and into the side aprons on each end. Secure it with 2.5-inch screws. Next, place the back seat slat. This one should be positioned flush against the front of the newly installed backrest supports. Secure it in the same way, with screws into the side aprons. Now you have the front and back boundaries for your seat. Evenly space the remaining three slats between the front and back ones.
Step 6: Attach the Backrest Slats
The bench is starting to look complete! The final construction step is to attach the slats that form the backrest. You will use the two remaining 48-inch 2×6 slats. Start with the top slat. Position it so its top edge is flush with the top of the angled backrest supports. It should have the same 1.5-inch overhang on each side as your seat slats.
Once you are happy with the position, apply a small amount of wood glue where the slat will contact the supports. Clamp it in place to hold it steady. Drill two pilot holes through the front of the slat into each of the backrest supports. Drive 2.5-inch screws to secure it firmly. For the lower backrest slat, place it about 1 inch below the top one, ensuring it is parallel.
Step 7: Add Optional Armrests
Armrests are not essential but add a great deal of comfort and a more finished look to your bench. For this, you will use the two 19-inch 1×4 pieces. Place one armrest on top of the front leg and the backrest support on one side of the bench. It should sit flat, spanning the distance between the front of the bench and the backrest. Adjust its position so it looks balanced and feels comfortable.
Once positioned, apply wood glue to the underside of the armrest where it contacts the leg and the backrest support. Drill pilot holes downwards through the armrest and into the frame below. Be careful not to drill all the way through the frame. Use 2.5-inch screws to fasten the armrest securely. Two screws into the front leg and two into the backrest support should be sufficient.

Step 8: Sand the Entire Bench
Sanding is a critical step that transforms your project from a raw assembly into a piece of finished furniture. It smooths rough surfaces, rounds sharp edges, and prepares the wood to accept stain or paint evenly. Using a random orbit sander will make this job much faster, but a sanding block and some patience will work just as well.
Start with medium-grit sandpaper, around 120-grit. Go over every single surface of the bench: legs, aprons, slats, and armrests. Pay special attention to any sharp corners or edges, rounding them over slightly for a more comfortable and professional feel. Also, focus on areas with wood glue squeeze-out or any minor imperfections.
Step 9: Final Sanding and Cleaning
For an extra-smooth finish, a second round of sanding is recommended. Switch to a fine-grit sandpaper, such as 220-grit. This will remove the tiny scratches left by the medium-grit paper and give the wood an almost polished feel. Go over the entire bench again, moving the sander with the grain of the wood. The difference in texture will be noticeable to the touch.
After this final sanding, cleaning the bench thoroughly is essential before applying any finish. Sawdust particles left on the surface will get trapped in the stain or paint, resulting in a gritty, unprofessional texture. Use a vacuum with a brush attachment to remove the majority of the dust. Follow this with a tack cloth or a slightly damp microfiber cloth to pick up any remaining fine particles.
Step 10: Apply Your Finish
The final step is to protect your beautiful new bench from the elements and give it the desired color. The type of finish you choose depends on where the bench will be located. For an outdoor bench, you must use an exterior-grade product. A good quality exterior stain and sealer combination will provide color and protect against sun and moisture. Alternatively, an exterior paint offers maximum protection.
For an indoor bench, you have more options, including interior stains, polyurethane, or oils. Always apply your finish in a well-ventilated area and follow the manufacturer’s instructions on the can. Use a high-quality brush or a clean rag to apply a thin, even coat. Allow the first coat to dry completely, which may take several hours or a full day. Lightly sand the surface with 220-grit sandpaper between coats, and wipe away the dust. Apply a second, and possibly a third, coat for the best protection and a deep, rich color. Once the final coat is fully cured, your bench is ready to be enjoyed.
Conclusion
Congratulations! You have successfully navigated the process of building your own wooden bench with a back.
This project on how to build a wooden bench with back is more than just an exercise in woodworking; it’s about creating a lasting piece of furniture that adds value and character to your space. You’ve learned to measure, cut, assemble, and finish wood, transforming raw lumber into a functional and beautiful object. Take a moment to admire your work—the straight lines, the sturdy joints, and the smooth finish.
Now, all that’s left to do is find the perfect spot for it, sit back, and enjoy the comfort and satisfaction of your handmade creation.
About
Mike May is a distinguished figure in the world of woodworking and timber design, with a decade of expertise creating innovative and sustainable indoor solutions. His professional focus lies in merging traditional craftsmanship with modern manufacturing techniques, fostering designs that are both practical and environmentally conscious. As the author of Woodimber, Mike delves into the art and science of timber-craft, inspiring artisans and industry professionals alike.
Education
RMIT University (Melbourne, Australia)
-
Associate Degree in Design (Timber): Focus on sustainable design, industry-driven projects, and practical craftsmanship.
-
Gained hands-on experience with traditional and digital manufacturing tools, such as CAD and CNC software.
Nottingham Trent University (United Kingdom)
-
Bachelor’s in Woodworking and Product Design (Honors): Specialized in product design with a focus on blending creativity with production techniques.
-
Participated in industry projects, working with companies like John Lewis and Vitsoe to gain real-world insights.
Publications and Impact
In Woodimber, May shares his insights on timber design processes, materials, and strategies for efficient production. His writing bridges the gap between artisan knowledge and modern industry needs, making it a must-read for both budding designers and seasoned professionals.